Drying basement – pump sump | build septic tank yourself
I built a sump pump at the lowest point of my house to help drain my cellar in the long term. The water is collected there and pumped out automatically.
In this article, I describe how I built the soakaway and what I had to pay particular attention to. I go into the advantages and disadvantages of this method of draining the cellar and of course also write about whether this method works.
Drying out the basement of my 120 year old house has been going on for 12 months now. In the interior, I have previously used the injection method to dry out. The areas above the barrier layer dry well and the indoor climate has also improved significantly.
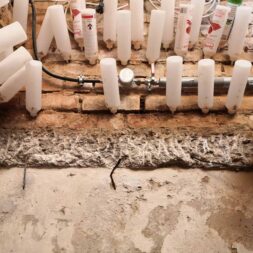
The injection method involves drilling holes in the walls at regular intervals and injecting a liquid into the masonry.
The liquid runs into the walls and spreads into the masonry. In this process, the pores of stone and joint compound are sealed. The walls become hydrophobic and waterproof.
The measured moisture in the masonry of the basement has since dropped from 1.6 to 0.8.
You can find more information on draining basement walls using the injection method here, for example:
Drying basement – #1 test drilling for the injection bottles.
Basement Drying #2 Intermediate Status after 1 Week | Injection Solution
Drying basement with injection – #3 intermediate status after 2 weeks
Draining the basement with injection #4 – Week 3 Infrared heating is used
Draining the cellar – Drainage in outdoor areas
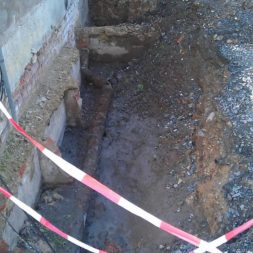
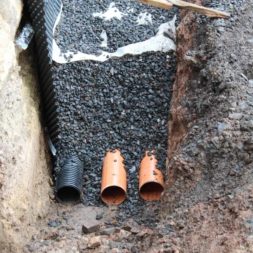
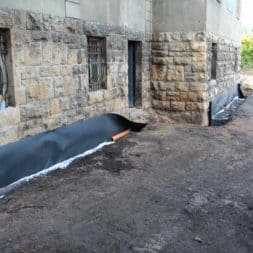
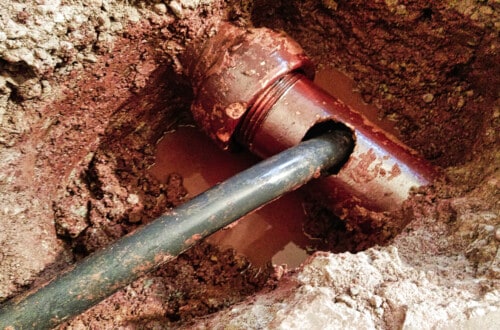
Five years ago, I drained the outside walls of my house myself and installed a drainage system.
The basement of my building is about 5 meters below ground level. The dimpled sheet and the drainage pipe, which I attached to the outside of the wall, are about 3 meters deep in the ground.
A deeper installation was not possible without affecting the foundation of the house, which consists of compacted sand and gravel. This allows water to penetrate the building from below.
As a possible solution to this problem, a subsequent horizontal barrier with an injection solution should be installed in the masonry.
Use and mode of action of injection solutions
Injection solutions such as Novusan, Silitrocken and Porofin are increasingly being used to dry out damp masonry in basements. This method is particularly popular for retrofitting horizontal barriers.
The way it works is based on a chemical reaction between the injection solution and the moisture in the masonry, which forms a water-repellent barrier.
The injection fluid is injected into pre-drilled holes in the masonry using a funnel or injection bottle. As soon as the solution comes into contact with the moisture in the brick, it reacts and forms a crystalline structure that blocks the penetration of water.
Products such as Novusan are typically silane/siloxane based, while Silitrocken and Porofin often have similar chemical compositions that target the pores of the masonry and seal them from the inside out.
One of the biggest advantages of this method is that it is relatively simple and quick to apply, offering a cost-effective alternative to more extensive renovation work.
In addition, such injection methods are less invasive than other methods that could potentially change the appearance of the building.
Disadvantages of injection solutions for masonry drying
However, there are also disadvantages.
The effectiveness of the injection method can be impaired by various factors such as the condition of the masonry or the degree of moisture. Another disadvantage is the possible development of harmful substances if the chemicals react with other materials in the masonry.
To minimize these disadvantages, a careful analysis of the masonry is required before the appropriate injection solution is selected.
Expert advice from specialists is essential to ensure chemical compatibility with the existing building material and to determine the optimum concentration and composition of the solution.
When retrofitting a horizontal barrier with injection solutions, there are risks such as uneven distribution of the chemical in the masonry, which can lead to ineffective waterproofing.
There is also a risk that the injection fluid could damage other components or trigger undesirable chemical reactions that could impair the structural integrity.
It is therefore important to carry out continuous moisture measurements during the process and to precisely control the injection depths to ensure even distribution and reaction.


The basement floor is waterproof – How to dry it now?
Unfortunately, the use of the injection solution to create a subsequent horizontal barrier in my cellar led to an undesirable side effect.
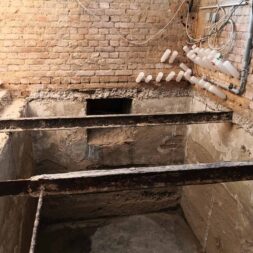
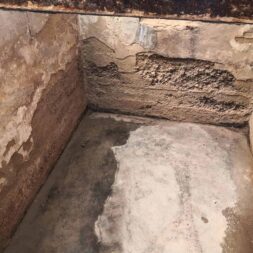
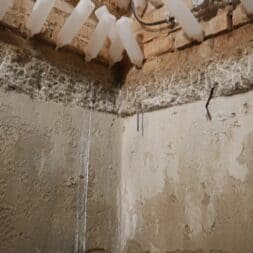
When the cellar was drained, some of the injection fluid dripped through holes and cracks in the walls and the suspended ceiling down to the floor of the cellar.
The injection fluid spread there and made the floor watertight in many places. As a result, the water that entered the cellar during long periods of rain could no longer drain and seep away properly.
During long and heavy rainfalls, a kind of small pool formed in the cellar as the water could no longer drain through the floor.
As a result, even more water seeped into the walls or evaporated directly into the cellar.
Although I plan to make further improvements to the exterior to stop the ingress of water in the long term, it was necessary to take further measures in the basement today.
That’s why I built a sump, a soakaway, in the cellar.
Zuletzt aktualisiert am 26. January 2026 um 15:22 . Ich weise darauf hin, dass sich hier angezeigte Preise inzwischen geändert haben können. Alle Angaben ohne Gewähr. (*) Bei den verwendeten Produktlinks handelt es sich um Affiliate Links. Ich bin nicht der Verkäufer des Produktes. Als Amazon-Partner verdiene ich an qualifizierten Verkäufen. Dein Preis ändert sich jedoch nicht.
Video: Build your own pump sump
I filmed the construction of my soakaway in the basement in detail and published it in an exciting and informative video on my YouTube channel.
The video is part of my project series“Draining the cellar“.
If you want to see more of me and my projects, feel free to check out my YouTube channel.

- Die innovative Eco Power-Serie von Einhell arbeitet mit weniger Stromverbrauch und gewährt gleichzeitig eine höhere Fördermenge. Mit 790 Watt schafft die Schmutzwasserpumpe.
- Die Sensor-Startautomatik ist auf 3 Höhen variabel einstellbar und schaltet bei einer Restwasserhöhe v. ca. 40 mm und einer Nachlaufzeit v. ca. 15 Sek. (ist kein Problem im Trockenlauf).
- 24 Stunden rund um die Uhr Schutz vor bösen Überraschungen durch Überflutungen, auch in Abwesenheit.
- Das im Schlauchadapter integrierte Rückschlagventil verhindert den Rücklauf des geförderten Schmutzwassers. Die hochwertige Gleitringdichtung ist in der Pumpe verbaut ist.
- Einfach zu transportieren ist die Pumpe durch den stabilen und ergonomischen Tragegriff und integrierter Aufhängeöse für die schnelle Einsatzbereitschaft.
- Das Gehäuse mit integrierter Kabelaufwicklung ist aus schlagfestem Kunststoff gefertigt Zudem ist die Außenseite mit einer widerstandsfähigen Edelstahl-Außenhaut ummantelt.
- Das schlanke Design in Verbindung mit dem integrierten Aquasensor und dem Pumpenauslass an der Oberseite ermöglicht auch den Einsatz in sehr engen Bereichen wie z.B Drainagen oder Schächten.
Structure and function of a pump sump
A sump pump in the basement serves as an effective solution for dealing with water ingress, especially in areas prone to flooding or where groundwater presses up.
Here I describe in detail the structure and function of such a system which has proved very successful for me.
Construction of a pump sump
The structure of a pump sump typically consists of a lower-lying collection basin, which is installed in the lowest part of the basement. This collecting basin catches the water that enters and prevents it from spreading in the cellar.
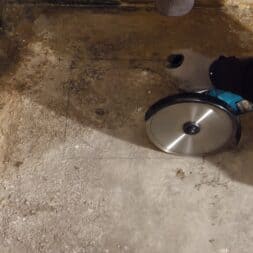
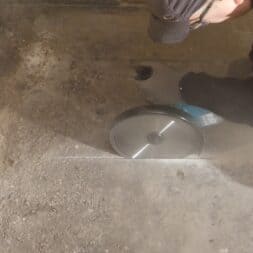
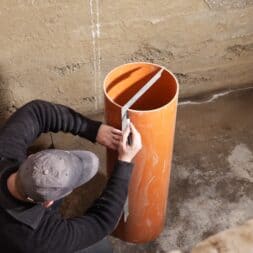
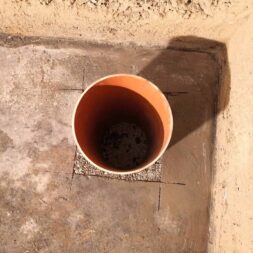
For the installation of my pump sump in the basement, I marked the size of the KG pipe, which I used to secure the shaft, on the concrete floor.
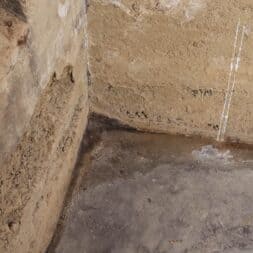
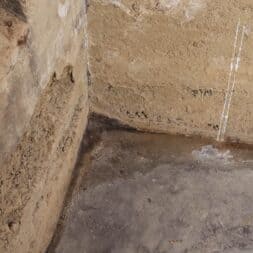
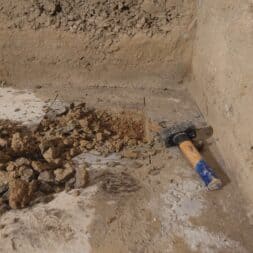
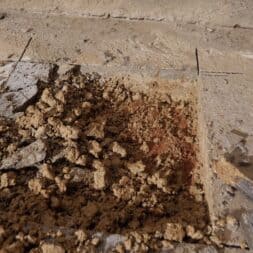
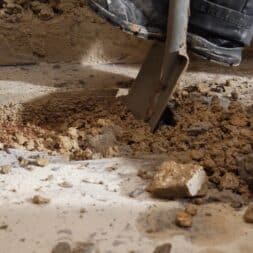
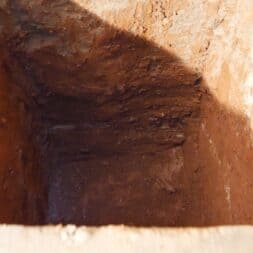
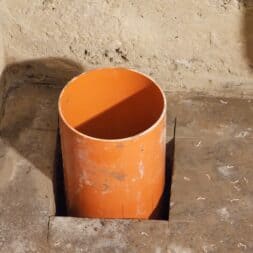
Using my large angle grinder, I was then able to cut out the opening cleanly and remove the concrete. The ground underneath consisted of pure clay, which made digging the approx. 1 meter deep hole quite laborious.
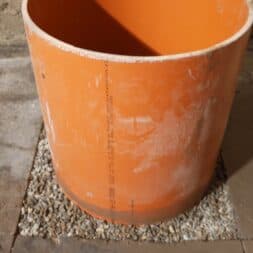
In order to build a drainage layer underneath the KG pipe so that the water could quickly and effectively reach the inside of the pipe, I filled the hole with a layer of frost protection or gravel about 10 centimetres thick.
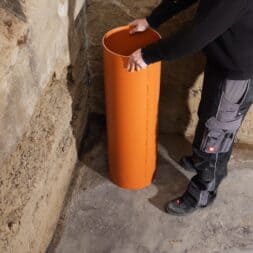
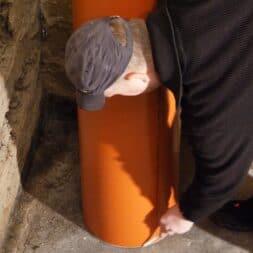
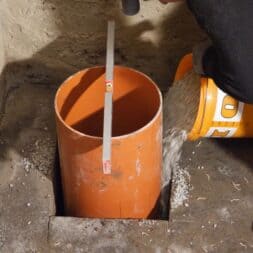
I then placed the KG pipe in the soakaway, aligned it and filled the sides with gravel. KG pipes are known for their robust plastic construction, corrosion resistance and durability, making them an ideal choice for water supply.
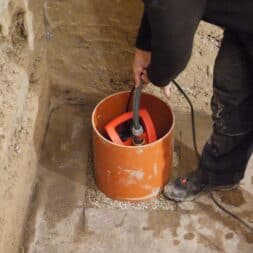
I then placed my submersible pump in the KG pipe. The pump has been configured so that it automatically pumps out the accumulated water as soon as a certain water level is reached.
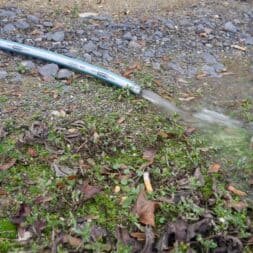
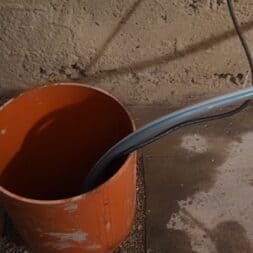
The submersible pump diverted the water outside into the garden via a hose.
Unfortunately, I couldn’t integrate it into the sewer at this point in the house because I don’t have any corresponding wastewater pipes here. My aim, however, is to later discharge the pumped-out water into the rainwater downpipe on the outside of the house.
Advantages of a pump sump
- Effective water removal: A sump pump can prevent water from spreading in the basement and causing damage. This protects the building fabric and the inventory in the cellar.
- Automation: The submersible pump works automatically, reducing manual effort and the risk of human error. This offers additional comfort and safety.
- Increasing the value of the house: By taking precautions against water damage, the sump pump can increase the value of a property. Property buyers appreciate such protective measures, which increases the resale value.
Disadvantages of a pump sump
- Power dependency: The submersible pump requires electricity, which can be a problem in the event of power failures. Without electricity, the system cannot function and the cellar could fill up.
- Maintenance required: The pump and sump must be serviced and cleaned regularly to ensure their functionality. This can cause time and costs.
- Installation: The installation of a sump pump can be invasive and often requires breaking through the basement floor. This can lead to short-term disruptions and additional costs.
To reduce the disadvantages, emergency generators or battery-operated backup pumps can be installed for power supply problems.
Regular maintenance should be carried out by qualified personnel to ensure the longevity and effectiveness of the system. I have drawn up a maintenance schedule according to which I regularly check the sump and the pump.
I also check and log the power consumption of my pump with my Home Assistant. This smart home system had already informed me of a problem with my construction shortly after it was built: New submersible pump defective – draining the cellar.
In addition, a precise examination of the cellar conditions and the groundwater level should be carried out before installation in order to determine the optimum positioning and size of the pump sump.
Risks when retrofitting a soakaway in the basement
- Structural damage: Excavating the pit can affect the structural integrity of the building if not done properly. Cracks in the masonry or foundation damage can be the result.
- Moisture problems: Incorrectly installed or leaking KG pipes can lead to further moisture problems. This can cause mold growth and further water damage.
- Legal regulations: In some regions, special building permits are required, and failure to comply with these can lead to legal problems. It is important to find out about local regulations before starting work.
- Creation of new watercourses: Another risk is that the pump shaft can draw in water from other areas under the house. This can lead to the formation of new underground watercourses, which then flow into the pump shaft. These new watercourses can change the distribution of water under the house and lead to an increased moisture load. This in turn can affect the fabric of the entire house by undermining the stability of the foundation and causing long-term structural damage.
Thorough planning and consultation with experts are essential to minimize these risks and create an effective solution for water management in the basement.
With the right approach and the right equipment, a sump pump can provide a reliable and long-term solution to water ingress.

- Ready-to-use Tauchpumpen-Set: Box enthält alles für en schnellen und anspruchsvollen Einsatz in schmutzigem Wasser.
KG pipe as manhole protection
To build my pump sump in the cellar, I first dug a hole about 1 meter deep. I inserted a 315 mm KG pipe into this hole, which stabilized the shaft and prevented soil and gravel from sliding down.
Installing the KG pipe
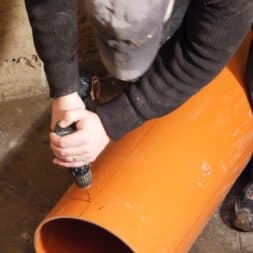
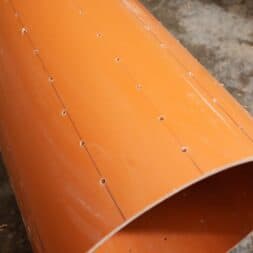
Before I installed the KG pipe, I drilled many small holes in it to create drainage, while still ensuring the stability of the pipe.
I filled in coarse gravel under the pipe to stabilize the soil and optimize the water supply.
I also poured gravel between the pipe and the surrounding soil. This prevented the soil from slipping and at the same time ensured that the water was directed into the KG pipe.
I then placed a drainage pump in the pipe to pump out the accumulating water.
To prevent the pump from sucking in dirt or stones, I placed a brick under the pump so that it was slightly raised.
As an additional measure, I thought about placing a wastepaper basket made of narrow metal mesh on the bottom of the pipe as a sieve. This would have the advantage of reliably preventing stones and dirt from being sucked into the pump.
This method would also have the advantage that the pump could pump the water out much deeper, keeping the cellar drier.
Optical integration and alternatives
I let the KG pipe protrude slightly at the top. I can also cut off the pipe at any time later. Thanks to the elevation, I can be sure that no foreign objects or animals will fall into the shaft. The look is of secondary importance to me in my basement.
In a converted basement, however, the KG pipe can also be installed in a visually appealing or invisible way.
- Covers and cladding: A simple option is to fit the pipe with a removable cover or cladding that blends in with the flooring. Tiles, wooden floors or carpets can be used to completely conceal the pipe while maintaining access for maintenance work.
- Built-in cupboards: Another option is to install a small cupboard or box above the pipe. These can be integrated into the design of the cellar and provide storage space at the same time.
- Bottom flaps: Integrated floor flaps allow easy access to the pump sump without detracting from the overall aesthetic impression of the cellar.
Alternatives to the use of KG pipes
I am very satisfied with the use of the KG pipe for shaft protection. The pipe is relatively inexpensive and can be processed very easily without special tools.
However, there are also alternatives to KG pipes for manhole protection:
- Concrete rings: Concrete rings offer a very stable and durable solution, but are heavier and more difficult to install. They are particularly suitable for larger shaft systems.
- Plastic or synthetic sumps: These sumps are specially designed for pump systems and offer integrated drainage and easy installation. They are available in various sizes and shapes.
- Metal mesh baskets: Metal mesh baskets can serve as an alternative when high permeability and stability are required. They enable good water drainage and prevent soil and gravel from slipping.

- 1m KG Steigrohr DN315 oder DN400
- VARIANTE 1 - DN315 Nennweite: DN315 Länge: 100 cm Material: PVC (Polyvinylchlorid)
- VARIANTE 2 - DN400 Nennweite: DN400 Länge: 100 cm Material: PVC (Polyvinylchlorid)
Submersible pump with integrated float switch
I installed an Einhell submersible pump in the pipe, which has an integrated float switch. This pump took up very little space and still provided sufficient power to pump the water upwards.
The integrated float switch played a decisive role here, as it enabled the pump to be activated and deactivated automatically depending on the water level. This contributed significantly to efficiency and energy savings, as the pump only ran when it was really necessary.
As soon as the water level reached 12 cm, the pump activated automatically and pumped the water outside through a garden hose. Once the water had been completely pumped out of the soakaway, the pump switched off again automatically.
The small size of the pump was particularly advantageous as it took up minimal space within the KG pipe.
This was important in order not to impair the stability of the shaft and at the same time to ensure effective water pumping.
My aim was to later integrate the water hose into the sewage pipes or rainwater pipes on the outside of the house in order to create a permanent and unobtrusive solution to the water problem.
Update:
A month later, however, came the nasty surprise! Due to a stupid mistake I almost destroyed the Einhell clear water pump.
I have therefore replaced the model with an INOX dirty water pump from Kärcher.
Summary and conclusion
I have been working on draining my 120-year-old cellar for 12 months, using the injection method among other things. The injection process dried the areas above the barrier layer well and significantly improved the indoor climate.
Holes are drilled into the walls through which a special liquid is injected, which is distributed in the masonry and makes it hydrophobic. I was able to reduce the moisture in the masonry from 1.6 to 0.8.
Five years ago, I already dried the outer walls and installed a drainage system, with the dimpled sheeting and drainage pipes lying about 3 meters below the surface. A deeper installation was not possible at that time without endangering the foundation.
Now an unplanned problem arose when the injection fluid dripped onto the cellar floor and made it watertight in some places, causing water to pool during heavy rainfall.
To counteract this, I built a sump with a submersible pump in the cellar.
A sump pump in the basement is an effective solution for dealing with water ingress, especially in flooded areas or when the groundwater level is high. During the construction of the soakaway, a 1-metre-deep hole was dug and a 315 mm KG pipe was inserted to stabilize the shaft. A submersible pump in the pipe automatically pumps out the accumulated water.
Advantages:
- Effective water removal: Prevents water damage and protects the building fabric.
- Automation: The pump works automatically and reduces manual effort.
- Increase in value: Taking precautions against water damage can increase the value of a property.
Disadvantages:
- Power dependency: The pump cannot operate in the event of a power failure.
- Maintenance: Regular maintenance and cleaning are required.
- Invasive installation: Breaking through the cellar floor may be necessary.
Risks:
- Structural damage: Improper excavation can affect the structure of the building.
- Moisture problems: Leaky KG pipes can lead to further moisture problems.
- Legal regulations: Planning permission may be required.
- New watercourses: The pump shaft can draw in water from other areas, which changes the water distribution under the house and can damage the structure of the building in the long term.
Optical integration:
In a converted cellar, the KG pipe can be integrated inconspicuously using covers, built-in cupboards or floor flaps. Alternatives to the KG pipe are concrete rings, plastic shafts and metal mesh baskets, which also provide stable shaft protection.

FAQ on installing and using a sump pump in the basement
1. what is a sump pump and what is it used for in the cellar?
A sump pump is a low-lying shaft in the basement that collects water and pumps it out automatically using a submersible pump. It is used to effectively manage moisture and water ingress in basements, especially where there is a high water table or risk of flooding.
2 How does the submersible pump work in the pump sump?
The submersible pump is activated automatically as soon as the water level reaches a certain level. It pumps the water from the sump pump outside via a hose to keep the cellar dry. An integrated float switch controls the switching on and off of the pump.
3 What are the advantages of a sump pump in the cellar?
A pump sump effectively removes excess water and protects the building fabric from water damage. The automatic mode of operation reduces manual effort and contributes to increasing the value of the property.
4 What are the disadvantages of a pump sump?
The disadvantages include the dependence on electricity for pump operation, the need for regular maintenance and cleaning and the possible invasive installation, which requires breaking through the cellar floor.
5. how is a pump sump built?
The construction of a pump sump requires the excavation of a deep hole at the lowest point of the cellar. A stable pipe, e.g. a KG pipe, is inserted into the hole and filled with gravel. A submersible pump is then placed in the pipe to pump out the water.
6 What are the risks of installing a pump sump?
Risks include potential structural damage due to improper excavation of the manhole, leaking pipes that can lead to moisture problems, and legal requirements for installation that vary from region to region.
7 Why is a non-return valve important?
A non-return valve prevents water from the hose from flowing back into the pump sump after pumping. Without this valve, the water can run back through negative pressure and put unnecessary strain on the pump.
8. how can the appearance of a pump sump in a converted cellar be improved?
To make the pump sump visually appealing, the KG pipe can be covered with covers, built-in cabinets or floor flaps. These solutions allow easy access to the pump sump and blend harmoniously into the interior design.
9. what are alternative materials to the KG pipe for manhole protection?
Alternatives to the KG pipe are concrete rings, plastic or synthetic manholes and metal mesh baskets. These materials offer different advantages in terms of stability, drainage properties and installation effort.
10. can a sump pump cause new watercourses under the house?
Yes, a sump pump can draw water from other areas under the house, which can lead to a change in water distribution and potentially increased moisture levels. Careful planning and professional installation are therefore important to minimize these risks.

- 1m KG Steigrohr DN315 oder DN400
- VARIANTE 1 - DN315 Nennweite: DN315 Länge: 100 cm Material: PVC (Polyvinylchlorid)
- VARIANTE 2 - DN400 Nennweite: DN400 Länge: 100 cm Material: PVC (Polyvinylchlorid)
Dieser Beitrag ist auch verfügbar auf:
English
Deutsch


