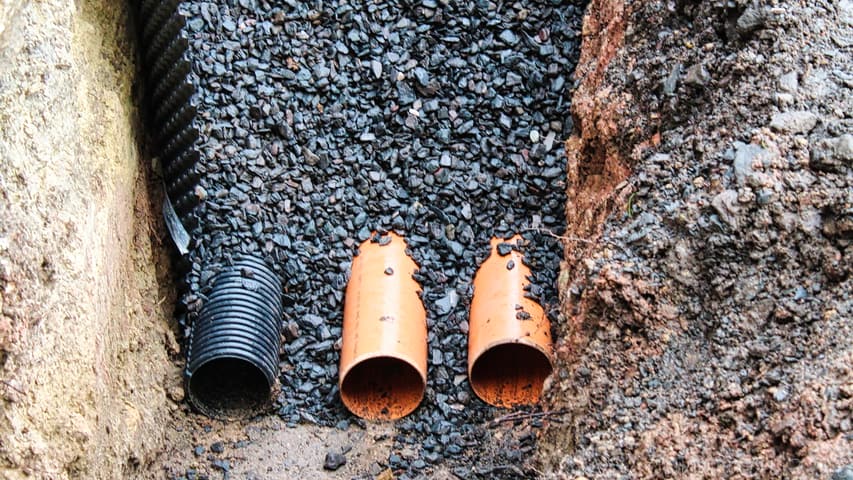
Drainage of the house – installation of drainage and water pipes.
Drainage from the house foundation with a drainage system became more and more important due to the heavy rain and continuous rain. Due to the slope of our property, the surface water always flowed to the house and seeped into the walls.
A little later, the floors in the basement became wet and and in the lower basement the water was standing. I could not achieve much by drying the walls – before that, the cause of the dampness had to be eliminated. Drainage should remedy the situation.
Cracks in the walls after drying
In the last post, I already wrote about the uncovering of the foundation. We then left the exposed areas on the house open for a good 2 months so that they could dry out.
In the office in the basement, you could even follow the drying process via a hygrometer. Thus, the relative humidity there fell from an average of 85% to 65% now. In the recreation room, in turn, large cracks appeared in the joints in the wall of the round arch.
Experts later reassured me, however, that this would be so-called drying cracks and this would also be normal.

- Dieses Drainagerohr dient zur Gebäudedrainage nach DIN 4095 (Ein- und Mehrfamilienhaus), sowie zur Flächendrainage (Landwirtschaft, Sportanlagen)
- und zur Rohrleitungskontrolle (z.B. Kabelschutz, Sammelleitungen).
- Durchmesser DN/OD 100/110 Rohrlänge 50 m Material PP-Kunststoff Drainage geschlitzt bzw. gelocht
- Drainrohre für die optimale Drainage in allen relevanten Bereichen.
- Drainung mit Rohren von DN/OD 80 bis DN/OD 110.
Installation of drainage, rainwater and sewage pipe
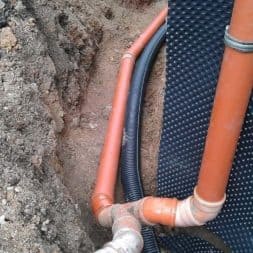
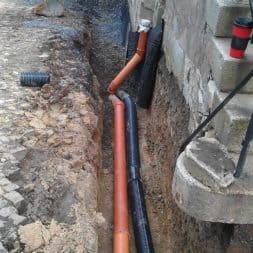
In July, we began improving our water drainage and drainage systems by replacing old clay and cast iron pipes with modern alternatives.
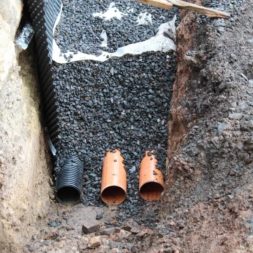
Instead of the conventional yellow round pipes, we chose the Strabusil system for our drainage, the unperforated lower part of which enables efficient water drainage without seepage.
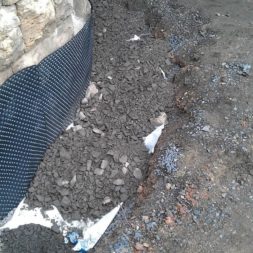
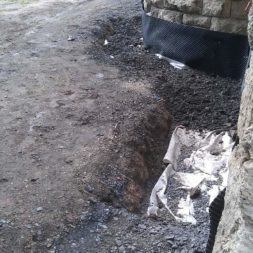
After laying the pipes, we installed a dimpled membrane with the dimples facing the wall to create an air cushion for improved ventilation and drying of the masonry.
We then covered the pipes with fine-grained gravel, laid a dirt fleece on top and filled in frost protection gravel up to the edge of the ground to ensure maximum protection and durability.
These measures not only improved the water drainage and drainage of our property, but also provided a permanent solution that effectively prevents moisture and water damage.

- ✔ Hochwertiges Geotextilvlies/Drainage- u. Filtervlies 150g/m² - Profi Qualität - MADE IN GERMANY
- ✔ MATERIAL: Qualitätsvlies aus 100% Polyester, SPEZIELL FÜR DEN AUSSENBEREICH - äußerst strapazierfähig
- ✔ EIGENSCHAFTEN: sofort wasserdurchlässig, UV-Stabil, reißfest, verrottungsfest, beständig gegen Bitumen + Folien, atmungsaktiv, metallfrei (detektorgeprüft)
- ✔ EINSATZBEREICH: Drainage- und Filtervlies im GaLa-Bau: für Wege-, Pflaster- u. Terrassenbau, Dachbegrünung, Wärmespeicher für Beete und Gewächshäuser, Steingärten, Schutz unter Teichfolien, WINTERVLIES: Schutz vor Frost und niedrigen Temperaturen
- ✔ ANGEBOT: 300g (bohrbar), 300g, 500g, 1000g / 2m-Breite/ Groß-Mengen
Connection of foot wipers to the waste water connection
We had our challenges on the north side of the house, mainly because of the driveway and the entrance. A little more brainpower had to be invested for the drainage.
On the one hand, it was clear that we didn’t want to leave the farm in its current state forever. At some point there would be plaster on it. That meant we had to think ahead so that we didn’t have to tear everything up again later.
On the other hand, we had the issue with the canopy and the doormat. Until now, both had simply let the rainwater run into the driveway. Now, however, the whole thing should be integrated into the wastewater system.
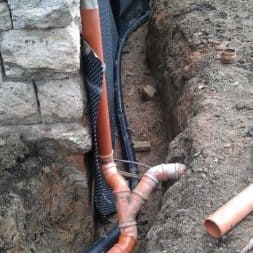
To this end, we first took preparatory measures and laid blind branches. I didn’t want to have to dig for meters again next year just to get to the pipes.
So that I later knew directly where I had to dig, I measured the spots with a folding rule and took photos.

- Bodenwanne + Maschenrost - SET
- Bodenwanne: Bauhöhe: 10 cm, Länge: 58,5 cm, Breite: 36,5 cm
- Maschenrost: Stahl verzinkt, Höhe: 2,0 cm, Länge: 57 cm, Breite: 35,5 cm
Drainage with excavator shovel and wheelbarrow
To be fair, I have to admit that I didn’t manage to uncover the area on this scale with a shovel. Here I had to rely on the help of an excavator.
With the mini-excavator I was able to carefully uncover some areas, while I had to call in the professionals with a large 20-ton excavator to fill in the drainage trench.
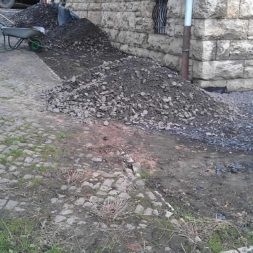
With this, the 60-70 tons of ballast could be poured back into the trench quite quickly, which of course saved a lot of time and above all sweat.
But there were also places where I couldn’t get with the excavator without, for example, breaking the lawn.
Here it was back to shovels and wheelbarrows – and the gravel was placed in the trench by hand.
Zuletzt aktualisiert am 22. May 2025 um 09:45 . Ich weise darauf hin, dass sich hier angezeigte Preise inzwischen geändert haben können. Alle Angaben ohne Gewähr. (*) Bei den verwendeten Produktlinks handelt es sich um Affiliate Links. Ich bin nicht der Verkäufer des Produktes. Als Amazon-Partner verdiene ich an qualifizierten Verkäufen. Dein Preis ändert sich jedoch nicht.
Tip: Since the gravel can be shoveled quite modestly, you ideally reach for a special“Frankfurt shovel“. These are tapered at the front and are significantly more robust than normal blades.
Due to the amount of frost protection have further optimized shoveling: I put a metal plate of 100 x 100 cm in front of the ballast pile, then pulled the stones with a rake onto the plate and could then shovel from it quite comfortably.
Little by little, I was able to backfill the trench and finally compact it with my vibratory plate.
Drainage with drainage – result
Since it rained constantly in mid-August, we were able to test our drainage directly and I must say that everything worked as desired. Despite the large amounts of water that ran to the house due to the slope, the climate improved significantly.
A 100% drainage and the guaranteed keeping away of soil or ground water is in fact not possible with a 110 year old house. But I think that we have reached the 90%.
The rest then had to be ensured by other measures. A subsequent horizontal barrier was then installed in the cellar walls.
Various solutions such as injection fluid, injection sticks and injection cream were then used for draining. I also built a pump sump in the basement.

- Robuste Materialqualität: Gefertigt aus Polypropylen (PP), bietet dieser Abwasserschacht eine hohe Beständigkeit gegen Abnutzung und Chemikalien
- Ideal für Rückstausituationen: Der Schacht ist speziell entworfen, um Rückstauklappen aufzunehmen und Abwasserstaus zu vermeiden
- Einfache Installation: Mit einem Durchmesser von 400 mm und einer Höhe von 416 mm passt dieser Schacht perfekt in bestehende Abwassersysteme
- Dauerhafte Dichtheit: Der Schacht ist mit einer hochwertigen Dichtung ausgestattet, die eine langfristige Dichtheit gewährleistet
- Einfacher Zugang: Der Schacht ermöglicht einen einfachen Zugang für Inspektionen und Wartungsarbeiten an der Rückstauklappe
Video Draining the cellar – result after 1 year
In my playlist for the project Drying out the basement on my YouTube channel, I have also published a video on the entire project. In this video, I summarize all the measures and give a final conclusion.
If you want to see more of me and my projects, feel free to check out my YouTube channel.
Laying new lawn after drying
However, the problem of moisture caused by rain or melting snow did not only affect the foundations of the house or the basement area. There were also frequent problems in the garden.
As soon as a few drops fell, everything around the house turned into a muddy landscape in a flash thanks to the high proportion of clay in the soil. Not exactly what you would imagine an idyllic garden to be.
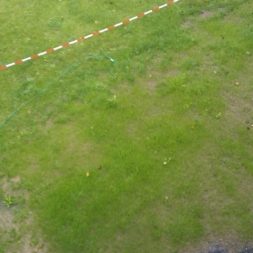
To counteract this, I started a campaign before our week’s vacation: I sowed a generous amount of fresh lawn seed behind the house. To protect the young lawn from being walked on, I had cordoned off the area.
In the meantime, the result was impressive: The lawn was now a good 20 cm high and had become quite dense.
It was a bit of an experiment, but it paid off in the end. The dense turf held the soil together and prevented it from turning to mud every time it rained.
So all in all, it worked perfectly.
Around the house I will then put a border and this then probably fill with white decorative stones so that the whole thing is still given a visual kick.
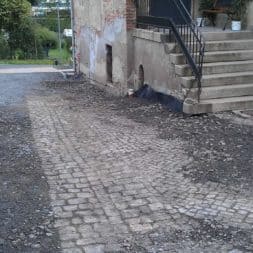
By the way, with the remaining gravel I created a cobblestone path to the side entrance and prepared another parking space.
Dieser Beitrag ist auch verfügbar auf:
English
Deutsch












5 Comments
finn
Nach Frühlingsüberschwemmungen muss ja die Trockenlegung ausgeführt. Meinen Dank für die Tipps dazu und die Visualisierung davon, denn ich soll meinen Eltern doch helfen. Wenn ich mich an diese Anleitungen halte, hoffe ich, mache ich nichts verkehrt. Nach dem Bagger soll vielleicht gesucht werden.
Mailin Dautel
Ich liebe euren Blog, der ist echt super. Wir haben uns auch eine alte Villa gekauft und sanieren selbst. Unser nächste Schritt ist die Trockenlegung des Kellers. Wir haben Kapillarwasserseperren gekauft und müssen diese noch einbauen. Es war eine gute Idee das Rasenstück mit Bändern abzustecken, dass sollten wir bei uns vielleicht auch machen. Meine Kinder laufen einfach immer über den frisch gesäten Rasen.
Joachim Hussing
Es ist schön zu hören, wie Sie die Entwässerungsmaßnahmen Mitte August bei Regen direkt testen konnten. Mein Haus hatte in den letzten Wochen einige Entwässerungsprobleme, und ich möchte es reparieren lassen. Ich werde für die Reparatur der Entwässerung professionelle Hilfe suchen.
Hendrik
Das sieht sehr interessant und professionell au, wie sie die Drainage gelegt haben. Regen ist bei uns eigentlich kein Problem. Wir haben aber auch permanent Feuchtigkeit im Haus und ich überlege, ob ich eine Leckortung durchführen lasse.
Pingback: