Build garden house with bird aviary yourself
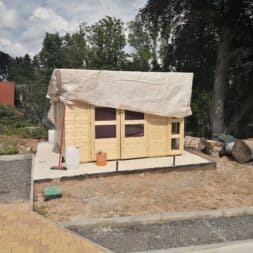
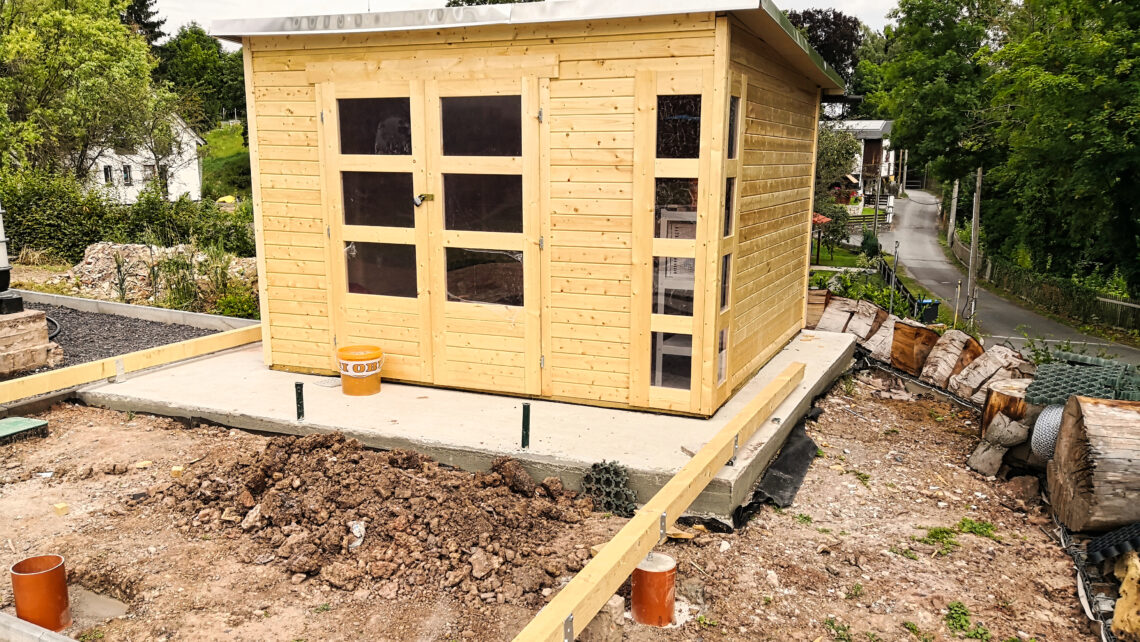
The garden shed for the aviary was built just 2 days after the concrete foundation in the garden was completed.
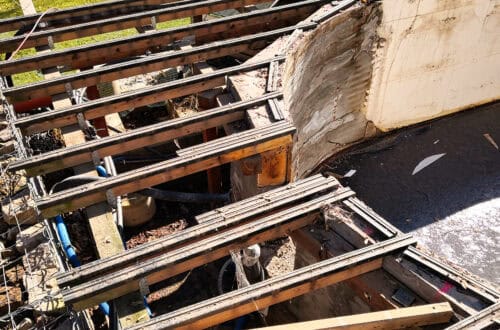
The concrete surface was dry and stable enough even if the entire floor slab would certainly need a few more weeks to dry out.
Garden house – delivery of the prefabricated house Karibu Kerko
As in 2015, when we built our log garage in the garden, we once again opted for a Karibu product, this time the Kerko 6 model.
The garden shed is intended as the future center of the small animal aviary. Personally, I would have preferred a different, more practical model, but this time the decision was up to our child, who acted as the builder.
The garden shed was ordered online and was delivered to us within a few days by a shipping company. The delivery arrived on a manageable, well-packed pallet, which showed no signs of damage.

- STECK- & SCHRAUBSYSTEM: Ein Gartenhaus mit Systembauweise ist eine günstige Alternative zur Blockbohlenbauweise. Bei dieser Bauweise werden bereits vorgefertigte Profilhölzer durch eine Nut- und Feder-Verbindung aufeinander gesteckt.
- WANDSTÄRKE: Mit seiner Wandstärke von 19 mm ist das Gartenhaus ideal als Stellplatz für Fahrräder, Gartengeräte und -utensilien geeignet. Leicht zu montieren reicht die einfache Ausführung als Unterstand oder Abstellraum vollkommen aus.
- MATERIALEIGENSCHAFTEN: Das hochwertig gearbeitete Gartenhaus zeichnet sich durch sein ausgesuchtes, erstklassiges Fichtenholz aus. Fichte ist besonders langlebig und robust, was für die notwendige Stabilität sorgt.
- DACHKONSTRUKTION: Das Flachdach überzeugt mit seiner Schlichtheit und klaren Linienführung. Die geringe Neigung dieser Dachform wirft wenig Schatten und behindert die Sicht kaum. Die Dachkonstruktion besteht aus 16 mm starken Dachplatten.
- AUSSTATTUNG: Folgende Fenster werden 8 feststehende Fenster, ca. B 23,5 x H 31,5 cm, mitgeliefert. In der Lieferung ist eine Doppeltür, ca. B 141 x H 177 cm, Sicherheitsüberfalle (Kunstglas) enthalten.
Sorting the components of the timber house and studying the construction plan
Based on the experience of building the first garden shed and numerous other projects, I carefully opened the foil of the pallet to check the goods for possible damage.
Unfortunately, the quality of the materials supplied did not meet my expectations. Some of the boards were cracked at the ends and worse still, a considerable number of the boards were warped.
In view of this quality, I briefly considered returning the goods. However, due to the prevailing shortage of timber and building materials and the fact that a replacement house would take months to be delivered, I decided to build the house anyway.
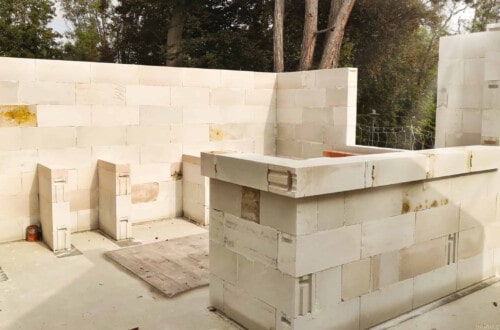
I carried the boards, doors, window fronts and boxes of accessories from the pallet onto the large concrete foundation of the future garden kitchen next to the new animal house. There I sorted the boards and marked them according to the packing list.
These preparations should simplify the subsequent assembly and minimize the risk of using the wrong board.
The enclosed construction plan in bound form was easy to understand and simple, which should make assembly easier.

- Schlagwerk abschaltbar
- Bürstenloser Motor für mehr Ausdauer, längere Lebensdauer und kompaktere Bauweise
- Mit leuchtstarker LED
- Feinfühlig regelbare Drehzahl
- 2-Gang-Vollmetall-Planetengetriebe
The right tools for the construction of our gazebo
As with many of my construction projects, using the right tools was crucial when building the garden shed.
We needed various tools such as a cordless screwdriver, jigsaw, hammer, spirit level and a ladder. Various bits, wood drills, a folding rule and a pencil were also used.
An essential step was the pre-drilling of all the boards before the screws were countersunk, which is why the use of a second cordless screwdriver was essential.
I had charged the batteries of my two Makita cordless screwdrivers, each with 4.0 Ah, the day before.
Fortunately, the first battery of each screwdriver lasted the entire construction phase, which once again underlines the quality of these tools.
-
Price: € 243.75
-
Price: € 9.95instead of: € 15.93
-
Festool Pendelstichsäge PS 300 EQ-Plus TRION (mit Stichsägeblatt-Set, Splitterschutz), im Systainer*Price: € 352.15instead of: € 365.42
-
Price: € 34.98
Build garden house – assemble walls
At the start of the project, I first mounted four 40 x 60 mm impregnated roof battens as a base. I cut the battens to fit exactly and sealed them with tar tape on the underside to prevent the ground moisture from rising.
This tar or repair tape was not included in the delivery, and roofing felt or similar materials were also missing.
Once the approx. 3 x 3 meter square of roof battens was finished, I aligned it so that my empty conduit came out of the ground exactly in the inner corner. The right angle of all corners was also carefully checked.
I then mounted four squared timbers on edge at the corners of the roof battens and aligned them. Then the actual assembly of the planks began, which were installed in clockwise order from bottom to top.
The tongue of the boards pointed upwards and the groove of the next board was carefully hammered in.
It was important to note that the boards not only had tongue and groove, but also a front and back. The spring was designed in such a way that no rainwater could flow into the joint.
At the ends, I screwed the boards into the previously mounted squared timbers with two screws each. I pre-drilled all the screw holes with a 2.5 mm wood drill bit to prevent the wood from splitting.
This work proved to be very time-consuming and sometimes laborious, as the boards were not always perfectly straight. In the end, however, the garden house stood before us with three closed sides.

- FastFix Schnellwechselsystem für einfachen Sägeblattwechsel
- Überlegene Lebensdauer durch hochwertige Antriebskomponenten
- Ausschnitte für Spülen und Kochmulden
- Technische Merkmale: Antriebsart Netz; Leistungsaufnahme 720 W; Hubzahl 1000 - 2900 min⁻¹; Pendelhubverstellung in Stufen 4; Schrägstellung 0 - 45 °; Schnitttiefe Holz 120.00 mm; Schnitttiefe NE-Metall 20.00 mm; Schnitttiefe Stahl (weich) 10.00 mm; Kabellänge 4.00 m; Produktgewicht 2.70 kg; Standard 230V; Inhalt: 1 Stück
- Lieferumfang: Festool Pendelstichsäge PS 300 EQ-Plus TRION, x Stichsägeblatt-Set: 1x WOOD FINE CUT S 75/2,5 und 1x WOOD UNIVERSAL S 75/4 FSG, Splitterschutz, Systainer SYS3 M 137
Installing window fronts in the garden house
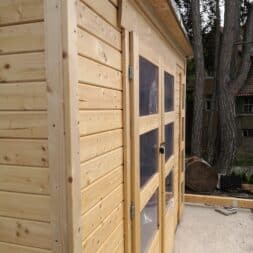
Installing the window front on the southwest corner of my garden house proved to be particularly challenging. The window fronts consisted of two prefabricated elements that were integrated floating into the adjacent walls.
“Floating” here means that the elements were not screwed directly to the side walls, but were simply placed in the opening and held in the correct position by a pre-faced board. This board was screwed to the respective side wall of the garden shed.
This construction method made it possible for the wall to work independently of the prefabricated window elements, which is important for a timber house with a side length of 3 meters and the associated temperature differences.
Unfortunately, it turned out that the side element did not fit exactly into the intended opening, as the gap was almost 1 cm too small. Despite careful preparation, I had to rework the element with a saw to make it fit.
Installing the window element at the front of the garden shed was even more complicated. A wall made of small boards was planned between the door and the window element, which was to end at the same height as the window element.
A long board above the window should then reach up to this small wall and thus provide additional stability.
The problem was that the window element was to be connected to a wall that would only be stabilized after it had been installed – a classic chicken-and-egg problem.
I found the solution by interlocking the small boards on the floor to build the wall.
I then positioned the window element and put up the small wall at the same time. A third person helped to install the upper long board to fix the wall and window element.
The situation was made more difficult by the fact that three boards were missing. After looking through the assembly instructions, I noticed that there was a long board left over from the side walls. We could have sawn up this board to finish the wall.
But later it turned out that this board was intended in the drawings as the top edge of the front, even though this was not described in the instructions.
After some back and forth, we nevertheless decided to saw the board in half.

- Lieferumfang Handkreissäge 2 x Akku Ladegerät Makpac
Video: Build your own Karibu garden shed
I recorded the construction of the garden hut with several cameras and put a video online on my YouTube channel. By the way, you can find all the other videos about this project in my playlist about building the animal house.
If you want to see more of me and my projects, feel free to check out my YouTube channel.
Zuletzt aktualisiert am 26. July 2024 um 04:46 . Ich weise darauf hin, dass sich hier angezeigte Preise inzwischen geändert haben können. Alle Angaben ohne Gewähr. (*) Bei den verwendeten Produktlinks handelt es sich um Affiliate Links. Ich bin nicht der Verkäufer des Produktes. Als Amazon-Partner verdiene ich an qualifizierten Verkäufen. Dein Preis ändert sich jedoch nicht.
Karibu Kerko garden hut – building roof
At this point, the future animal house already consisted of three surrounding walls and the two small walls at the front, including the two window elements.
Only the opening for the door was still open, which is why the roof had to be fitted.
For the roof, the two side walls first had to be extended by an additional, prefabricated wooden element in a triangular shape, which enabled a uniform roof pitch over the length of the house.
The roof ran out to zero at the rear, and another 3-meter board had to be installed at the front.
Theoretically, there was still room for a board cut into thirds in width, but we had already sawn it up to build the wall at the front window. I later closed the resulting gap with one of the long boards from the roof curb.
From the inside, I installed three massive wooden beams at the height of the future roof, across the door. These wooden beams each consisted of three individual boards, which I had to screw together beforehand.
The supplied chipboard was then placed on top of these beams and screwed in place.

- Bitumen-Schweißbahn - Die Dachbahn ist modifiziert mit SBS-Elastomeren. Die Matrix ist ein Polyester-Vliesstoff mit hohem Flächengewicht, hoher Elastizität und sehr hoher Reißfestigkeit
- Hochwertige Abdichtungsbahn - Die Außenfläche der Dachpappe ist mit groben Mineralstreuseln bedeckt, die Unterseite ist mit einer leicht schmelzbaren Kunststofffolie befestigt. Entlang einer Kante der Schweißbahn gibt es eine Überlappung, die mit Kunststofffolie befestigt ist
- Professionelle Dachabdichtung - Ideal als Deckschicht von mehrlagigen wasserdichten Dacheindeckungen im Neubau und bei Renovierung alter Bitumendacheindeckungen
- Lieferumfang - Enthalten ist eine Rolle Schweißbahn PYE PV 200 S5 beschiefert in grau mit den Maßen 1 x 5 m² (EN 13707:2004+A2:200; EN 13707+A2:2012; EN 13501-5+A1:2010)
- Qualität von Isolbau - Alle Isolbau Produkte werden unter höchsten Qualitätsstandards entwickelt und hergestellt und haben sich über Jahre in der Baubranche ausgezeichnet und bewährt
Karibu garden shed – welded membrane and OSB on the roof
The decision to use chipboard as a load-bearing roof structure seemed completely inadequate to me. Due to the rain, snow and constant humidity, I feared that the chipboard would swell and disintegrate quickly.
The original construction plan only provided for a layer of roofing felt as protection, supplemented by a recommendation for self-adhesive welding sheets, which I also considered to be completely inadequate.
The wooden eaves boards on the sides, which were included in the construction plan, didn’t seem to me to be durable either.
I therefore developed a more robust plan on my own, which included OSB panels, stainless steel eaves and in-situ sheets as well as a gutter and high-quality S5 welded sheets.
First, I covered the entire roof surface with OSB boards, which I screwed together. Due to the shortage of raw materials, I had to make do with 12 mm thick panels, although thicker panels would have been preferable.
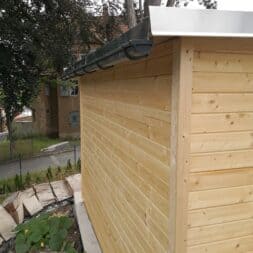
I then fitted the brackets for the gutter on the east side of the roof and temporarily installed the gutter. The separately purchased rain gutter set impressed me with its excellent price-performance ratio.
I then attached the drip tray to the roof so that the edge ended just above the gutter to effectively drain off the rainwater. I fitted the side eaves plates from bottom to top to optimize water drainage.
Once the eaves sheet had been attached to the front, the roof was completely enclosed.
For the exact details, in particular the overlapping of the materials, I refer you to my video Build your own garden aviary – #1 Construction garden house | rabbits | parakeets | guinea pigs.
The last step was to lay the S5 welding track. After I had cut them to size, I laid them across the roof, starting on the east side.
I rolled up the sheet slightly on one side, heated the underside with a flame thrower and rolled it out again, then welded it neatly to the OSB board. I applied the second layer in the same way with an overlap of 10 cm.
I covered the narrow area on the west side of the roof with offcuts.
After all, the roof was both tread-proof and waterproof.

- ANWÄRMBRENNER-SET: 1x Hochleistungsbrenner – Stahl verzinkt & randverstärkt; 1x Propangasschlauch – 5,0 m, G 2 x 3/8“ L; 1x Propan-Konstantregler; 1x Griffstück mit Dreiwegeventil und fixierter Pilotflamme; 1x 60 cm Brennerrohr mit Brennerstütze
- ANWENDUNGSVORTEILE: Der Hochleistungsbrenner für Abflamm- und Heißklebearbeiten in Economy Ausführung, Niedriger Gasverbrauch durch exakte Brennereinstellung
- ANWENDUNGSGEBIETE: Flämmen von Bitumenbahnen; Aufwärmen; Abflammen; Verschweißen von Folien; Teerarbeiten; Dachisolierungen; Beton- und Mauerwerkstrocknung; Biologische Unkrautvertilgung und Moosbeseitigung; Auch optimal zum Auftauen/ Enteisen geeignet; Europalettenveredelung & Möbelveredelung im Vintage-Style zum Selbermachen
- ANWENDUNGSGEBIET UNKRAUTVERNICHTUNG: Das Gerät wenige Sek in einem Abstand von ca. 3 cm über das Unkraut führen. Die Flamme erreicht 1.000⁰C und bringt die Zellflüssigkeit der Wurzeln zum Gerinnen wodurch diese innerhalb weniger Tage vertrocknen, ein Verbrennen ist nicht nötig. Der umweltschonende Unkrautentferner kommt komplett ohne chemische Stoffe wie Glyphosat & Co aus
- TECHNISCHE DATEN: Flammentemperatur: bis 1060 °C; Gasdruck: max. 4 bar, 8 kg/h; Brennerbiegung mit 60 cm, ca. 35° gebogen; Brenner: Ø 57 mm
Install doors in Karibu Kerko summer house
The installation of the door was similarly complex as the installation of the two window fronts. First, a door frame or frame had to be built from various boards. This frame was also connected to the adjacent walls floating.
Despite all the concerns, this design is stable and reliable. During assembly, the two timbers on the left and right of the door frame were mounted first.
This is where I noticed the 2nd error in the build instructions. While in one picture the squared lumber was to be screwed flush with the outside of the wall, in another picture it was the inside wall that was to be flush.
Only the stop edge or the door sill on the floor brought certainty. This was to be flush with the outside – which made perfect sense from my point of view.
And so that the door frame was tight all around, the two outer squared lumber members also had to be placed on the outer edge.
Now all that was missing was the lintel above the door and the frame was ready. The door leaves, as well as the two window elements, were pre-assembled and only the 3 hinges had to be turned into the pre-drilled openings.
Then the left door was placed in the frame and marked the position of the counterparts of the hinges on the wall of the garden house. These components were then attached to the wall with 3 screws each and the door was received.
The same procedure was followed with the right door leaf.
On the left door was now mounted a stop wood from the inside and the two bolts for locking. The bolts of the transoms are pushed directly into the wood above and below. The necessary holes must be drilled with a 10 mm wood drill.
From the outside, the latches were added so that the door can be closed. While my other garden shed had a door with a latch and lock, this arbor is secured only by the hasp and a massive padlock.
All in all, the assembly took a good 2 days. The first animals have then already moved in the following day. Soon the garden house will be expanded with a large outdoor aviary.
However, there is a separate entry for this: Build your own aviary – outdoor enclosure for rabbits, birds and guinea pigs

- Material: Stahl, galvanisch gelb verzinkt
- Abmessungen: Breite 50 mm - Länge Überfalle 153 mm - Länge Anschraubplatte 68 mm - Abstand Mitte Langloch-Mitte Stift 121,5 mm - Vorhängeschloss-Ø 15 mm - Materialstärke 3 mm - Anzahl Löcher 1 / 4 / 4 - Loch 14 x 40 / Ø8 / Ø8,5 mm
- Ausführung: mit Öse auf Platte - versenkte und verdeckte Schraublöcher
- Hochwertige Sicherheits-Überfalle in bewährter Qualität von Alberts - Problemlöser in Spitzenqualität, die immer dann helfen, wenn es perfekt werden muss.
- Alberts bietet nicht nur ein umfangreiches Sortiment an hochwertigen Eisenwaren an. Wir führen auch eine Vielzahl von Profilen, Blechen und Winkeln, attraktive und sichere Fenstergitter sowie praktische und dekorative Zäune.
Summary and conclusion
After quickly completing the concrete foundation in my garden, I was able to quickly start building the garden shed.
The selected Kerko 6 model from the Karibu brand, known from our previous project in 2015, was chosen as the future center of the small animal aviary.
Despite my preference for a more practical model, I left the decision to our child, who took on the role of builder. The garden shed was delivered to us quickly and undamaged by a shipping company.
When unpacking, however, I found that the quality of the materials supplied left a lot to be desired. Some of the boards were cracked and warped, which made me briefly consider sending them back.
However, in view of the current shortage of wood and building materials and the long wait for replacements, I decided to go ahead with the construction.
The materials were sorted next to the future animal house on the large concrete foundation and prepared according to the packing list to simplify assembly.
The assembly itself required various tools such as a cordless screwdriver, jigsaw and spirit level, and thanks to the quality of my tools, especially the cordless screwdriver, the assembly went smoothly.
The construction began with the installation of impregnated roof battens, which served as a base and were sealed against ground moisture with tar tape.
The walls were then assembled systematically and the special tongue and groove construction of the boards ensured that no rainwater could penetrate.
The challenge was the integration of the window fronts, which were installed in a floating manner to allow for different working methods of the materials in the event of temperature fluctuations.
An incorrect fit required reworking with the saw, and the complicated assembly of the window element on the front was solved creatively by first assembling the wall on the floor and then inserting the window element.
I have documented the entire process on my YouTube channel and will soon be presenting more details about the planned expansion to include a large outdoor aviary in a new blog post.
The first animals have already moved in and the garden house now forms the centerpiece of the new aviary in the garden.

- KOMPLETT-LÖSUNG: Regenrinnen Set aus Kunststoff inkl. aller notwendigen Einzelteile wie Ablaufstutzen, Fallrohre oder Rinnenverbinder. Alle Teile sind einzeln nachbestellbar
- ANWENDUNG: Fachgerechte Dachentwässerung für eine Dachseite (z.B. Pultdach) an deinem Carport, Gartenhaus oder deiner Terrasse mit einer Dachfläche bis ca. 50 m²
- HOCHWERTIGER KUNSTSTOFF: Qualitativ hochwertiger PVC-U Kunststoff, welcher witterungs- und UV-beständig ist und zudem eine hohe Schlagfestigkeit und Formstabilität aufweist
- EINFACHE MONTAGE: Das passgenaue Stecksystem von INEFA ermöglicht eine einfache und fachgerechte Montage in wenigen Schritten. Flexible Größenanpassung der Dachrinne möglich
- MADE IN GERMANY : Die Premiummarke INEFA bietet Europas größtes Sortiment an Dachentwässerung. Zubehör wie z. B. Laubschutzgitter in unserem Sortiment erhältlich
Dieser Beitrag ist auch verfügbar auf:
English
Deutsch


