Build carport yourself – prepare building site
A carport on our property should have long given the vehicles the necessary protection. In principle, there were two possible building sites on the property where the construction of a double carport was feasible.
Directly at the entrance, however, the practical implementation would be difficult. Due to the slope to the south and the incline of the driveway, the effort required to level this area would simply have been too great.
The right building site for the carport
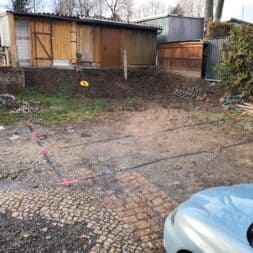
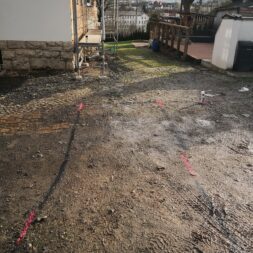
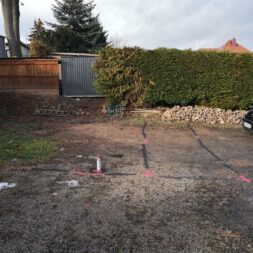
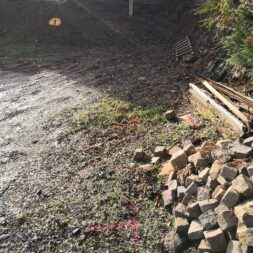
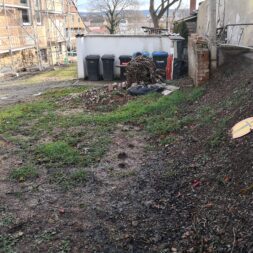
At the end of our driveway was an area of around 100 square meters, which had previously been unused at the north-western corner of the property.
This area was bordered to the south by the WPC terrace with garden kitchen and our courtyard. On the other two sides, a garden with weekend arbors and our neighbors’ garden sheds bordered this area.
Many years ago, the plan was to convert this area into a parking space for the residents of our building, which was finally implemented in 2018.
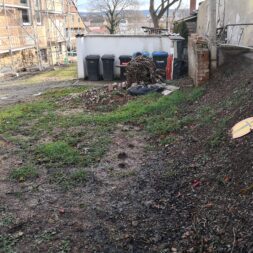
The adjoining plot to the garden in the west was about one meter higher than the planned building site and was supported by a small garden wall made of bricks until a decade ago.
However, as this wall fell into disrepair, the earth from the neighboring property slid further and further into our yard, along with the gazebo above it.
After many detours, an agreement was finally reached with the owners of the gazebo and the small building was demolished.
This was the starting signal for us to begin building a parking space.

- Für alle Markierungen auf Asphalt, Beton, Holz und Erde
- Inhalt (ml): 500
- Farbe: neonpink
Requirements for the carport
To protect our vehicles, I decided to build a covered parking area, in our case a carport.
I also planned to fit the south-west-facing roof area of the carport with a photovoltaic system, as it was not possible to install one on the roof of our villa.
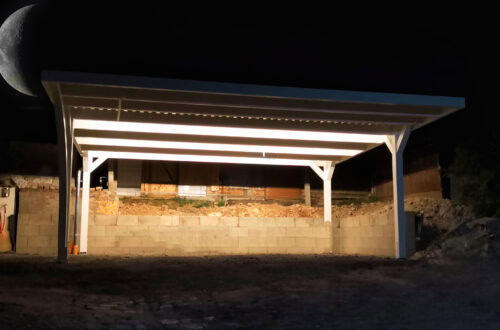
The carport should cover an area of 6 x 6 meters to accommodate at least two vehicles. A central post in the driveway was to be expressly avoided, which had to be taken into account when planning the statics.
Before we could order the carport, the building site had to be prepared according to our requirements. It was necessary for the site to be level and easily accessible by car.
In order to start our project, the problematic slope first had to be secured, as rain and weather continued to cause the earth to fall away and wash out.
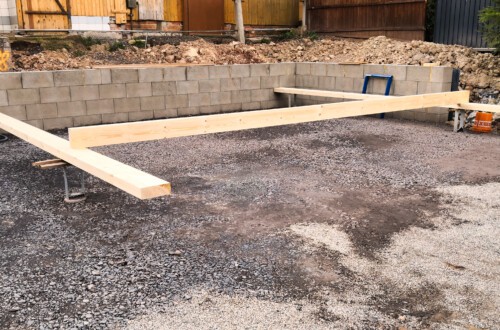
Our aim was to stabilize this slope over a length of a good 8 metres to the south-west and 7 metres to the north with a wall about one metre high.
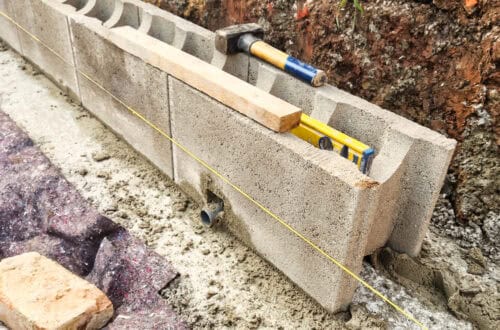
After looking at various options, including L-sections and gabions, we decided to build a concrete formwork wall.
Video: Preparing the building site for the carport
I recorded the excavation of the building pit and the preparations on the building site for the construction of the new double carport in an informative video and published it on my YouTube channel.
You can find my videos about building the carport in my playlist Project Carport – Building a Carport on a Slope by Yourself.
If you want to see more of me and my projects, feel free to check out my YouTube channel.
Zuletzt aktualisiert am 17. February 2026 um 20:51 . Ich weise darauf hin, dass sich hier angezeigte Preise inzwischen geändert haben können. Alle Angaben ohne Gewähr. (*) Bei den verwendeten Produktlinks handelt es sich um Affiliate Links. Ich bin nicht der Verkäufer des Produktes. Als Amazon-Partner verdiene ich an qualifizierten Verkäufen. Dein Preis ändert sich jedoch nicht.
Remove slope and level surface
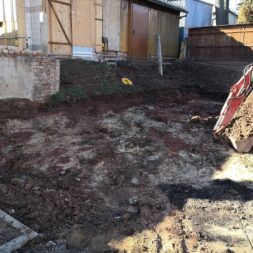
Before the protective retaining wall could be erected, the area in question first had to be leveled. I wouldn’t have gotten far here with a shovel and spade alone, as the area and the mass of earth were simply too extensive.
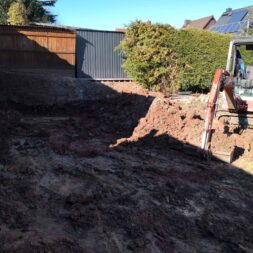
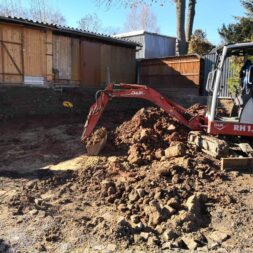
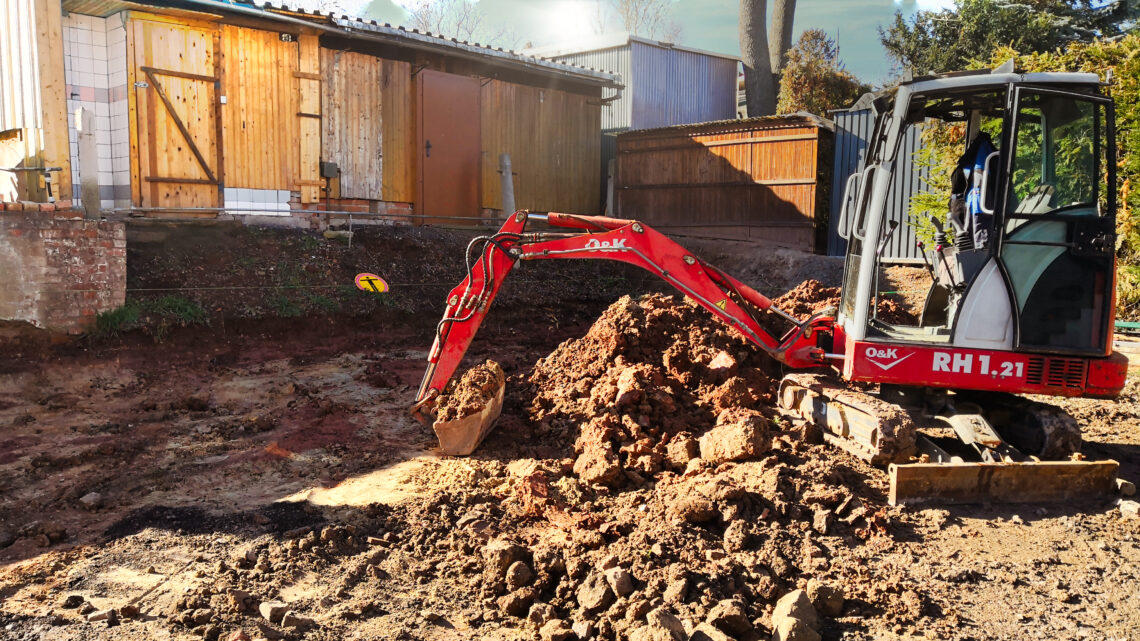
That’s why I hired a mini excavator for a weekend, including an excavator driver. This was to level the ground on the construction site and load the earth onto a truck that had also been ordered.
I had also found a buyer for the soil, or rather for the bare clay soil. One Saturday morning, we met up for a day’s work and got down to business on time.
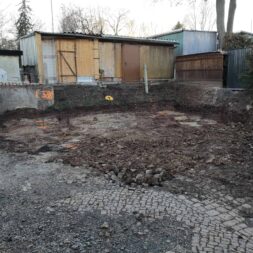
The excavator was used to cleanly remove the border to the slope and level a total area of around 10 x 10 meters. The planned 10 m³ of soil eventually became a good 25 m³ of heavy clay soil.
The technical failure of the transport vehicle for the earth then made the chaos perfect from midday.
The clay soil was so heavy that the hydraulics of the tipping device gave up the ghost after the fourth tour. The last load then had to be unloaded by hand with a shovel.
Fortunately, I was able to organize a replacement truck at short notice. Despite the unplanned downtime, the leveling of the footprint was completed that day.
The next step was to secure the earth slope with a formwork wall. The carport was only to be erected once these had been completed.

- ORIENTIERUNGSHILFE: Ideal geeignet für verschiedensten Einsätzen im Garten- & Baubereich | Einsetzbar als Maurerschnur, Pflaster-, Lot- oder Bauschnur
- FLEXIBEL EINSETZBAR: Geeignet zum horizontalen & vertikalen Fluchten von Mauern | Zum Ausloten oder Erstellen vom Schnurgerüst | Zum Verlegen von Fliesen bei Grundstücksplanungen oder für diverse Gartenarbeiten
- HOCHWERTIG & KOMPAKT: Hohe Reißfestigkeit, Belastbarkeit & Flexibilität | Unempfindlich gegen Schmutz & Feuchtigkeit | Knotenfest | Auf Spule zum einfachen & schnelle Abrollen der Schnur | Platzsparend zu verstauen
- PRODUKT-DETAILS: Schnur-Länge: 100 m | Stärke: 2,0 mm | Material: Polypropylen (PP) | Farbe: rot/weiß
Driving an excavator – basics and tips
Working with an excavator was an important skill on many of my construction sites. This versatile construction machine played a decisive role in earthworks, excavation and lifting work.
In this section, I will highlight the basic functions of an excavator and explain in detail how it is operated using pedals and joysticks. First of all, however, an important note:
!Important!
Please note that I am not a certified specialist in the field of excavator operation. The information in this article is based on my personal experience and the knowledge I have gained from working with excavators.
I assume no liability for the accuracy, completeness or reliability of the information provided. The use of this information is at your own risk.
I also accept no responsibility for any damage or loss that may result from the use of the techniques and instructions described.
Before operating an excavator, I recommend that you receive appropriate training from a specialist and familiarize yourself thoroughly with the safety regulations and technical operation.
Basic functions of an excavator
An excavator usually consists of an undercarriage with crawler or tire chassis, a rotating uppercarriage with drive, the cab and the working arm with attachments such as a bucket or hammer.
The main tasks of an excavator include digging pits and trenches, lifting loads and leveling surfaces.
Modern excavators are equipped with hydraulic systems that enable precise control and powerful movements.
Detailed operating instructions
The cabin and its elements
The cab of an excavator is the control center where the operator sits and monitors and controls all important functions. It is usually equipped with a range of control instruments, including displays for monitoring machine status and performance.
The ergonomically arranged seats and clearly visible controls increase operator comfort and safety.
Using the joysticks
There are typically two joysticks in the excavator cab, which are used to control the various movements of the working arm and the bucket.
The left joystick usually controls the rotation of the uppercarriage and the raising and lowering of the boom.
The right joystick is used to operate the bucket itself, including extending and retracting the dipper arm and tilting the bucket.
Function and use of the pedals
The pedals of an excavator are responsible for the fine control and movement of the chassis. The left pedal is often used to set the direction of travel, while the right pedal is used to control the speed in many models.
On some excavator models, the right pedal can also control the auxiliary hydraulics for attachments, which is particularly important when using hydraulic hammers or grabs.
Safety precautions when working with an excavator
Safety is a top priority when handling heavy machinery such as an excavator. Before starting to operate the excavator, a thorough check should be carried out.
This includes checking all hydraulic systems, checking the oil level and visually inspecting the attachments for damage.
During operation, it is crucial that the operator always maintains a clear overview of the working environment and follows safety guidelines such as wearing protective equipment.
Other safety measures include avoiding overloading, maintaining safe working distances from other employees and observing weather conditions that could affect the stability of the machine.
Use of an excavator on a construction site
The use of an excavator on a construction site begins with planning and preparation. It is important to check the subsoil for stability and to ensure that no underground pipes or cables are damaged – keyword shaft plan.
When working on a construction site, the excavator is often used for digging foundations, moving earth and leveling the terrain.
The precise control via the joysticks and pedals enables the operator to work efficiently even in confined spaces. The ability to change attachments quickly increases flexibility and efficiency for various tasks.
When building my carport, the excavator plays a crucial role in digging the foundations and leveling the site. By using an excavator, I was able to prepare the ground precisely and efficiently for the installation of the KG pipes and the construction of my foundation for the retaining wall.
I was also able to make good use of the excavator when transporting and placing heavy building materials such as beams and roof structures. This makes construction easier and speeds up the entire process considerably.
Conclusion and summary
An excavator is a versatile and indispensable piece of construction site equipment that is used in many phases of the construction project, from earthmoving to the precise placement of building materials.
The basic functions of the excavator include digging, lifting and grading, supported by a powerful hydraulic system for precise control.
It is operated using two joysticks to control the working arm and bucket as well as pedals to move and control the speed of the undercarriage.
Safety precautions are extremely important when working with excavators and include regular machine checks, wearing protective equipment and maintaining safe distances.
On the building site, the excavator facilitates the digging of foundations and site preparation, while it is essential when building a carport for digging foundations and handling heavy building materials.
The efficient use of an excavator requires a sound knowledge of machine operation and a high level of attention to safety aspects.
This not only ensures safety in the workplace, but also the quality and efficiency of the construction work.

Summary and conclusion
Before we could build the carport, I had to choose the right location on our property and prepare the ground.
Initially, I decided against a building site directly on the driveway because of the difficult slope and the extensive leveling work required. Instead, I chose a previously unused area of around 100 square meters at the end of the driveway, which was ideally located.
The chosen location was surrounded by our WPC terrace with garden kitchen and the courtyard to the south as well as a garden area and the neighboring garden on the other sides.
The plan to use this area as a parking space had been in place for years and was implemented from 2018.
The challenge was to stabilize the ground, as the adjacent property was about a metre higher and soil had slipped through the dilapidated garden wall into our yard.
Once an agreement had been reached with the owners of the gazebo above and the building had been dismantled, I was able to start building the carport.
I planned to build the carport with an area of 6 x 6 meters without a central post and to equip the roof area with a photovoltaic system.
The building site had to be level and easily accessible, which required the slope to be secured with a concrete formwork wall.
Despite some technical difficulties and the need to organize a replacement truck, I was able to successfully complete the levelling of the site and start building the carport.

- MAGNETISCH: Extrastarkes Seltenerd-Magnetsystem zur Haftung an metallischen Bauelementen – freie Hände beim Ausrichten und Justieren von Pfosten und Trägern
- ATTRAKTIV: Drei häufig genutzte Längen. Strapazierfähige, verschließbare Wasserwaagen-Tasche. Wasserwaagen 120 cm und 60 cm mit zwei Vertikal-Libellen für schnelles Ablesen in jeder Position
- HOCHWERTIG: Stabiles Aluminium-Profil. Integrierte Rutsch-Stopper für festen Sitz der Wasserwaage beim Anzeichnen. Einfache Reinigung des Profils. Kunststoff-Endkappen zum Schutz des Profils
- OPTIMAL ABLESBAR: Zwei beschichtete Messflächen. Qualitätslibellen mit fluoreszierender Flüssigkeit. Robustes Acrylglas mit präzise geschliffenen Innenkonturen und bündig sitzenden Ableseringen
- DAUERHAFT PRÄZISE: Einbautechnologie LOCKED VIALS sorgt für Langzeitpräzision. Messgenauigkeit in Normalposition ± 0,5 mm/m, in Umschlagposition ± 0,75 mm/m. Exaktes Ablesen von -20 °C bis +50 °C
Dieser Beitrag ist auch verfügbar auf:
English
Deutsch


