Erdhang mit Gabionen abfangen am Carport b 1 - Build your own carport - safely stabilize slopes with gabions

Build your own carport – safely stabilize slopes with gabions

Lesezeit 4 Minuten

Securing the slope with a gabion wall was the final task in our “Build your own carport” project.

Our double carport was finally finished. The roof turned out to be tight, and I had applied the paint several times to ensure long-lasting quality and protection.

Once I had installed the electrics, LED lighting, motion detectors and a surveillance camera, the interior of the carport was as good as complete.

Now I turned my attention to the final slope stabilization behind and next to the carport.

In addition to the solid, steel-reinforced formwork stone wall, I planned to erect a decorative gabion wall in the front viewing area to provide additional stabilization and aesthetic enhancement.


The slope by the carport must be secured

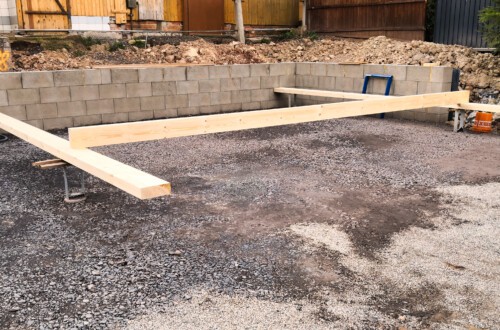
I had already intercepted and secured the small slope on which the carport was erected. The formwork wall that I built on the west and east sides served as a boundary between the slope and the pitch.

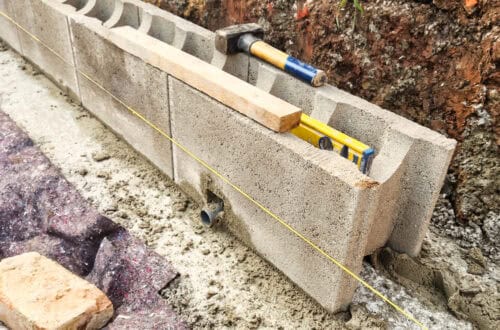
I described the construction of this formwork stone wall in the entry Building a carport yourself – securing a slope with formwork stones and documented it there with a video.

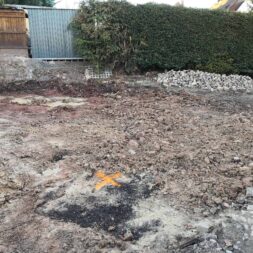
However, the transition from the formwork wall to the driveway on the north side was not yet secured. At this point, the earth slope slowly ran out into the driveway.

Although this has not been a problem in the past, even during major storms with heavy rain showers, this area was not very visually appealing.

I therefore decided to box up this area too. As is so often the case, I used gabions to secure the slope.


Zuletzt aktualisiert am 10. October 2024 um 23:31 . Ich weise darauf hin, dass sich hier angezeigte Preise inzwischen geändert haben können. Alle Angaben ohne Gewähr. (*) Bei den verwendeten Produktlinks handelt es sich um Affiliate Links. Ich bin nicht der Verkäufer des Produktes. Als Amazon-Partner verdiene ich an qualifizierten Verkäufen. Dein Preis ändert sich jedoch nicht.


Video: Securing a slope with designer gabions

I recorded the construction of the gabion wall at the carport again in a video. All steps, from digging the soil to filling the gabions with stones, can be seen there.

You can find my videos about building the carport in my playlist Project Carport – Building a Carport on a Slope by Yourself.

If you want to see more of me and my projects, feel free to check out my YouTube channel.


Abonniere COMMAIK auf YouTube

Camas Gabione 830mm x 1000mm
Camas Gabione 830mm x 1000mm*
by Camas GmbH
  • 830mm x 1050mm Gabionen von Zaunbau Gortner
  • Gabionenzaun
  • Zaun und Gabionensysteme
  • Steinmauer
 Price: € 59.00 Jetzt auf Amazon kaufen*
Preis inkl. MwSt., zzgl. Versandkosten
Zuletzt aktualisiert am 11. October 2024 um 11:15 . Ich weise darauf hin, dass sich hier angezeigte Preise inzwischen geändert haben können. Alle Angaben ohne Gewähr. (*) Bei den verwendeten Produktlinks handelt es sich um Affiliate Links. Ich bin nicht der Verkäufer des Produktes. Als Amazon-Partner verdiene ich an qualifizierten Verkäufen. Dein Preis ändert sich jedoch nicht.


Installation of the gabions across the corner

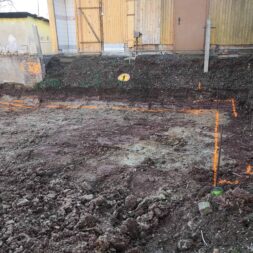
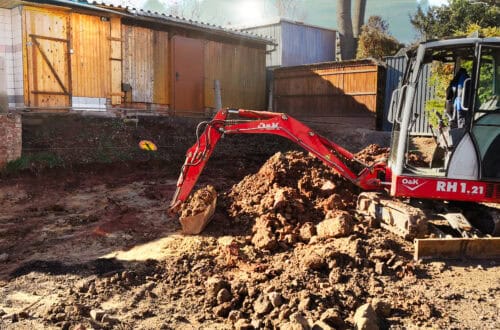
The installation of the two gabions turned out to be less complicated than expected. First, I leveled the ground along the alignment of the formwork wall. I excavated a short section that protruded into the slope and also brought it up to the level of the wall.

As the ground had grown naturally and was therefore very firm and stable, I didn’t need an additional foundation for the gabions.


I first assembled the gabions individually using the spirals and aligned them around the corner on the slope. I still had to remove some soil in places before I could align the stone baskets perfectly in terms of angle and level.

I then fastened the two gabions together with cable ties. I fixed the grilles very tightly with the cable ties.

This was necessary because I had removed the spirals at the corners of the respective gabions in order to then turn them through the grids of both stone baskets at the same time. In this way, the two baskets were firmly connected and the grids stabilized.


Estexo Spiral Steingabionen, Gabione, Steinkorb, Wand, Drahtkorb, Mauer (1 Stück 100x80x20 cm)
Estexo Spiral Steingabionen, Gabione, Steinkorb, Wand, Drahtkorb, Mauer (1 Stück 100x80x20 cm)*
by 512469
  • Spiral Steingabionen, Gabione, Steinkorb, Wand, Drahtkorb, Mauer
  • wählbare Größen: Rechteck-Gabionen mit Distanzhalter für hohe Formstabilität (Länge x Höhe x Tiefe): 100 x 20 x 20 cm mit 3 Distanzhalter, 100 x 40 x 20 cm mit 4 Distanzhalter, 100 x 50 x 20 cm mit 4 Distanzhalter, 100 x 80 x 20 cm mit 6 Distanzhalter, 100 x 100 x 20 cm mit 9 Distanzhalter
  • Maschenweite: ca. 5 x 10 cm, Gitterdrahtstärke: ca. 4 mm
  • Material: feuerverzinktes, punktgeschweißtes Drahtgitter für lange Lebensdauer
  • mehr Details siehe Produktbeschreibung
 Price: € 39.95 Jetzt auf Amazon kaufen*
Preis inkl. MwSt., zzgl. Versandkosten
Zuletzt aktualisiert am 10. October 2024 um 23:30 . Ich weise darauf hin, dass sich hier angezeigte Preise inzwischen geändert haben können. Alle Angaben ohne Gewähr. (*) Bei den verwendeten Produktlinks handelt es sich um Affiliate Links. Ich bin nicht der Verkäufer des Produktes. Als Amazon-Partner verdiene ich an qualifizierten Verkäufen. Dein Preis ändert sich jedoch nicht.


I stabilized the lower section of the gabions with concrete screed. To do this, I poured several bags of ready-mixed concrete into the lower area, watered it and tamped it down well.

I also firmly connected the stone basket along the formwork stone wall to the wall. The new slope stabilization was now safe and stable.

To prevent the soil from pushing through the stone baskets, I attached a protective fleece to the back of the baskets.

I also fitted the spacers, which keep the opposing grilles at a parallel distance and prevent the baskets from bulging.

The new retaining wall on the slope was finally completed when the gabion wall was filled.

As a result, I have created a raised bed around the carport, which is held in place by my formwork stone wall and the gabions.


DeRiTex 150g/m² Drainagevlies, Filtervlies 25m² (1m x 25m)
DeRiTex 150g/m² Drainagevlies, Filtervlies 25m² (1m x 25m)*
by Qualitätsvlies trading-point24 Denise Richter
  • ✔ Hochwertiges Geotextilvlies/Drainage- u. Filtervlies 150g/m² - Profi Qualität - MADE IN GERMANY
  • ✔ MATERIAL: Qualitätsvlies aus 100% Polyester, SPEZIELL FÜR DEN AUSSENBEREICH - äußerst strapazierfähig
  • ✔ EIGENSCHAFTEN: sofort wasserdurchlässig, UV-Stabil, reißfest, verrottungsfest, beständig gegen Bitumen + Folien, atmungsaktiv, metallfrei (detektorgeprüft)
  • ✔ EINSATZBEREICH: Drainage- und Filtervlies im GaLa-Bau: für Wege-, Pflaster- u. Terrassenbau, Dachbegrünung, Wärmespeicher für Beete und Gewächshäuser, Steingärten, Schutz unter Teichfolien, WINTERVLIES: Schutz vor Frost und niedrigen Temperaturen
  • ✔ ANGEBOT: 300g (bohrbar), 300g, 500g, 1000g / 2m-Breite/ Groß-Mengen
 Price: € 38.90 (€ 1.56 / quadratmeter) Jetzt auf Amazon kaufen*
Preis inkl. MwSt., zzgl. Versandkosten
Zuletzt aktualisiert am 10. October 2024 um 23:30 . Ich weise darauf hin, dass sich hier angezeigte Preise inzwischen geändert haben können. Alle Angaben ohne Gewähr. (*) Bei den verwendeten Produktlinks handelt es sich um Affiliate Links. Ich bin nicht der Verkäufer des Produktes. Als Amazon-Partner verdiene ich an qualifizierten Verkäufen. Dein Preis ändert sich jedoch nicht.


Summary and conclusion

Once our double carport was fully assembled and the roof sealed, I concentrated on the final work.

I had already installed the electrics, LED lighting, motion detectors and a surveillance camera, which almost completed the interior of the carport.

The next step was to secure the slope behind and next to the carport.

In addition to a solid, steel-reinforced formwork stone wall, I decided to erect a decorative gabion wall in the front viewing area to ensure both stabilization and aesthetic enhancement.

The installation of the gabions proved to be uncomplicated. I leveled the ground, excavated a short section of the slope and did without an additional foundation due to the firm, natural subsoil.

After assembling the gabions and aligning them, I was able to connect them firmly together and stabilize them with concrete screed.

Finally, I installed spacers to keep the gabion grids parallel and without bulging, and created a raised bed around the carport, which is supported by the formwork stone wall and the gabion wall.


Gabionen 1000 x 1000 x 500 x 4,5 mm, Steinkorb Gabionenkorb enge Front
Gabionen 1000 x 1000 x 500 x 4,5 mm, Steinkorb Gabionenkorb enge Front*
by Drahtwaren Driller GmbH
  • Gabionenkorb * Breite 1000 mm * Höhe 1000 mm * Tiefe 500 mm
  • Frontgittergröße 1000 x 1000 mm * Maschenweite 50 x 100 mm * Drahtstärke 4,5 mm
  • Maschenweite der restlichen Gitter 100 x 100 mm * Drahtstärke 4,5 mm
  • Verbindungsart * Spiralverbindung
  • Ausführung Galfan (95% Zink, 5% Alu)
 Price: € 60.08 Jetzt auf Amazon kaufen*
Preis inkl. MwSt., zzgl. Versandkosten
Zuletzt aktualisiert am 11. October 2024 um 21:30 . Ich weise darauf hin, dass sich hier angezeigte Preise inzwischen geändert haben können. Alle Angaben ohne Gewähr. (*) Bei den verwendeten Produktlinks handelt es sich um Affiliate Links. Ich bin nicht der Verkäufer des Produktes. Als Amazon-Partner verdiene ich an qualifizierten Verkäufen. Dein Preis ändert sich jedoch nicht.


Dieser Beitrag ist auch verfügbar auf: English Deutsch

My name is Maik and I have been writing this construction diary since 2008. In addition to my family and job, the expansion and renovation of our art nouveau villa is an important part of my life. Here in the blog I share my experiences. Attention: Some of the linked products are affiliate links. If you order the products through the links, I will be supported with a commission. This has no effect on your price.

Leave a Reply

Your email address will not be published. Required fields are marked *

I accept that my given data and my IP address is sent to a server in the USA only for the purpose of spam prevention through the Akismet program.More information on Akismet and GDPR.

This site uses Akismet to reduce spam. Learn how your comment data is processed.