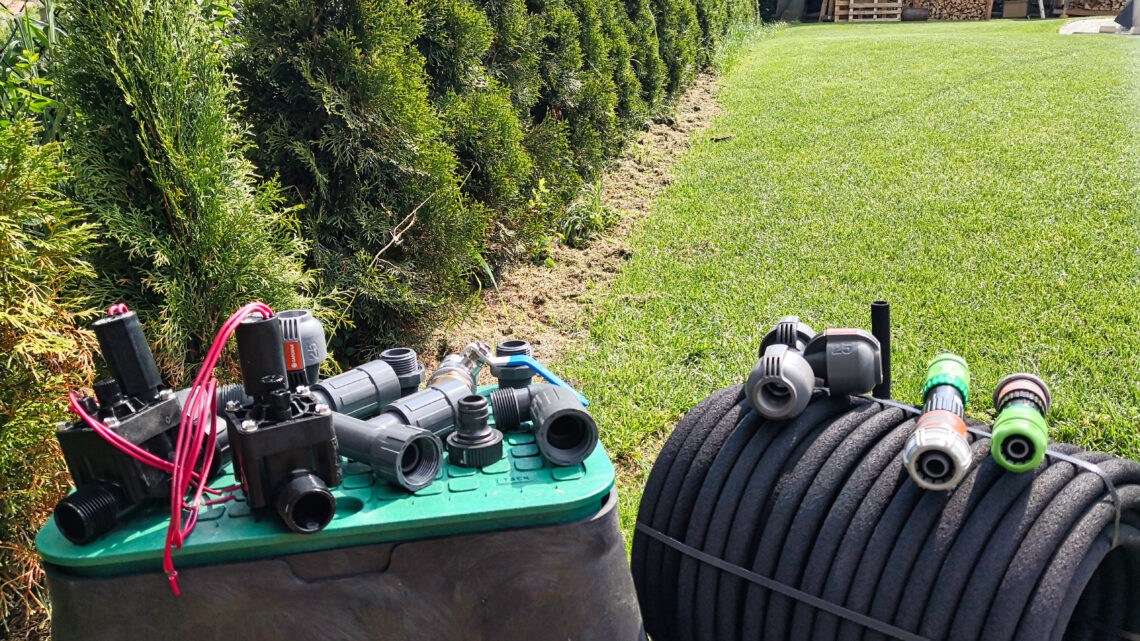
Build your own automatic hedge watering system
A good 10 years ago, I planted a hedge on the south side of our property, which consisted of around 200 Thuja Smaragd plants. These were carefully placed in the ground along a guideline.
The plants I bought from a nursery were barely taller than 20 cm, including the roots. Watering the hedge took a lot of time in the summer, which prompted me to look for a solution to optimize this process.
To optimally support the growth of this hedge and reduce the time required for watering, I decided early on to install an automatic hedge watering system.
Based on the experience I gained from building my lawn irrigation system, I chose tried and tested components for the hedge irrigation system: Solenoid valves from Hunter and built-in parts from Rain Bird.
The entire irrigation process was automated by my Hunter X-Core irrigation computer, which allowed for precise and on-demand watering.
This system allowed me to fully automate the watering of the hedge, promoting the health and growth of the plants without the need for daily manual effort.
The hedge is not growing – lack of water and light
The western part of my hedge developed beautifully as it was in the sun all day. Full sunlight and unhindered access to rainwater contributed significantly to this success.
The thujas stood completely free, which meant that light and water could reach the plants without barriers.
It is ideal for thujas to receive around six to eight hours of direct sunlight per day. With this amount of light, they develop a dense and vivid green coloration of their needles.
In terms of water supply, I found that regular watering is crucial, especially during dry periods. In summer, I watered the thujas in the western part of the hedge twice a week.
I made sure that the soil was deeply moistened, which corresponds to about 10-15 liters of water per plant.
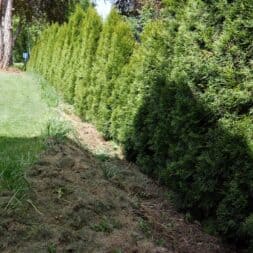
The eastern part of the hedge under the 30-meter-high beech trees and the black pine, on the other hand, grew rather sparsely. The large trees towered over the hedge and shielded it almost completely, so there was a distinct lack of light.
In this shady area, it would have been better to water the thujas less frequently but more selectively to take account of the reduced evaporation.
Here it was usually sufficient to water once a week, as the soil moisture was retained for longer.
The lack of light and water in combination with the competition from the roots of the large trees made this location suboptimal.
Even the regular addition of fertilizer could not improve the conditions, as the basic requirements for light and water were not met.
For future plantings, I would recommend planting Thuja Smaragd in areas that receive more light or at least ensure that sufficient water is available even in shady conditions.

Hedge irrigation – What must the system be able to do?
As I wanted my hedge to be watered consistently and efficiently, I decided to build an irrigation system. It was important to me that this system should be low-maintenance, frost-proof and, above all, automated.
My aim was to install the system once and then leave it to its own devices for the most part, apart from the necessary inspection and maintenance work.
I planned to use an irrigation computer that would automatically detect whether the plants needed water. If necessary, this would then release the necessary amount of water to the thuja hedge. The use of humidity sensors should also be possible in principle.
The idea of using the components of a lawn irrigation system to create such an automatic hedge irrigation system quickly matured.
I decided to use a bead hose, as this allows water to be distributed evenly and precisely directly to the roots of the plants.

- ✅ Empfohlene Verbinder für unsere 1/2 Zoll CS Perlschlauch Variante - Startup
- ✅ 1/2 Zoll T-Verbinder, Eckverbinder, Geradeverbinder und Endstopfen, Ideal zum Verbinden von CS Perlschläuche und Gartenschlauch
- ❌ Nicht geeignet für den CS Perlschlauch Premium, Profi und Drucklos!
Location for the valve box
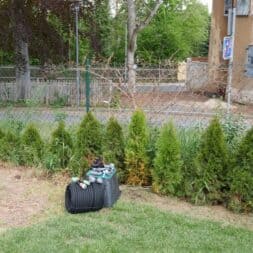
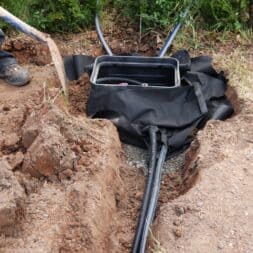
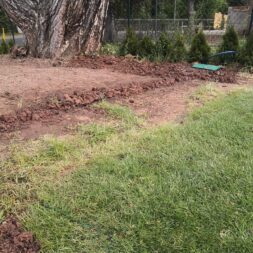
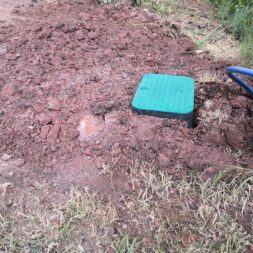
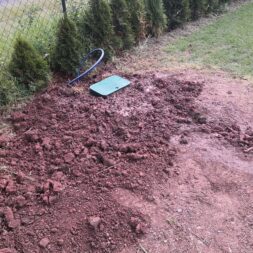
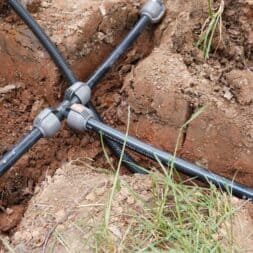
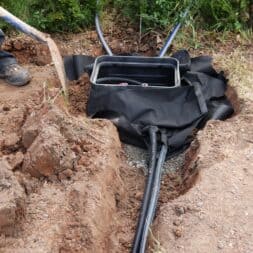
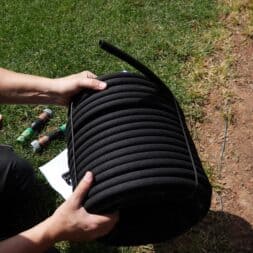
To water my hedge effectively, I decided to use a bead hose. First, I dug a hole in the middle of the hedge in a suitable place to place the valve box.
I was aware that if I used a 50-meter beaded hose, there was a risk that no water would reach the other end if I only ran the hose from one side.
So I divided the 50-meter-long beaded hose into two 25-meter-long pieces. These two halves were to be supplied with water individually from the center to the east and west.
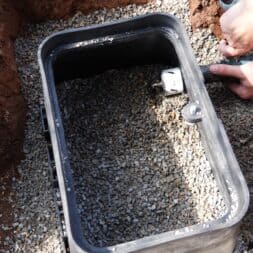
For the installation and protection of the connections, I again opted for a 12″ valve box, which offered enough space for the two water connections and an additional connection.
There are a few technical details to consider when using a beaded hose. The length of the bead hose should be selected so that the water pressure is sufficient over the entire length to ensure even distribution.
As a rule, lengths of up to 30 meters are optimal to maintain the water pressure. However, because I used two 25-meter-long pieces and supplied them with water separately, I was able to ensure that the water pressure was sufficient.
Another important aspect is the water pressure itself, which should ideally be between 0.5 and 1.0 bar for a beaded hose.
Excessive pressure can damage the hose or cause water to escape unevenly. To avoid this, I used a pressure reducer to regulate the water pressure to a level suitable for the bead hose.
This enabled efficient and gentle irrigation of the hedge.

- UZMAN 12" HDPE Ventilkasten, Ventilbox, Hydrantenschacht
- Bodeneinbaudose für den unterirdischen Einbau von Bewässerungsventilen
- Klasse A 15 begehbar ------- Qualitätsprodukt EN 124
- lieferbar 14" jumbo ventilbox Artikelnummer: B085NC5SJD
Rain Bird distributor and Hunter valves in the box
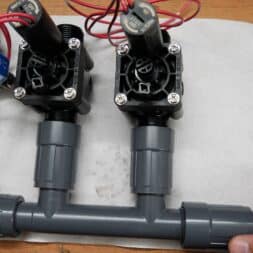
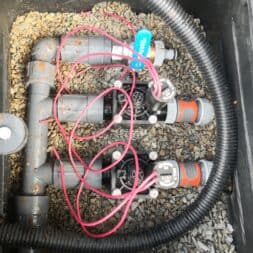
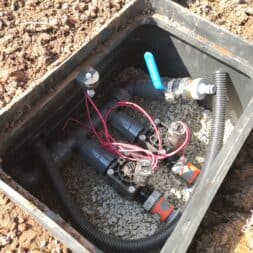
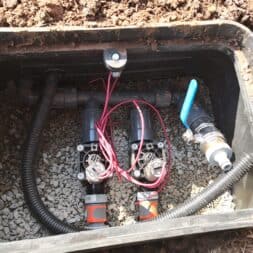
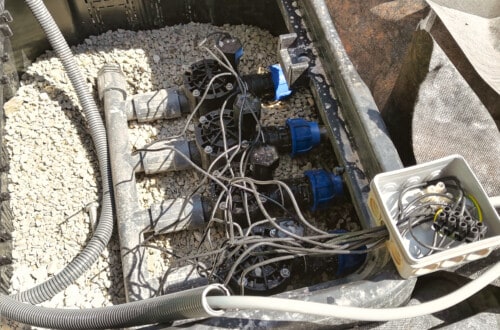
I connected the irrigation technology in the newly installed distribution box. This included not only the two solenoid valves for the automatic control of the hedge irrigation, but also a normal tap to be able to draw water when required.
I chose two Hunter solenoid valves to integrate the irrigation control. These valves, which are operated with 24V alternating current, are especially known for their reliability and durability.
In addition to a common earth connection, each valve requires its own voltage wire, so I needed at least a 3-core cable for the control.
The Hunter PGV-101 solenoid valves offer integrated flow regulation, which makes it possible to precisely adjust the flow rate. This function proved to be particularly advantageous as it allowed me to regulate the water pressure directly at the valve.
This meant that I could do without an additional pressure reducer for the bead hose as long as the flow regulation was set correctly. This considerably simplified the installation and maintenance of the entire irrigation system.
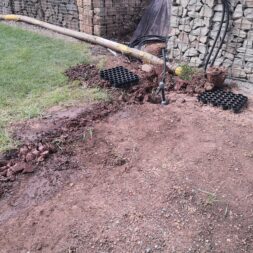
I also decided to lay an additional empty conduit from the pool house to the distribution box. This enabled me to pull in more cables later without having to dig up the lawn again.
The Hunter X-Core 801i irrigation computer I’ve been using has been adequate so far, but I’m considering an upgrade as the eight ports are starting to reach their capacity limits.

- Hunter PGV101 Magnetkugelhahn mit Außengewinde (1 Zoll (AG x AG) mit Durchflussregulierung)
Connect the bead hose to the solenoid valves
I didn’t want to connect the bead hose directly to the Hunter solenoid valves in the valve box. The water would then drip out in the box and not on the hedge. So I needed a transition for the almost 50 cm from the box to the hedge.
I used a 3/4″ garden hose to bridge this distance. This was attached to the valves using a quick-release coupling and then routed underground from the box to the hedge.
The Rain Bird manifold covers, which can be pulled back, allowed me to open the hose coupling if necessary without having to dismantle the entire installation, as the manifold and hose were permanently installed.
At the other end of the garden hose, despite the integrated flow rate regulation of my Hunter PGV-101 solenoid valves, I installed a pressure reducer, also connected to a quick-release coupling.
This pressure reducer reduced the water pressure to the recommended 1 bar. Excessive pressure could quickly damage the bead hose, so this measure was essential.
I connected the two halves of the bead hose to the outlet of the pressure reducer again using a quick-release coupling. With this configuration, the installation of the valve box and the entire distribution system for the automatic hedge irrigation was complete.
Now I could lay the bead hose along the hedge to ensure even and efficient watering.

- Trinkwasser
- Betriebsdruck max. 12,5 bar bei 20 Grad Celsius
- schwarz mit blauen Streifen
Video tutorial on building my automatic hedge watering system
I accompanied the construction of my automatic hedge watering system in a separate video. In the video I show all the steps, from the initial situation to the final test.
The video is part of my project series “Garden irrigation”. In the playlist you will find many more videos about automatic irrigation in the garden.
If you want to see more of me and my projects, feel free to check out my YouTube channel.
Zuletzt aktualisiert am 26. July 2024 um 06:45 . Ich weise darauf hin, dass sich hier angezeigte Preise inzwischen geändert haben können. Alle Angaben ohne Gewähr. (*) Bei den verwendeten Produktlinks handelt es sich um Affiliate Links. Ich bin nicht der Verkäufer des Produktes. Als Amazon-Partner verdiene ich an qualifizierten Verkäufen. Dein Preis ändert sich jedoch nicht.
Laying the beaded hose correctly on the hedge
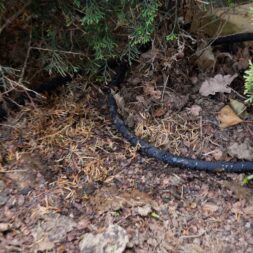
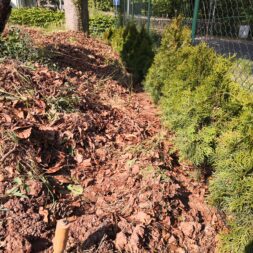
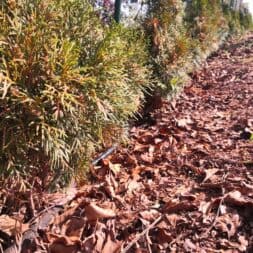
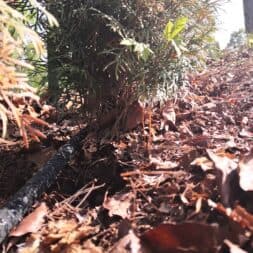
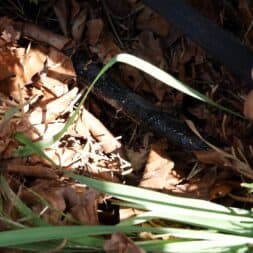
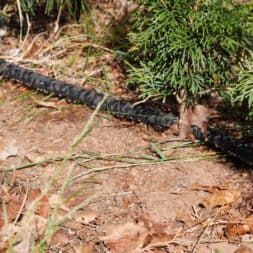
The two beaded hoses were laid on the thujas in serpentine lines, once in front of the plants and then again behind them.
To make it possible to continuously check the water supply, I placed a small loop at the end of each hose. This allows me to check at any time whether enough water is coming through the hose.
When installing the bead hose, I deliberately decided against burying it, based on experience with another hedge.
I had buried the bead hose there, which caused the roots to grow into the hose. This considerably reduced the water flow and meant that no more water reached the end of the hose.
To minimize such risks, it is advisable to lay the bead hose above ground. This not only makes inspection and maintenance easier, but also prevents the penetration of roots.
Other important notes on the function and correct installation of the bead hose include observing the recommended water pressure of around 1 bar and the even layout of the hose to ensure optimum water distribution.
The bead hose should not be overstretched or twisted, as this could also impede the water flow.
As a long-term consideration, I plan to replace the beaded hose I currently use with a Rain Bird XFS drip tube.
Thanks to its patented copper barrier technology, the XFS drip tube offers effective protection against root ingrowth, making it particularly suitable for underground installations.
In addition, the precise drip technology ensures more even and efficient water distribution over longer distances and regardless of terrain gradients.
Although the XFS drip tube is a more expensive alternative to the bead hose, the long-term benefits in terms of reliability and low maintenance justify the additional cost.
Investing in the XFS drip tube would therefore be a strategic decision to improve the efficiency and sustainability of hedge irrigation. First, however, I would like to wait and see the results with the bead hose over a longer period of time.

- ❗Der Druckminderer hat eine Druckausgleichsbohrung diese ist dafür da um bei zuviel Wasserdruck den Druckminderer vor beschädigung zu schützen und lässt über diese Bohrung Wasser ab.
Beaded hose in winter
I have taken various precautionary measures to prevent winter damage to the bead hose.
The bead hose is designed so that it empties automatically after watering. The pores in the hose allow the water to drain away completely. This is particularly important as any water remaining in the hose could freeze and damage the hose if it freezes.
I implemented additional measures for the inlet and the 50 cm long 3/4″ garden hose sections, which do not have self-draining properties.
Similar to my other installations, I used compressed air to completely drain these sections. By pulling back the cover on the Rain Bird distributor, I was able to open the hose couplings and free the garden hoses from water.
This method ensures that no residual water remains in the pipes, which could freeze when temperatures drop and damage the hoses as well as the couplings and valves.
Draining these parts before the start of the frost period is crucial to maintain the integrity of the entire irrigation system and avoid costly repairs.

- HOHE DRUCK- & SCHLAGFESTIGKEIT: Das Schutzrohr weist eine hohe Schlagfestigkeit von 2kg/10cm und eine hohe Druckbeständigkeit von 750N/5cm auf und bietet dadurch eine hervorragende Stabilität und Trittfestigkeit.
- UNIVERSELL EINSETZBAR: Das Wellrohr eignet sich für die Verlegung auf und unter Putz, in Beton, in Estrichen, in Hohlwänden und Zwischendecken sowie auf Holz als auch für die Verlegung im Erdreich und Außenbereich.
- HOHE TEMPERATURBESTÄNDIGKEIT: Unser Elektroinstallationsrohr verfügt über eine hohe Temperaturbeständigkeit (dauernd) von -25°C bis hin zu +120°C und kann dadurch in vielen Bereichen Einsatz finden.
- FLEXIBEL & HOHE BIEGEFESTIGKEIT: Neben hoher Druck- und Schlagfestigkeit sind unsere Leerrohre flexibel und leicht zu verarbeiten. Sie besitzen eine hohe Biegefestigkeit und sind durch diese Eigenschaften leicht zu handhaben.
- HOCHWERTIGES MATERIAL & UV-BESTÄNDIG: Das Leerrohr besteht aus einem flammwidrigen Polyethylen mit hoher Dichte (PE-HD). PE-HD ist gegen nahezu alle Medien wie z.B. Alkohole, Fette, Mineralöle oder Kraftstoffe beständig. Dank dem zugesetzten UV-Stabilisator erreicht das Wellrohr eine UV-Beständigkeit von bis zu 120kLy und damit auch eine erhöhte Beständigkeit im Außenbereich.
- INTEGRIERTER ZUGDRAHT: Das Leerrohr ist mit einem integriertem Zugdraht ausgestattet, mit dem sich auch nach der bereits abgeschlossenen Installation Kabel leichter und unkompliziert einziehen lassen.
Alternatives to the beaded hose – The drip hose
When installing my raised bed on a slope, I decided to use a drip hose from Rain Bird, which is characterized by its special copper construction at the openings.
This design effectively prevents roots from penetrating the hose, which is a common problem with conventional irrigation systems.
This drip hose, also known as the Rain Bird XFS drip tube, offers further technical advantages in addition to the root barrier thanks to its copper coating.
It is frost-proof and resistant to animal damage, making it particularly suitable for outdoor applications. The price of the XFS drip tube is above the average for a simple bead tube, but remains within an affordable range.
A significant difference between the Rain Bird XFS drip tube and a conventional bead hose lies in the way the water is dispensed. With the XFS drip tube, water is dispensed through specifically placed holes at 30 cm intervals.
This targeted placement enables a precise supply of water directly to the roots of the plants, which is particularly advantageous on slopes to avoid water running.
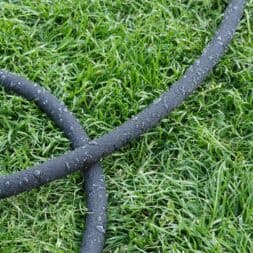
In contrast, the beaded hose enables water to be dispensed continuously along its entire length. The water escapes evenly through the pores of the hose, which leads to a uniform distribution of moisture in the soil.
This can be particularly advantageous for watering a large area evenly.
The choice between beaded hose and XFS drip tube therefore depends on the specific requirements of the respective application.
While the drip tube is ideal for targeted, efficient and root-proof irrigation, the bead hose offers comprehensive and even water distribution, making it ideal for wide-area applications.


Automatic hedge watering in the test
I had not yet installed a moisture sensor in the area of the hedge, which was mainly due to the different conditions of the locations.
The east side was dark and dry due to the large trees, while the west side benefited from sun and rain. For this reason, it would have made sense to use two sensors to provide both sides with optimum coverage.
However, my Hunter X-Core 801i is designed to process data from just one sensor. So far, I have not been able to integrate the moisture sensors without upgrading my irrigation computer. As long as this condition persisted, I had to control the irrigation manually.
How does a moisture sensor, such as the Hunter Soil-Clik, work?
The Hunter Soil-Clik moisture sensor measures soil moisture using a capacitive measuring method. This method uses the properties of the soil to influence electric fields in order to determine its moisture content.
Specifically, the sensor consists of two parts: a probe that is inserted into the soil and a control unit that is connected to the irrigation computer.
The probe emits an electric field into the ground. Water in the soil changes the capacity of this field, as water is a very good conductor of electricity. The change in capacitance is measured by the probe and interpreted as a humidity value.
The sensor’s control unit processes this information and sends a signal to the irrigation computer.
If the measured humidity is above a predetermined threshold, the sensor signals the irrigation system to stop the water supply to prevent overwatering.
If the soil moisture is below the threshold value, watering is continued or started. This process enables very efficient and targeted irrigation, which both saves water and promotes plant health.
To provide the hedge with sufficient water in midsummer, I let the irrigation system run for about 45 to 60 minutes if necessary.
This ensured that the soil around the plants was well moistened and supported the growth of the hedge plants under the more difficult light and moisture conditions.
Integrating a soil moisture meter into my irrigation system on the Thuja hedge would therefore significantly improve the efficiency and precision of watering in the future, once the system has been upgraded.

- Bodenfeuchtegrad und Status auf einen Blick
- Schaltet die Beregnung ab, sobald die gewünschte Bodenfeuchte erreicht ist
- Herkunfstland - Vereinigte Staaten
- Verpackungsabmessungen: 52 L x 230 H x 160 W (zentimeters)
Summary and conclusion
About 10 years ago, I planted a hedge of around 200 Thuja Smaragd plants on the south side of our property.
I installed an automatic hedge watering system to reduce the time needed for watering in summer and to support the growth of the hedge in the best possible way.
This included tried and tested components such as Hunter solenoid valves and Rain Bird fittings, controlled by my Hunter X-Core irrigation computer, which enabled precise and on-demand water delivery.
The western part of my hedge developed splendidly due to the full sunlight and unhindered access to rainwater. Here I watered the thuja twice a week, using about 10-15 liters of water per plant to deeply moisten the soil.
The eastern part of the hedge, on the other hand, suffered from a lack of light and water due to the cover of large trees, which impaired growth. There I reduced the watering to once a week to do justice to the lower evaporation.
To ensure efficient water distribution, I decided to use a bead hose, which allowed water to be distributed evenly and precisely directly to the plants.
I divided a 50-meter-long beaded hose into two 25-meter-long pieces, each of which was routed separately from the middle of the hedge to the ends.
I made sure that the water pressure was between 0.5 and 1.0 bar to prevent damage to the hose and to ensure an even flow of water.
In the future, I plan to replace the bead hose with a Rain Bird XFS drip tube, which, with its copper barrier technology against root ingrowth and its precise drip technology, offers an even more efficient and reliable watering solution, despite the higher cost.
This could be particularly useful for improving the efficiency and sustainability of hedge irrigation.

- Ventilbox mit 4 Magnetventilen anschlussfertig vormontiert
- Plug&Rain: Baugruppen statt viele Einzelteile, so gelingt die Planung und Installation einer Bewässerungsanlage sicher!
- Dimensionen für Eingang: 25mm PE-Rohr (3/4")
- Dimension der Abgänge aus der Ventilbox zu Tropfrohr und Regnern: 25mm PE-Rohr (3/4")
- Hohe Qualität und Komponenten von Hunter, Dura, etc - weltweit führenden Bewässerungsherstellern
Dieser Beitrag ist auch verfügbar auf:
English
Deutsch


