Plan and install lawn irrigation yourself 2 – Calculating the water connection
After describing how the selection and placement of sprinklers can be calculated online free of charge in the last article on building a lawn irrigation system, this entry is about calculating the correct sizes for the lawn sprinklers.
I often receive requests such as:
- how much water such a system requires
- how much pressure do I need at the connection
- How many sprinklers fit on one circle
- What can I do if my connection is not sufficient
But before I go into the questions, a brief summary of my system. This is what my experiences and statements here in the article refer to. Please note, however, that I operate this system privately and my tips are not legally binding.
If you are unsure or are planning larger, more complex systems, you should commission a specialist company!
You can find a full video on the subject further down in this article!
A look at my lawn irrigation system
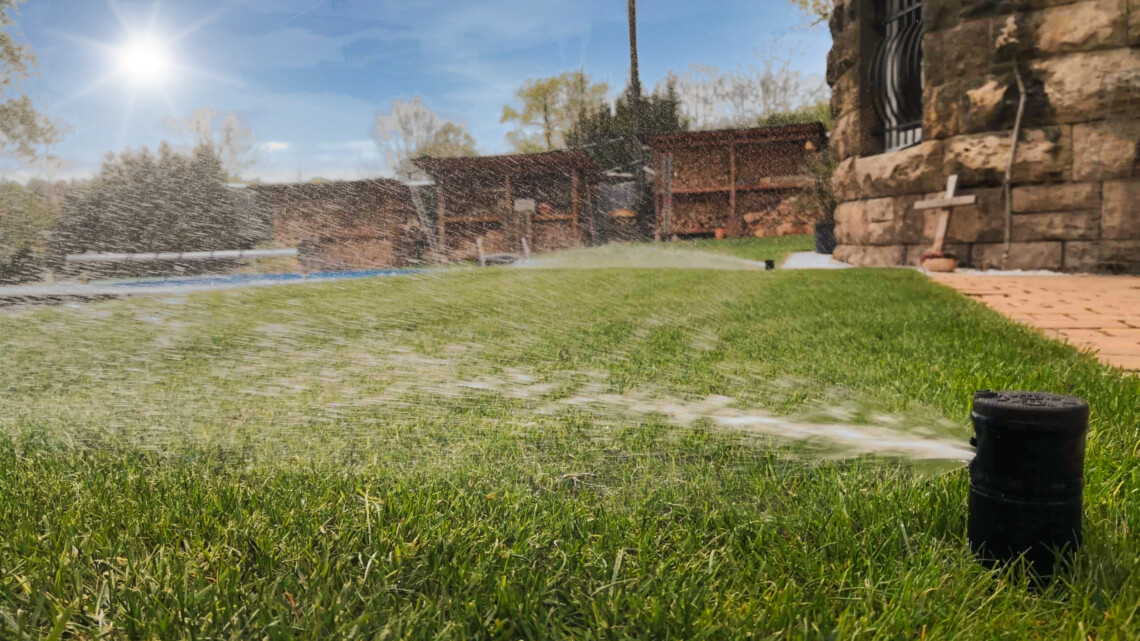
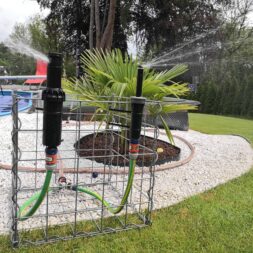
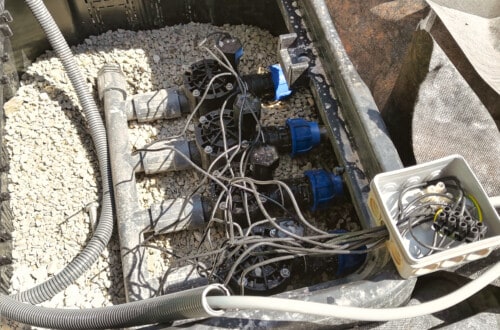
My system consists of 6 irrigation circuits, each with 3 Hunter I20 sprinklers. Distribution takes place in 2 valve boxes from Hunter and Rain Bird. Automatic control is handled by the X-Core 801 irrigation computer from Hunter.
I have already made several videos on the individual components, planning and installation of my Hunter lawn irrigation system. You can find the matching playlist here or have a look directly at my YouTube channel.
I currently still get my water from my house connection, so I use normal drinking water. A cistern for the use of rainwater is currently being planned.
However, I have already set up my system today in such a way that I could easily integrate a cistern or pump later on.
Zuletzt aktualisiert am 26. July 2024 um 04:30 . Ich weise darauf hin, dass sich hier angezeigte Preise inzwischen geändert haben können. Alle Angaben ohne Gewähr. (*) Bei den verwendeten Produktlinks handelt es sich um Affiliate Links. Ich bin nicht der Verkäufer des Produktes. Als Amazon-Partner verdiene ich an qualifizierten Verkäufen. Dein Preis ändert sich jedoch nicht.
Basic knowledge about a lawn irrigation system:
You should already have roughly measured the area you want to irrigate and know where you want to place the sprinklers. There is a lot of literature(PDF) but also simple online tools. In my opinion, the Gardena irrigation planner is ideal for the layman.
Take a look at my video on planning a lawn irrigation system.
As a result, this planner calculates the exact position of the sprinklers as well as the (rough) key figures.
As I have only used Hunter sprinklers myself, I can’t say anything about the Gardena sprinklers at this point. The pipes and connectors from Gardena that I like to use myself are, in my opinion, absolutely recommendable.
You also need the throwing distances of the individual sprinklers. Some only need 4 meters, others 10 meters to irrigate the desired area.
The pressure and the amount of water must be sufficient to supply all sprinklers. If this is not enough, you will need another irrigation circuit.
Your lawn is then watered by several circles one after the other. This takes a little longer overall, but ultimately leads to the same result. Alternatively, you can use a different sprinkler that requires less water. But this would also have to run for longer.
After all, the aim is to irrigate the entire lawn uniformly. It is precisely for this reason that different sprinklers should not be combined in a circle.
Only one sprinkler type per water circuit!

- Trinkwasser
- Betriebsdruck max. 12,5 bar bei 20 Grad Celsius
- schwarz mit blauen Streifen
Placement of the sprinklers
Each of your sprinklers will later be connected to the water pipe. I use 25 mm PE pipe. However, 32 mm pipe is recommended for larger systems – provided the water inlet, for example a pump, can cope with the ordered water volume.
The pipe should be laid so that the sprinklers are connected in parallel, i.e. not one after the other, but next to each other. If this is not possible, there is a risk that too much water will come out of the first sprinkler and far too little out of the last.
In electrical engineering, one would speak of a parallel connection to avoid a series connection. Let’s assume you have 6 sprinklers, which are arranged like the six dots on a cube:
What you should not do:
The water pipe should not go from the first sprinkler at the bottom left to the middle left sprinkler, then to the top right sprinkler and from there to the top right again via the middle right sprinkler to the sprinkler at the bottom right.
This would be a “series connection” where less water would arrive at the last sprinkler than at the first sprinkler.
How to do it better:
Instead, a water pipe should run through the middle. At the first two sprinklers there is a branch to the left and right to the lower right and left sprinklers. There is also a branch to the left and right in the middle.
At the top, distribution to the last two blasters takes place via a T-piece.
This would then be the desired “parallel circuit” in which the water is distributed more evenly.
Sometimes the position of the pipes already determines the number of sprinklers.
In my opinion, it makes no sense to first lay in one direction to connect two sprinklers and then go 50 meters in the other direction to take another sprinkler there – just because the calculation has shown that 3 pieces would be possible.
Better to build 2 separate circuits.
Calculate water volume and water pressure?
Ultimately, it’s quite simple! You can read from a manufacturer’s table how much water the lawn sprinkler you want needs. The water pressure and throwing distance are of course important here.
Add up the amount of water read from your sprinklers, either per minute or per hour, and check whether your water connection can cope with this.
If in doubt, you should always round off and create a second water circuit, because you can always reduce the water flow, but not increase it.
To determine the water flow of the water connection, all you need is a 10 liter bucket and a stopwatch. You position the bucket at the transfer point under the tap or at the outlet of your pump – depending on where you get your water from.
Then measure how long it takes until the 10 liter bucket can be filled with water. In my example, this is 18 seconds.
Now divide your 10 liters by the 18 seconds and multiply by 60 seconds to get your water flow per minute. The result in my example is 33 liters per minute.
If I multiply this again by 60, this results in 1,980 liters per hour.
If your water output is rather limited and you have a bucket with a scale, you can also measure how much water flows into the bucket in 10 seconds – then multiply this by 6 and you will also have the output per minute.
Unfortunately, you cannot calculate the water pressure so easily. It is advisable to connect a pressure gauge to the tap. If you don’t have one, you may be able to find the water pressure on your home appliance or water filter.
Pump users simply refer to the pump data sheet.
The pressure at my water connection fluctuates between 4.0 and 4.5 bar. I assume 4 bar for the example calculation.

- vormontierter Verteiler für Ventilbox ( Box inklusiv) im Lieferumfang enthalten: PP Verschraubung Magnetventil 100-HV-MM von Rain Bird, Kugelschieber, Nippe,l Plug, Verteiler Rain Bird 1 x Rain Bird Bogen mit 2 x Innengewinde, 1 x Pressluftanschluss, Ventilbox VBA02675 ( 4 fach Verteiler) VBA02674 (2 und 3 fach Verteiler)
- passendes Steuergerät RZX 4 Zonen ,6 Zonen,8 Zonen für den Innenraum oder 4 Zonen,6 Zonen ,8 Zonen Außenbereich finden Sie in unserem Shop
Selection of sprinkler and correct nozzle
Now you have the most important key figures and you can start calculating – either you have the paper catalog to hand or you can simply go online.
Look for the right blasters in the catalog. I use the Hunter I20 in my lawn irrigation system. However, I will also install the Hunter MP rotators on another section.
Various nozzles are available for the Hunter I20. The nozzles on the I20 are freely interchangeable and the different colors make it easy to see what each nozzle is intended for. I myself use the gray nozzles (which were included with the I20) and the black nozzles.
The grey nozzles are suitable for throwing distances of 7 to 11 meters. The black nozzles are intended for the short range and throw effectively from 5 meters to 7 meters.
In practice, both also work with slightly shorter throwing distances. Some nozzles are labeled LA – which stands for Low Angle, i.e. flat spray nozzle – with these nozzles, the water is ejected at an angle of 13° instead of the usual 25°.
For the calculation in this example, I opt for the black short-jet nozzles as my throw range of 4.5 meters is quite manageable.
The nozzles also differ in terms of the water flow rate. This figure is clearly shown in the tables in the product catalog. The selection ranges from 0.5 to 3. The higher the number, the greater the amount of water that flows through the nozzles.
Choose the right nozzle depending on the irrigation time and the type of soil you have.
- Little water – e.g. with clay soil so that there are no puddles or waterlogging
- Plenty of water – e.g. sandy soil
I have rather loamy soil and use the 2.0 and 2.5 nozzles. However, I have tested and optimized this over time during operation – after all, you can change the nozzles without any problems.
The black 2.0 nozzle requires a water flow rate of 8.2 liters per minute at my 4 bar in the table. 2 sprinklers therefore require 16.4 liters and 3 sprinklers then 24.6 liters.
According to my measurement at the tap, my pipe delivers 33 liters per minute. I could therefore run a maximum of 4 sprinklers at the same time – i.e. in a circle. That would be 32.8 liters per minute.
If in doubt, you should rather round off. After all, the pipes also have a certain resistance which is completely neglected in my calculation.

- Ventilbox mit 4 Magnetventilen anschlussfertig vormontiert
- Plug&Rain: Baugruppen statt viele Einzelteile, so gelingt die Planung und Installation einer Bewässerungsanlage sicher!
- Dimensionen für Eingang: 25mm PE-Rohr (3/4")
- Dimension der Abgänge aus der Ventilbox zu Tropfrohr und Regnern: 25mm PE-Rohr (3/4")
- Hohe Qualität und Komponenten von Hunter, Dura, etc - weltweit führenden Bewässerungsherstellern
Video on the calculation of a lawn irrigation system
In the following video, I have summarized all the steps for calculating a lawn irrigation system in a tutorial. You can also use the examples shown to better understand many processes.
You can find more videos in my playlist on automatic garden irrigation.
If you want to see more of me and my projects, feel free to check out my YouTube channel.
Observe different times of day and irrigation locations
So I could have put more than these 3 sprinklers in one circle – but:
The upper eastern area of the lawn is in the shade earlier in the day than the western area. The southern lawn is even in the blazing sun from 10:00 to around 16:00. The water requirement therefore varies over the entire area.
I can easily control this using split circuits.
In my case, this is also done automatically by my Hunter X-Core watering computer, which opens all the circuits one after the other and waters them for different lengths of time.
I also stick to my rule that the system or pipes are laid modularly and section by section. So a separate pipe for each area.
Summary – what you need for the calculation
As you can see, the calculation is not that difficult
- You need the water pressure -> You need to read this with a pressure gauge
- You simply measure the flow rate -> with a bucket and a clock
- And you need the table
And if the water pressure is not sufficient?
If your house connection or your pump have the necessary performance data, you can start planning at this point and I wish you every success in building your own lawn irrigation system.
But what if your surfaces are significantly smaller or the pressure is simply too low?
There is an alternative for this too! The Hunter MP Rotator!
I will be installing this myself shortly, so I have not yet been able to gather any long-term experience of my own. Nevertheless, the Hunter MP rotators should be mentioned here.
The rotators require significantly less water and pressure. But they also run a little longer. The slower application of water means that less waterlogging occurs and evaporation is also reduced.
The throwing distance is between 1.8 m and 10.7 meters. Various housings are available for the Hunter MP rotators. The Pro-Spray PRS40 housing is often recommended to me because it automatically limits the water pressure to 2.8 bar.

- Das Set enthält Regnergehäse Hunter PROS-04-PRS40-CV und Hunter MP Rotator Düse zum Auswahl
- PRS40 - die beste Wahl für MP Rotator Düsen, 2,8 bar druckregulierter, Aufsteiger 10 cm (4"),
- Graue Kennungskappe für einfache Erkennung im Feld. Innovative, ausrichtbare Spülkappe
- MP Rotator - Präzise Beregnung mit beliebiger Einstellung von Teilkreis und Wurfweite (2,5 - 10,7m)
- Wurfweite kann bei allen Modellen um bis zu 25 % verringert werden.
Comparison of geared sprinklers and rotator sprinklers
The rotators have a completely different throwing pattern to the I20 gearbox regulator. The angle and throw range of this can be freely adjusted to a certain extent.
When purchasing the nozzles, which are freely interchangeable as with the I20, you must already know how large the angle of the throw pattern must be.
If I want a right-angled throw pattern at an inside corner with a throw range of 5 meters, I use the MP Rotator MP2000 with 90°. The pressure is automatically reduced to 2.8 bar by the housing and the water consumption would therefore be 1.63 liters per minute.
This system therefore allows significantly more sprinklers to be operated per circuit.
A comparison of the two Sprenger Hunter i20 geared sprinklers and Hunter MP Rotator can be found here: Lawn irrigation comparison Hunter MP Rotator vs. RainBird R-Van.

- Das Set enthält Regnergehäse Hunter PROS-04-PRS40-CV und Hunter MP Rotator Düse zum Auswahl
- PRS40 - die beste Wahl für MP Rotator Düsen, 2,8 bar druckregulierter, Aufsteiger 10 cm (4"),
- Graue Kennungskappe für einfache Erkennung im Feld. Innovative, ausrichtbare Spülkappe
- MP Rotator - Präzise Beregnung mit beliebiger Einstellung von Teilkreis und Wurfweite (2,5 - 10,7m)
- Wurfweite kann bei allen Modellen um bis zu 25 % verringert werden.
Dieser Beitrag ist auch verfügbar auf:
English
Deutsch


