DIY ornamental bed with automatic Rain Bird drip tube irrigation
For automatic watering, I again used the drip tube from Rain Bird. In combination with a valve box, solenoid valves from Hunter and automatic control by my irrigation computer, our ornamental bed is now thriving more beautifully than ever before.
In this post, I’ll show you how I prepared the area. I show how I installed the automatic irrigation system with all its components. Accompanied by lots of tips and hints, I’ll show you the result of my work.
Initial situation – Why the old bed has to go
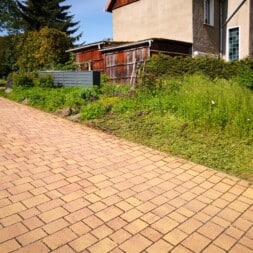
The 20 to 30 square meter area on the right at the end of our driveway had been a thorn in my side for a long time. The area, which is also the business card of my wife’s estate agency, was planted with rose bushes, small maple trees and some ornamental plants.
However, they didn’t really want to grow. The subsoil was very clayey and full of garbage and building debris from the past.
Over 100 years ago, it was probably common practice to bury building rubble underground instead of recycling it centrally in a demolition site. The high clay content of my soil made it doubly difficult for the plants.
In spring and fall, the rainwater had difficulty draining away and formed a swamp-like waterlogged surface. In summer, the area dried out quickly and did not provide the plants with the water they needed.
Apart from the appearance, something definitely had to happen here and after all the years of building our house, I had now found the time to take care of this area.
The area should be easy to maintain so that in the future, when I no longer have the time or ability, the maintenance effort would be as low as possible. In addition to the roses, small trees and ornamental plants should definitely be preserved. I didn’t like a pure stone bed without decorative elements.
So that the plants could grow better in the future, the entire area was to be supplied with automatic irrigation.
This time, however, it wasn’t going to be I20 water sprinklers or rotators from Hunter or Rain Bird, but an underground pipe system. This time I decided to install the drip tube system from Rain Bird, as I had already done on my raised bed in the parking lot.
In combination with the solenoid valves from Hunter in a smart valve box, the whole thing would certainly work well and run completely automatically in conjunction with my irrigation computer.
Preparation of the ornamental bed
First, of course, the area had to be cleared.
We had planted some ground cover in the past to prevent the proliferation of weeds. Over time, however, the ground cover plants have taken over the area and unfortunately pushed back the desirable plants as well as the weeds.
The planted ground cover plants were very well rooted in the soil and intertwined with each other. I first scraped the surface with a rake and pulled out as much of the plants as possible.
The rose bushes were pruned back to the extent that they could still survive the season. However, I should also have enough space to work underneath without any problems. The small ornamental tree, a red maple no taller than 1.50 m, had to go.
It simply stopped growing and already had mold spores and other deposits on its leaves. There was nothing more I could do, although I had tried continuously over the last few years. Perhaps the location was simply unsuitable. I have therefore transplanted the tree to the south side.
To the east, towards the sidewalk, a visual barrier should provide privacy. My driveway still doesn’t have a gate at the moment, so anyone passing by can not only look into the piece of art, but even enter it.
Although I can use one of my many cameras afterwards to check who may have been visiting, it doesn’t help to avoid uninvited guests. A visual barrier should protect the area from prying eyes.
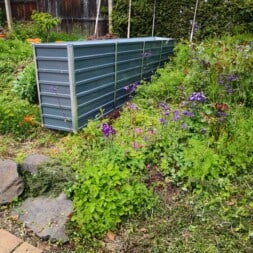
As a fence or other privacy screen only had a visual function, but we also wanted to make practical use of the barrier, we bought a raised bed.
The raised bed was over three meters long and 40 centimeters wide. The height was just under 80 centimeters. This raised bed was to serve as a privacy screen across the driveway and at the same time we wanted to grow herbs, plants and other food in the raised bed.
The area was thus demarcated by the fence to the neighbor, the privacy screen to the east and the driveway on the other side.
The ground had been cleared of the ground covers, stones and sticks that were lying around so that I could now start installing the irrigation system.

- Dieses Hochbeet ist extrem haltbar und sieht wunderschön aus
- Es ist tief und groß genug, um genügend Erde aufzunehmen und Ihren Blumen, Ihrem Gemüse und Ihren Kräutern genügend Raum zu geben
- Aufgrund seiner einfachen, rechteckigen Form wird es jeden Balkon und jede Terrasse verschönern
- Es ist aus verzinktem Stahl hergestellt worden und besitzt innenliegende Stützbügel, sodass dieser Übertopf sehr stabil ist und lange halten wird
- Der Rand des Übertopfes besitzt eine Kantenausgestaltung, sodass es keine gefährlichen Kanten gibt.Der Artikel ist einfach zu montieren.
Protect the substrate with garden fleece
If I had applied the decorative gravel directly to the surface, the herbs and especially the ground cover would have simply grown through it. The amount of work would probably have been even greater than before.
For this reason, a stable fleece should initially prevent the existing herbs and plants from growing further. I have already had very good experience with the black fleece.
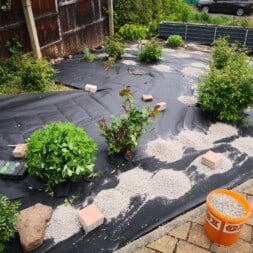
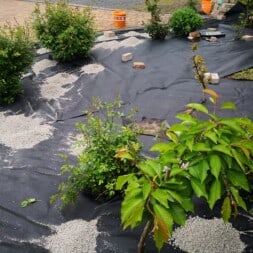
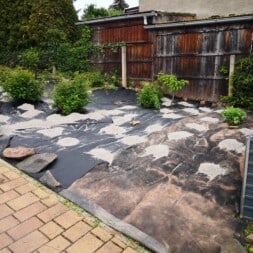
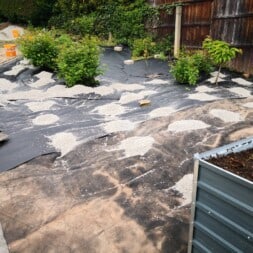
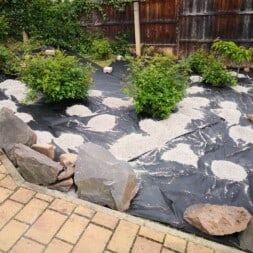
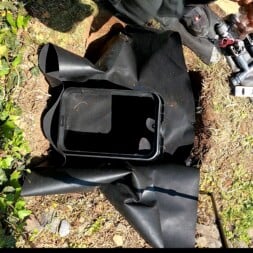
I applied the fleece over a large area. Starting at the top, I worked my way down bit by bit. I let the fleece overlap in such a way that no plants can grow through it.
To secure the fleece and protect it from wind and weather, I stapled it to the ground at regular intervals with pegs. I placed the fleece relatively tightly around the plants and cut it in such a way that it does not disturb the plants as they continue to grow.
A happy medium is crucial here. If I cut out too much of the fleece, the unwanted plants in this area simply grow through again and I have gained nothing.
If I cut away too little, the growing plants pull the weed fleece upwards with them and everything slips or it tears, which means that the further protective effect would also be lost.

- KEIN UNKRAUT PFLÜCKEN MEHR - Mit dem hochwertigen Filtervlies von Xabian sparen Sie sich eine Menge Arbeit! Lästiges Pflücken von Unkraut gehört der Vergangenheit an! Pflanzen wachsen Dank dieser Unkrautschutzfolie von nun an dort, wo Sie es möchten!
- INNOVATIVES MATERIAL - Unser Unkrautschutzvlies für Pflanzen ist besonders atmungsaktiv, reißfest und wasserdurchlässig! Die schwarze Farbe des Bodenvlies heizt den Unkraut Vlies bei Sonneneinstrahlung auf und speichert die Wärme und Feuchtigkeit!
- VIELSEITIG & BELASTBAR - Mehr als ein reiner Vlies gegen Unkraut! - Durch die hohe Qualität und Dicke des Pflanzenvlies wird eine außergewöhnlich hohe Reißfestigkeit erreicht! Ideal als Trennvlies, Drainagevlies, Hochbeet Folie, Wurzelvlies, Sandkastenvlies oder als nachhaltige Gartenfolie!
- WITTERUNGSBESTÄNDIG - Dieses Vlies besteht aus hochwertigstem Polypropylen & ist dadurch absolut witterungsbeständig. Starke UV-Strahlen oder Regen und Feuchtigkeit können dem Bodenvlies nichts anhaben. Dieses Unterbodengewebe bleibt beständig!
- 30-TAGE-RÜCKGABERECHT - Sie sind nicht zu 100% mit unserer Mulchfolie zufrieden? Dann schicken Sie das Vlies kostenlos zurück und Sie erhalten ohne Wenn und Aber Ihr Geld zurück. Ganz ohne Risiko! Unternehmenssitz in Deutschland.
Decoration and protection in the garden – installing boulders
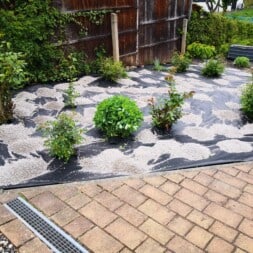
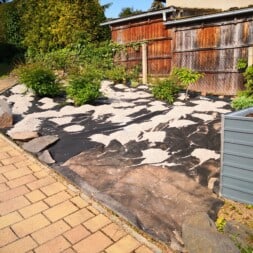
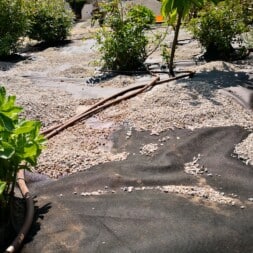
The entire area was now covered in black fleece and was only interrupted by my existing and newly planted trees and shrubs.
The entrance area had to be specially protected. There is a small parking lot opposite this area and drivers are often unwilling to turn the steering wheel an extra time to get into the driveway. Instead, they quickly drive over the bed.
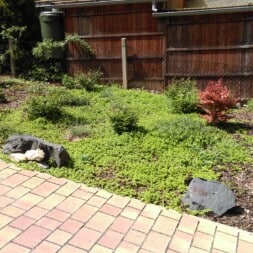
As I still had larger stones and boulders left over from building my first gabion wall, I wanted to place them there.
In future, drivers had to consciously steer more and take a small detour to avoid damaging their cars on the sharp edges of the stones.
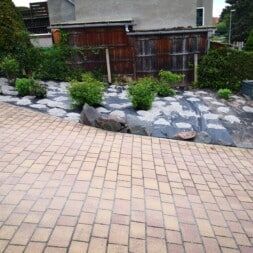
I built up the boulders around the edge so that it looks like a large rock garden. They are firmly wedged together so that even an accidental collision will not cause any damage.
And now that I had placed the fleece on the substrate and then the boulders on top of it, it was finally time to install the irrigation.
-
Price: € 4.01
-
Price: € 4.21instead of: € 4.32
-
Price: € 4.05instead of: € 4.35
-
Price: € 114.90
-
Price: € 103.93
Surface irrigation or underground drip pipe?
When planning the irrigation for the ornamental bed, I was faced with the decision between surface irrigation with sprinklers and underground irrigation with drip pipes. Each system has its specific advantages and disadvantages, which I weighed up carefully.
Surface irrigation with sprinklers is a widely used method that enables water to be supplied quickly and evenly over large areas.
Their advantages lie in their ease of installation and adaptability to different garden layouts.
However, this method also has disadvantages, such as higher water consumption due to evaporation and the potential promotion of fungal infestation on leaves by wetting the plant surfaces.
Underground irrigation with drip pipes, on the other hand, provides a targeted supply of water directly to the roots of the plants.
This minimizes evaporation and increases the efficiency of water use. This system also reduces the risk of fungal infestation, as the plant surfaces remain dry.
The disadvantages are the higher installation costs and the need for regular maintenance to prevent blockages in the drippers.
After careful consideration and based on my consistently positive experience with the Rain Bird system, I decided to use underground irrigation with drip pipes.
The decisive factor for me was the efficient use of water, which is particularly important in times of growing environmental awareness and rising water prices.
I also appreciated the reduced impact on plant health due to fungal infestation and the ability to control the water requirements of individual plant areas more precisely through targeted irrigation.
Despite the higher initial investment and maintenance costs, the long-term advantages of drip irrigation outweighed the disadvantages for me.
Building underground irrigation with drip pipe – valve box
The area is located on the north side of my driveway. I currently have no electricity, network or any water connections in this area. Everything I have built so far is exclusively south of the driveway.
However, I have already planned the supply on the northern side. And as soon as the new fiber optic connections have finally been laid, I can start working on them too. The water supply would therefore initially be via a water hose.
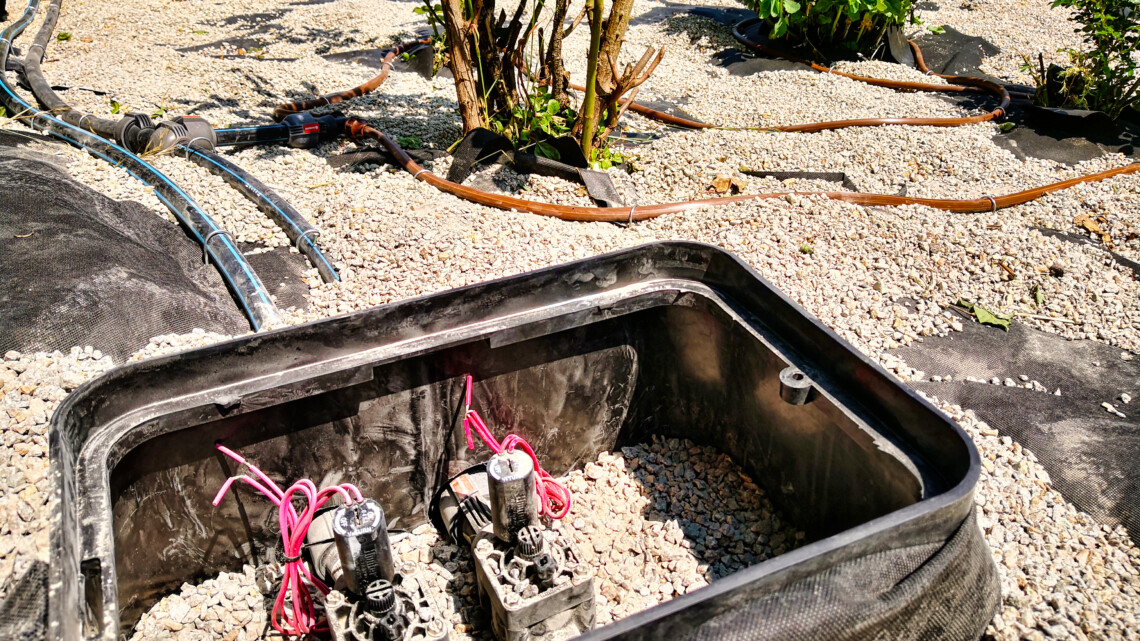
However, the automatic irrigation system should already be ready so that I only need to connect my PE pipe in the valve box later. I placed the valve box in the upper part of the area between the raised bed for the vines and the black fleece laid out.
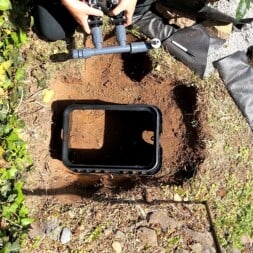
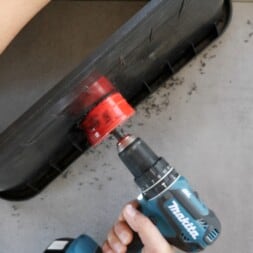
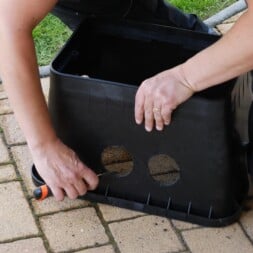
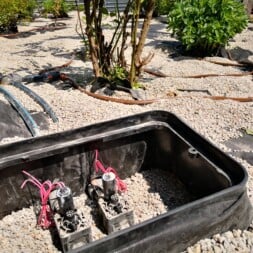
To do this, I first dug a hole about 60 x 50 centimeters in size and about 30 cm deep in the ground. The valve box fits well in these areas and still has enough space on the sides for the pipes.
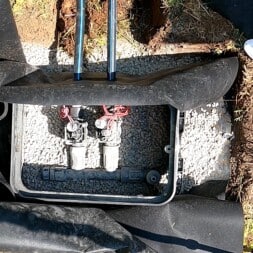
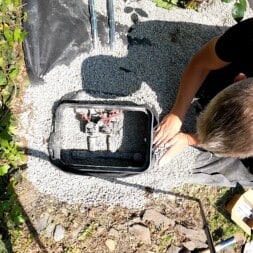
Before inserting the valve box, I filled the hole with a layer of gravel about five to ten centimeters thick. This is intended to prevent backwater during heavy rainfall. The water can simply run off and does not collect in my valve box.
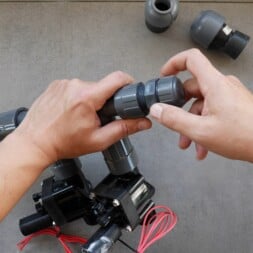
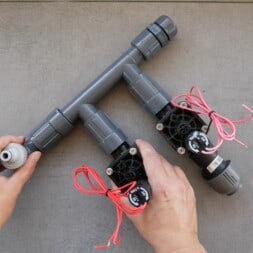
I have placed a Rain Bird distributor in the valve box. The distributor has an access to which I first attached a garden hose adapter. The PE pipe from the inlet is to be installed here later.
Two side drains point downwards to my newly designed bed. One of these inlets is to supply the drip irrigation system with water. The second is intended for watering the raised bed.
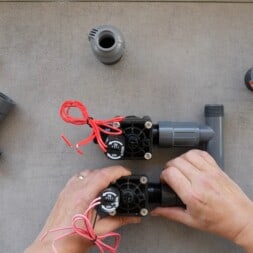
I can control the two inlets independently of each other automatically or manually using the built-in solenoid valves.
A fourth drain points north towards the garden fence. I still have enough space here to connect another drip pipe to supply the raised bed with my vine plant.
I assembled the distributor and the valve beforehand and checked them for leaks before installing them in the valve box.
The drip pipe can now be connected to the solenoid valves.

- UZMAN 12" HDPE Ventilkasten, Ventilbox, Hydrantenschacht
- Bodeneinbaudose für den unterirdischen Einbau von Bewässerungsventilen
- Klasse A 15 begehbar ------- Qualitätsprodukt EN 124
- lieferbar 14" jumbo ventilbox Artikelnummer: B085NC5SJD
Rain Bird Drip Pipe – XFS and XFD
I have already installed both versions of the Rain Bird drip tube in my raised beds and along my hedges. In my opinion, there is no significant difference when it comes to installation. However, there are definitely different applications for the two variants.
The Rain Bird XFS drip pipe, or dripline as it is also known, is pressure-equalizing, self-cleaning and perfectly suited for underground installation thanks to the integrated copper plates (Cooper ShieldTM technology).
Soil, sand and other debris are automatically flushed out of the pipe every time you water. The copper plates, which are installed at the drip holes, reliably prevent roots from growing into the pipe.
This additional protection makes it more expensive than the Rain Bird XFD drip pipe, which is also self-cleaning and pressure-equalizing – but has no copper technology against root growth.
| Rain Bird XFS drip pipe (underground) | Rain Bird XFD (above ground) | |
| Flow rate | 2.3 liters per hour | 2.3 liters per hour |
| Dripper spacing | 33 cm | 33 cm |
| Working pressure | 0.59 to 4.14 bar | 0.59 to 4.2 bar |
| Maximum length | 140 m (at 4.2 bar) | 140 m (at 4.2 bar) |
| Water temperature | up to 38°C | up to 38°C |
| Air temperature | up to 52°C | up to 52°C |
| Filtering | 120 micron | 120 micron |
| Self-cleaning | Yes | Yes |
| Pressure regulating | Yes | Yes |
| Copper protection against roots | Yes | No |

|

|
Further information can be found in the Rain Bird data sheet from page 30 (as of 02/ 2024).


Laying Rain Bird drip pipe
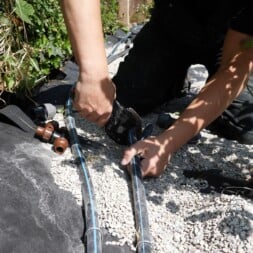
I first connected a PE pipe to the solenoid valve in the valve box, which runs along the garden fence at the edge of the area to be irrigated. This PE pipe should serve as a supply line and have several outlets for the various drip pipe irrigation circuits.
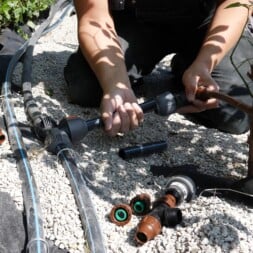
So after just under a meter I placed a T-piece. As so often, I decided to use the quick connectors from Gardena. They may be a little more expensive, but they are very easy to use.
The PE pipe from the inlet is connected on one side and continues on the opposite side. I placed another piece of PE pipe at the branch of the T-piece, which extends a little deeper into the area to be irrigated.
At the end of this PE pipe I then laid an irrigation circuit with the drip pipe from Rain Bird. For this I fitted an adapter from PE25 to ¾” female thread, also from Gardena.
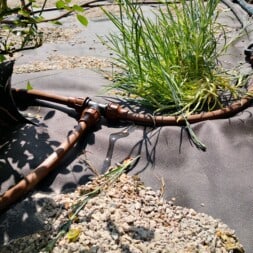
I then screwed a T-piece from the Rain Bird drip pipe system into the internal thread. The T-piece for the drip pipe has a ¾” external thread and fits perfectly into the Gardena connection.
The drip pipe can be connected firmly and securely to the other two ends of the T-piece using a union nut.
To make it easier for me to lay the drip tube, I laid it in the sun beforehand. This makes the material a little more flexible without losing its stability.
As the pipe is transported coiled, it must be carefully uncoiled during installation. This works best if you work in pairs. Alternatively, the pipe can of course be unwound in advance so that it does not get tangled during installation.
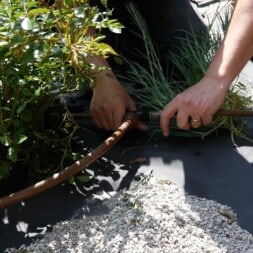
I have now moved the drip tube to the ground around the plants. I chose the radii to be as small as possible. The specifications were based on the size of the plant and, of course, the hose must not kink. A diameter of less than 30 cm is therefore hardly possible.
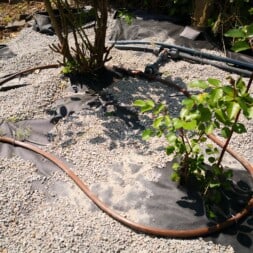
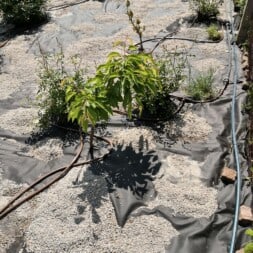
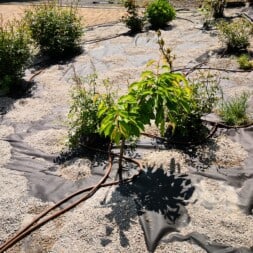
At the first outlet I took care of my rose bushes and the small peach tree. The drip pipe was not laid as a branch line, but as an irrigation circuit.
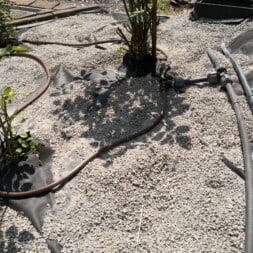
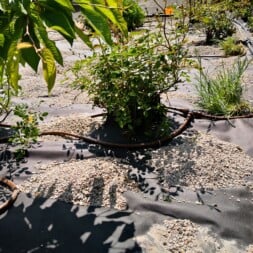
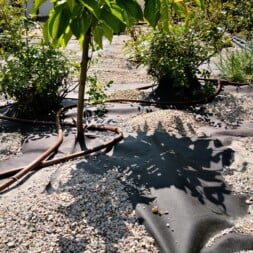
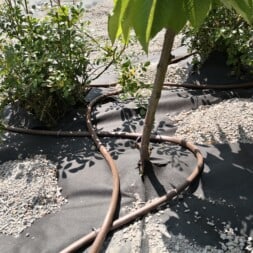
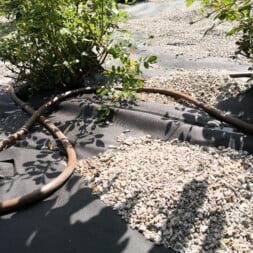
The tube runs around the plants, forming a loop at the last plant. On the way back, I always laid the Rain Bird drip tube on the other side of the plants.
The result is a picture of several figure eights that have been placed next to each other and completely enclose the plants. Back at the starting point of this irrigation circuit, I have now connected the drip pipe to the free side of the T-piece.
The first circle was finished.
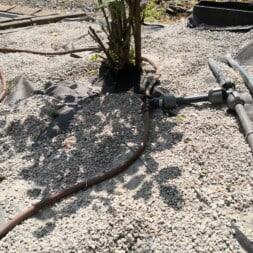
To ensure that the drip tube remains in position and does not move even in wind and weather or under high water pressure, I fixed it to the ground with ground anchors every 30 to 40 centimeters.
The ground anchors are stable enough to hold the drip tube to the ground, but at the same time loose enough to prevent the tube from being crushed. In the same way, I created a second irrigation circle for the cherry tree and the ornamental plants in the middle of the bed.
I have also laid a third circle. However, I connected the Rain Bird T-piece directly to the end of the PE pipe.
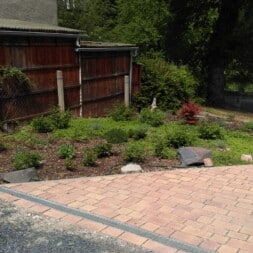
The new ornamental bed now had a black surface on which the copper-colored pipes of the new drip irrigation system wound around the plants.

- Brand: Quarzflex
- 100 m Quarzflex PE Rohr 25 x 2,3 mm Trinkwasser PN16 DVGW
- Product Type: HARDWARE_TUBING
- Color: Schwarz
Video: Building automatic irrigation with a drip pipe
I have published the construction of the new ornamental bed with its underground drip irrigation system in a video. You can view the procedure described in this article in detail there.
The video belongs to my playlist: Garden irrigation
If you want to see more of me and my projects, have a look at my YouTube channel.

- aus hochwertigem Polyethylen - Anschlussstück Lock Type - 3/4" IG / AG nach Wahl
Testing underground drip irrigation
Once the Rain Bird drip pipe had been completely laid, the surface could be sealed.
However, in my opinion, it makes no sense to start immediately without testing the system first. If I had worked inaccurately somewhere or the material was perhaps damaged, I would hardly notice any resulting water damage.
So I attached a long water hose to the inlet in the valve box and turned on the water without opening the solenoid valves.
When I put the water on the hose, a meter-high fountain of water immediately came shooting out of the valve box. As it turned out, a screw connection on the inlet was not properly tightened.
Of course, I was able to rectify this error quickly and the actual test on the site could begin.
I opened the Hunter solenoid valve and observed the water coming out of the holes in the Rain Bird drip tube. The hissing and bubbling in the pipe when the water displaces the air was easy to hear.
First in the upper area and then at the lowest point of the drip tube, you could now see the small drops of water beading out of the openings of the drip tube.
In contrast to watering with my sprinklers, this watering method is very time-consuming. The drip tube delivers only 2.3 liters per running meter per hour. To ensure sufficient irrigation, the system must therefore run for approximately 30 minutes.
I therefore ran the system for a good 60 minutes at a time for my test as a precaution. The water initially rolled off the garden fleece and collected in the hollows and depressions. But the drip tube and the connectors were all tight!
The fleece is still waterproof during installation. Within a few hours or days, however, it becomes permeable to water. This allows rainwater to penetrate the ground from above without the water being able to evaporate upwards from the ground.
A perfect solution.

- Hunter PGV101 Magnetkugelhahn mit Außengewinde (1 Zoll (AG x AG) mit Durchflussregulierung)
Spreading decorative gravel on the bed
As the garden fleece is not UV-resistant, it would disintegrate over time. The surface therefore had to be secured.
I also find the black color quite appealing, but it doesn’t really go well with an ornamental bed here right by the driveway.
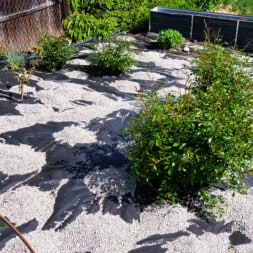
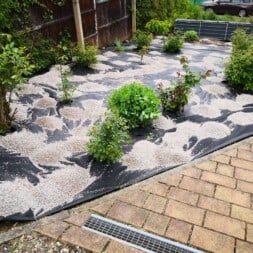
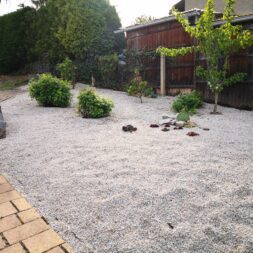
I therefore generously filled the entire area with a 10 to 20 centimeter thick layer of laying gravel. I had considered using special decorative gravel. Due to the quantity used, the price-performance ratio would no longer be given in my view.
The laying gravel has the property of being extremely robust. When dry, it is almost white and changes color to a plain grey in damp or wet weather. This play of colors suited me perfectly.
I drove many loads of gravel to the bed with the wheelbarrow and spread it there, first with the rakes and then with a scraper. I made sure that the pipes and the fleece remained in the desired positions.
I placed small granite stones that I had left over from building my gabion wall on top of the decorative gravel. I have built small sculptures on which many lizards and a grass snake now feel at home.
I planted the stones and the areas in between with succulents and hardy cacti.
Both are now thriving very well.
Zuletzt aktualisiert am 26. July 2024 um 09:30 . Ich weise darauf hin, dass sich hier angezeigte Preise inzwischen geändert haben können. Alle Angaben ohne Gewähr. (*) Bei den verwendeten Produktlinks handelt es sich um Affiliate Links. Ich bin nicht der Verkäufer des Produktes. Als Amazon-Partner verdiene ich an qualifizierten Verkäufen. Dein Preis ändert sich jedoch nicht.
The plants love it!
I am well aware that this type of ornamental bed is not to everyone’s taste. I have found that big city dwellers in particular often make unconstructive and insulting comments.
But my plants don’t seem to care much. They love the new area!
The ornamental shrubs and roses are growing better than before and even the peach tree, which hadn’t really wanted to grow for years, has blossomed within a few weeks and is even bearing its first fruit.
As I wrote above, the wildlife also feels right at home. Reptiles and insects are permanent guests in the ornamental bed. Nevertheless, I left the beehive on the raised bed on the opposite slope.
The entrance to our apartment building and estate agent’s office now finally has an attractive entrance area. This has also had a positive effect on the misuse of our property as a public garbage dump, which had unfortunately occurred time and again previously.

- Unterirdische XfS Dripline mit Copper ShieldTM-Technologie
- Unterirdisches Tropfrohr XfS mit Copper Shield von Rain Bird zur unterirdischen Tropfbewässerung ist die jüngste Innovation in der Rain Bird dripline-familie. Rain Birds zum Patent angemeldete Copper Shield- Technologie schützt den Tropfer vor Wurzeleinwüchsen. damit entsteht ein langlebiges und wa r tungsarmes unterirdisches Tropfbewässerungssystem zur Verwendung unter Rasen - oder Strauchflächen und Bodendeckern
- das unterirdische Tropfrohr XfS mit Copper Shield ist das flexibelste Tropfrohr in der Branche und damit das am einfachsten zu planende und installierende unterirdische Tropfrohr.
- Mit ihnen können Rain Bird Lock Type- Anschlussstücke, selbsthaltende Xff dripline Anschlussstücke und andere selbsthaltende 17-mm-Anschlussstücke verwendet werden.
Summary and conclusion
For the automatic watering of my ornamental bed, I once again used the Rain Bird drip tube. In combination with a valve box, Hunter solenoid valves and an irrigation computer, I achieved optimum plant growth.
I deliberately decided against surface irrigation and opted for the underground system with the drip pipe to ensure efficient use of water and less damage to plant health from fungal infestation.
The old bed, which was not ideal for the plants due to the loamy soil and poor subsoil, was completely redesigned.
I removed ground cover and unwanted plants, replaced a red maple that wasn’t growing and planted new plants suitable for drip irrigation. As a visual barrier and practical addition, I integrated a raised bed as a privacy screen.
Once the area was prepared, I protected the ground against weed growth with a sturdy garden fleece and laid out boulders as decorative protection along the driveway.
The drip pipe system was chosen due to its efficiency and the positive experience with Rain Bird technology.
The underground irrigation system was carefully installed, and I tested the system before covering it with decorative gravel so that any faults could be rectified immediately.
By switching to underground irrigation with the Rain Bird drip tube and detailed planning of the new ornamental bed, I achieved a significant improvement in plant health and the appearance of the area, which had a positive impact on the whole property.

- Einfache Installation: Die patentierte „Quick&Easy“ Verbindungstechnik ermöglicht eine schnelle Rohrmontage durch einfaches Drehen der Verschraubung um 140°, das spart Kraft und Zeit beim Verlegen der Rohrleitungen
- Wasserdicht: Die Gewindeverbindung ist selbstdichtend, sodass kein zusätzliches Dichtmaterial erforderlich ist
- Frostsicher: Das T-Stück dient dem Einbau des Entwässerungsventils im Rohrverlauf. Im Rahmen des Gardena Sprinklersystems verhindert das Gardena Entwässerungsventil Frostschäden an der unterirdisch verlegten Anlage
- Teil des Gardena Sprinklersystems: Das Gardena Sprinklersystem bietet ein komplettes Sortiment an Versenkregnern und jegliches benötigte Zubehör
- Lieferumfang beinhaltet: 1x Gardena T-Stück mit 25 mm x 3/4 Zoll- Innengewinde
Dieser Beitrag ist auch verfügbar auf:
English
Deutsch


