Build your own garden kitchen – Masonry walls with aerated concrete
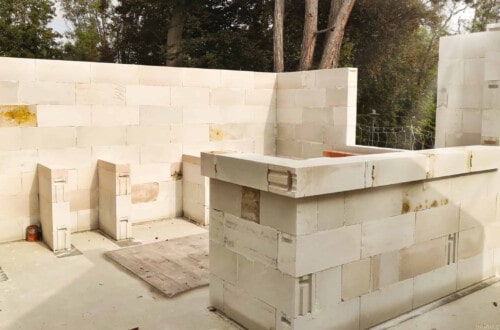
The foundation of the garden kitchen was ready and now the masonry with the gas concrete blocks could start. Overall, my project for the new outdoor kitchen right by the pool had already been delayed by 6 months. Cov19, shortage of materials and craftsmen sent their regards.
The weather also very often put a spoke in my wheel. But now the time had come and it could start.
Choice of materials for the garden kitchen
The new garden kitchen should be built solid. I had already drawn up the plans for the kitchen, so I was able to estimate the material consumption quite well. The shortlist included Poroton bricks, sand-lime bricks and aerated concrete.
Poroton bricks
Poroton was the cheapest option, but unfortunately also the one with the highest effort.
Advantages:
- Cost-effective: Poroton bricks are inexpensive and therefore economically attractive.
- Good thermal insulation: The hollow chambers in the bricks provide excellent insulation.
Disadvantages:
- Difficult processing: The hollow chambers make these stones difficult to process. The installation of hollow boxes for the electrics or the creation of stable dowel holes is problematic.
Due to these disadvantages, Poroton bricks were eliminated from my choice at an early stage.
Sand-lime brick
That left sand-lime brick and aerated concrete. Sand-lime brick is significantly more solid and therefore more difficult to work with.
Advantages:
- High strength: Sand-lime brick is extremely robust and offers excellent stability.
- Good sound insulation: Due to its density, sand-lime brick offers excellent sound insulation properties.
- Sustainability: Sand-lime brick is ecologically harmless and is made from natural raw materials.
Disadvantages:
- Heavy processing: An electric saw is essential for processing the stones, which means additional costs and effort.
- Higher weight: The higher weight of the stones makes transportation and handling more difficult.
Aerated concrete
The aerated concrete blocks, on the other hand, can be sawn by hand with a special saw blade.
Advantages:
- Easy processing: Aerated concrete blocks are lightweight and can be processed with simple tools.
- Good thermal insulation: They also offer good insulation, which promotes energy efficiency.
- Low weight: Their low weight makes them easier to handle and transport.
Disadvantages:
- Lower strength: In comparison to sand-lime bricks, aerated concrete blocks are less robust and stable.
- Moisture-sensitive: Aerated concrete is more susceptible to moisture and requires careful sealing.
Since both stones had both advantages and disadvantages for my project, the decision came down to cost. And that spoke for the gas concrete blocks.
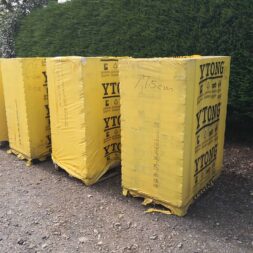
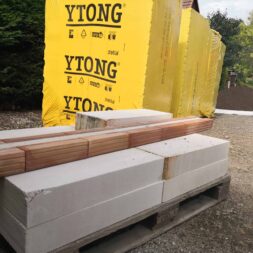
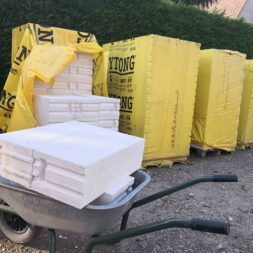
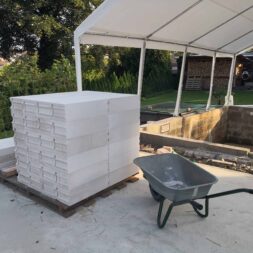
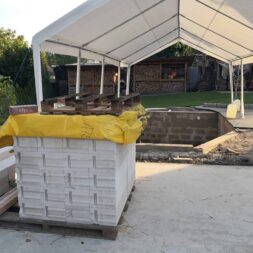
Shortly afterwards there were 4 pallets with a total of 192 Ytong bricks measuring (W x H x L) 17.5 x 25 x 60 cm in my driveway.
Zuletzt aktualisiert am 26. July 2024 um 04:47 . Ich weise darauf hin, dass sich hier angezeigte Preise inzwischen geändert haben können. Alle Angaben ohne Gewähr. (*) Bei den verwendeten Produktlinks handelt es sich um Affiliate Links. Ich bin nicht der Verkäufer des Produktes. Als Amazon-Partner verdiene ich an qualifizierten Verkäufen. Dein Preis ändert sich jedoch nicht.
Video: Building a base for an outdoor kitchen
I accompanied the construction of the first Ytong row with my camera and have put a new film online on my YouTube channel.
I have summarized all the other films about my project in the DIY garden kitchen playlist.
If you want to see more of me and my projects, feel free to check out my YouTube channel.

- Mit 750 Watt bringt die Universalsäge genügend Leistung auf das Blatt, um 150 mm in Holz und 10 mm in Stahl zu schneiden.
- Handlich in der Handhabung und flexibel im Einsatz ist die Universalsäge durch ihre ergonomische, schlanke Bauform.
- Zum material- und anwendungsgerechtem Arbeiten ist die Universalsäge mit einer Hubzahl-Elektronik ausgestattet, die gewissenhafte Voreinstellungen auf den zu bearbeitenden Werkstoffen erlaubt.
- Der werkzeuglos verstellbarer Sägeschuh ist für die optimale Sägeblattnutzung ausgelegt.
- Der werkzeuglose Sägeblattwechsel geht schnell und einfach von Hand, ganz ohne weiteres Werkzeug zur Montage.
- Ein großer Softgrip-Bereich gewährt einen sicheren und festen Halt zum komfortablen Arbeiten auch bei langwierigen Arbeitseinsätzen.
- In die Lieferung inbegriffen ist ein KWB-Sägeblatt für Holz.
Aligning the stones – test lying in the garden kitchen
The construction plan was clear: the new outdoor kitchen should have the shape of a “U”. A 4.50 meter long back wall, the 4 meter long side wall in the south and the good 3 meter long front with the bar. To the top, a wooden roof should protect the garden kitchen from the wind and weather.
However, it was the details that made planning exciting. The perimeter countertop had to be placed on cross walls. This resulted in many niches on the walls.
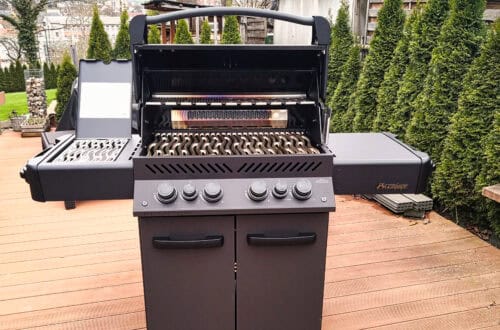
But how big should or did these niches have to be? The niche for the sink had to be larger than the niche for the technical corner. The only thing that was clear was that the grill, my Napoleon PHANTOM P500 had to fit into a niche on the east wall.
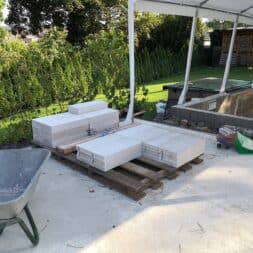
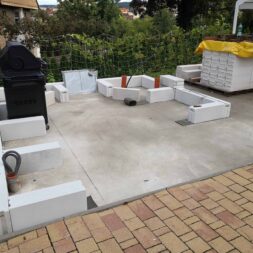
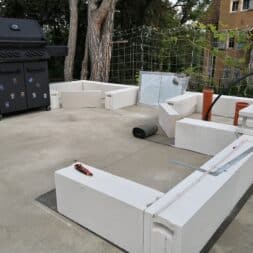
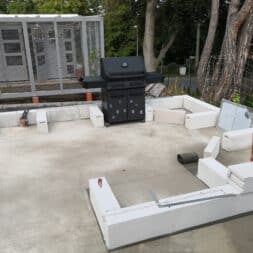
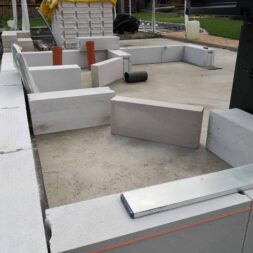
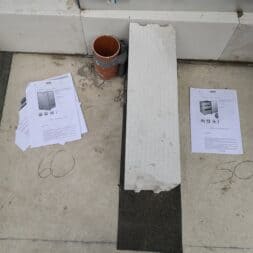
To find out how the space was distributed and how large these niches actually had to be, I first laid out the Ytong blocks dry on the floor, i.e. without mortar.
I slid the grill into place and began experimenting with the size of the niches.
The size of sink, refrigerator, gas bottle tank and so on were researched and the niches were adjusted accordingly. So I can be sure that everything fits later. At the same time, I bind myself to exactly the researched mounting parts or sizes.
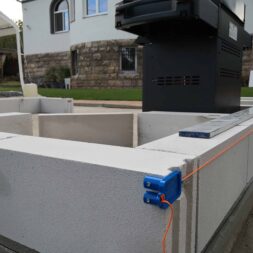
However, after I was satisfied with the space allocation I was able to align my tension cord. With the special cord holders, alignment was as easy as can be. Now it could go to the walls.
Zuletzt aktualisiert am 26. July 2024 um 04:46 . Ich weise darauf hin, dass sich hier angezeigte Preise inzwischen geändert haben können. Alle Angaben ohne Gewähr. (*) Bei den verwendeten Produktlinks handelt es sich um Affiliate Links. Ich bin nicht der Verkäufer des Produktes. Als Amazon-Partner verdiene ich an qualifizierten Verkäufen. Dein Preis ändert sich jedoch nicht.
Processing aerated concrete
The processing of aerated concrete is relatively simple. In contrast to the limestones, the stones are relatively light and easy to handle due to the recessed grips. To cut the stones, a normal wood saw like a foxtail will do.
However, in order for the saw blade to last significantly longer, it is recommended to use a special gas concrete saw.
However, as soon as you need to cut more than a few bricks, it is advisable to use an electric foxtail or an electric reciprocating saw for which there are special gas concrete saw blades.
This saves time and ensures a straight clean cut.
If the cut is not clean or the surfaces and edges need to be leveled, a rasping board or scraping board is recommended. This allows the stone to be smoothed quickly and effectively.
But no matter how you work the stone: in any case, there will be a lot of grinding dust. So the workplace should be well thought out.
A tension cord or straightedge should be used to align the wall. This ensures a straight course of the wall.
The stones should be aligned with a constant distance of 2 to 3 millimeters to the straightedge. In this way, you prevent the cord from moving.
In order to fix the cord at the ends of the wall, it is advisable to use cord tensioning rods. I worked with it for the first time on this wall and can absolutely recommend it.
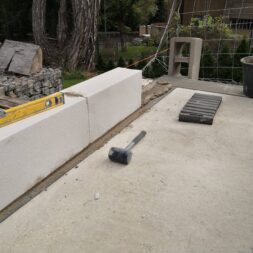
Finally, of course, do not miss a good rubber mallet. Aligning the stones in the scale with your own body weight is only possible up to a certain point. A well-aimed blow with a rubber mallet on the aerated concrete block was much more effective.
Finally, of course, I also recommend a good spirit level, a large right angle and a straightedge.
Zuletzt aktualisiert am 26. July 2024 um 04:46 . Ich weise darauf hin, dass sich hier angezeigte Preise inzwischen geändert haben können. Alle Angaben ohne Gewähr. (*) Bei den verwendeten Produktlinks handelt es sich um Affiliate Links. Ich bin nicht der Verkäufer des Produktes. Als Amazon-Partner verdiene ich an qualifizierten Verkäufen. Dein Preis ändert sich jedoch nicht.
Brick Ytong base with mortar
The aerated concrete blocks are always bonded using the thin-bed method. With a special trowel (with a little practice, however, any other notched trowel will also work), the adhesive is removed thinly over the stones and the new stone is placed flush.
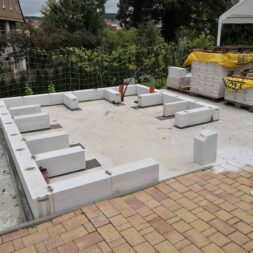
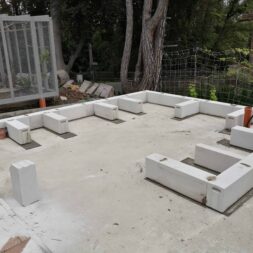
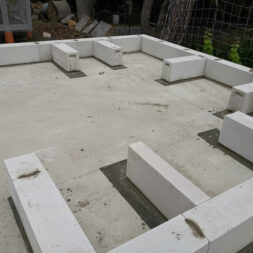
Only the first layer, the base, is set in mortar.
Here it is incredibly important to align each stone, and thus the entire 1st row, absolutely scales. Because what’s already crooked and lopsided at the bottom doesn’t get any better at the top.
So, I started by looking for the highest point in my rehearsal series. Here I wanted to set the first stone and level out the slight slope of the foundation with the mortar. The mortar may be installed in a thickness of 1 cm to 3 cm under the aerated concrete blocks.
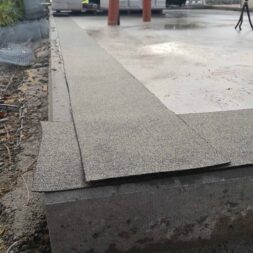
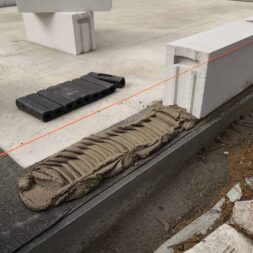
To protect the gas concrete blocks of the new garden kitchen from rising damp from the concrete foundation, I first laid a layer of bitumen sheeting or tar paper.
This release liner is available in rolls in a wide range of widths and lengths.
Then the bricklaying could finally begin. I mixed myself a bucket of cement mortar. For optimal consistency, I recommend a slightly moister “earth-moist” mixture.
The mortar must remain on the trowel without running. At the same time, it should not be too firm so that the stones could still be well aligned in height.
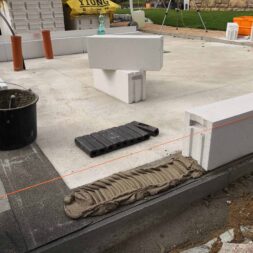
I then spread this mortar on the tar track and set the first stone parallel to my straightedge. With the spirit level, the stone was now aligned absolutely level.
Now I set the 2nd stone also in mortar directly to the first stone and also aligned it at a height to the 1st stone in balance.

- Kann problemlos über Eck verlegt werden auch bei niedrigen Temperaturen entstehen keine Risse
So now it went forward brick by brick. The unevenness of the foundation was leveled with the mortar and the entire base was at one level in the end.
After the “U” was finished, I set the cross stones for the niches in mortar as well. I had marked the niche size beforehand and I now had to pay attention to the right angle to the surrounding wall in addition to the scale.
All in all, I needed a good 6 hours for the 29 bricks and used a good 90kg of cement mortar in the process.
Provided the weather cooperates, I will be installing the other rows of stone for my new garden kitchen in the coming days. This time, however, with the thin-bed bonding method already mentioned.
You can read how this works in one of my next blog entries.

Summary and conclusion
Once the foundation of my garden kitchen was finished, I was able to start building the base and walls from Ytong aerated concrete blocks.
The project had been delayed by six months due to COVID-19, a lack of materials and tradesmen, and the weather had also thwarted my plans several times. But finally it started.
I decided to use Ytong bricks because they were ideal for my project due to their light weight and ease of processing. They could be sawn manually with a special saw blade, which enabled me to cut the stones precisely to size.
I had weighed up Poroton, limestone and aerated concrete, with cost efficiency and ease of handling ultimately tipping the scales in favor of Ytong.
The first row of Ytong bricks, the plinth, was carefully laid in a thick layer of earth-moist mortar.
I used the thin-bed method for the other rows of stones, which enabled precise and clean processing. The stones were thinly bonded with a special trowel and precisely aligned to ensure a stable and straight structure.
Overall, the processing of Ytong in my garden kitchen was efficient and resulted in a visually appealing and functional outdoor kitchen that fitted perfectly into the overall look of my garden by the pool.

- Hochwertiger und leistungsstarker Farb-Mörtelrührer für das professionelle Aufrühren und Anmischen flüssiger und pulverförmiger Bauwerkstoffe mit langlebigem Aluminium-Getriebegehäuse
- Softstart und präzise wählbare Drehzahlregelelektronik während des Betriebs
- Ergonomischer Griffbügel und schlankes Gehäuse für die komfortable Bedienbarkeit
- Rühreraufnahme für Rührwerkzeuge mit M14 Gewinde
- Inklusive Mörtelrührer mit 133 mm
Dieser Beitrag ist auch verfügbar auf:
English
Deutsch


