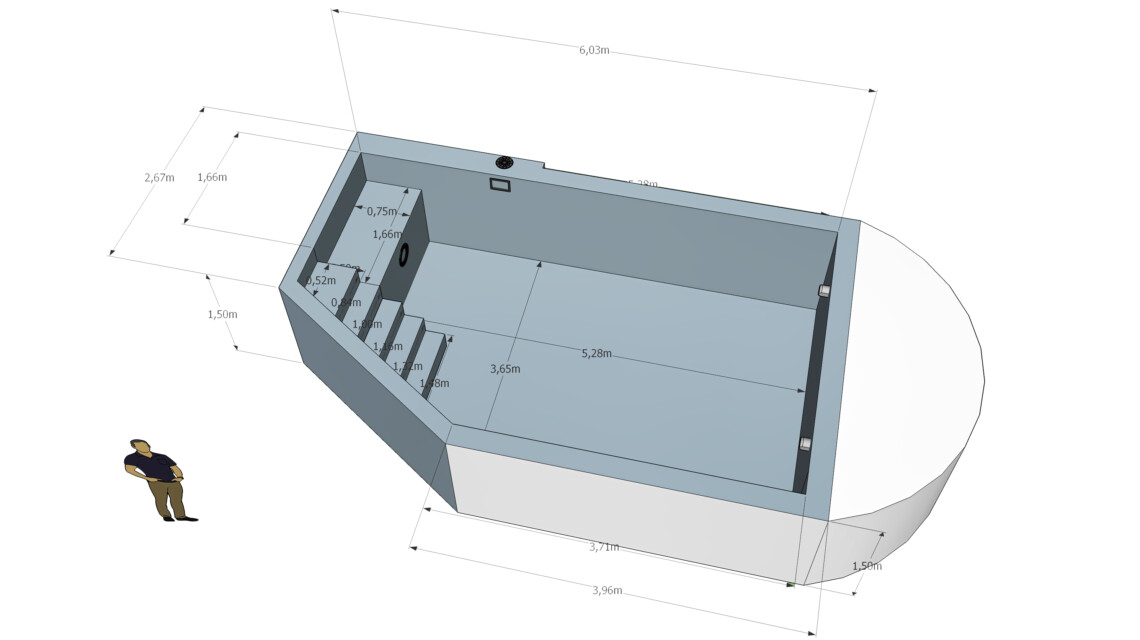
Plan your own pool and create a 3D floor plan
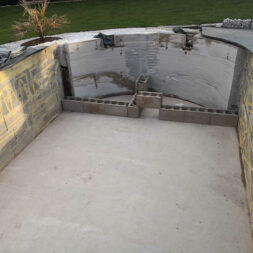
The layout for our new pool was partially predetermined by the retaining walls of the old oval steel wall pool. However, some adjustments were still possible and also necessary.
The new pool in our garden was definitely going to have steps and a seating platform in the water was also planned. The old excavation pit offered several possibilities – but none for a classic rectangular pool.
The demolition of the old pool landscape was completed and it was now time for me to make some thoughts and plans for the new concrete pool. How could I get the best out of these specifications? And what tools could I use to plan a pool myself?
I will explore these questions in the following article.
Stairs and seating platform in the new pool
Basically, the new pool should have proper steps to get in. I could then happily do without the stainless steel pool ladder.
My aim was to be able to walk comfortably down a few steps into the water in the future. Such a staircase solution not only offered more comfort, but also increased safety, especially for children and the elderly.
Another important criterion was the integration of a sunbathing area in the water. This area was to serve as a seating platform where people could relax and sunbathe.
I had imagined how nice it would be to just sit in the shallow water without being completely submerged. This sunbathing area not only made the pool more functional, but also more inviting.
My old steel wall pool didn’t offer these options. It had always bothered me that I didn’t have the option of simply sitting down or dangling my legs in the water.
With the new steps and the seating platform, I wanted to significantly improve the comfort and functionality of my pool. The new pool should overcome these weaknesses and offer a more relaxed pool experience.
Necessary technology in the new pool
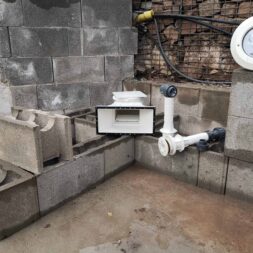
Technically, there were also some unchangeable conditions due to the reconstruction of the steel wall pool. The prevailing wind direction had not changed, and so in the future the skimmer would have to be from the east side and the inlet nozzles on the west side.
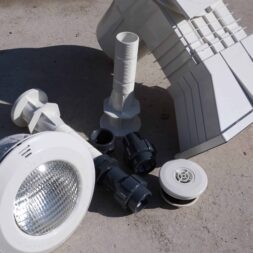
The components themselves would have to change, however, as the old components were intended for a steel wall pool. But now we built a stone pool. There are a few things to keep in mind.
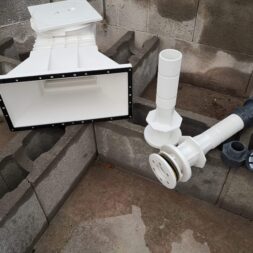
The skimmer was purchased in a slightly larger variant. With a throughput of 7.5 m³/ h, this would be a 50% increase over the old steel wall skimmer. By the way, one of these skimmers per 25m² of water surface is recommended.
My pump with a max. conveying capacity, a Speck Magic II 8, I could continue to use. The power was sufficient to circulate the water in the pool three times a day.
However, I had to completely replace the inlet nozzles on the west side. To get the water into the pool, I initially relied on 2 masonry penetrations. These are installed directly in the pool wall.
A suitable nozzle, either for foil pools or color/epoxy pools, can then be screwed in on the inside of the pool. On the outside, the 50 or 60 flex pipe can be connected directly to the 2″ external thread with the appropriate fittings.
An underwater floodlight was to be installed again on the east side. The recommended place was the wall below the pedestal. Here, the bright LED headlight would not dazzle anyone.

- Filter-Umwälzpumpe
- selbstansaugend
- steckerfertig
- Fördermenge in m³/h = 8
- Förderhöhe in m WS = 8

- Wasserinhalt: 26,600 l (Füllhöhe 140 cm)
- Robuster, verzinkter und beschichteter Stahlmantel (ca. 0,60 mm bis 1,20 m Tiefe; 0,80 mm bei 1,50 m Tiefe)
- Handlauf und Bodenschienen aus Kunststoff
- Winterfeste Innenfolie in Adriablau: ca. 0,60 mm
- Stahlwandverbindung mit Steckprofil
- Stanzungen für Skimmer und Einlaufdüse sind bereits vorhanden
Video: Plan your own pool in 3D
The entire project to convert our pool, from steel wall pool to stone pool, I accompany with my camera.
In my Youtube playlist “Projekt Pool umBAU” you can watch all videos about the rebuild.
If you want to see more of me and my projects, feel free to check out my YouTube channel.
Zuletzt aktualisiert am 26. July 2024 um 04:34 . Ich weise darauf hin, dass sich hier angezeigte Preise inzwischen geändert haben können. Alle Angaben ohne Gewähr. (*) Bei den verwendeten Produktlinks handelt es sich um Affiliate Links. Ich bin nicht der Verkäufer des Produktes. Als Amazon-Partner verdiene ich an qualifizierten Verkäufen. Dein Preis ändert sich jedoch nicht.
Plan pool on the computer itself – Sketchup
After the minimum requirements for the new pool made of shuttering blocks were clarified, the detailed planning began. Finally, I had to order the material and therefore needed an exact idea of what I would have to buy.
I did the planning for this with the free 3D program Sketchup. The program is relatively intuitive to use after some practice and also offers a very large component library.
So I measured the maximum possible floor plan in the excavation and entered it on a paper sketch. Then it was off to the PC and I transferred the floor plan to the 3D model to the centimeter.
Especially with the stairs and the landing, I then got a pretty good feel for how big the components would affect the entire pool. The material requirements could also be calculated quite well in this way.
My goal was to face the curve left from the oval pool on the west side with a straight shuttering wall. For this purpose, 25cm wide concrete formwork blocks would be used.
Steel reinforcement, which would be anchored in each of the old lateral retaining walls, should increase stability, as should a connecting wall to the rounding.
The stairs should also be built with 25cm concrete formwork blocks. The height of 25cm and the step depth of 25cm were not perfect, but relatively good to walk.
The landing was planned in a line between the staircase to the north and the wall to the south with a height of 1m. For this purpose, 17.5cm formwork blocks should be used.
The platform then had a seating area of a good 3m x 1m. The area between the pool outer wall and the 17.5 cm formwork wall should be reinforced with 2 further retaining walls.
I then wanted to fill the gaps with antifreeze and compact them. Finally, on the frost protection should be poured over the entire seat a kind of base plate.

- Styroporbecken 6 x 3 x 1,5 mit eckiger Römertreppe
- Satz Styroporsteine abgestimmt auf die Poolgröße
- Endschuber + Vlies + 2X Mauer + 2XDüse
- Schutzvlies für Boden und Wände
- Folieneinhängeprofil extra breit aus Alu
- Verrohrungsmaterial + Montageanleitung in deutsch
- Innenfolie adriablau 0,8mm dick
- Römertreppe eckig weiss
- Innenfolie adriablau 0,8mm
Excursus: Pool planning with SketchUp
I decided to use the free 3D CAD program SketchUp to plan my new pool.
SketchUp is a versatile and user-friendly program that allowed me to create detailed 3D models and visually represent different design options.
Basic functions and options
SketchUp offered me a wide range of features specifically designed for 3D modeling. The basic functions included:
- Drawing lines and shapes: I was able to create simple geometric shapes such as lines, rectangles and circles, which formed the basis for more complex models.
- Extrusion of surfaces: Using the Push/Pull tool, I was able to transform 2D surfaces into 3D objects by simply pulling them in the desired direction.
- Components and groups: To make it easier to organize my model, I was able to combine individual elements into components or groups. This made it easier to edit and duplicate recurring elements.
- Materials and textures: SketchUp offered a variety of materials and textures that I could apply to the surfaces of my models to achieve a realistic look.
- Shadows and lighting: By adjusting the shadows and lighting, I was able to visualize the effect of my design under different lighting conditions.
Operation of the program
Using SketchUp was intuitive and I quickly learned how to use it. After starting the program, I first selected a suitable template that determined the units of measurement and the layout.
I then started to create my 3D model:
- Drawing the basic shape: I started by drawing the basic shape of my pool using the line and shape tools.
- Creating 3D objects: Using the push/pull tool, I extruded the drawn surfaces to create the walls and bottom of the pool.
- Detailing: To add more detail to the model, I used tools such as rotating, scaling and moving. This allowed me to add stairs, seating platforms and other elements.
- Apply materials: By applying materials and textures, I was able to give the model a realistic look.
- Shadows and lighting: Finally, I adjusted the shadows and lighting to view the model under different lighting conditions.
Download Sketchup
For some time now, SketchUp has only been offered commercially and for a fee.
Further information and the option to purchase can be found on the official SketchUp website.
SketchUp Make 2017
For those who prefer a free version, there is also SketchUp Make 2017. This older version offers many basic functions and is still suitable for private users. I also used this free version.
You can download SketchUp Make 2017 from various download sites on the Internet. The best way to do this is to search for “SketchUp Make 2017”.
With SketchUp, I was able to plan my new pool in detail and precisely. The program’s ease of use and versatile functions helped me to try out different design options and achieve the best possible result.

Optimization and integration of retaining walls for pool construction
On the east side, behind the curve of the old steel wall pool, I had demarcated a small, approximately 1.5 x 4 meter area to the south with a 25 cm wide and two stone high formwork wall.
This area was located under the pool terrace on the east side and served as a maintenance area. Here I could easily service the skimmer and underwater spotlight underneath the terrace if necessary.
I wanted to integrate these 25 cm wide concrete formwork blocks into the new pool construction. Unfortunately, it turned out that the almost 3-meter-long formwork under the terrace was not built in line with the retaining wall. The escape was also slightly postponed.
My plan was to first build two rows of 11.5 cm wide formwork blocks in front of this wall so that they extended the alignment of the southern retaining wall in a straight line.
I was then able to continue building with 25 cm formwork blocks. The alignment and angle should then also fit again.
In the lower section of this wall, a two-row wall of 11.5 cm thick bricks would therefore stand in front of the old, sloping wall of 25 cm thick bricks. From the third row onwards, new 25 cm thick bricks would then be laid flush with the inner wall.
This allowed me to ensure that the new wall structure was stable and visually appealing.
This solution enabled me to make sensible use of the existing structures and at the same time create a solid basis for the new pool.
Zuletzt aktualisiert am 26. July 2024 um 04:46 . Ich weise darauf hin, dass sich hier angezeigte Preise inzwischen geändert haben können. Alle Angaben ohne Gewähr. (*) Bei den verwendeten Produktlinks handelt es sich um Affiliate Links. Ich bin nicht der Verkäufer des Produktes. Als Amazon-Partner verdiene ich an qualifizierten Verkäufen. Dein Preis ändert sich jedoch nicht.
Transfer construction drawing to the pool
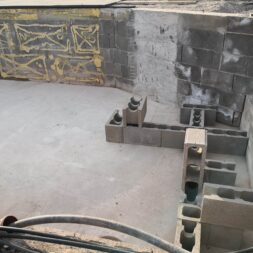
With my 3D SketchUp construction plan, I went back into the excavation pit for the pool. Here I transferred the construction drawing to the floor slab by drawing the walls, the stairs and the platform and inspecting them again.
Once the planning had proven itself in practice, I was able to place the order with the building materials dealer.
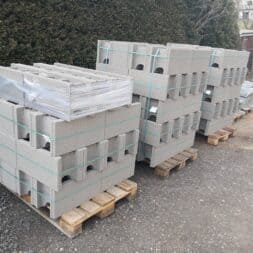
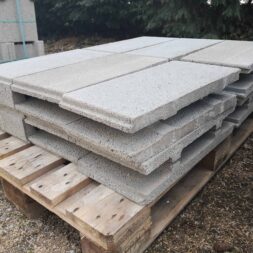
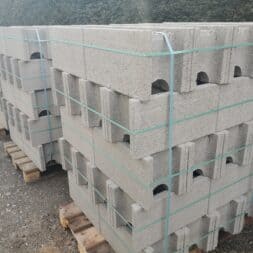
Shortly after, the truck arrived with several pallets of concrete blocks, reinforcing steel and concrete screed.
It was important that the planning was implemented precisely in order to avoid subsequent adjustments. The prompt delivery included all the necessary materials to build the pool according to the construction drawing.
This meant I was ready to start the actual construction and turn the theoretical planning into reality. You can find out how I built the pool walls in the article Build your own pool – building walls with reinforcement | setting formwork stones.

- ✔ PROFI MATERIAL - die Drillspindel aus robustem Carbon-Stahl, ein mechanisch verfestigter Draht Dreher Binder Haken sowie ein rutschfester PVC Griff in ergonomischer Form - das Material der Drahtbinde Zange entspricht höchster Qualität!
- ✔ STABIL UND NACHHALTIG - die Integration des Stoßabfänger Moduls wirkt verschleißtypischen Effekten beim Drahtwerkzeug entgegen. Die Carbonspindel des Drahtdriller ist mit einer Legierung überzogen und ermöglicht durchweg leichtgängige Anwendung der Drillzange!
- ✔ EINFACHE BENUTZUNG - Drill Draht um Elemente legen, Drahtdreher durch beide Drahtverschluss Ösen durchstecken und mit 1-3 kurzen Ziehbewegungen verdrillen - kein mühsames Drillen mit Drahtzwirbelzange, Drehzange oder manuellem Drillbinder!
- ✔ VIELFÄLTIGE ANWENDUNG - geeignet als Florist Drillwerkzeug für Gärtner und Heimwerker, als Eisenflechter Zange oder Roedler Apparat für Zaunbau und Bauarbeiter sowie als Drahtsackverschluss für Drilldraht, Rödeldraht & Bindedrähte!
- ✔ 60 TAGE GELD ZURÜCK - Sollten Sie aus bestimmten Gründen nicht voll zufrieden mit dem HEIMFLEISS Drillgerät sein, erstatten wir Ihnen den vollen Kaufpreis zurück - bis zu 60 Tage nach Kauf!
Summary and conclusion
After spending over six months planning the construction of a new garden kitchen and small animal house, it was clear that no progress could be made without a solid concrete foundation.
Fortunately, I was told that the foundations could be realized soon.
The need for a concrete foundation resulted from the slope of my plot, which is why several plateaus were created to make optimum use of the area.
To ensure the stability of the planned buildings, it was essential that the subsoil was reinforced with a concrete foundation, particularly because the backfilled soil alone did not have sufficient load-bearing capacity.
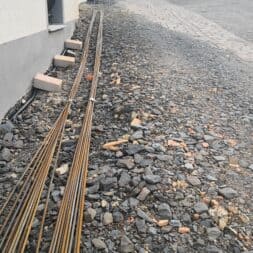
To prepare the concrete foundation for the garden kitchen, gravel was first laid and compacted as a frost protection layer. Empty conduits and a water pipe were laid in the gravel bed in advance for the necessary connections such as electricity and water.
The construction of the foundation also included the erection of a formwork with concrete shelves to keep the concrete in shape and protect it from environmental influences.
I carried out the detailed planning of the project, including the positioning of the foundation and the necessary pipes, using the 3D program Sketchup, which made it possible to order materials precisely.
The actual pouring of the concrete foundation was carried out using a concrete pump, which prepared the construction of the garden kitchen and garden shed and put them on a firm footing.

- 【Pool-Zubehör】Kompatibel mit 90% Poolleuchten, für PAR56 poolscheinwerfer Birnenförmige , ultradünne Harz pool-lampen, Halogenlampen. für alle COOLWEST PAR56 Scheinwerferlampen, (Farbe: RGB, RGBW, 6000K, 3000K, blau) .
- 【Wasserdichtes Edelstahlgehäuse IP68】: Das Set beinhaltet die vordere und hintere Abdeckung, die Lampenhalterung, Dichtungen, den Dichtungsring, Kabelbinder mit Dichtungen, das Kabel und alle notwendigen Schrauben.
- 【Ohne Lampe】: Dieses Produkt ist eine Poolbeleuchtungsschale, enthält keine Lichter, wenn Sie diese benötigen, können Sie alle Arten von Poolbeleuchtungen von unserem COOLWEST kaufen. Hinweis - Sie müssen im Voraus einen 12-V AC Transformator vorbereiten + LED Par56 (poolbeleuchtung nicht enthalten).
- 【Schützen Sie die Poolbeleuchtung】 Bei der Montage auf Betonfliesen lassen Sie die Installation bitte von einem professionellen Elektriker durchführen.Dadurch wird die Lebensdauer der Poolbeleuchtung besser verlängert.
- 【Bemerkung】 Die Installation ist sehr einfach, Bedienungsanleitung in der Verpackung enthalten, wenn Sie Fragen haben, kontaktieren Sie uns bitte. Unser Kundenservice ist 24 Stunden am Tag online und wird Ihnen helfen, Ihre Verwirrung rechtzeitig zu lösen.
Dieser Beitrag ist auch verfügbar auf:
English
Deutsch


