Converting a pool – dismantling an old steel wall pool
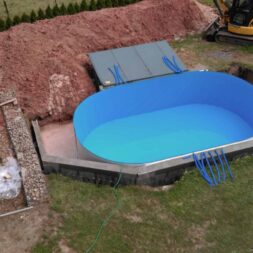
Our steel wall pool is already a few years old. The oval pool has a size of 6.23 x 3.60 x 1.5 meters. The almost 30 m³ of water is heated to a pleasant 30°C automatically and weather-controlled via a solar system.
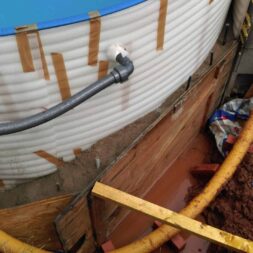
The pool was built on a solid concrete base plate. On the sides, 2 walls of concrete formwork support the sides of the pool. I had shuttered the curves and also filled them with concrete.
This pool is now being dismantled. I am building a new pool from concrete formwork blocks at this point.
In this article, I write about the removal of the old steel wall. I show the rusty weak points of the steel wall which I discovered during dismantling and I describe how the wall can be removed so that it can be used again at another location without any problems.
Pool liners: durability, properties and care tips
When I decided to line my pool, I chose a pool liner made of high-quality PVC (polyvinyl chloride).
These plastic sheets are specially designed to seal the inner walls and floor of the pool and protect them from water loss.
Their composition makes them particularly resistant to the aggressive chemicals used in pool water for cleaning and disinfection.
The films are characterized by their high chemical resistance, which makes them ideal for pools in which chlorine or other disinfectants are regularly used.
Their temperature resistance is also remarkable. They can withstand fluctuations from very cold to very warm water temperatures without becoming too brittle or deformed.
Nevertheless, there are risks that can arise if the water is either too cold or too hot.
If the temperature is too cold, the film can become stiff and tear more easily under pressure.
If the temperature is too high, however, the film can become soft and stretch, which can also lead to damage.
To mitigate these risks, I made sure that the water temperature in my pool was always kept within a safe range.
An automated heating system helps to regulate the temperature and avoid extreme fluctuations.
In addition, a pool cover protects the water from direct sunlight, which could greatly increase the temperature and affect the liner.

- Brand: SAXONICA
- Poolfolie Innenhülle Ovalpool 623 x 360 x 120 cm - 0,8 mm blau Ovalbecken
- Product Type: OUTDOOR_LIVING
Foil from steel wall pool destroyed
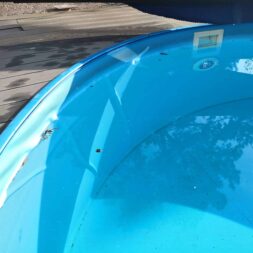
But then disaster struck. In the summer of 2020, small air bubbles formed between the pool liner and the steel shell. I hardly noticed it at first. But within just a few weeks, the bubbles got bigger and bigger.
After 2 months, real wrinkles had formed on the edges and bottom. I could not push these out either.
After some research, there were several possible causes for this damage. Too high water temperatures in the pool and incorrect application of pool chemistry.
The pool liner we used only had an approval up to 28°C permanent water temperature. This is probably true for 95% of all pool liners. However, our pool heater regulates the temperature only at 30°C.
The temperature in the pool was thus above the allowed 28°C for weeks and months.
Also, due to the higher temperatures, I had increased the addition of chlorine. The values were measured weekly and the chlorine content in the water was adjusted.
Nevertheless, the film manufacturer stated that the chlorine level was too high as the cause of the total loss.
What should we do now? The foil bag can be replaced without any problems – as long as you also replace all seals for skimmers, inlet nozzles and LED spotlights. This is because these components have to be dismantled when the film is changed.
I also had to completely change the inlet nozzles because they were glued to the supply lines behind the steel wall. A new foil alone would have cost around EUR 600.00 – plus… of a 25% surcharge for a “high temperature film”.
All in all, we would have had to pay around EUR 1000 in repair costs.

- Wasserinhalt: 26,600 l (Füllhöhe 140 cm)
- Robuster, verzinkter und beschichteter Stahlmantel (ca. 0,60 mm bis 1,20 m Tiefe; 0,80 mm bei 1,50 m Tiefe)
- Handlauf und Bodenschienen aus Kunststoff
- Winterfeste Innenfolie in Adriablau: ca. 0,60 mm
- Stahlwandverbindung mit Steckprofil
- Stanzungen für Skimmer und Einlaufdüse sind bereits vorhanden
Replace the pool liner or build a new pool?
Under these conditions, we decided to put the money in hand. However, not for a new liner but for a complete rebuild of our steel wall pool.
The steel wall pool was to become a stone wall pool.
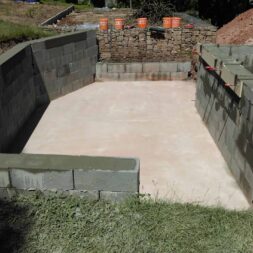
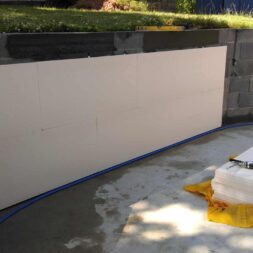
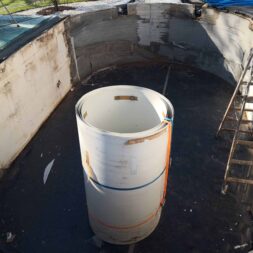
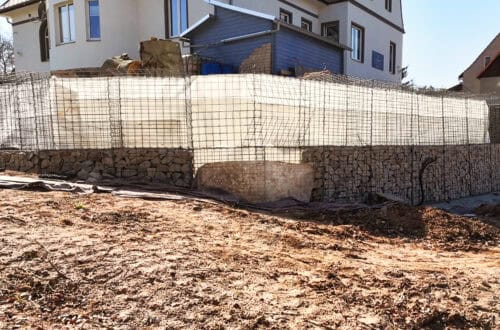
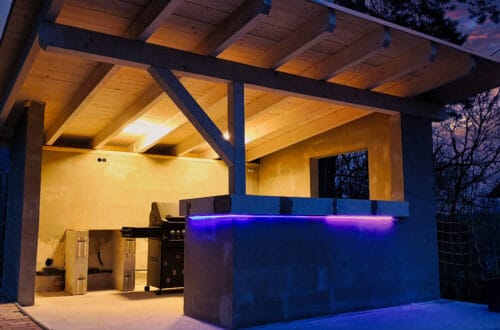
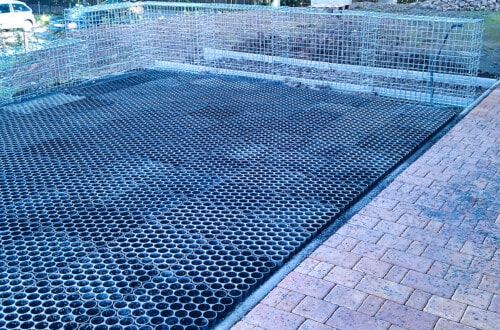
The new pool should integrate the already existing walls. These walls were reinforced and could easily be extended as you can see in the following pictures from the construction phase.

- Styroporbecken 6 x 3 x 1,5 mit eckiger Römertreppe
- Satz Styroporsteine abgestimmt auf die Poolgröße
- Endschuber + Vlies + 2X Mauer + 2XDüse
- Schutzvlies für Boden und Wände
- Folieneinhängeprofil extra breit aus Alu
- Verrohrungsmaterial + Montageanleitung in deutsch
- Innenfolie adriablau 0,8mm dick
- Römertreppe eckig weiss
- Innenfolie adriablau 0,8mm
Pump out water – Drain the pool – What pump?
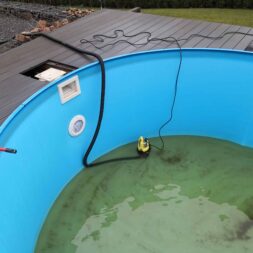
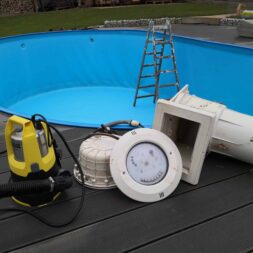
Of course, before the steel wall could be removed, the skimmer, inlet nozzles and LED underwater spotlights had to be removed first. The pool liner also had to be removed. However, the very first thing I had to do was get the water out of the pool.
In all these years, I had never pumped the pool empty. In the fall, the water level was only lowered to just below the inlet nozzles. My normal submersible pump was sufficient for this.
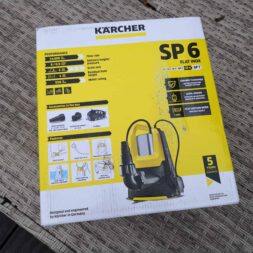
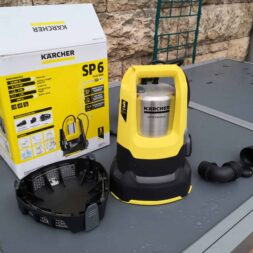
However, this pump would not be able to completely empty the pool. A new, a better pump had to do the job. After a long search, I got stuck with a Kärcher exchange pump.
This submersible pump is capable of pumping 14,000 liters per hour up to a height of 9 meters (9bar).For me, however, the decisive factor is the ability to pump up to a water level of only 1mm.
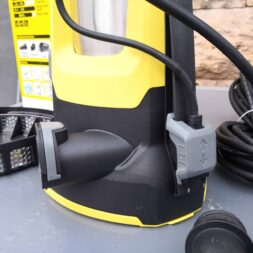
Due to the small and compact design and the maintenance-free float – it is only two contact pins – the pump should later find its use in my pump sump.
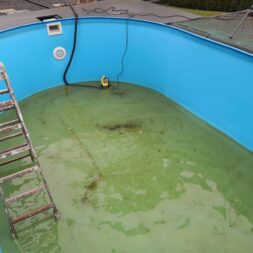
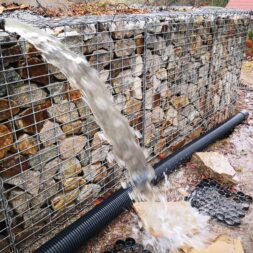
The pump was connected to a 38mm pool hose and the first 4 to 5m³ were pumped out very quickly. But the last centimeter took another good hour.
But the pump really cleared the pool liner of water down to the last millimeter.

- Zuverlässiges Abpumpen von bis zu 14.000 Liter klares bis leicht verschmutztes Wasser pro Stunde
- Automatische Entlüftung ab einem Wasserstand von 7 mm nimmt die Pumpe den Betrieb im Manuell-Modus auf
- Robuster und einfach anzubringender Edelstahlvorfilter schützt die Pumpe vor zu starker Verschmutzung und verhindert damit eine Verstopfung des Pumpenlaufrads
- Anwendungsgebiete: Wasserschäden im Haus und im Keller, Abpumpen von Wasser aus Pools und Installation im Drainage-Schacht
- Lieferumfang: Entwässerungspumpe mit komfortablem Tragegriff, Schlauchanschlussstück, Edelstahl-Vorfilter, keramische Gleitringdichtung
Removal of the inlet nozzles from the steel wall
The inlet nozzles are fixed in the steel wall with several seals. Inside there is a cover under which the screws are located. This cover can be pulled off with a little force.
After removing the screws, I was able to remove the inner part of the inlet nozzle, including the sealing rings. On the outside, however, it was a little more difficult.
The water was connected via a flex pipe. In front of the nozzle I glued in a transition from flex pipe to 50 PE pipe.The piping with the flex hose is a great thing because it is very flexible.
The other side of the pipe was glued to the inlet nozzle. The connection from the flex pipe can be opened at any time.
However, the fitting is too large for the hole in the steel wall. So I had to saw through the pipe to be able to pull the nozzle inward through the steel wall.

Video: Dismantling the pool liner and steel wall
I will be following the entire conversion of our steel wall pool to a stone pool with my camera. In my playlist for the project pool you can watch the whole process in peace.
I also made a video about the dismantling of the steel wall pool. In this video you can see the removal of the skimmer, inlet nozzles, LED underwater spotlight and the pool liner in detail. You can also see the dismantling of the steel wall in the video.
If you want to see more of me and my projects, feel free to check out my YouTube channel.
-
Price: € 23.95
-
Price: € 89.95instead of: € 94.95
-
Price: € 9.20
-
Price: € 9.98instead of: € 13.05
Removal of skimmer and LED underwater spotlight
Opposite the inlet nozzles is the skimmer and the LED underwater spotlight. In order to remove the pool liner, these two built-in parts had to be dismantled beforehand as well, of course.
The skimmer collects the water in the pool and directs it to the pump through a flex pipe. I first loosened the connector fitting from the pipe to the skimmer with the flex wrench and then rebuilt the pipe.
The skimmer frame is protected on the inside by a screen. This bezel must be removed very carefully as it is very fragile.
The corners of the bezel are fixed with small lugs in the corners of the frame. However, you can pry the frame out with a small screwdriver.
The screws are located under the cover frame. The screws go through the steel wall into the skimmer. They hold and fix the skimmer. With 3 seals, the watertight transition to the pool liner is made.
After removing the screws, the skimmer can be removed with a little effort.
The LED underwater spotlight is removed in the same way. First, the headlight is removed from the lamp pot. By loosening the two screws on the side, this is relatively easy.
After all, I winterized the headlight in this way every fall.
After removing the two seals for the cable, I was able to remove the lamp body completely. Now the screws of the mounting niche were removed here as well and I could take out the lamp pot.
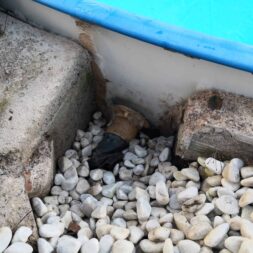
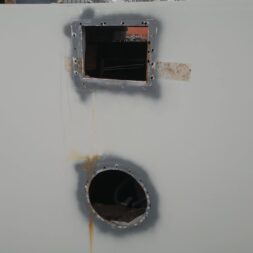
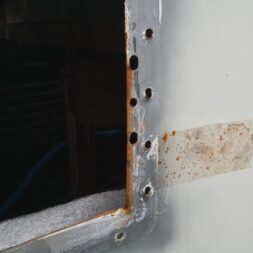
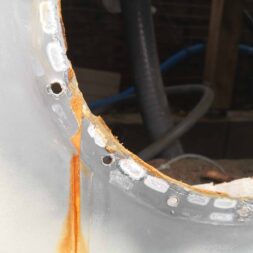
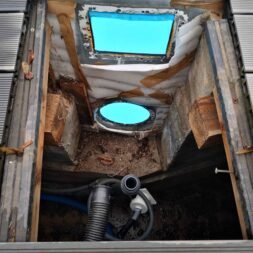
While the steel wall by the inlet nozzles was absolutely fine, rust had formed on the skimmer and the LED underwater spotlight.
I did use zinc spray on the edges when installing the skimmer and lamp. But still water came up to the steel shell.
Overall, the rusting was visually severe, but the steel shell was still in very good condition.

- 【Pool-Zubehör】Kompatibel mit 90% Poolleuchten, für PAR56 poolscheinwerfer Birnenförmige , ultradünne Harz pool-lampen, Halogenlampen. für alle COOLWEST PAR56 Scheinwerferlampen, (Farbe: RGB, RGBW, 6000K, 3000K, blau) .
- 【Wasserdichtes Edelstahlgehäuse IP68】: Das Set beinhaltet die vordere und hintere Abdeckung, die Lampenhalterung, Dichtungen, den Dichtungsring, Kabelbinder mit Dichtungen, das Kabel und alle notwendigen Schrauben.
- 【Ohne Lampe】: Dieses Produkt ist eine Poolbeleuchtungsschale, enthält keine Lichter, wenn Sie diese benötigen, können Sie alle Arten von Poolbeleuchtungen von unserem COOLWEST kaufen. Hinweis - Sie müssen im Voraus einen 12-V AC Transformator vorbereiten + LED Par56 (poolbeleuchtung nicht enthalten).
- 【Schützen Sie die Poolbeleuchtung】 Bei der Montage auf Betonfliesen lassen Sie die Installation bitte von einem professionellen Elektriker durchführen.Dadurch wird die Lebensdauer der Poolbeleuchtung besser verlängert.
- 【Bemerkung】 Die Installation ist sehr einfach, Bedienungsanleitung in der Verpackung enthalten, wenn Sie Fragen haben, kontaktieren Sie uns bitte. Unser Kundenservice ist 24 Stunden am Tag online und wird Ihnen helfen, Ihre Verwirrung rechtzeitig zu lösen.
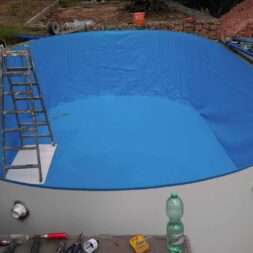
Remove pool liner
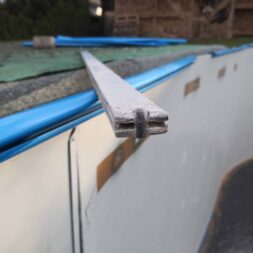
The pool liner is only hooked to the steel shell. With the handrail, which is also clicked from above, the film is fixed. I first carefully knocked the handrail out from underneath with a mallet.
I was then able to unhook the liner from the steel wall and fold it at the bottom of the pool. With the prevailing maximum 10 ° C, this was very laborious. The film was simply too stiff.
Ideally, temperatures of at least 20°C should prevail when laying or removing the film.
Then the film is nice and soft.
Dismantle steel wall from pool
The steel wall is 0.8mm thick and correspondingly heavy and unwieldy. At the bottom the steel wall is in the guide rail and at the top it is fixed by the handrail.
On the long sides, I bolted the steel wall to the support walls. Thus, the wall has the necessary stability.
The two ends of the steel wall are held together with a connecting rail. I had knocked these in with a sledgehammer during assembly. Accordingly, the expansion of this rail was more than costly.
I first levered the rail up with a crowbar – as far as it would go. Then I placed a metal wedge between the two steel wall ends and under the wedge.
I then hit this wedge from below with a hammer.
In the millimeter range, I was able to knock out the rail upwards. The rail now has a small dent, but it is still functional.
After I had also removed the lateral screws to the supporting wall – and these were very badly rusted(!) we were able to lift the steel wall out of the lower guide rail and wind it up into a roll in the pool.
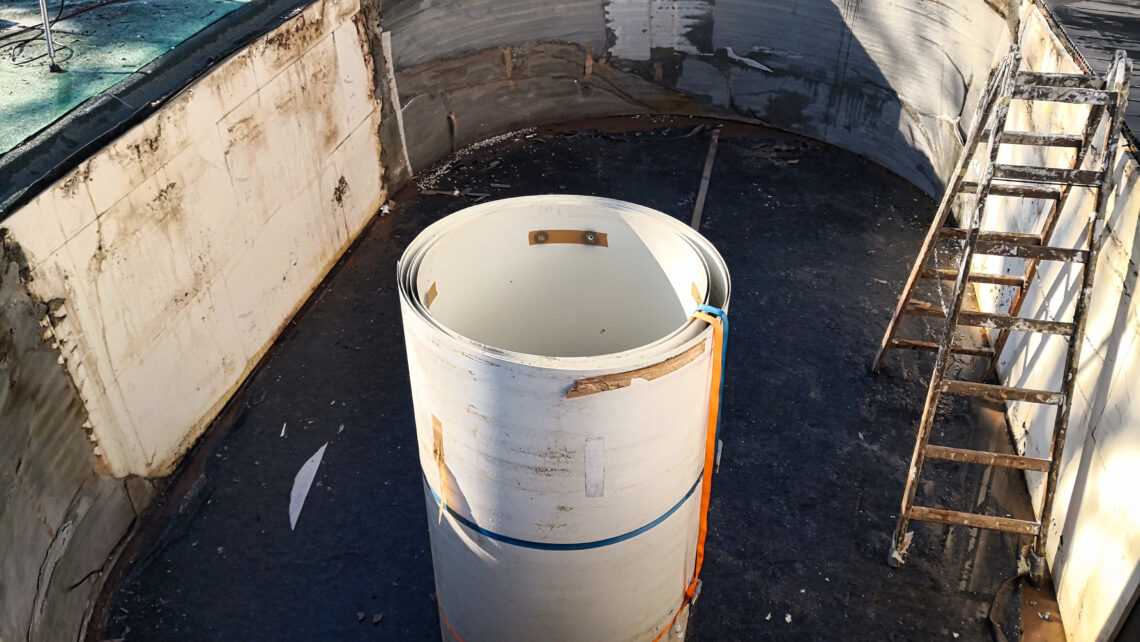
The steel wall was then fixed with safety belts and lifted out of the pool by three people. The steel wall was then rolled out on the terrace and then neatly rolled up again and fixed with tension belts.

Summary and conclusion
When I built my own oval steel wall pool a few years ago, I decided to use a pool liner made of high-quality PVC to seal the inside of my pool and protect it from water loss.
This pool liner proved to be particularly resistant to the aggressive chemicals in the pool water.
Despite their robustness, the temperature of the water had to be carefully controlled to prevent damage caused by temperatures that were too cold or too hot. I used an automated heating system and a pool cover to avoid extreme temperature fluctuations.
In the summer of 2020, however, excessively high water temperatures and incorrect handling of the pool chemicals led to air bubbles and creases forming in the pool liner.
The repair costs, including the replacement of the inlet nozzles and other connections, would have amounted to around 1000 euros.
I therefore decided to dismantle the old steel wall pool and build a new pool with the existing reinforced walls, which would be more durable and robust.
The decision to replace the old steel wall pool with a pool made of formwork stones was primarily due to the fact that the existing walls could be used, resulting in a more stable and durable pool structure
Dismantling the old pool involved emptying the pool with a powerful submersible pump, removing the pool liner and the steel wall, and dismantling the inlet nozzles and the LED underwater spotlight.
Dieser Beitrag ist auch verfügbar auf:
English
Deutsch


