Converting the pool – demolishing the old retaining walls
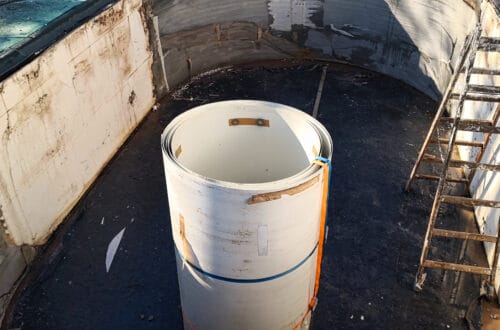
The pool remodel in our backyard is still in full swing. The steel wall pool is to be converted into a stone pool. For this purpose, the oval steel-walled pool, which is sunk into the ground, must first be dismantled.
I had already removed the foil, the skimmer, the inlet nozzles and also the LED underwater spotlight in the previous weeks. The steel wall was also removed in one piece.
Last week I built back the terrace around the pool. I took down the BPC decking boards and also removed the freestanding substructure, on the east side of the pool.
Now before I can build the new pool, I need to remove the retaining wall on the east side as well.
Retaining wall by the pool – for what?
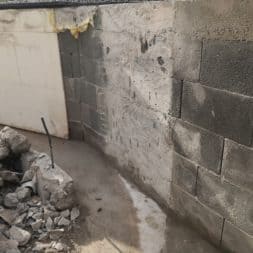
The steel wall pool had an oval shape with dimensions of 6.23 x 3.60 meters. On the long lateral sides, the steel wall was supported by a wall of shuttering blocks. The formwork blocks were reinforced and filled with concrete.
These walls form the new outer walls of the pool.
On each of the short sides of the steel wall, the pool was semicircular. In this area, the steel wall had held on its own. Nevertheless, I have additionally stabilized these areas.
On the west side, it was relatively easy. The area between the steel wall and the soil behind it was filled with lean concrete. So I was able to remove the water from the pool without the soil slipping.
On the east side, this was already more difficult. Here the skimmer and the LED lamp were installed. Both are built-in parts that must be accessible at all times. Due to the slope of the pool, it made sense to build the terrace freestanding around the pool and to banish the technical area under the terrace.
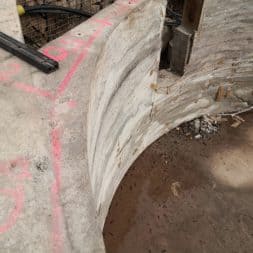
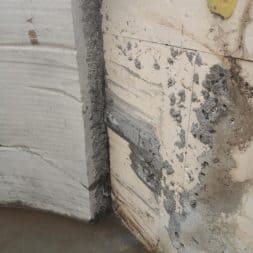
In order to have enough bearing surface for the substructure of the pool terrace, and at the same time to further stabilize the steel wall of the pool, I had shuttered the complete rounding and filled it with concrete.
Reinforcement made of reinforcing grids and iron pipes should make this retaining wall even more stable. Which she did.

- 3-in-1 Gerät - Der Einhell Bohrhammer TE-RH 40 3F ist mit einem Drehschalter ausgestattet, mit dem man zwischen drei Funktionen wählt: Hammerbohren und Meißeln mit und ohne Fixierung.
- Leistung - Der 1050 Watt starke Bohrhammer verfügt über ein pneumatisches Schlagwerk, das eine Schlagzahl bis zu 4.100 Schläge pro Minute erzeugt.
- Schlagstärke - Der robuste Bohrhammer arbeitet sich mit einer Schlagstärke von 10 Joule durch härteste Materialien mit einer Bohrleistung bis zu 40 mm in Beton.
- SDS-Max- Die SDS-max-Aufnahme ermöglicht einen schnellen und werkzeuglosen Wechsel von verschiedenen, handelsüblichen Bohrern und Meißeln.
- Komfortable Handhabung - Durch einen Zusatzhandgriff, Softgrip-Flächen und Anti-Vibrations-Funktion liegt der Bohrhammer auch bei längeren Arbeiten gut in der Hand.
- Inklusive Zubehör - Der Einhell Bohrhammer TE-RH 40 3F wird inklusive Zubehör, nämlich einem Flachmeißel und einem Spitzmeißel geliefert.
- Inklusive Transportkoffer - Im robusten Transport- und Aufbewahrungskoffer ist der Bohrhammer mitsamt Zubehör jederzeit ordentlich verstaut und schnell griffbereit.
How to remove a reinforced retaining wall?
Even during the preparation phase, I asked myself how I should proceed most effectively and developed a precise plan.
I laid out various tools, including a 3 kg sledgehammer, a mallet, chisels, my pneumatic chisel and a large hammer drill.
I also got my father to help me, because together we planned to remove this wall within a day.
The rounding on the west side was to be retained for the most part; we only wanted to remove part of it in order to align the new wall with the side retaining walls.

- mit 4-teiligem Meißelsatz
- Abtriebsprofil: Außenvierkant
- Stecktülle für Schnellkupplung
- Arbeitsdruck: 6,3 bar
- Luftverbrauch: 113 l/min
- Schlagzahl: 4500 1/min
- Vibration: ahd = 9,4 m/s² / K = 1,5 m/s²
- Schalldruckpegel: 84 dB (A)
- Schalleistungspegel: 95 dB (A)
Is the hammer enough?
To cut a long story short: No, the sledgehammer was not enough.
I was only able to use it to remove the upper part of the retaining wall. This area was much less heavily reinforced and was easier to smash due to the existing openings in which skimmers and LED underwater spotlights had previously been installed.
But after a while it became clear that this could not be a permanent solution.
The wall was too solid and stable to be effectively destroyed with a sledgehammer alone.
Heavy technology always goes – hammer drill in use
The hammer drill was a completely different caliber.
With the Hilti, I was able to blast the wall into many small pieces, which meant that we had to use much less force than with the sledgehammer.
Unfortunately, it was not possible to knock larger pieces out of the wall with the device.
True to the motto “the squirrel eats with difficulty”, we made slow but steady progress by picking off lots of smaller pieces.

- Der Bohrhammer GBH 3-28 DFR von Bosch Professional - hohe Leistung und niedrigste Vibrationswerte
- Der GBH 3-28 DFR verfügt über einen schnellen Fortschritt beim Bohren und eine hohe Meißelleistung
- Lieferumfang: Maschinentuch, Schnellwechselbohrfutter 13mm, Wechselfutter SDS plus, Zusatzhandgriff, Fetttube, Handwerkoffer
Video: Dismantling the concrete walls of the old steel wall pool
The entire project to convert our pool, from steel wall pool to stone pool, I accompany with my camera. In my Youtube playlist “Projekt Pool umBAU” you can watch all videos about the rebuild. I also captured the demolition of the retaining wall in a separate film.
If you want to see more of me and my projects, feel free to check out my YouTube channel.
Zuletzt aktualisiert am 16. February 2026 um 20:51 . Ich weise darauf hin, dass sich hier angezeigte Preise inzwischen geändert haben können. Alle Angaben ohne Gewähr. (*) Bei den verwendeten Produktlinks handelt es sich um Affiliate Links. Ich bin nicht der Verkäufer des Produktes. Als Amazon-Partner verdiene ich an qualifizierten Verkäufen. Dein Preis ändert sich jedoch nicht.
Remove retaining wall with angle grinder?
I somehow realized beforehand that I would need more than just a sledgehammer.
So I had my large angle grinder, my Flex, ready to hand to make the work easier. Using a diamond blade, I cut vertically from top to bottom – as deep as possible – into the retaining wall. I made a new slit every 20 to 30 cm.
I then switched to the other side of the retaining wall and started again exactly opposite the slots I had previously made, again from top to bottom and as deep as possible.
Although I couldn’t saw through the wall completely in the middle due to its thickness, I was able to significantly reduce the stability of the wall with this measure.
Once I had made all the cuts, I reached for the sledgehammer again. This time there was clearly more movement. Large sections of the wall could thus be effectively removed.
Compressor and compressed air chisel remove the wall
I have already had some success with my duo of pneumatic chisel and powerful compressor. Finally, I managed to remove the reinforced basement ceiling within three days.
The pneumatic chisel also proved useful on the retaining wall of the old steel wall pool.
Although it lacked the decisive power to break out large pieces – similar to the hammer drill, I could only remove small pieces – the chisel enabled me to work much more precisely.
This was particularly advantageous at the connection to the two lateral formwork walls, which I wanted to continue using. It was important to me to minimize any damage to these walls.

- Doppelzylinder sorgt für die kraftvolle Ansaugleistung von 412 l/min
- Maximaler Arbeitsdruck von 10 bar
- Leistungsstarker 3,0 PS Motor
- Kesselvolumen von 50 L
- Druckminderer für die optimale Regelung des Arbeitsdruckes
- Anschluss an gewöhnlichen 230 V Stromzugang
- 2 Schnellanschlusskupplungen für einen schnellen Werkzeugwechsel
- Vibrationsgedämpfte Standfüße aus Gummi für rutschfestes Abstellen
- Fahrvorrichtung für einen einfachen Transport
- Bitte beachten Sie: Die Abbildung zeigt einen Druckminderer und weicht vom tatsächlichen Produkt ab. Die korrekte maximale Luftleistung beträgt 412 l/min. Auf dem Artikel selbst und in der Bedienungsanleitung ist fälschlicherweise 371 l/min angegeben.
Detach retaining wall from concrete floor
At the beginning of the demolition, I was very concerned that it would be difficult to remove the retaining wall cleanly from the concrete floor. Although the wall was not directly anchored to the ground, the concrete had been poured a few years ago.
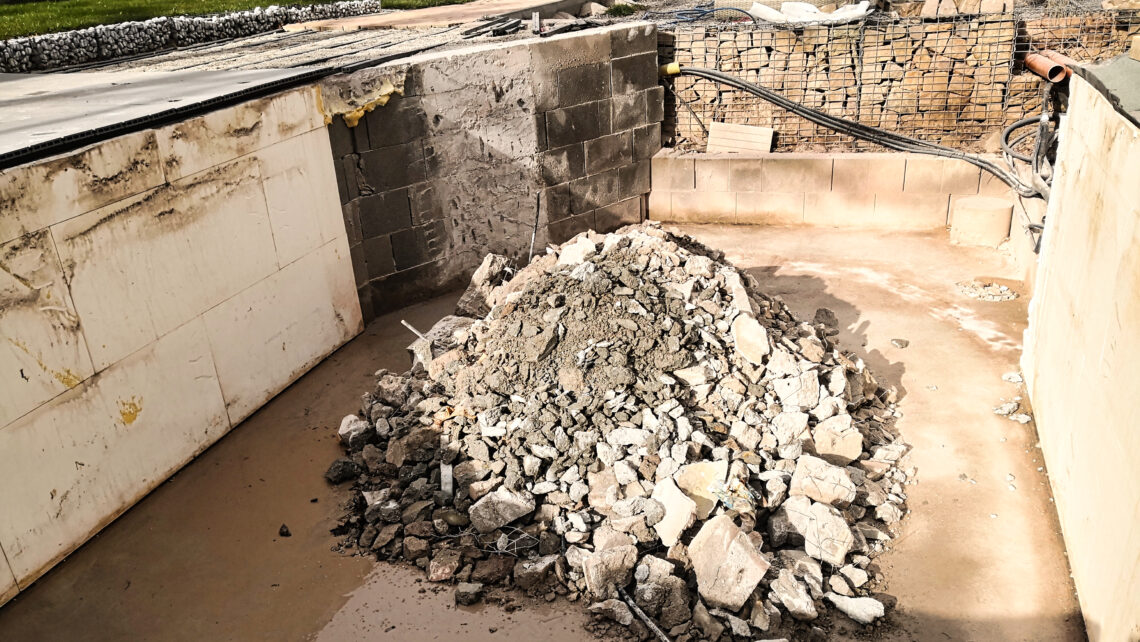
To my astonishment, however, the retaining wall could be separated from the ground with virtually no damage, as the concrete had not bonded with the ground. The demolition, which was originally supposed to take the whole day, was completed in just three hours.
After the remains of the wall in the middle of the excavation had been heaped up, I was able to turn my attention to the excavations on the west side.
Notch round retaining wall – The angle grinder helps
To get the recess clean and straight, I first drew a vertical line at the corresponding point of the curve. I then used my Flex to make a clean cut in the wall from top to bottom.
As the wall was not free-standing, I couldn’t use a hammer and had to carefully chisel out the edge. Here, the small pneumatic chisel once again proved its strength.
After just 30 minutes, the two edges on the left and right sides of the western retaining wall were successfully removed.
Construction waste from the pit
A weekend later, hard work was again the order of the day. A good 4t of construction debris had to be hauled out of the excavation pit and loaded into the container 50 meters away.
With the help of many hardworking (and strong) helpers, this was also done within 2 hours.
Remove hard foam boards from the stone wall
I still had to remove the XPS rigid foam panels that I had glued to the side formwork walls with construction foam. These plates were used to decouple the steel wall from the stones and protect it.
I managed to remove the panels effortlessly with a large spatula. However, removing the construction foam residue proved to be much more time-consuming. Neither the use of a Bunsen burner nor chemical agents led to success.
In the end, I could only scrape off the construction foam with a paint scraper.
Once this challenge had also been overcome, I was finally able to start building the new pool.
Summary and conclusion
I have started converting my old steel-walled pool into a pool with stone walls.
Originally supported by formwork stone walls, the conversion initially required the removal of the oval steel wall pool and the surrounding terrace.
The retaining walls on the east side also had to be removed to make room for the new pool.
The existing formwork stone walls, reinforced and filled with concrete, formed the new outer walls of the pool.
The challenge was to build the pool itself, with steel reinforcement playing an important role in ensuring structural integrity.
Despite initial reservations, I was able to detach the retaining wall from the concrete floor without any major damage.
The effective use of heavy equipment such as a hammer drill and an angle grinder made the demolition and preparation for the new construction much easier.
FAQ on the demolition of the retaining wall and pool conversion
1. why did the retaining wall have to be removed?
The retaining wall was part of the old pool construction and supported the oval steel wall of the original pool. As the new pool is to be made of stone walls, the retaining wall had to be removed to make room for the new construction.
2. how was the original retaining wall constructed?
The retaining wall consisted of reinforced formwork stones that were filled with concrete. On the long sides of the pool, the wall served to stabilize the steel wall, while additional concrete fillings and reinforcements provided stability on the semi-circular ends.
3. which tools were used to demolish the retaining wall?
Various tools were used, including a sledgehammer, hammer drill, angle grinder with diamond blade, pneumatic chisel and compressor. This equipment made it possible to remove the wall in small sections and work precisely.
4. why was the sledgehammer not enough to remove the wall?
The sledgehammer could only remove the less heavily reinforced upper part of the wall. The massive and heavily reinforced lower areas required the use of heavier tools such as hammer drills and angle grinders.
5. how was the retaining wall detached from the concrete floor?
Although the wall was not firmly connected to the concrete floor, the supporting wall could be separated from the floor with virtually no damage due to the age of the construction. This made the work easier and considerably shortened the demolition time.
6. how was demolition facilitated by the angle grinder?
The angle grinder was used to make vertical cuts in the wall from top to bottom. These slits weakened the structure of the wall and made it easier to remove large sections with a sledgehammer.
7. how was the rubble disposed of?
Around four tons of rubble were removed from the excavation pit and loaded into a nearby container. With the help of several volunteers, this work was completed within a few hours.
8. what challenges did you face when removing the XPS rigid foam panels?
The XPS rigid foam panels that were attached to the formwork walls were easy to remove with a spatula. However, removing the construction foam residue used for fastening was much more difficult and required laborious scraping.
9. what measures were taken to protect the retaining wall during demolition?
The pneumatic chisel was used for precise work on the side formwork walls. This minimized the risk of damage to the existing walls.
10. how was the curve of the retaining wall on the west side adjusted?
The curve on the west side of the pool was precisely machined with the angle grinder to keep the recess straight. The small pneumatic chisel was used to carve out the wall edges cleanly.
Dieser Beitrag ist auch verfügbar auf:
English
Deutsch


