Slope stabilization – stack gabions safely on top of each other
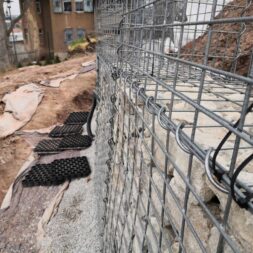
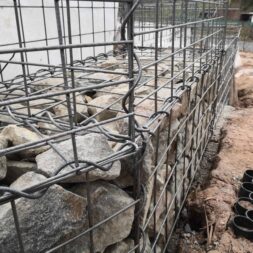
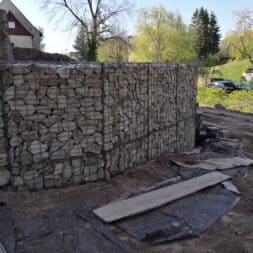
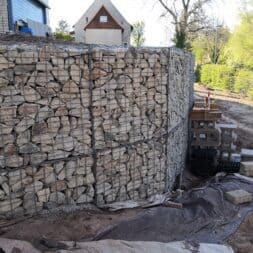
Over a period of a few weeks, I built the first row of gabions over a length of around 30 meters. A relatively straight section was followed by a slight bend. By placing the gabions inside each other, I was able to form a corner on the south-east side.
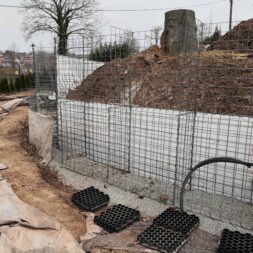
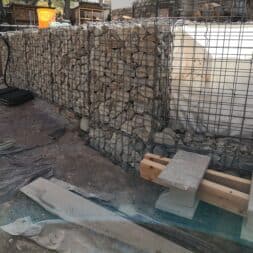
Towards the end, the difference in height to the existing gabion wall was ensured via a terraced structure of the subsoil. As this was not enough to safely support the entire slope behind the wall, I had to stack the stone baskets in a second row.
In this article I describe the construction of my 2 meter high and more than 30 meter long gabion wall which serves as slope protection. The focus of this article is on the effective, stable and safe installation of the 2nd row of baskets.
Effective slope stabilization with gabions – installation and safety aspects
Securing the slope in my garden with a gabion wall is an efficient and aesthetically pleasing solution for preventing erosion and stabilizing the terrain.
In my project, I built a gabion wall about 40 meters long and between 1 and 2 meters high to stabilize an earth slope.
The wall consists of two stacked rows of stone baskets, each measuring 100 x 100 x 50 centimeters and filled with 80 – 120 mm granite stones.
Instead of a concrete foundation, I opted for a base of crushed stone and gravel, which is adapted to the natural soil conditions.
Mounting the second row of baskets:
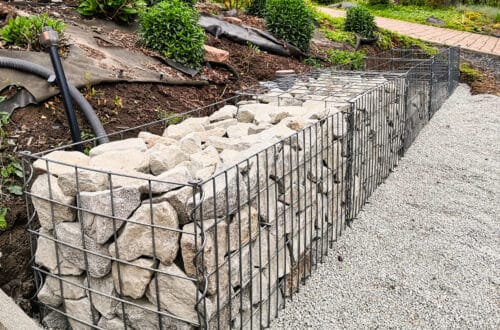
When building the second row of baskets for my gabion wall, it was crucial that the baskets were precisely aligned and securely connected to each other and to the bottom row.
This prevented displacements and potential instabilities. I made the connections using special gabion spirals and cable ties, which ensure a high level of stability.
Statics and installation angle:
The statics of a gabion wall are fundamental to its longevity and safety. The installation angle of the gabions played a decisive role, especially at a height of 2 meters.
I chose a slight angle of inclination towards the slope side to effectively absorb the pressure of the earth masses. Too steep an installation could have tipped forward under the weight of the soil.
Load effect and risks:
There was a considerable load on my gabion wall due to the weight of the stones and the soil behind them. In addition, water pressure during rain could increase the load.
Without adequate installation and insufficient anchoring, there was a risk of the wall slipping or tipping over.
Risk minimization:
To minimize the risks, it was important to anchor the gabion baskets deep enough in the ground and to ensure that the gravel was thoroughly compacted.
In addition, drainage behind the wall helped to reduce water pressure and maintain the structural integrity of the gabion wall.
Regular inspection and maintenance of the gabion wall is also recommended to prevent long-term damage.

- Gabionenkorb * Breite 1000 mm * Höhe 1000 mm * Tiefe 500 mm
- Frontgittergröße 1000 x 1000 mm * Maschenweite 50 x 100 mm * Drahtstärke 4,5 mm
- Maschenweite der restlichen Gitter 100 x 100 mm * Drahtstärke 4,5 mm
- Verbindungsart * Spiralverbindung
- Ausführung Galfan (95% Zink, 5% Alu)
The lower gabions are completely backfilled
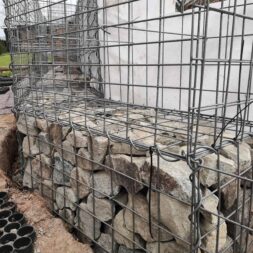
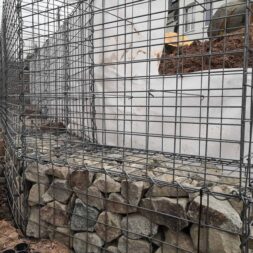
Over several weeks, I painstakingly filled the baskets with 80×125 granite stones. I stacked the bricks on the front in a visually appealing way, using my many years of Tetris experience to my advantage.
On good days, I could fill up to three baskets, i.e. stones with a volume of 1.5 m³ and a weight of 2.4 tons. However, I had to be careful not to overdo it, as the work was very hard on my back.
I also carefully sorted the granite stones in the middle and rear areas of the gabion wall to maximize the weight and thus the stability. Due to the cold and wet weather, the soil gradually slipped into the stone baskets, which is why I had to hurry up with the work.
As soon as the gabions were filled with the stones, I attached the fleece to the back. I then filled in the soil behind the stone baskets. The subsequent rain helped to compact the earth and further increase the stability of the structure.

- ✔ Hochwertiges Geotextilvlies/Drainage- u. Filtervlies 150g/m² - Profi Qualität - MADE IN GERMANY
- ✔ MATERIAL: Qualitätsvlies aus 100% Polyester, SPEZIELL FÜR DEN AUSSENBEREICH - äußerst strapazierfähig
- ✔ EIGENSCHAFTEN: sofort wasserdurchlässig, UV-Stabil, reißfest, verrottungsfest, beständig gegen Bitumen + Folien, atmungsaktiv, metallfrei (detektorgeprüft)
- ✔ EINSATZBEREICH: Drainage- und Filtervlies im GaLa-Bau: für Wege-, Pflaster- u. Terrassenbau, Dachbegrünung, Wärmespeicher für Beete und Gewächshäuser, Steingärten, Schutz unter Teichfolien, WINTERVLIES: Schutz vor Frost und niedrigen Temperaturen
- ✔ ANGEBOT: 300g (bohrbar), 300g, 500g, 1000g / 2m-Breite/ Groß-Mengen
The 2nd row of stone cages is installed
Once I had completed all the preparatory work, I was finally able to start assembling the second row of baskets.
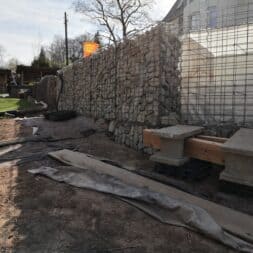
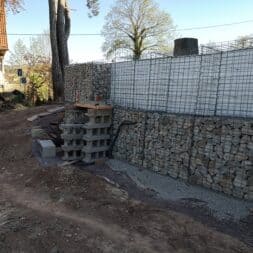
Starting at my existing gabion wall by the pool, I pulled through the height of the old wall for about six meters. This was followed by the construction of my terrace.
The difference in height between the upper and lower baskets was now exactly one meter.
My aim was to build the upper row of baskets directly on top of the lower row. Visually, this would result in a gabion wall consisting of one row of baskets on the west side and two rows of baskets on the south and east sides.
Video: Securing a slope with gabions – stacking baskets on top of each other
I recorded the installation of the 2nd row of stone baskets in my gabion wall for slope stabilization in an informative video and published it on my YouTube channel.
You can find the entire playlist of my videos here: Gabions for slope stabilization
If you want to see more of me and my projects, feel free to check out my YouTube channel.
Zuletzt aktualisiert am 16. February 2026 um 20:35 . Ich weise darauf hin, dass sich hier angezeigte Preise inzwischen geändert haben können. Alle Angaben ohne Gewähr. (*) Bei den verwendeten Produktlinks handelt es sich um Affiliate Links. Ich bin nicht der Verkäufer des Produktes. Als Amazon-Partner verdiene ich an qualifizierten Verkäufen. Dein Preis ändert sich jedoch nicht.
Gabion assembly – Connect all grids together at the same time
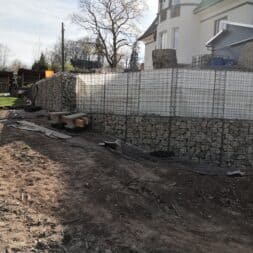
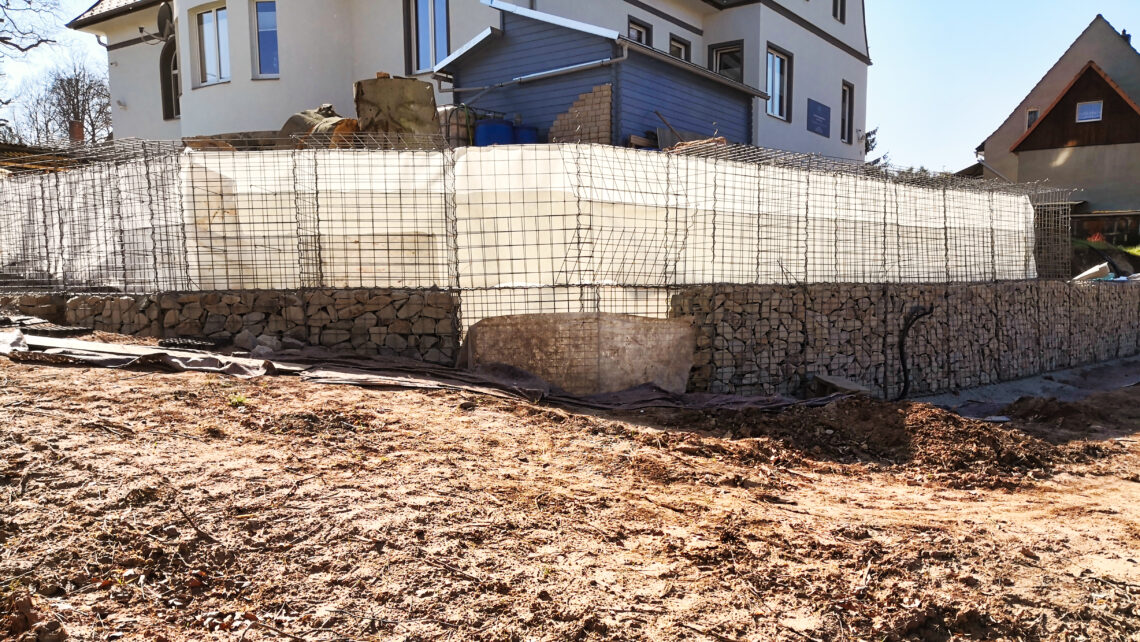
My goal now was to place a second row of baskets on top of the first to draw the raised level along my slope for about 15 meters. The second row of gabions was then to be angled into the slope and spatially separate the planned plateau above the gabion slope.
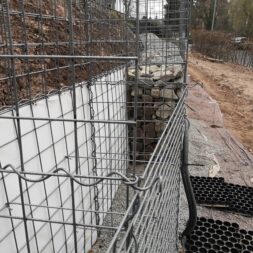
To do this, I connected the new front and rear grilles to the existing grilles and the middle partition grille at the same time with a spiral. Ideally, you need at least three arms and hands for this work – or a second helper.
As I was working alone at the time, I had to master the challenge without help – and I succeeded! I put the grids together and fixed them in place in advance with cable ties if necessary.
This procedure made it much easier to screw in the spirals. So I gradually fitted the side panels.
I used the lid of the first row as the base for the second row, i.e. a horizontal grid between the two baskets. Everything was connected with the spirals.
I had to secure the stone basket grids with the cable ties in advance, especially in the bend area. Sometimes there was already so much tension on the baskets that I needed additional help and had to press the grids together with pliers, for example, to twist in the spirals.
Extreme care had to be taken not to damage the protective coating of the galvanized grilles. To be on the safe side, I sprayed some zinc spray on the grilles and spirals pressed with the pliers to prevent possible rust.
After a few days, this task was also completed. I again attached the protective fleece to the back of the second row of baskets to prevent soil from washing through.
At this point, it was possible to see for the first time how the entire work fitted harmoniously into the landscape. Only the stone filling of the upper row of baskets was still missing.

- Schneidleistung bis 48 HRC Härte
- Robuste Schneiden zusätzlich induktiv gehärtet, Schneidenhärte ca. 62 HRC
- Angeschmiedeter Anschlag mit komfortablem Dämpfer
- Gute Zugänglichkeit durch sehr flachen Kopf- und Gelenkbereich
- Schenkel ergonomisch abgewinkelt für ermüdungsarmes Arbeiten
Summary and conclusion
In my project, I erected a gabion wall around 40 meters long and between 1 and 2 meters high to stabilize an earth slope.
The wall consisted of two rows of stone baskets stacked on top of each other, each of which I filled with 80 – 120 mm granite stones.
Instead of a concrete foundation, I chose a base of crushed stone and gravel, which corresponded to the natural soil conditions.
When assembling the second row of cages, it was crucial to align the cages precisely and connect them securely to each other and to the bottom row in order to avoid displacement and potential instability.
After completing all the preparations, I began assembling the second row of baskets, extending the raised level along my slope to about 15 meters.
I connected the grids together and made sure that the stone basket grids were also securely fastened in the curved areas. Screwing in the spirals was made easier by fastening them with cable ties beforehand.
The statics of the gabion wall, in particular the installation angle, played an important role in the durability and safety of the construction.
The load from the weight of the stones and the soil behind them, reinforced by occasional water pressure when it rains, required adequate installation and good anchoring to minimize the risk of the wall slipping or tipping over.
Regular inspections and maintenance also contributed to long-term stability.

- SCHUTZ – WEICON Zink-Spray spezial hell verleiht allen Metalloberflächen einen dauerhaften kathodischen Korrosionsschutz.
- STARK – Das Rostschutz Spray ist hitzebeständig von -50 °C bis +300 °C. Im Salzsprühtest gem. DIN EN ISO 9227 zeigten Metallteile nach mehr als 550 Std. keinerlei Korrosion.
- INNEN UND AUSSEN – Die wetterfeste Rostschutzfarbe eignet sich als Grundierung, Versiegelung & Beschichtung für Schweiß- und Bohrstellen. Sie schützt Zäune, Rohre, Tanks, Maschinenteile, Tore u. v. m.
- ABRIEBFEST – Der Metallschutz ist robust gegen mechanische Beanspruchung, perfekt für den dauerhaften Schutz & die Instandhaltung.
- ANWENDUNG – Oberfläche reinigen. Dose schütteln, Zinkspray gleichmäßig im Kreuzgang im Abstand von ca. 25 cm aufsprühen.
Dieser Beitrag ist auch verfügbar auf:
English
Deutsch


