Set up Reolink camera optimally
The Reolink surveillance cameras offer many functions. But what settings do I need to make step by step to get the most out of my security camera? And what is the difference between the settings on the network video recorder (NVR) and the camera?
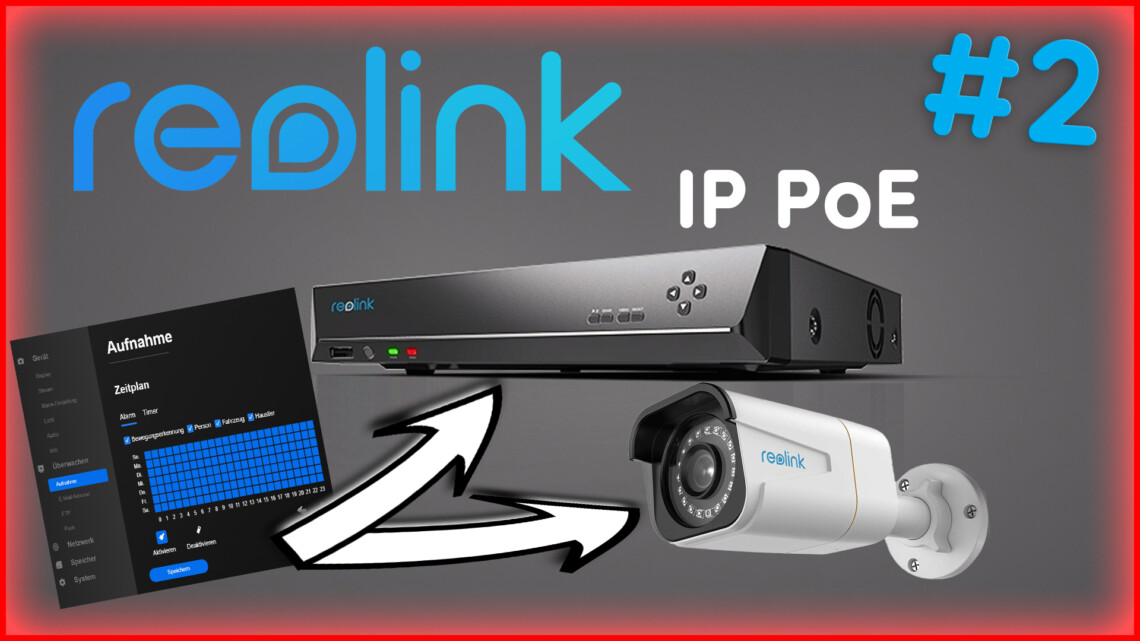
I would like to describe the setup and configuration of my Reolink PoE IP camera in more detail in the following article. You can also watch the entire installation process at in my YouTube video. The video forms the basis for this blog entry.
Video: Reolink camera setup – NVR | App | Client
In my video I show you how I configured my Reolink surveillance cameras and what I paid particular attention to.
For example, I will show you the differences between the alarm recording functions on the NVR and the cameras.
Here you can find my playlist with more videos about the installation and setup of Reolink camera and NVR.
If you want to see more of me and my projects, feel free to check out my YouTube channel.

- 12MP HOHE AUFLÖSUNG MIT 93° BLICKWINKEL: Diese PoE IP Kamera rühmt sich einer beispiellosen 12MP Klarheit und erfasst revolutionär schärfere Details als alle 4K-Überwachungskameras. Die schärferen Bilder und der größere Betrachtungswinkel machen die RLC-1212A zu einer bahnbrechenden Überwachungskamera für Ihr Zuhause
- PERSONEN-/FAHRZEUGERKENNUNG MIT SMARTEN ALARMEN: Diese 12MP-Überwachungskamera identifiziert Personen und Fahrzeuge mit Hilfe eines innovativen Erkennungsalgorithmus, der unnötige Alarme vermeidet. Präzise Push-Benachrichtigungen mit spezifischen Typen halten Sie jederzeit über das Wesentliche auf dem Laufenden.
- PLUG UND PLAY: Die Power over Ethernet-Technologie ermöglicht die Übertragung von Videos und die Stromversorgung der Kamera über ein einziges Netzwerkkabel, so dass sie in kürzester Zeit installiert werden kann. Die kostenlose Reolink App/Client mit einfach zu bedienender Funktion sorgt für eine unkomplizierte Einrichtung der Kamera
- ZWEI-WEGE-AUDIO & EINGEBAUTER LAUTSPRECHER: Sie können Ihre Familie oder Freunde jederzeit und überall durch einfaches Antippen hören und mit ihnen sprechen. Mit der Technik des eingebauten Lautsprechers können Sie auch den Sirenenalarm anpassen, um jegliche Bedrohungen abzuschrecken.
- MEHRERE AUFZEICHNUNGSOPTIONEN: Diese Überwachungskamera unterstützt die Aufzeichnung 24/7 kontinuierlich oder während der geplanten Zeit, oder die Zeit, die Bewegung erkannt wird. Die Videos können auf einer microSD Karte(bis zu 512GB, nicht im Lieferumfang enthalten), einem Reolink NVR oder einem FTP-Server ohne Abonnement gespeichert werden.
NVR and IP camera installation
Before I can make the settings on the camera, it must of course first be installed. The network video recorder, the NVR, must also be set up first.
In my entry Install Reolink RLN36 NVR | Install hard disk and set up camera, I have already described how I installed the Reolink RLN36 NVR. I have installed a new hard disk and inserted the cameras.
In another post, you could read how I replaced my old Hikvision cameras on the front of the house with new Reolink IP cameras and how I set up my PoE network.
You can find the matching videos here:

- 4K ULTRA HD: Dieses PoE Überwachungssystem bietet fast die vierfache Schärfe von 1080p und eine unglaubliche Schärfe mit 20 Bildern pro Sekunde für 4K-Auflösung, die bei Tag und Nacht ein Höchstmaß an Details in Ihrem Überwachungsbereich gewährleistet.
- PERSONEN-/FAHRZEUGERKENNUNG: Das System verfügt jetzt über eine Personen-/Fahrzeugerkennungsfunktion, die Fehlalarme durch wehende Äste und fliegende Käfer reduziert, so dass Sie nur bei echten Bedrohungen alarmiert werden.
- UNBEDINGTE 24/7 AUFZEICHNUNGEN: Ihr Eigentum ist jetzt rund um die Uhr geschützt, ohne dass Sie wichtige Momente verpassen, da der NVR mit einer 2TB Festplatte vorinstalliert ist. Der Zugriff und die Wiedergabe können auch aus der Ferne mit der Reolink-Software erfolgen.
- PLUG & PLAY EINRICHTUNG: Die PoE Technologie macht es einfach, ein Kamerasystem zu installieren. Schließen Sie einfach alle Kameras über ein Ethernet-Kabel an Ihren PoE NVR an, und Ihr System fügt sie automatisch hinzu, bereit für Ihre Befehle.
- KOMPATIBEL NUR MIT REOLINK IP KAMERAS: Dieses 4K PoE CCTV Kamera Kit kann mit jeder Reolink PoE/WIFI-Kamera(Batterie-freien) ohne Kompatibilitätsprobleme auf ein 16-Kamera-Kit erweitert werden wie Reolink 8MP/5MP/4MP PoE IP Kameras RLC510A, 811A, E-Serie usw.
Surveillance camera with PoE – What does that mean?
When I was planning my home surveillance system, I decided to use Power over Ethernet (PoE) to install the surveillance cameras.
PoE is a technology that makes it possible to transmit power and data via a single, standard Ethernet cable (CAT5e or higher). This greatly simplifies the installation and maintenance of network devices, as only one cable is required for both functions.
The biggest advantage of PoE in my private network was the flexibility in the placement of the cameras.
Since no separate power source is required near the camera, I was able to install cameras in optimal locations without having to worry about the availability of power outlets.
This made installation easier and gave me the freedom to place cameras exactly where I needed them for the security of my home.
Another advantage was the reliability. Thanks to the central power supply via the PoE-capable switch, I was able to secure the system easily with an uninterruptible power supply (UPS).
This ensured that my surveillance cameras continued to work even in the event of a power failure.
However, there were also disadvantages to consider. The acquisition costs for PoE-capable network devices, such as switches and cameras, were higher than for conventional devices.
I also had to make sure that my network could cope with the additional load caused by the power consumption of the cameras. This required careful planning in order to avoid overloading the network.
Despite the initially higher costs and the need for careful network planning, the advantages of PoE clearly outweighed the disadvantages for me.
The ease of installation, increased flexibility in camera placement and improved reliability through centralized power supply made PoE an ideal solution for my home surveillance system.

- Optimale Verbindung: Erweitern Sie Ihr Netzwerk mit einem Linksys Gigabit-Switch, um mehr Geräte zu verbinden. Nutzen Sie eine schnellere, stabile Verbindung mit Datenraten von bis zu 1000 Mbit/s
- Highspeed-Datentransfer: Reduzieren Sie Störungen sowie die Datentransferzeit und streamen Sie Dateien mit hoher Bandbreite. Führen Sie Server-Backups im Netz über eine zuverlässige Verbindung aus
- Smart Netzwerk-Switch: Die Ports mit Auto-Sensing-Funktion optimieren die Datenrate der verbundenen Geräte. Durch Bandbreitenerweiterung ist das Netzwerk weniger überlastet und effizienter
- Energieeffizient: Die Abschaltfunktion deaktiviert nicht genutzte Ports automatisch. PoE+ erfordert nur ein Kabel zur Übertragung von Daten und Strom
- Plug-and-Play: Der Unmanaged Switch erweitert Ihr Netzwerk sofort. Eine Konfiguration ist nicht erforderlich. Er lässt sich auf dem Schreibtisch oder an der Wand platzieren
Reolink Client on Windows PC
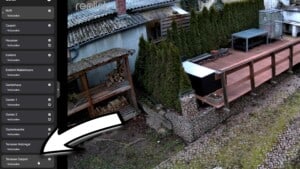
The camera can be set up directly via the menu on the NVR. The settings can also be configured via the app (Android or iOS). In my opinion, however, the setup on the computer is much more effective.
The app and the user manual can be downloaded free of charge. There are also illustrated instructions in English for installing the NVR and setting it up on the monitor, via app or client.
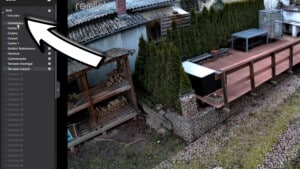
As I save the alarm recordings on the NVR’s hard disk and also on the respective SD cards, my cameras are displayed twice on the client: once as a single camera and once under the management of the NVR.
Although I make my settings directly in the camera menu, the settings on the NVR are also adjusted automatically. I will explain the differences between the camera menu and the NVR menu later.
Device setting
Display
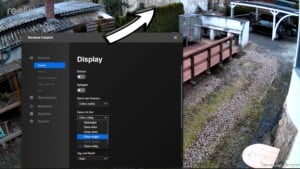
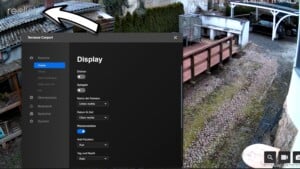
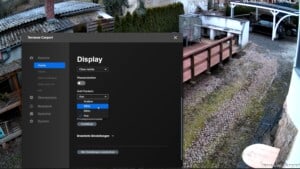
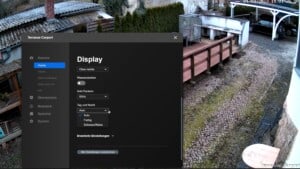
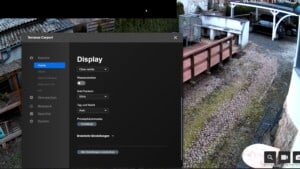
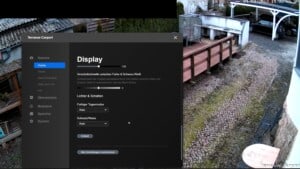
In the “Display” menu, I can rotate the picture and turn it upside down. I can mirror the image, i.e. swap the left and right sides.
The name of the camera is already displayed at the bottom right and the date is displayed at the top center. I change the date to “Top right”. I deactivate the Reolink watermark at the top left because I don’t need it.
The settings for“Anti-flicker” must be set to 50Hz in Europe. This is the frequency of our electricity grid.
This setting synchronizes the video image with the frequency of the power grid. This prevents flickering and flickering when filming lamps and other electrical light sources.
Switching between day and night works very well in automatic mode. From a certain level of darkness, the camera automatically switches on the infrared LEDs and switches to the black and white view. The details can be refined in another menu.
However, I could also use this parameter to force the permanent color view or the permanent black and white view.

- Material: Alulegierung. Eigenschaften: Wasserfest, praktisch und langlebig.
- Die wetterfeste Anschlussdose schutzt das Ethernet-Kabel und den RJ45-Anschluss der Reolink bullet PoE/WLAN-Kameras vor Wasser und Vandalismus und macht die Verkabelung sauber und einfach.
- Entwickelt für Reolink PoE-Kameras: RLC-510A, RLC-810A, RLC-811A, RLC-812A, RLC-1212A, RLC-81MA, CX410, CX810, Duo 2 PoE, Duo 3 PoE.
- Entwickelt für Reolink WLAN-Kameras: RLC-410W, RLC-510WA, RLC-511WA, RLC-810WA, RLC-811WA, CX410W, Duo 2 WiFi.
- Entwickelt für Reolink Überwachungskamera Set: RLK8-410B4-4MP, RLK8-410B4-5MP, RLK8-800B4, RLK8-800B6, RLK8-811B4, RLK8-1200B4-A, RLK16-800B8, RLK16-1200B8-A, RLK12-800WB4, RLK12-500WB4.
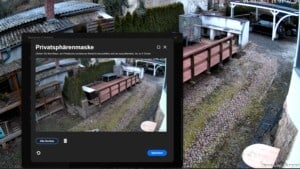
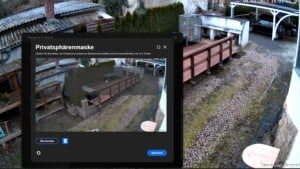
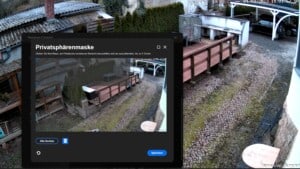
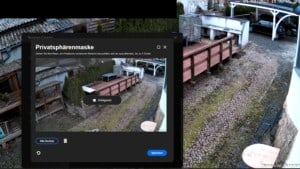
The privacy mask function can (and should) be used to hide the areas that may not be filmed. As I am only allowed to film my own property in Germany, all other areas have to be blacked out.
To mask, I draw a square with the mouse. I can move the rectangle freely and adjust its size so that all external areas are covered.
When the setting is saved, the protected areas are automatically blacked out and no longer recorded.
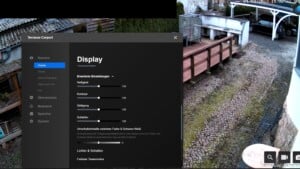
The brightness, contrast, saturation and sharpness can be individually adjusted under “Advanced settings“. These settings can be adjusted to optimize the image quality.
In my opinion, the automatic mode works very well and only in extremely dark or very bright areas should an adjustment be made.
The switching values for the colored day mode, the black and white mode and the colored night mode can be adjusted in the Lights & Shadows menu. During the day, the video image should be recorded and played back in color. At night, the camera should film in black and white with infrared lighting.
In my opinion, the automatic settings work very well here too. I haven’t had any problems with that yet.

- Erkennung von Menschen/Auto mit intelligenten Warnungen: Diese PoE IP-Kamera kann Personen und Fahrzeuge anhand ihrer Form identifizieren, wodurch unnötige Alarme wie Tiere oder Schatten minimiert werden. Es kann auch die Art der Erkennung angeben, wenn Bewegungsalarme an Sie gesendet werden. Und Sie können wissen, was passiert ist, indem Sie einfach auf den Bildschirm des Telefons blicken
- 4K Ultra HD mit 5X optischem Zoom: Diese PoE IP-Kamera hat eine hohe Auflösung von 3840x2160. Sie ist 1,6X schärfer als 5MP und 4X klarer als 1080P. Mit dem 5-fachen optischen Zoom können Sie hineinzoomen, um ein detaillierteres Bild zu erhalten, und herauszoomen, um eine breitere Ansicht zu erhalten. Die detaillierten Informationen, die Sie rund um Ihr Haus oder Geschäft sehe, werden mit Live-Streaming und Wiedergabe perfekt dargestellt
- Schnellere und vereinfachte PoE-Installation: Dank der PoE-Technologie (Power over Ethernet) kann diese Bullet Außenkamera über nur ein Netzwerkkabel Videos übertragen und sich mit Strom versorgen. Sie können diese Kamera schnell und einfach für eine zuverlässige Verbindung installieren. Kein Netzadapter im Lieferumfang enthalten
- Vollfarbige Nachtsicht mit Spotlights: Diese 4K-Außenkamera ermöglicht Ihnen klare Bilder mit brillanten Farben bei Live-Video-Streaming und Wiedergabe. Wenn kein Tageslicht mehr vorhanden ist, zeichnet die 811A PoE-Kamera mit integrierten Spotlights weiterhin in voller Farbe auf. Dies bringt mehr visuelle Details, die bei der Erkennung von Personen und Fahrzeugen helfen, als Schwarz-Weiß-Videos
- Zeitraffervideos und mehrere Aufnahmeoptionen: Mit Zeitraffervideos können Sie Ihren 3D-Druck weiter verfolgen, den gesamten Bauprozess in wenigen Minuten sehen oder schöne Ansichten vom Sonnenaufgang bis zum Sonnenuntergang aufnehmen. Die Videos können auf einer microSD Karte (bis zu 512 GB, nicht im Lieferumfang enthalten), einem Reolink NVR oder einem FTP-Server
Stream
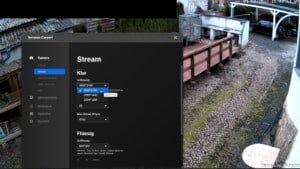
The “Stream” setting is used to set the resolution and data rate of the video image. The higher the resolution and data rate selected, the more bandwidth and storage space is required.
This should not only be taken into account when determining the size of the hard disk, but also when setting up the network. After all, the network must be able to process the data. An old Ethernet network with 100Mbit/s quickly reaches its limits.
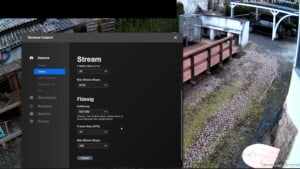
Reolink therefore already offers 2 streams with different bandwidth utilization by default.
There is a clear stream with high resolution which is ideal for use on a computer or NVR monitor within the LAN network.
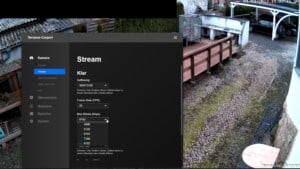
My Reolink IP camera can process a maximum of 8 megapixels with a maximum bit rate of 8,192 Kbps and 25 frames per second. The video is therefore virtually smooth. I select this setting for the best possible quality for the clear stream.
However, if the video images are accessed via the smartphone in the mobile data, this amount of data would quickly exhaust my available data volume. Of course, there would also be restrictions when using a slow network.
This is exactly what the liquid stream is for. This has a significantly lower resolution/bit rate and therefore requires much less data volume.
The frame rate (FPS ) also indicates how many individual images the video should consist of per second. The human eye perceives a smooth movie from approx. 25 images/second (frames per second).
Motion detection
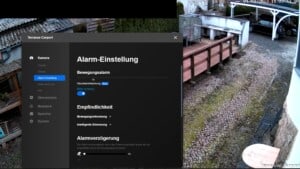
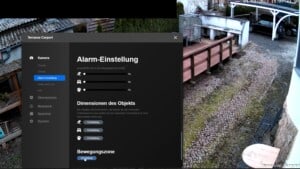
The parameters for triggering the alarm are set in the Alarm settings or Motion detection menu.
Depending on the firmware version, the menu may look different. However, the sensitivity, alarm delay, object size and non-detection zone can always be edited. Motion detection is also supplemented by intelligent motion detection.
When I made my video, the pet recognition feature was still in the beta phase. Pet recognition is already an integral part of firmware v8.14.2. Instead, the movement marker has now been added as a new beta function. Reolink is therefore constantly developing the software further.
With pet detection, the recordings can later be reliably filtered for alarm recordings in which animals were detected. I now also know that I have a badger as well as foxes, martens, cats and raccoons.
Motion detection and the associated alarm triggering can be limited over a period of time. I prefer 24/7 monitoring.
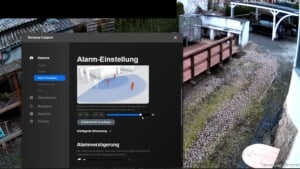
The sensitivity controls the point at which the camera should react to movement. If I set the slider to the maximum of 50, every slightest movement is detected, an alarm is triggered and, depending on the setting, the video is saved.
The disadvantage of this solution, however, is that a small insect flying in front of the camera or rain and snowflakes, for example, will also trigger the alarm. The number of false alarms therefore increases with increasing sensitivity.
If I set the threshold value too low, it can happen that the alarm is no longer triggered. This only happens when a very large object moves through the image. I have had good experiences with the setting of 40 for areas that are not very busy.
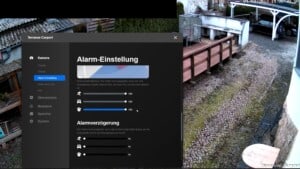
Intelligent detection goes one step further and differentiates between the sensitivity for detecting people, vehicles and animals. As only clearly assigned triggers trigger an alarm with this setting, I have set this setting to the maximum of 100.


The alarm delay del ays the alarm if an object is detected and should not be recorded immediately. I can’t say what this function is actually there for. I always start video recording as soon as movement is detected.
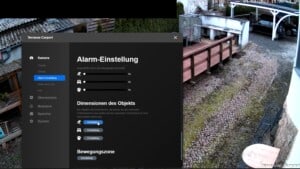
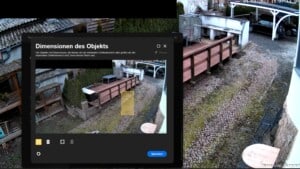
With the “Dimension of object” function, I can also make size comparisons. For example, I can define the minimum height that a person must be to trigger an alarm. If the object is smaller than this square, it is not a person.
This setting makes sense, for example, if the camera is used to record different distances and only people in the front area (of a certain height) should trigger the alarm.
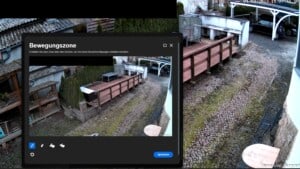
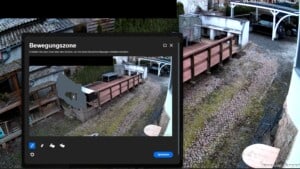
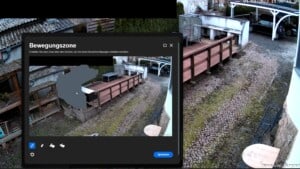
The movement zone is the next item in the device settings. I use this parameter to define where a movement that triggers an alarm may occur. In other words: I exclude zones from motion detection.
In contrast to the privacy mask, however, these zones are not blacked out and can therefore be seen in the live image as well as in the recordings. This applies, for example, to wind turbines or flags whose movements could trigger false alarms.


Audio and light
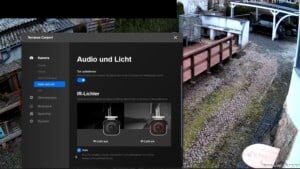
The audio and light settings are explained relatively quickly. The camera has a loudspeaker and a microphone. The microphone can be activated or deactivated.
The change in the evening and in the morning between the color view and the black and white view with the infrared lighting should take place automatically. However, the switching value can also be adjusted manually if required.
Monitoring
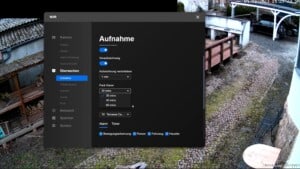
Recording
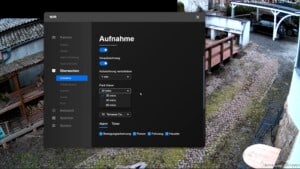
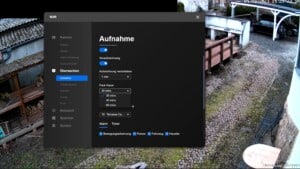
The parameters for video recording are set under Recording. These recordings can then be viewed later in playback mode.
The first difference between the settings for SD card storage and data storage on the NVR can be seen here.
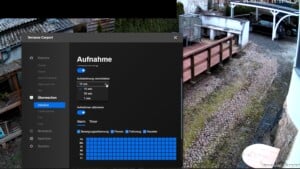
The “Overwrite” menu item activates the overwriting of older recordings. The oldest recording is always overwritten. The alternative would be to deactivate the function. However, if the hard disk is full, recording would no longer take place.
Depending on the size of the hard disk in the NVR or the memory card in the camera, overwriting limits the maximum available period of alarm recordings to one week, two months or half a year, for example.
The camera or NVR permanently records the live image and analyzes it for movement patterns. The corresponding recording is only saved permanently when an alarm is triggered.
With pre-recording, it is possible to permanently save not only the images from the time of motion detection, but also the 10 seconds before the alarm. This setting can only be activated or deactivated. Unfortunately, it is not possible to set the time.
The pre-recordings are really very exciting and quite relevant for me, which is why I have activated this function.
Postponing the recording determines the additional recording time after the last alarm triggering. In my opinion, the minimum should be 30 seconds. As long as there is a permanent alarm triggering in the image, this value always takes effect from the last detected movement.
A crowd of people moving in the picture for 2 hours would therefore be recorded for 2 hours and 30 seconds.
The duration of the shift can be set to significantly higher values for the NVR than for the camera. The NVR therefore stores a longer period of time before the alarm is actually triggered.
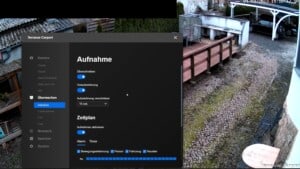
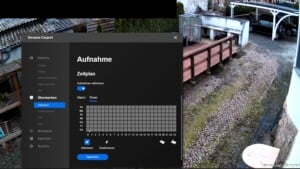
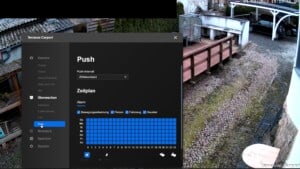
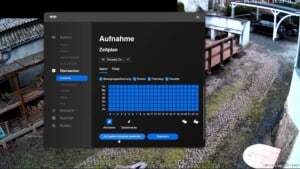
The schedule defines when the camera should record. Recording can be carried out via the timer, the alarm trigger or both functions simultaneously. The difference is then visible in the playback of the recordings.
Recording using the schedule/timer always takes place at the activated times. It does not matter whether an alarm has been triggered or not.
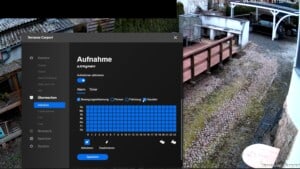
Recording by means of motion detection only takes place when the alarm is triggered. However, an additional time window when the alarm triggers cause a recording can also be defined.
In both cases, the schedule is activated or deactivated using the day-hour matrix. The lessons are selected or deselected in the corresponding days.
With motion detection, I can also differentiate whether the recording should be marked separately for person detection, vehicle detection or pet detection.
I find it useful to control the recordings with the alarm triggering 24 hours a day, 7 days a week, and to activate all additional markers for motion detection.
Zuletzt aktualisiert am 26. September 2025 um 17:03 . Ich weise darauf hin, dass sich hier angezeigte Preise inzwischen geändert haben können. Alle Angaben ohne Gewähr. (*) Bei den verwendeten Produktlinks handelt es sich um Affiliate Links. Ich bin nicht der Verkäufer des Produktes. Als Amazon-Partner verdiene ich an qualifizierten Verkäufen. Dein Preis ändert sich jedoch nicht.
The e-mail address can be used to receive an additional alarm message. To do this, access to a mail server must be created on the NVR or the camera via which the mail is to be sent.
I use the function in the NVR for this, as it can then be used centrally for all cameras.
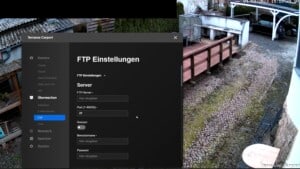
Further storage locations for video recordings are defined in the FTP settings. As an alternative to the NVR or the SD card, an external hard disk, a computer, a NAS or a cloud service can also be stored here, for example.
The push notification is the last point. If the function is activated, I automatically receive a push notification on my phone as soon as movement is detected. However, this function can also be controlled using the phone’s app.
Network
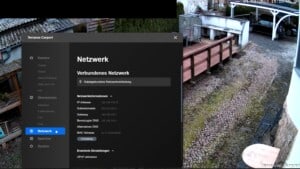
The network and the IP of the camera are displayed in the Network menu. It is then possible to access the camera’s web interface directly via the IP.
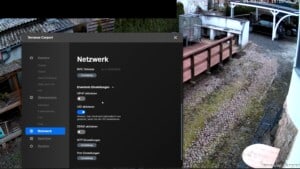
There may well be a need for settings in the advanced settings. If the camera is to be accessed from outside via the Internet, the corresponding ports on the router or firewall must be enabled.
The camera or NVR with the active UPnP function can do this automatically. Alternatively, the ports must be set up manually.
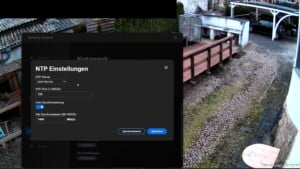
The default NTP settings can be taken from the default settings. This setting automatically synchronizes the time with the Internet. In the example, automatic synchronization takes place every 1,440 minutes.
Memory
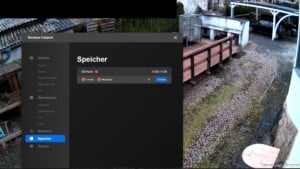
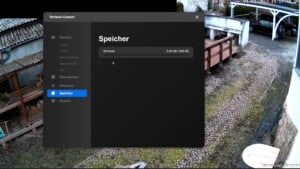
The SD card of the camera or the hard disk of the NVR can be seen in the “Memory” menu. If the NVR has several hard disks, these are displayed one below the other. In addition, the already used and the maximum usable storage space is displayed.
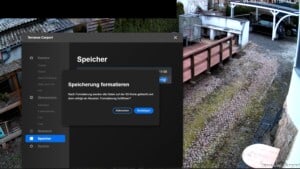
When using the device for the first time, you will often see an error message because the storage media have not yet been formatted. Formatting can be carried out conveniently via the camera or NVR menu.
To do this, click on the corresponding storage medium and a context menu will open. Formatting can be started in this menu. After formatting, the camera or NVR restarts and the storage medium is displayed correctly.
ATTENTION: All data already saved on the storage medium will be lost!

- Speziell entwickelt für Überwachungssicherheitssysteme
- Konzipiert für schreibintensive Anwendungen mit geringer Bitrate und hoher Streamzahl, was typisch für die meisten Überwachungsanwendungen ist
- Laufwerke mit 8 TB und höher haben zusätzliche Verbesserungen und höhere Arbeitslastraten für KI-fähigie NVRs
- Unterstützt Arbeitslastraten von bis zu 180 TB/Jahr (Arbeitslastraten von bis zu 360 TB/Jahr bei Laufwerken mit 8 TB, 10 TB, 12 TB, 14 TB, 16 TB und 18 TB)
- Unterstützung für mehr als acht Steckplätze
System
User management
The users who have direct access to the camera are managed under User Management. New users can be created, deleted and blocked. It is also possible to change passwords.
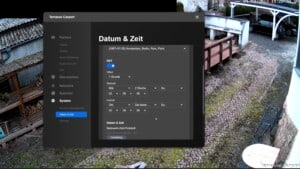
Date & time
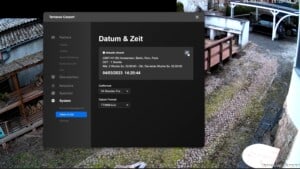
In the Date and time menu item, it is possible to switch the time format from 24h to 12h. The format of the date can also be changed in this setting.
By clicking on the submenu next to the current time, you can make further settings options for selecting the time zone, programming the changeover between summer and standard time and activating the automatic synchronization of the time.
I have the time synchronized automatically via the Internet. This setting means that the DST setting(change between summer time and standard time) doesn’t make too much sense, but it doesn’t do any harm either.
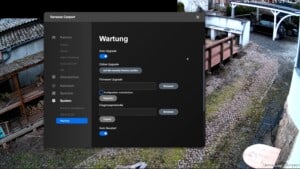
Maintenance
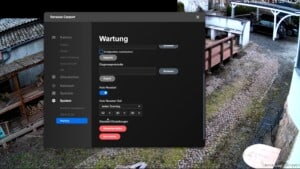
The settings in the Maintenance menu deal with the maintenance of the camera.
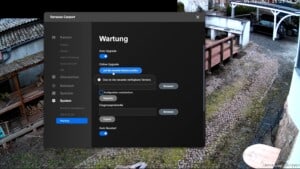
The Auto Upgrade is stored automatically. The camera regularly checks for new firmware versions and installs them automatically. The camera software is therefore always up to date.
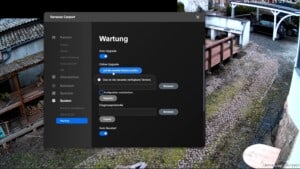
The firmware check can also be started manually. If there is an update that does not install automatically, it can be installed manually.
Unfortunately, in my experience, neither the automatic update nor the manual update via the user interface works reliably. I therefore recommend checking the Reolink Download Center regularly for the latest firmware.
The automatic reboot ensures that the camera is automatically restarted at a specific time. This makes sense, for example, if the camera no longer responds correctly after a long period of use.
The camera is reset with the reboot. However, the settings are not lost in the process. A restart takes approximately 20 to 30 seconds, during which time no alarm recordings are made.
The default setting is: Sunday at 02:00. Since this setting is identical for every Reolink camera, I recommend adjusting it to a different (non-critical) time.
The “Restore” function resets the camera to the factory settings. All data will be deleted!
“Restart” forces a camera restart. No data is lost in the process.

- Die SanDisk Extreme PRO microSDXC ist ideal geeignet für alle Android Smartphones und Tablets, sowie Drohnen oder Actioncams
- Für eine bessere App- Performance und schnelleres Laden sorgt die microSD Karte durch den vorhandenen A2 Leistungsstandard
- Mit einer Lesegeschwindigkeit von 200 MB/s und einer Schreibgeschwindigkeit von 140 MB/s übertragen Sie Ihre Daten extrem schnell dank SanDisk QuickFlow-Technologie
- Machen Sie verlustfreie 4K UHD Videoaufzeichnungen dank UHS Speed Klasse 3 (U3) und Video Speed Klasse 30 (V30) mit der microSD Karte für Smartphones
- Lieferumfang: SanDisk Extreme PRO microSDXC UHS-I Speicherkarte 512 GB + Adapter & RescuePRO Deluxe (Für Smartphones, Actionkameras oder Drohnen, A2, V30, U3, 200 MB/s Übertragung) 30 Jahre Garantie
Differences between NVR and SD card
The settings made in the camera settings are also applied in the NVR:
- In the “Monitor” menu, the recording duration can be up to 10 minutes in the “Postpone recording” setting
- The size of the video files on the NVR is up to 60 minutes before a second file is written
- The timer and alarm settings can be applied to all cameras on the NVR with one click
I hope I was able to give you an understanding of how to set up the Reolink cameras with my blog post and video.
If you have any questions and would like to talk to me, just write a reply or use the comment column under my YouTube video. I’ll answer you as soon as I can.
Summary and conclusion
I decided to install Reolink PoE security cameras for my home to achieve a higher level of security.
This decision was based on the ability of PoE (Power over Ethernet) to deliver power and data over a single cable, which simplified the installation and gave me more flexibility in the placement of the cameras.
The installation process began with setting up the network video recorder (NVR) and physically mounting the cameras. I replaced old cameras with new Reolink IP cameras and set up my PoE network to ensure efficient power and data transmission.
A key advantage of this system was the ease of installation, as no separate power source was required for the cameras. I was able to place them wherever was best for monitoring my property.
In addition, the central power supply offered increased reliability thanks to the PoE-capable switch and the option of backing up the system with a UPS (uninterruptible power supply).
This ensured that my surveillance cameras continued to work even in the event of a power failure.
The cameras were configured via the NVR as well as via the Reolink app and the client on my Windows PC.
I found the setting options more effective, especially on the PC. I was able to rotate and flip the camera images and adjust settings such as anti-flicker and day/night switching.
I set sensitivities for motion detection and defined recording schedules to trigger alarms and start recordings only for certain movements.
One disadvantage, however, was the higher purchase costs for PoE-capable devices and the need to prepare my network for the additional power consumption of the cameras.
Nevertheless, the advantages clearly outweighed the disadvantages for me, mainly because of the installation flexibility and the improved monitoring efficiency.
Overall, choosing Reolink PoE security cameras and network has allowed me to monitor my home more securely and intelligently, with the convenience of centralized control and maintenance.

- Packunggewicht: 4.66 kg
- Packung die Größe: 14.4 L x 32.79 H x 28.6 W (cm)
- Eaton Ellipse ECO 800 USB FR Unterbrechungsfreie Stromversorgung (UPS) 800 VA 500 W Vier AC-Ausgänge - Unterbrechungsfreie Stromversorgungen (USP) (800 VA, 500 W, 161 V, 284 V, 50/60 Hz, 220 V)
- Nur zur externen Verwendung
- Sorgfältig handeln
FAQ about Reolink PoE surveillance cameras
1 What is PoE (Power over Ethernet)?
PoE enables the transmission of power and data via the same Ethernet cable (CAT5e or higher). This simplifies installation as no separate power supply is required for the cameras.
2 What are the advantages of Reolink PoE cameras?
- Simple installation: Power and data are transmitted via a single cable, which makes the positioning of the cameras flexible.
- Central power supply: Cameras can be protected by a UPS (uninterruptible power supply) to remain operational even in the event of a power failure.
- Greater reliability: Thanks to a central power supply, PoE cameras are less susceptible to failures.
3. how are Reolink cameras set up?
Setup is done via the NVR, the Reolink app or the Reolink client on the PC. The PC option offers more comprehensive setting options, e.g. for picture rotation, day/night switching and adjusting the picture quality.
4. what does anti-flickering mean and how is it set?
Anti-flicker synchronizes the frame rate with the frequency of the power supply (50Hz in Europe) to avoid flickering in artificial light. The setting is particularly important for indoor monitoring.
5 How does the day/night switchover work?
The camera automatically switches to black and white mode and switches on the infrared LEDs if the lighting conditions are insufficient. This function can be adjusted manually to always force color images or black and white images.
6. how are areas that should not be monitored excluded?
With the “Privacy mask” function, certain areas in the image can be blacked out to protect privacy. This is particularly important, as in Germany only your own property may be filmed.
7 Which settings are important for motion detection?
- Sensitivity: Determines when the camera reacts to movement. A higher sensitivity can trigger false alarms.
- Intelligent detection: Distinguishes between people, vehicles and animals to trigger targeted alarms.
- Non-detection zone: Defines areas that are to be excluded from motion detection.
8. how are video recordings stored?
The recordings can be saved on the NVR, the camera’s SD card or an external storage device (e.g. NAS, cloud). By activating the “Overwrite” function, older recordings are automatically deleted when memory space is running low.
9 What is pre-recording and what is it used for?
Pre-recordings save the 10 seconds before motion detection. This function is useful for recording the start of an event.
10. how can access to the cameras be set up from outside?
To access the cameras via the Internet, the corresponding ports on the router must be enabled. This can be done either automatically via UPnP or manually.
11 What is the difference between clear and liquid streams?
- Clear stream: High resolution and bit rate, ideal for local viewing on computer or NVR monitor.
- Smooth stream: Lower resolution and bit rate to conserve bandwidth and data volume, e.g. for access via mobile data.
12 What is the function of the automatic restart?
The camera can be restarted automatically at a specific time to rectify possible software problems. This helps to keep the camera ready for use.

- ALLES-IN-EINEM-VERWALTUNGS- & SPEICHERZENTRALE: Der Reolink Home Hub dient als vielseitige Sicherheitslösung für zentrale Verwaltung, Speicherung und Alarmierung. Er ist hochkompatibel mit all derzeit erhältlichen Reolink-Geräten, einschließlich Akku-WLAN-Kameras, kabelgebundenen WLAN-Kameras, PoE-Kameras und Video-Türklingeln (außer Reolink 4G-Kameras). Sie können bis zu 8 Kameras hinzufügen, um Ihre eigene Sicherheitszentrale aufzubauen.
- OFFLINE-AUFZEICHNUNG & LOKALE SPEICHERUNG: Ihre Aufzeichnungen werden sicher im Hub gespeichert, auch wenn Ihr Kameranetzwerk unterbrochen ist. Der Hub wird mit einer 64GB-SD-Karte geliefert, und mit seinen zwei SD-Kartensteckplätzen unterstützt er erweiterbare Speicherung von bis zu 2*512 GB (1 TB). Machen Sie sich nie wieder Sorgen, dass Ihnen der Speicherplatz für Ihre wichtigen Aufnahmen ausgeht.
- WI-FI 6 FÜR HOCHAUFLÖSENDE LIVE-ANSICHT UND WIEDERGABE: Genießen Sie die reibungslose Live-Ansicht und Wiedergabe in bis zu 4K-Auflösung mit Wi-Fi 6-Technologie. 2,4/5-GHz-Dualband-Wi-Fi und Wi-Fi 6 sorgen für schnellere Ladegeschwindigkeiten, minimale Latenzzeiten und verbesserte Sicherheit und bieten Ihnen das ultimative Fernseherlebnis.
- SICHERHEITSÜBERSICHTEN & ALARMZENTRALE: Durch das Sammeln von Erkennungsaufzeichnungen aller Kameras können Sie mit täglichen, wöchentlichen und monatlichen Übersichten leicht feststellen, was passiert ist, und Ereignisse mit wenigen Klicks lokalisieren und überprüfen. Außerdem können Sie mit dem Sirenenalarm, der ertönt, wenn die Kamera Verdächtige erkennt, schnell auf jedes Bewegungsereignis reagieren.
- HÖCHSTER SCHUTZ DER PRIVATSPHÄRE: Dank der geräteinternen AES128-Verschlüsselung und den exklusiven Verschlüsselungsalgorithmen von Reolink profitieren Sie von einem unvergleichlichen Datenschutz. Selbst wenn das Hub-Gerät gestohlen oder die Aufzeichnungsdateien kompromittiert werden, bleiben Ihre Aufnahmen unzugänglich, selbst nach einem Reset.
Dieser Beitrag ist auch verfügbar auf:
English
Deutsch


