Build your own carport – secure slope with shuttering blocks
To effectively secure the slope behind my carport, I decided to build a retaining wall made of formwork stones.
This measure was not only intended to bring visual improvements, but also to ensure the stability of the slope.
In this context, the construction of a solid strip foundation was essential in order to guarantee permanent slope stabilization.
In this article I describe how I built the concrete foundation and I describe how I built my steel-reinforced wall from concrete formwork blocks in order to be able to use our new carport safely, despite the slope.
Prepare foundation for the formwork wall
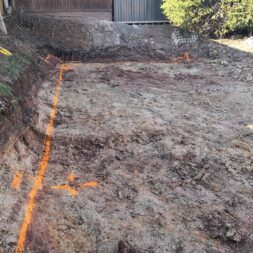
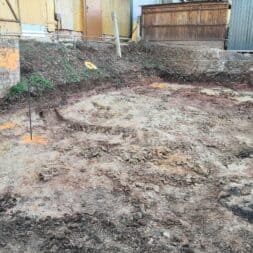
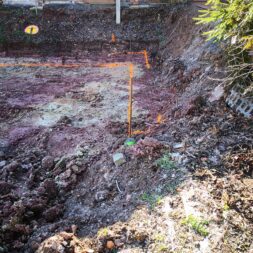
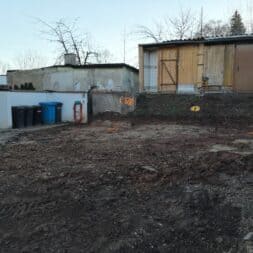
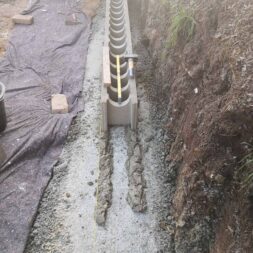
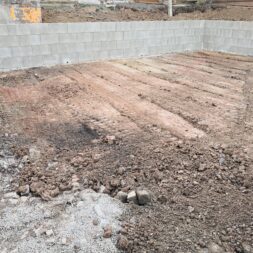
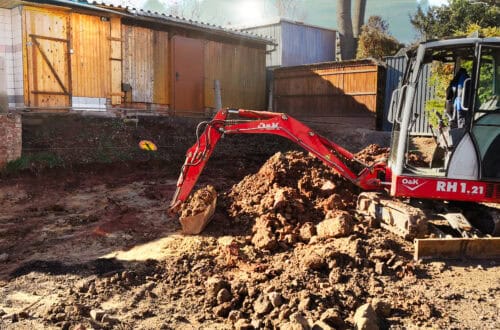
After I had prepared the excavation pit for the new carport, I used a mini excavator to dig the trench for the future foundation of the concrete formwork wall. With a shovel width of 40 cm and a depth of 100 cm, there was naturally a considerable amount of excavated material.
Nevertheless, there was still enough space to deliver the frost protection for the foundation by truck. I placed the frost protection in the trench and compacted it with a vibrating rammer, also known colloquially as a “frog”.
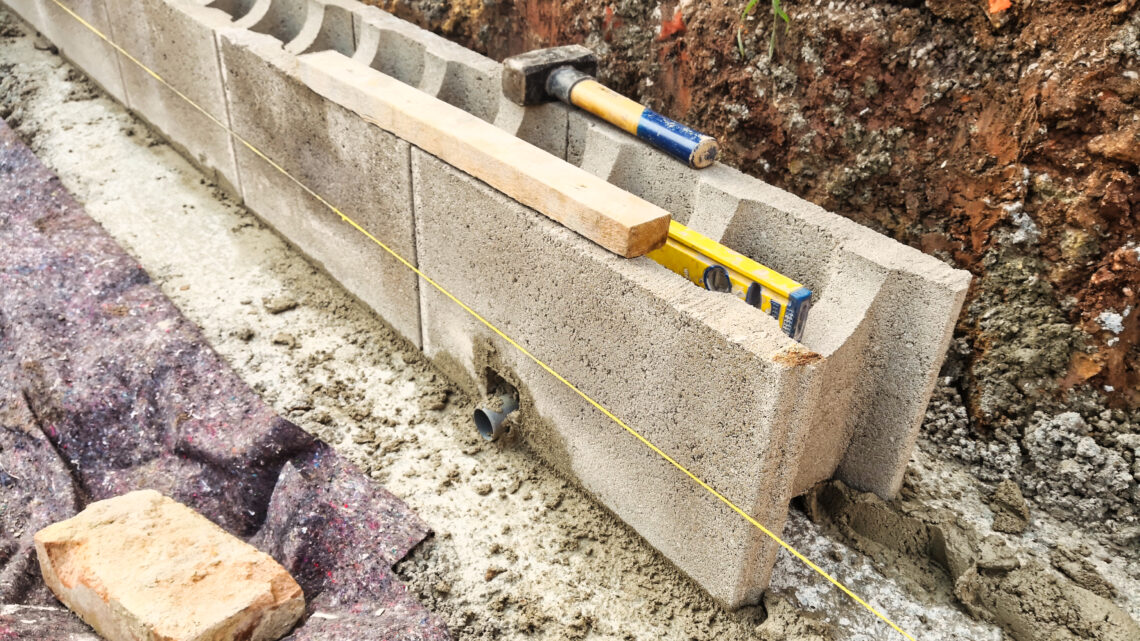
I then measured out the trench to ensure that the foundation would be of a uniform height later on. Using a level, I stretched a mason’s cord at the correct height over both sides of the future wall.
I was later able to measure the exact distance to the foundation from this cord.
The following day, the concrete was delivered and poured according to a company’s specifications. This was one of the few jobs carried out by external companies.
I lacked the necessary tools and, above all, the time for this work.
The poured concrete then had to harden for another four weeks or so before I had time and material for the next stage. This consisted of setting the formwork blocks and then pouring the concrete.

- Für alle Markierungen auf Asphalt, Beton, Holz und Erde
- Inhalt (ml): 500
- Farbe: neonpink
Necessity and structure of a foundation
The need for a foundation basically depends on several factors, such as the nature of the subsoil, the expected load and the slope inclination.
A foundation is particularly necessary if the ground is soft or uneven or if a heavy load – as in my case due to the slope stabilization – has to be carried.
If the ground is stable and firm, a foundation could possibly be dispensed with, but there are risks involved. Without foundations, the wall may not be adequately secured against displacement or erosion.
The advantages of a foundation are obvious: it provides a solid base that helps to distribute loads evenly and stabilize the structure as a whole.
The disadvantages, however, are the additional costs and the increased workload.
I had decided on a solid strip foundation as the basis for my retaining wall on the slope.
This foundation extends over a width of approx. 7 meters, a height of approx. 1.5 meters and a depth of approx. 2 meters. The strip foundation serves as a solid base for the retaining wall, which consists of 50 x 25 x 25 cm concrete formwork blocks.
An optimum strip foundation is typically constructed as follows:
First, the ground is excavated and formwork is created. Concrete is then poured into this formwork, which is often reinforced with reinforcing steel to increase the load-bearing capacity.
Once the concrete has hardened, the strip foundation provides an extremely resistant base that distributes pressure evenly and thus effectively supports the wall above.

- Betonstahl im Durchmesser 4 mm bis 16 mm auswählbar
- Bewehrungsstahl in den Längen 50cm, 75cm, 1,00m, 1,25m, 1,50m oder 2m auswählbar
- Längentoleranz +/-3mm
- Streckgrenze 500 N / mm² - Zugfestigkeit 550 N / mm²
- Lieferumfang: 10 Stück je ausgewählter Größe (bei 50cm jeweils 10x 2 Stück)
Lay the 1st row of bricks correctly
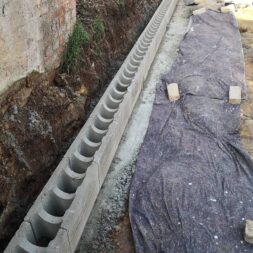
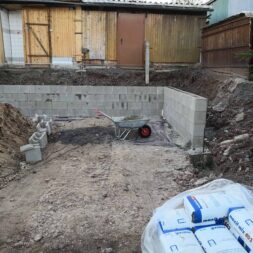
To build the wall, I needed a total of 100 formwork blocks measuring 50 x 25 x 25 centimetres and three pallets of ready-mixed concrete. One Saturday morning, I started work with my father.
First, we set the first row of formwork blocks in earth-moist concrete and aligned them precisely both in line and in height with the help of a guide line.
We worked particularly meticulously on the first row, because a precise first row made it much easier to set the subsequent layers, as the other stones simply had to be placed on top.
We then attached vertical reinforcement bars to strengthen the connection between the formwork wall and the foundation.
To do this, we drilled holes about 30 cm deep in the foundation at the appropriate positions and inserted the reinforcement rods.
Video: Build retaining wall on the slope
In the following video I have documented the individual construction stages for building the retaining wall on the slope.
You can find my videos about building the carport in my playlist Project Carport – Building a Carport on a Slope by Yourself.
If you want to see more of me and my projects, feel free to check out my YouTube channel.
Zuletzt aktualisiert am 17. January 2026 um 13:02 . Ich weise darauf hin, dass sich hier angezeigte Preise inzwischen geändert haben können. Alle Angaben ohne Gewähr. (*) Bei den verwendeten Produktlinks handelt es sich um Affiliate Links. Ich bin nicht der Verkäufer des Produktes. Als Amazon-Partner verdiene ich an qualifizierten Verkäufen. Dein Preis ändert sich jedoch nicht.
Fill shuttering blocks with concrete
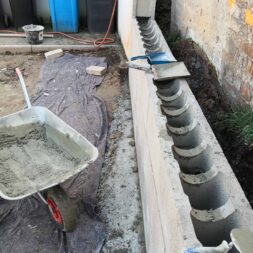
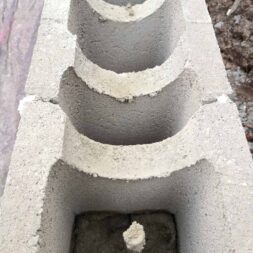
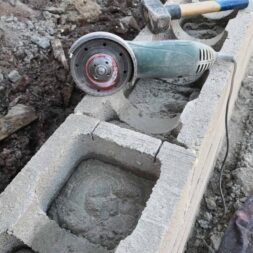
Once the reinforcement was in place, I filled the concrete, which was produced in an old but extremely robust GDR concrete mixer, into the formwork blocks.
The effort involved was relatively high. First I had to pour the bags of ready-mixed concrete into a wheelbarrow, as they didn’t fit directly into the concrete mixer.
I then mixed the concrete with water to form a viscous mass.
The viscous concrete was then transferred from the concrete mixer to a second wheelbarrow. I used a hand shovel to fill the concrete from the wheelbarrow into the openings of the formwork stones.
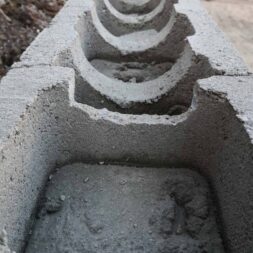
To make sure that the concrete really spread into all corners, I stirred the mixture in the formwork stones with a metal rod.

- 1. Vielseitig einsetzbar: Ideal zum Anrühren kleiner Mörtelmengen direkt am Einsatzort – mit Spachtel oder Kelle schnell und präzise verarbeitbar.
- Die "STUBAI Mörtelschöpfer" eignen sich besonders für professionelle Bauarbeiten. Hergestellt aus robustem Stahlblech sind die Mörtelschöpfer äußerst widerstandsfähig und langlebig. Ihre stabile Konstruktion gewährleistet eine zuverlässige Leistung selbst unter anspruchsvollen Bedingungen auf Baustellen.
- Ein herausragendes Merkmal ist die starke Tülle, die einen festen Halt beim Mischen, Transportieren und Auftragen von Mörtel, Spachtelmasse und anderen Materialien bietet. Dies ermöglicht eine präzise und effiziente Arbeitsweise, wodurch die Produktivität gesteigert wird.
- Die Mörtelschöpfer sind mit einer speziell verzinkten, glatten Edelstahloberfläche ausgestattet, die einen effektiven Schutz vor Korrosion und Rostbildung bietet. Dadurch können sie auch in feuchten oder aggressiven Umgebungen eingesetzt werden, ohne dass ihre Qualität beeinträchtigt wird.
- Durch ihre Vielseitigkeit sind die Putzpfannen für verschiedene Oberflächen und Materialien geeignet, darunter Beton, Putz, Mörtel und Spachtelmasse. Dadurch sind sie ein unverzichtbares Werkzeug für Bauvorhaben jeder Art.
Construction and concreting of further rows of the formwork wall
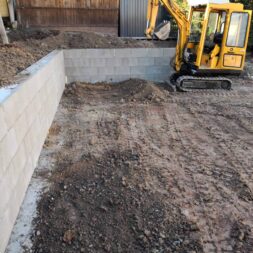
I then placed the second row of formwork stones with an offset of half a stone, followed by the third row, which was also placed with an offset.
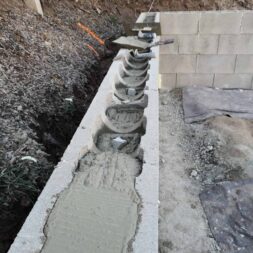
At the same time, I filled the concrete into the stones with a shovel from the wheelbarrow.
As the first row had been placed accurately in alignment and level in the concrete, I could simply stack the following stones on top of the previous row.
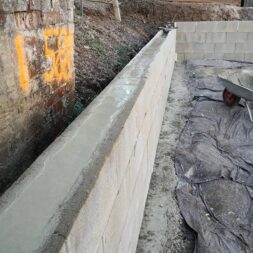
The next day I placed the fourth row and filled it completely with concrete.
I then removed the top layer of concrete with a trowel.
Drainage and drainage behind the formwork wall
As the area behind the wall was to be backfilled with the excavated material, I decided to create a load equalization for any rainwater that might accumulate.
I concreted in small HT pipes in the lower section of the wall, through which the water could then run off. On the slope side, I laid a bed of gravel in front of the HT pipes to prevent the pipes from being blocked by the soil.
In addition, I installed a drainage hose behind the wall, which should reliably guide the remaining backwater past the side of the wall.
Today, almost three years later, I can say that it worked!

- PROFI-DRAINAGEROHR-SET: Inklusive Filterschlauch, erhältlich in verschiedenen Größen von DN50 bis DN100, ideal für die Entwässerung von feuchten Kellern und Gartenflächen.
- VIELSEITIG EINSETZBAR: Geeignet für Tiefbau, Garten- und Landschaftsbau, Friedhöfe, landwirtschaftlichen Dränbau und Sportplatzbau, bietet effektive Flächentrocknung und Schutz vor feuchten Hauswänden.
- HÖCHSTE QUALITÄT: Erfüllt die DIN 1187 Norm für Dränrohre aus PVC-U, güteüberwacht und bietet eine Standardschlitzbreite von 1,2 mm für optimale Wasseraufnahme.
- EINFACHE HANDHABUNG: Der flexible Filterschlauch kann einfach über das Drainagerohr gezogen werden und sorgt für eine perfekte Passform.
- LANGFRISTIGER SCHUTZ: Filterschlauch verhindert Verstopfung der Drainagerohrlöcher, sorgt für erhöhte Wasserdurchlässigkeit und schützt das System vor Schmutz und Verrottung.
Dimpled sheet behind the shuttering stone wall
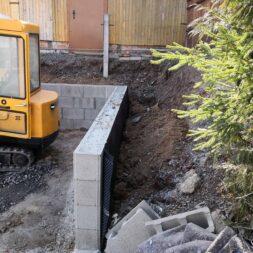
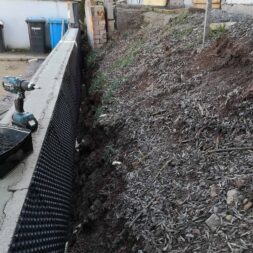
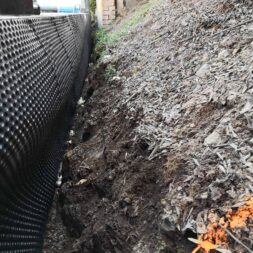
To give the wall additional protection against roots and other external influences, I installed a dimpled membrane.
First I rolled out the dimpled sheet on the wall and then lowered it behind the wall.
With the studs facing the wall, I fixed the mat with drywall screws, which I screwed into the joints of the formwork blocks.
Now I let the whole thing dry out before I could start backfilling.

- ANWENDUNGSBEREICH: Grundmauerschutz, Bauwerkdrainage, Dichtungsbahn in Wänden und Decken, Abdichten von Grünflächen auf Dächern, beim Bau eines Hochbeets.
- TECHNISCHE DATEN: Stärke: ca. 0,5 mm, Breite: 100 cm (+/- 3 % Toleranz), Länge: 20 m, Noppenhöhe: ca. 6 mm, Luftvolumen zwischen den Noppen: ca. 5,3 l/m³.
- EIGENSCHAFTEN: wurzelfest, verrottungsfest, chemikalienbeständig, trinkwasserunbedenklich, beständig gegen Pilz- und Bakterienbefall, B2 nach DIN 4102. Farbe: schwarz.
- EXPERTEN TIPP: Diese Noppenfolie ist frei von Weichmachern und somit sehr gut geeignet als Hochbeetfolie.
- TOP QUALITÄT: Die Noppenbahn hat eine hohe beständigkeit gegen Feuchte und ist trinkwasserunbedenklich.
- HINWEIS: In Ausnahmefällen kann es passieren, dass 2 Rollen in der Größe 1 m x 10 m geschickt werden.
Video: Securing a slope with a formwork wall – time lapse
You can also watch the construction of the formwork wall at the new carport to secure the slope in the following time-lapse video.
You can find my videos about building the carport in my playlist Project Carport – Building a Carport on a Slope by Yourself.
If you want to see more of me and my projects, feel free to check out my YouTube channel.

- - - Unser Drillapparat besteht aus robustem Carbonstahl und verfgt ber einen mechanisch verstrkten Drahtdreher-Binder-Haken. Der ergonomische, rutschfeste PVC-Griff sorgt fr optimalen Halt und Komfort bei jeder Anwendung.
- & - Dank des integrierten Stodmpfer-Moduls wird Verschlei effektiv reduziert. Die mit einer speziellen Legierung berzogene Carbonspindel gewhrleistet eine dauerhaft leichtgngige und zuverlssige Nutzung Ihres Drahtdrillers.
- - Legen Sie den Draht um die Elemente, stecken Sie den Drahtdreher durch die Verschluss-sen und verdrillen Sie ihn mit 1-3 kurzen Zgen. Sparen Sie Zeit und Mhe gegenber herkmmlichen Methoden wie Drahtzwirbelzangen oder Drehzangen.
- - Ideal fr Floristen, Grtner und Heimwerker. Nutzen Sie den Drillapparat als Eisenflechterzange im Bau, als Rdler-Apparat beim Zaunbau oder als Drahtsackverschluss. Perfekt geeignet fr Drilldraht, Rdeldraht und diverse Bindedrhte.
- - Der speziell geformte Griff liegt bequem in der Hand und reduziert Ermdungserscheinungen bei lngerem Gebrauch. Die hochwertige Verarbeitung und das durchdachte Design machen den Drillapparat zum unverzichtbaren Werkzeug in Ihrem Alltag.
Summary and conclusion
To secure the slope behind my carport, I decided to build a retaining wall made of formwork stones and create a raised bed behind it.
For the foundation of the formwork wall, I used a solid strip foundation that extended over a total of 15 meters.
After I had accurately aligned the first row of formwork stones and fixed them with concrete, I filled the other layers with a viscous concrete mix that I made using a GDR concrete mixer.
By using reinforcing bars and setting the stones in layers, I ensured the stability of the entire wall.
For effective drainage, I integrated HT pipes and a drainage hose to drain rainwater and prevent the wall from being overloaded.
A dimpled sheet also protected the back of the wall from roots and other external influences.
After successful completion of the construction work and the subsequent backfilling, the slope stabilization proved to be functional and stable.

- Ösenbindedraht verkupfert
- beidseitig mit Schlingen
- ideal für Betonbau, Landwirtschaft, Gartenbau & Industrie
- zum Verschluss von Beuteln, Säcken usw. geeignet
Dieser Beitrag ist auch verfügbar auf:
English
Deutsch


