Draining the cellar – 1 year later
I have been working on drying out my basement for a good 2 years. In addition to repairs to the pipe system, ventilation concepts, dehumidifiers, dryers and a pump shaft in the cellar, I also installed a subsequent horizontal barrier with a masonry injection.
It is now time for a review and a summary of the individual measures.
Initial situation – damp and wet basement
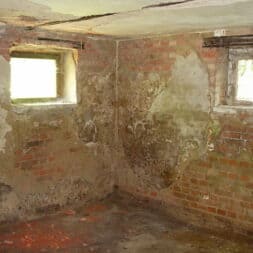
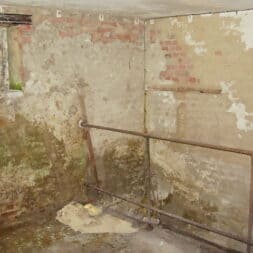
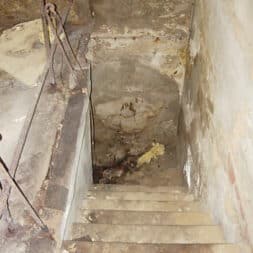
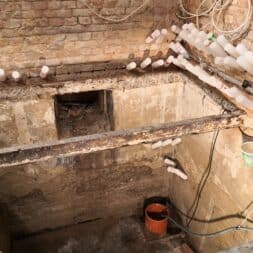
Our house is built into the slope on the north-west side. The cellar in the corner of the house protrudes only about 50 cm from the ground. Under this cellar is another cellar which was formerly used as a vegetable cellar, air-raid shelter and finally coal cellar.
The floor of the 2nd cellar is over 4 meters below the surface. Down here it is cool and damp all year round. The steel girders of the false ceiling were already so rusty that I tore out the ceiling with great difficulty.
I want to put my new workshop in the upper basement area. The installation of the new suspended ceiling has been extremely delayed due to the corona-related delivery bottlenecks.
I have therefore used the meantime to further dry out the cellar so that my tools and building materials do not suffer any damage.
Why is drainage so important?
Draining my old cellar was a crucial step in preserving the substance of my house in the long term.
The cellar suffered from permanent damp, which not only endangered the fabric of the building, but also created an unhealthy indoor climate.
Moisture in the cellar can lead to mold growth, which not only worsens the air quality but can also cause allergic reactions.
In addition, moisture accelerates the deterioration of the building fabric by attacking the masonry and leading to salt efflorescence, which further damages the structure of the building.
The advantages of draining were manifold. On the one hand, the risk of mold growth and the associated health risks were eliminated by removing the moisture.
On the other hand, the measure protected the fabric of my house from further deterioration, which ensured the long-term preservation of the building and consequently increased the value of the property.
In addition, the indoor climate in the cellar improved noticeably, which extended the possible uses of the cellar and contributed to an overall more pleasant living environment.
Nevertheless, there were also disadvantages that had to be considered.
Draining a cellar can sometimes be a costly and labor-intensive undertaking.
In addition, if not carried out properly, there is a risk that moisture barriers will not have a lasting effect or that new moisture problems will arise in other parts of the house.

- 【Hochpräziser Hygrometer】Innenthermometer 10S aktualisiert die Messung einmal, schnelle Reaktionsgeschwindigkeit, thermometer hygrometer Eingebauter genauer und empfindlicher Feuchtigkeitssensoren, hygrometer digital Aktualisieren 10S Sie den Bildschirm automatisch, um die genauesten Messwerte zu erhalten.
- 【Messbereich Hygrometer innen】Thermometer hygrometer LCD with large digital display,Temperature accurate to ±0.6℉/±1℃, humidity ±5%RH,Messbereich Temperatur: -50 ° C ~ 70 ° C (-58 ° F ~ 158 ° F) Feuchtigkeitsmesswerte: 10% RH ~ 99% RH,thermometer umschaltbar auf °C oder °F Anzeige.
- 【Drei Möglichkeiten der Platzierung】Das Thermometer hygrometer kann durch die hintere Halterung auf dem Tisch platziert oder durch das Aufhängeloch auf der Rückseite an der Wand installiert werden. Außerdem können Magnete das Thermometer hygrometer am Kühlschrank fixieren.
- 【Behaglichkeitsanzeige Luftfeuchtigkeit】Das Thermometer innen zeigt mit drei Symbolen den Feuchtigkeitszustand des Raumes an. Ein lächelndes Gesicht eignet sich für Komfort, ein neutrales Gesicht für Feuchtigkeit und ein trauriges Gesicht für Trockenheit. Machen Sie den Feuchtigkeitsgehalt und die Temperatur in Innenräumen klarer.
- 【Qualität und Sicherheit】 Das Thermometer hygrometer besteht aus hochwertigen umweltfreundlichen Materialien wie PC/ABS+PMMA und verfügt über vollständige Qualitäts- und Sicherheitszertifizierungen wie FCC/EMC/CE/ROHS. Sorgen Sie für die Gesundheit Ihrer Familie und geben Sie Ihnen ein Gefühl der Sicherheit.
Video: Replacing the basement ceiling
A video of the three-day demolition of the steel-reinforced basement ceiling can be found here. I wrote the matching blog post here.
You can find the entire playlist of my videos here: “Draining the basement”.
If you want to see more of me and my projects, feel free to check out my YouTube channel.

- Einsatzbereich: Mit seinem 50 Liter Kessel und seinen 412 L/min Ansaugleistung verfügt der Kompressor stehts über genügend Reserven für Anwendungen in Haus und Garage. Durch die Schnellanschlusskupplungen kann der Kompressor je nach Bedarf einfach umgerüstet werden
- Kraftvoll: mit einer Leistung von 2200 Watt kann man den Kompressor hervorragend für verschiedene Zwecke einsetzen. Des weiteren ist ein Druckminderer für optionale Regulierung des Arbeitsdrucks vorhanden
- Variabel und langlebig: der Kompressor ist geeignet für Arbeiten wie zum Beispiel: Reifen befüllen, das Arbeiten mit Nagelpistolen oder auch für Lackierarbeiten
- Lieferumfang: 1 x scheppach Kompressor HC53DC, Gewicht: 42,6 kg
Draining from the outside and problems with the deep cellar
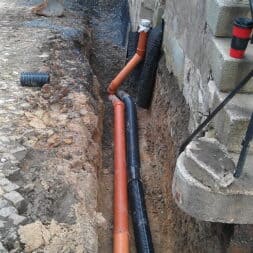
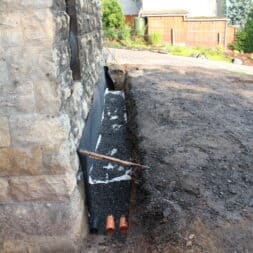
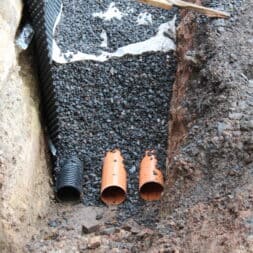
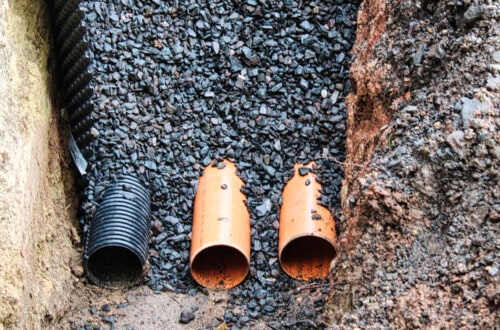
The upper part of the outer walls was dug up to the edge of the foundation a few years ago. Drainage pipes from Strasil were installed in the trench and backfilled with drainage gravel and frost protection.
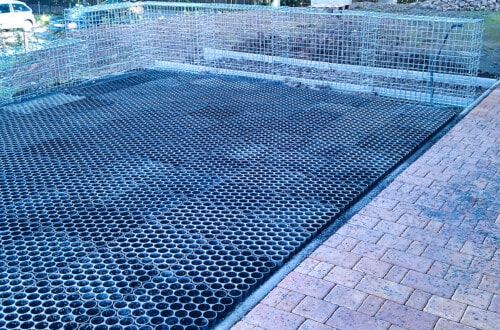
On the outer wall there is an additional dimpled sheet that protects the brick walls. In this way, moisture can not get to the walls from the side. Since then, the moisture comes exclusively from below.
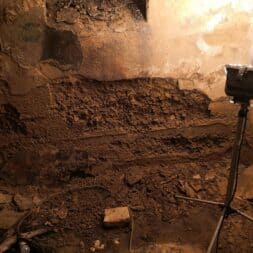
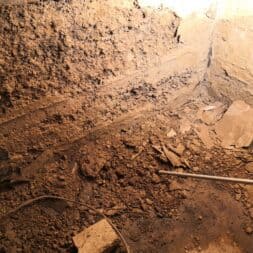
And that’s where it gets complicated. While the upper cellar consists of brick walls about 60 cm to 1 meter thick, the walls in the lower cellar are neither masonry nor poured with concrete.
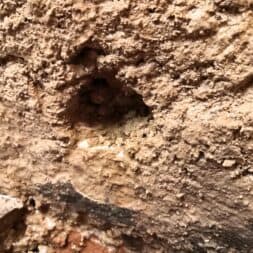
The walls consist of a sand-gravel mixture which was probably mixed with cement. In some places you can still clearly see the imprints of the formwork boards.
This material, these walls are strong enough to support the house. But the walls are not waterproof. During heavy rain or long periods of rain, the water seeps down to the lower foundation of the house.
Due to the extremely clayey soil under the house, the water also cannot seep away. So it finds its way through the walls and runs directly into this sub-basement.
Drainage with the drainage pipe on the outside had improved the situation somewhat, but the problem still persisted.
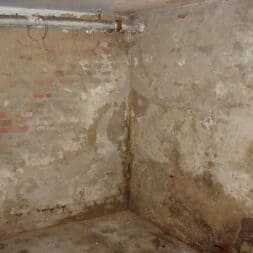
The water moves from the bottom through the stones to the top and then evaporates in the upper area. As a result, the humidity was much too high. The average values were 90% relative humidity at a temperature of 15 °C.
Zuletzt aktualisiert am 9. May 2025 um 06:19 . Ich weise darauf hin, dass sich hier angezeigte Preise inzwischen geändert haben können. Alle Angaben ohne Gewähr. (*) Bei den verwendeten Produktlinks handelt es sich um Affiliate Links. Ich bin nicht der Verkäufer des Produktes. Als Amazon-Partner verdiene ich an qualifizierten Verkäufen. Dein Preis ändert sich jedoch nicht.
Drying basement with the right ventilation concept?
To get the increased humidity out of the basement I followed the known ventilation rules. Shock ventilation in summer and continuous ventilation in winter brought a small success.
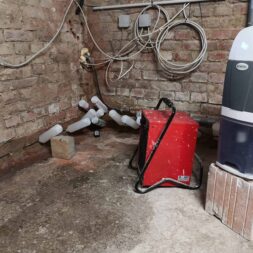
My dryer also served me well. At times, the dehumidifier ran 24 hours a day in automatic mode. At particularly wet periods, I activated the “Dry Clothes” function. This made it possible to get up to 24 liters a day out of the air.
The device has a small water tank. However, I have connected a hose on the back so that I can use the device in continuous operation without having to regularly check the water level.
I am still very satisfied with this dryer.

- Arbeitsbereich: Dieser kompakte Raumentfeuchter arbeitet kontinuierlich in einem Bereich zwischen 35 und 85 % r.F. und lässt sich über das übersichtliche Bedientableau einschalten
- Leistung: Der große 3-Liter-Wasserauffangbehälter und eine satte Entfeuchtungsleistung von bis zu 30 l/Tag bieten ausreichend Kapazität für die Entfeuchtung von Räumen bis zu 90 m² bzw. 230 m³
- Einsatzbereich: Ob zu Hause, im Büro oder im Keller– der Luftentfeuchter TTK 96 E ist flexibel einsetzbar und entfeuchtet zuverlässig in den verschiedensten Bereichen
- Wäschetrocknung: Der TTK 96 E kann auch als Raumluft-Wäschetrockner zur Unterstützung der Trocknung von nasser Wäsche in Wohn- oder Haushaltsräumen eingesetzt werden
- Funktionen: Der Luftentfeuchter TTK 96 E sorgt durch seine hygrostatgesteuerte Entfeuchtungsautomatik mit Echtwert-Feuchtevorwahl, wahlweise Vollautomatik- oder Permanent-Betrieb und Timer-Funktion jederzeit für optimales Raumklima
Drain cellar with injection solution
In the end, however, the airing and also the dryer was only a reduction of the symptoms. I had to turn off the causes of the high humidity, and that’s where things got really exciting.
Since I have already had very good experience in another basement with drying out the walls with an injection solution, I wanted to use this method in this basement as well.
In the case of masonry drying with an induction solution, a liquid is introduced into the masonry which makes the walls water-repellent, i.e. hydrophobic.
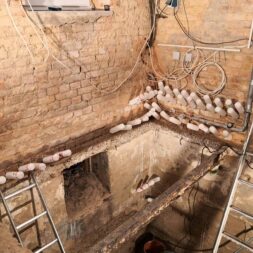
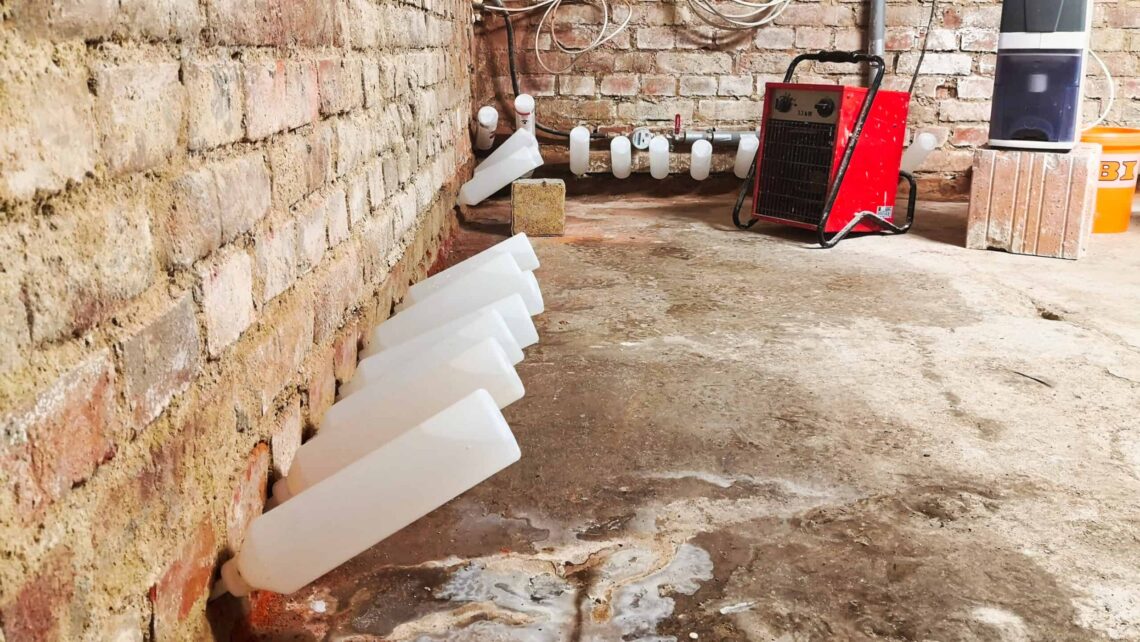
To do this, I drilled holes in the walls with a 12 mm masonry drill. The angle is about 30° and the depth of the holes should go to about 2/3 of the thickness of the wall. In my case, however, I was only able to drill holes a good 30cm deep.
I set the holes at a distance of one brick so that the end is at the ring anchor from the foundation. One stone row higher I drilled a second row which has a half stone offset to the lower stone row.
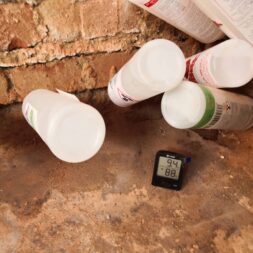
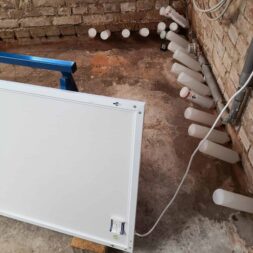
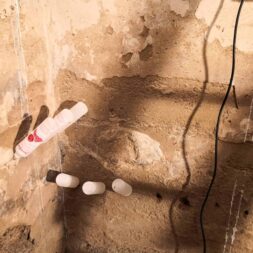
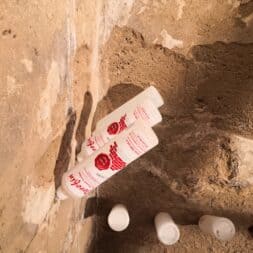
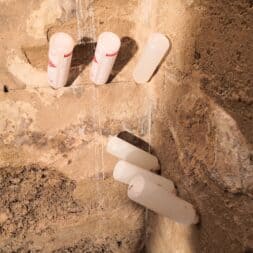
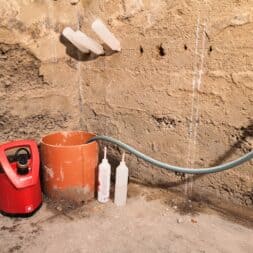
To fill the injection liquid, there are funnels as well as bottles. The funnels are open at the top. This makes refilling much easier. I still prefer to use the bottles because I have had better experiences with them.
With the bottles, the liquid only runs slowly into the hole and the air must come into the bottle via the borehole. Therefore, the injection fluid runs much slower in the the wall. Also, the liquid very rarely leaked out of the boreholes.
This happened to me very often with the funnels and I had to carefully seal the funnels at the borehole each time so that none of the expensive liquid was lost.
For the injection fluid, I tried different suppliers. In another cellar, I was able to achieve a very good result with Porofin and permanently dry out the walls.
I have also used Tobolin in a 3rd basement with success. Both remedies have shown a significant effect after a few months.
Here in this cellar I have used the agent Silitrocken. The decisive factor was the significantly lower price compared to the other two manufacturers. I ordered the Silitrocken in 25 liter canisters and then refilled the bottles myself with a funnel.
In total, the bottles were filled 3 to 5 times with a total of 200 liters.


I also documented the drying of the basement walls and recorded it in some videos. You can also find the corresponding blog entries for each step here on the blog.
- Drying cellar #1 – test drilling for the injection bottles
- Drying basement #2 – intermediate status after 1 week | injection solution
- Drying basement with injection – #3 intermediate status after 2 weeks
- Drying basement with injection #4 – Week 3 Infrared heating comes into play
I always refilled the bottles when they were empty. Bottles that were still full after 4 weeks I put in another well. In total, this process took 18 months.
Since then, I did not refill the bottles because the walls had not absorbed any new liquid.
Zuletzt aktualisiert am 9. May 2025 um 06:20 . Ich weise darauf hin, dass sich hier angezeigte Preise inzwischen geändert haben können. Alle Angaben ohne Gewähr. (*) Bei den verwendeten Produktlinks handelt es sich um Affiliate Links. Ich bin nicht der Verkäufer des Produktes. Als Amazon-Partner verdiene ich an qualifizierten Verkäufen. Dein Preis ändert sich jedoch nicht.
I regularly documented the humidity and moisture of the walls. The relative humidity was 95% at a room temperature of 10°C at the beginning and now 65% at 9°C after a total of 2 years.
The values have definitely improved, but I had expected much more.
I was more positive about the result of the measurement of my walls. I took all measurements on my marked test stone.
The initially very high humidity of 20% has been reduced to 7% within a few months. The humidity then remained at this level.
Especially on the colder days, when the dew point is relatively low, I can observe the formation of water droplets on the concrete ring anchor. The wall is waterproof and the moisture in the air settles on the cold walls, but it cannot penetrate the walls.
Also the moisture, which moves from the bottom to the top, is blocked at the level of the ring anchor.
The brick wall in the upper part of the basement has dried well due to the drainage from the outside and the blocking off from below. Even the formerly soggy and damp plaster is now dry and dusty.
As soon as the new basement ceiling is installed, I can start building the new workshop here.
Unfortunately, this did not work so well in the lower area. I did some trial injections into the sand-gravel mix walls.
Unfortunately, the walls are so porous that the liquid completely disappeared into the wall within a few minutes.
Condensation also forms on the walls immediately next to the drill holes.
But to seal the entire wall watertight, I would probably need hundreds more liters of injection solution. This quickly raises the question of cost and benefit.
Also, completely waterproofing the walls in this sub-basement would likely direct the water elsewhere under the house.

- 【Zerstörungsfreie Feuchtigkeitsmessung】Das Feuchtigkeitsmessgerät arbeitet komplett ohne Eindringen in das Material – es sind keine Sonden oder Nadeln nötig. Es erkennt zuverlässig versteckte Feuchtigkeit bis zu 40 mm tief, ideal zur frühzeitigen Erkennung von Schimmelrisiken in Wand, Boden oder Decke
- 【Vielseitig einsetzbar】Ob Holz, Mauerwerk oder Estrich – dieser elektronische Feuchtigkeitsdetektor hilft Ihnen dabei, Feuchtigkeitsquellen in verschiedenen Baumaterialien exakt zu lokalisieren. Ideal für Heimwerker, Hausbesitzer oder professionelle Bauinspektionen
- 【Praktische Hold-, Max- & Min-Funktion】Mit der "Hold"-Taste können Sie den aktuellen Wert speichern, um ihn später einfach abzulesen. Zusätzlich zeigt das Gerät maximale und minimale Feuchtigkeitswerte für eine umfassendere Analyse
- 【Für präzise Ergebnisse – bitte beachten】Die Oberfläche sollte vor der Messung trocken und sauber sein. Metallnägel, Untergründe oder Ihre Hand können die Ergebnisse beeinflussen. Achten Sie darauf, dass sich kein Metall im Umkreis von 5 cm befindet, um verfälschte Messwerte zu vermeiden
- 【Mit integrierter LED-Taschenlampe】Dank der eingebauten Taschenlampe lässt sich die Oberflächenfeuchte auch an dunklen, schwer zugänglichen Stellen schnell erkennen – perfekt für Baustellen, Keller oder schlecht beleuchtete Räume
- Jedes Feuchtemessgerät verfügt über eine einfache Kalibrierfunktion und wird durch eine 3-jährige Garantie unterstützt
Drainage with pump well
The recent heavy rains have also made it clear to me that a complete waterproofing of these walls would be difficult. On some days, real rivers of water came running through the walls.
This water then collected on the floor of the lower basement and stood 10cm high in places. The water then naturally penetrated the surrounding walls and soaked them permanently. I think this also explains the still too high humidity.
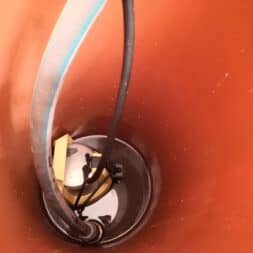
To further address this problem I installed a soakaway, pump well here in the basement last winter.
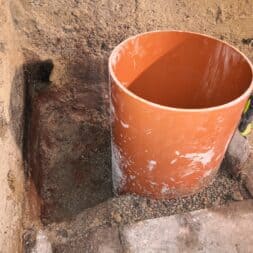
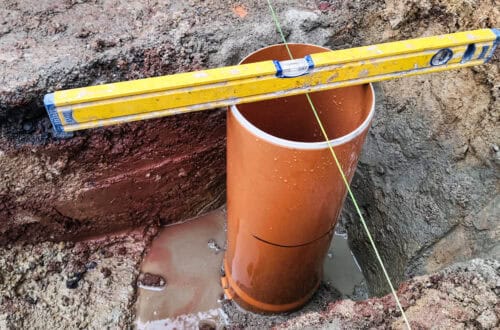
To do this, I dug a hole a good 1 meter deep directly in the clay soil under the foundation, in which I anchored a DN 315 KG pipe. The pipe I have provided on the sides with several small holes so that the water can run well inside.
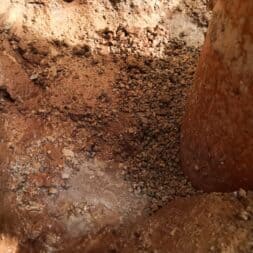
On the underside, the tube is completely open which, by the way, was a big mistake. The 1st pump I had placed in the well sucked up the drainage gravel and thus destroyed itself.
I did have the pump placed on a clinker stone a good 6 inches above the gravel, but the suction was just too strong.
I therefore recommend you to install a fleece or a filter from below. The easiest way, in my opinion, would be to make an end cap with small holes in it and put it on the bottom end of the KG pipe.

- 1m KG Steigrohr DN315 oder DN400
- VARIANTE 1 - DN315 Nennweite: DN315 Länge: 100 cm Material: PVC (Polyvinylchlorid)
- VARIANTE 2 - DN400 Nennweite: DN400 Länge: 100 cm Material: PVC (Polyvinylchlorid)
Video: Drainage – Build your own pump shaft in the cellar
I documented the entire construction of the sump in a video. You can find the matching playlist on my YouTube channel for the project Drying out the basement here.
If you want to see more of me and my projects, feel free to check out my YouTube channel.

- Zuverlässiges Abpumpen von bis zu 14.000 Liter klares bis leicht verschmutztes Wasser pro Stunde
- Automatische Entlüftung ab einem Wasserstand von 7 mm nimmt die Pumpe den Betrieb im Manuell-Modus auf
- Robuster und einfach anzubringender Edelstahlvorfilter schützt die Pumpe vor zu starker Verschmutzung und verhindert damit eine Verstopfung des Pumpenlaufrads
- Anwendungsgebiete: Wasserschäden im Haus und im Keller, Abpumpen von Wasser aus Pools und Installation im Drainage-Schacht
- Lieferumfang: Entwässerungspumpe mit komfortablem Tragegriff, Schlauchanschlussstück, Edelstahl-Vorfilter, keramische Gleitringdichtung
Unfortunately, after a few months, the integrated float switch of the pump then jammed more and more frequently. The pump then did not run at all, or what I considered worse, it ran continuously.
I therefore replaced the pump with another much better model with an electronic float.
Overall, I am very happy with my pump well. The new Kärcher pump has been running absolutely reliably for many months now. Along the west wall, I will add a small drainage ditch or moat.
Then the water which runs further south through the wall can be led directly into the pump sump.
-
Price: € 15.95
-
Price: € 23.99instead of: € 26.00
-
Price: € 119.84instead of: € 129.92
-
Price: € 4.69instead of: € 5.89
-
Price: € 8.90
Draining the cellar – 1 year later
When we bought the house over 10 years ago, the water was knee high in the basement. A clay rain pipe, right at the corner of the house, had broken in the ground and a good 100sqm of roof rainwater had leaked into the basement over the years.
The repair of the pipe has extremely limited further damage. Nevertheless, after long rains, the walls were completely soaked and the water was in the basement.
With the drainage from the outside, the situation has improved further. In the other basement areas, where the drainage runs at foundation level, the basements have now reached a habitable climate.
The ventilation and drying equipment were certainly a small assistance to dry out the basement. However, this only treated the symptoms, which makes no sense in the long term!
It was not until the walls were drained with the injection solution that a sustainably better result was achieved. The effort is manageable. Drilling the holes and filling and inserting the bottles took a couple of hours.
After that I refilled the bottles once a day – later only every 2 or every 3 days.
The injection fluid has created a water-repellent barrier layer above the concrete ring anchor. Since the wall is protected from the outside by the drainage and the dimpled membrane, the upper area of the basement with the brick walls was able to dry very well.
Video: Draining the cellar – result after 1 year
In my playlist for the project Drying out the basement on my YouTube channel, I have also published a video on the entire project. In this video, I summarize all the measures and give a final conclusion.
If you want to see more of me and my projects, feel free to check out my YouTube channel.

- Starke Performance: Die Kärcher Schmutzwasser-Tauchpumpe SP 16.000 Flood Box bewältigt bis zu 16.000 Liter Wasser pro Stunde – auch verunreinigtes Wasser mit Schmutzpartikeln von bis zu 20 mm Größe
- Für den schnellen Einsatz: Im Flutkorb lassen sich die Pumpe und der 10-m-Gewebeschlauch mit werkzeugloser Befestigung aufbewahren. Der Korb kann zudem als Vorfilter verwendet werden
- Höhenverstellbarer Schwimmerschalter: Der höhenverstellbare Schwimmer lässt sich an der Pumpe fixieren, damit die Pumpe im automatischen Betrieb früher startet und flacher abpumpt
- Gut geschützt: Dank der keramischen Gleitringdichtung und der Ölkammer ist die Tauchpumpe SP 16.000 Flood Box besonders langlebig und kann problemlos im Dauerbetrieb eingesetzt werden
- Lieferumfang: Im Lieferumfang ist die Kärcher SP 16.000 Flood Box Schmutzwasser-Tauchpumpe enthalten sowie ein Quick Connect-Schlauchanschluss und ein G 1- und G 1 1/2-Anschlussgewinde
I am satisfied with the result
In the lower range, the use of the injection solution is also possible. However, the porous walls would no longer justify the use of materials and thus the costs.
My goal is to pour a massive 2 to 3 meter wide concrete base around this basement so that the surface water cannot penetrate into these deeper layers of earth.
But until then, I have a good solution with the pump in my drainage shaft. The construction has cost me 1 day of work and also the material costs were with just under EUR 250, – incl. of the pump is manageable.
What solutions have you used to dry out the basement walls? What are your experiences. What would you do differently? Drop me a line in the comments below.

- SCHUTZ VOR FEUCHTIGKEIT - Die Creme schützt Ihren Keller vor aufsteigender Feuchtigkeit & Nässe. Fehlt Ihrem Haus die Mauersperrbahn, schaffen Sie mit der Injektionsmasse nachträglich eine Abdichtung.
- WAND TROCKENLEGEN - Neben der Feuchtigkeits-Abwehr eignet sich das Injektionsverfahren, um bereits vollständig durchfeuchtete Wände dauerhaft auszutrocknen.
- FÜR JEDE WAND - Die Horizontal-Sperre eignet sich für Lagerfugen in allen mineralischen Wänden (auch in Hohlwänden) - z.B. für Ziegel, Gitterstein, Sandstein, Hohlkammerstein uvm.
- EINFACHES ANBRINGEN - Das Einsetzen der Feuchtigkeitssperre ist auch Laien möglich - ohne schweres Gerät & Ausschachten: Löcher bohren & langsam das Bohrloch mit Schlauchbeutelpresse befüllen.
- BKM.MANNESMANN - Für ein trockenes Zuhause! In unserem Sortiment finden Sie verschiedenste Produkte, um Ihr Zuhause von Feuchtigkeit zu befreien & nachhaltig zu schützen.
Summary and conclusion
Draining my damp cellar was a lengthy but necessary measure to protect the structure of my house and ensure a healthy living environment.
Over two years, I used various methods, including repairs to the pipe system, the establishment of an effective ventilation concept, the use of dryers, masonry injections for sealing and a newly installed pump shaft.
The need for drainage was underlined by the permanent damp in the basement, which not only increased the risk of mold growth and the associated health risks, but also endangered the building fabric in the long term.
The benefits of successful drainage were evident in the significant reduction in moisture, which led to an improvement in the indoor climate and made the cellar usable.
Despite the positive effects, I had to realize that the drainage was also associated with challenges, especially in terms of costs and the amount of work involved.
To minimize the disadvantages, careful planning and the use of effective methods were crucial.
The injection solution proved to be particularly effective in making the walls water-repellent and thus permanently reducing moisture.
However, the deeper basement area and its porous walls posed a particular challenge that would have required a disproportionately high use of materials.
Finally, draining my cellar was an important step in ensuring the longevity of the building and creating a more pleasant living environment.
Despite the initial costs and the amount of work involved, the benefits ultimately outweighed the costs.
The measures taken, especially the masonry injection and the pump shaft, turned out to be effective solutions that supported my goal of creating a dry and usable basement.

- SCHUTZ VOR FEUCHTIGKEIT - Novusticks schützen Ihren Keller vor aufsteigender Feuchtigkeit & Nässe. Fehlt Ihrem Haus die Mauersperrbahn, schaffen Sie mit den Stäbchen nachträglich eine Abdichtung.
- WAND TROCKENLEGEN - Neben der Feuchtigkeits-Abwehr eignen sich die Sticks, um bereits feuchte oder nasse Wände mit bis zu 95% Mauerwerksfeuchtigkeit auszutrocknen.
- FÜR JEDE WAND - Die Horizontal-Sperre eignet sich für alle mineralischen Wände mit Lagerfuge (auch Hohlwände) - für Ziegel, Gitterstein, Sandstein, Hohlkammerstein uvm.
- EINFACHES ANBRINGEN - Das Einsetzen der Mauerwerkssperre ist auch Laien möglich - ohne schweres Gerät & Ausschachten: Löcher bohren, Sticks einlegen & die Wand verschließen!
- BKM.MANNESMANN - Für ein trockenes Zuhause! In unserem Sortiment finden Sie verschiedenste Produkte, um Ihr Zuhause von Feuchtigkeit zu befreien & nachhaltig zu schützen.
Dieser Beitrag ist auch verfügbar auf:
English
Deutsch


