2. set up balcony power station in the garden and connect in series.
Despite my balcony power station in the backyard and lower electricity consumption, electricity costs keep going up. According to the http://strom-report.de, KWh of electricity costs an average of 34.6 cents. New contracts currently cost as much as 41 cents.
It is therefore necessary to think about cost-effective alternatives and to add another module to my existing Balkan power plant.
But can I connect 2 different PV modules together at all? Do I need a new inverter for two modules or can I continue to use the two old micro inverters?
Generating electricity yourself – what alternatives are there?
I can’t really make myself self-sufficient from an external power supply in Germany.
Whether electric power from photovoltaic modules, wind power or even combined heat and power plants: Either I am dependent on the whims of nature, as with solar and wind power, and or on an external energy source such as oil or gas.
Our house was built in 1900 and has been continuously renovated and refurbished since 2008. The possibilities to save energy in old buildings are limited and eventually exhausted.
In this case, the possibility of additional power generation must be considered. A combined heat and power plant, which in addition to heating and hot water also produces electricity, was ruled out at an early stage.
The space was lacking and the prices of these facilities were also utopian in 2008.
Reconstruction of the heating system, including the work necessary to connect the power distribution, is difficult – and unfortunately very expensive – to accomplish after the fact. Therefore, we have completely hidden this issue.
The topic of wind power was also ruled out because such a plant would be difficult to implement in a residential area. I have been reading up on the subject of smaller wind turbines and find this option absolutely interesting.
However, this article is about the private generation of electricity with the help of the sun: In short, photovoltaics – sometimes colloquially called solar system or solar power.
Besides the large PV plants, which are mounted on roofs or fields, there are also the smaller guerrilla power plants, the balcony power plants.
These systems mostly consist of a PV module, the necessary elevation, the inverter and all necessary cables. In short, everything you need is there.
The system is simply assembled and the plug is inserted into the socket. When the sun shines, the electricity flows “backwards” into the company’s own power grid.
But for whom is the system suitable?

- - Mit der Solakon-App berwachen Sie Ihre Balkonkraftwerk Daten per WLAN-Funktion in Echtzeit. Sie sind direkt informiert ber tgliche & jhrliche Solarertrge & CO-Einsparungen! Dank einfacher Einrichtung und intuitiver Bedienung direkt startklar! Hchste Server-Standards durch deutsche Eigenentwicklung!
- - Durch die bifazialen Solarmodule knnen Sie bis zu 30% mehr Energie erzeugen, bei gleicher Wattzahl. Die Technologie ermglicht es, Sonnenlicht auf beiden Seiten der Module (Glas-Glas) zu nutzen.
- - Das 1000W Balkonkraftwerk besteht nur aus hochwertigen Bauteilen. 2x bifaziale 500W JA Solar JAM60D40 Solarmodule, 1x Growatt NEO 800W Wechselrichter, 2x 2,0m Verlngerungskabel, 1x 5m Kabel zur Steckdose & 1x Wechselrichterhalterung.
- % - Mit unserem neuestem 800W Wechselrichter steigern Sie ab sofort den Ertrag Ihrer PV Module um 33%. Profitieren Sie noch heute mit Ihrem Balkonkraftwerk!
- - Die Bauteile der Stecker Solaranlage versprechen eine lineare Leistung bis zu 30 Jahre nach dem Kauf. Somit sind die Ertrge Ihres Balkonkraftwerks gesichert und bereit fr die Zukunft.
Solar power only for homeowners? What about tenants?
A balcony power plant is suitable for both homeowners and tenants – provided a sunny installation site is available. Furthermore, a suitable power outlet should be nearby.
As the name suggests, a balcony power plant can be placed on the balcony. Meanwhile, there are also systems that can be screwed to the balcony parapet and do not take up any space there.
As a homeowner, we have considered where we could place the PV module. Of course, the module should get as much sunlight as possible. Since we don’t have a balcony, but we do have a garden, the 1st balcony power plant was placed in the garden on top of the pool house.
Here the module has an unobstructed view to the south without houses, trees or other buildings casting a shadow on the power plant. I also have a power outlet in close proximity.
Zuletzt aktualisiert am 5. July 2025 um 20:42 . Ich weise darauf hin, dass sich hier angezeigte Preise inzwischen geändert haben können. Alle Angaben ohne Gewähr. (*) Bei den verwendeten Produktlinks handelt es sich um Affiliate Links. Ich bin nicht der Verkäufer des Produktes. Als Amazon-Partner verdiene ich an qualifizierten Verkäufen. Dein Preis ändert sich jedoch nicht.
Why a balcony power plant is not enough
Both PV module and inverter from the 1st balcony power plant have an output of max. 300 watts.
In the perfect laboratory environment with 90° sunlight, the right temperature (PV modules tend to like it cold) and full sunshine, the module can generate 300 watts of electricity. In one hour this would be 0.3 KWh and on a perfect day with 10 hours of sunshine this would be 3 KWh.
If the electricity was consumed in the household at the same time, this results in a financial saving of EUR 1.23 (3 KWh x EUR 0.41).
Unfortunately, this perfect place only exists in the laboratory. I was able to get a maximum output of 280 watts out of the old balcony power plant with near perfect conditions.
The electricity generated is intended to ensure the cost-neutral operation of our pool. However, the pool pump already requires 450 watts. So in the perfect laboratory case, I would still have to buy an additional 150 watts from the energy supply company.
An additional UV-C lamp or even a heat pump would completely overwhelm the photovoltaic module.
So the plan was to create a Buy 2nd solar panel and couple it with the 1st balcony power plant.
But why not connect 3 or 4 balcony power plants?
Balcony power plant – maximum 600 watts are possible
In Germany (to the best of my knowledge currently) a mini photovoltaic system with a maximum power of 600W may be installed without a permit. However, a notification to the RU is required.
Supplement: From 2024, some changes will apply to the use of balcony power plants. Among other things, a power of 800W is now permitted.
§ Disclaimer §
Before purchasing a balcony power plant, please clarify the legal framework for your place of residence independently. I assume no liability for these statements!
The reasons for this are certainly manifold. On the one hand, there is the safety aspect. The electricity is fed from the PV module directly into the house grid or power grid of the apartment via a “reverse socket”.
600 watts of continuous power should not be a problem for the existing power lines. But 1200W or even higher continuous power leads to heating of the power cable in the wall.
Depending on the condition and age of the cables, this can then lead to a cable fire with dire consequences.
Another reason is likely to be the predictability of the electricity fed into the grid. Especially in times with a lot of sunshine or in times of strong fluctuations, the power supply companies have more and more problems to stabilize the grid frequency at a clean 50Hz.
The more plants that are built, the bigger the problem becomes.
By the way, this is also one of the reasons why the large PV systems on the roofs MUST be throttled to 70% of their rated power! Unfortunately, my research did not clarify why there are no restrictions in other countries.
But perhaps there is another reason: every kilowatt hour of electricity generated by the company itself does not have to be purchased! The EVU simply earns less money (with higher costs at the same time).
Why more than 300W per balcony power plant makes sense
We had now decided on a 2nd balcony power plant. This time for a module with 345W. The Envertech inverter, as with the 1st PV mini system, also has an output of 300W.
Both systems have a maximum power of 600W and are therefore not subject to approval, although the modules could have a total power of 645W.
The 345W module now has a decisive advantage: the power can drop to 87% (wrong sun angle, shading or too warm ambient temperature…) to still deliver 300W to the inverter.
My 1st module would only deliver 261Watts at 87% system power. The buffer for unfavorable conditions is therefore larger.

- - Mit der Solakon-App berwachen Sie Ihre Balkonkraftwerk Daten per WLAN-Funktion in Echtzeit. Sie sind direkt informiert ber tgliche & jhrliche Solarertrge & CO-Einsparungen! Dank einfacher Einrichtung und intuitiver Bedienung direkt startklar! Hchste Server-Standards durch deutsche Eigenentwicklung!
- - Durch die bifazialen Solarmodule knnen Sie bis zu 30% mehr Energie erzeugen, bei gleicher Wattzahl. Die Technologie ermglicht es, Sonnenlicht auf beiden Seiten der Module (Glas-Glas) zu nutzen.
- - Das 900W Balkonkraftwerk besteht nur aus hochwertigen Bauteilen. 2x bifaziale 450W TWMNH-48HD Solarmodule, 1x Fox ESS 800W Wechselrichter, 2x 2,0m Verlngerungskabel, 1x 5m Kabel zur Steckdose & 1x Wechselrichterhalterung.
- % - Mit unserem neuestem 800W Wechselrichter steigern Sie ab sofort den Ertrag Ihrer PV Module um 33%. Profitieren Sie noch heute mit Ihrem Balkonkraftwerk!
- - Die Bauteile der Stecker Solaranlage versprechen eine lineare Leistung bis zu 30 Jahre nach dem Kauf. Somit sind die Ertrge Ihres Balkonkraftwerks gesichert und bereit fr die Zukunft.
Structure, installation and connection balcony power plant
The construction, installation and connection of a mini PV system is very simple. I bought my two balcony power plants from Amazon because of problem-free processing (even in the event of problems/damage, etc.).
The delivery time was stated as 3 weeks. After a good 2 weeks, the large package was delivered. I had ordered the 1st module 3 months earlier with a delivery time of 3 days. Currently, the waiting time is sometimes 2 to 3 months – if anything can be delivered at all.
The package had a size of 180cm x 115cm x 7cm and weighed 17kg according to the delivery bill. Transportation in the trunk of a mid-range car is therefore no longer possible. It is therefore best to have the package delivered to your destination right away.
The first thing I did was open the package and check the goods for damage and completeness. Besides the module, the aluminum profiles of the elevation and a box with the accessories (inverter, grounding cable, power connection cable and screws) are in the large package.
Everything was in impeccable condition.
First, I screwed 3 aluminum profiles of the elevation together to form a “triangle”. The two “triangles” can now be immediately attached to the frame of the module for transverse mounting. The holes for the screws are already there and the supplied screws fit perfectly.
Since I wanted to set up my two balcony power plants on the pool house on edge for space reasons, I had to drill 2 additional holes in the aluminum frame of the PV module. For this, I marked the correct position and drilled the holes with a sharp 8 metal drill bit.
I recommend placing a protective piece of wood underneath so that you don’t accidentally drill into the module.
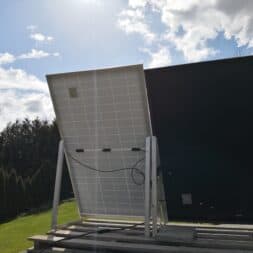
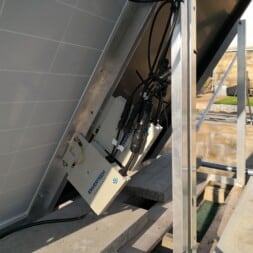
After that I screwed the inverter (incl. the grounding cable) to one leg of the elevation. These holes are also pre-drilled. Note the length of the connection cables which are plugged from the module into the inverter.
In the case of a transverse mounting, the cables always reach up to the inverter. For an upright installation, the elevation must of course be mounted on the side where the cables are also installed on the module!
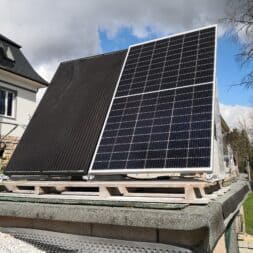
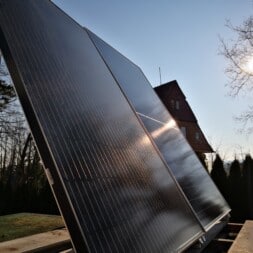
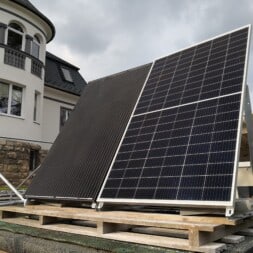
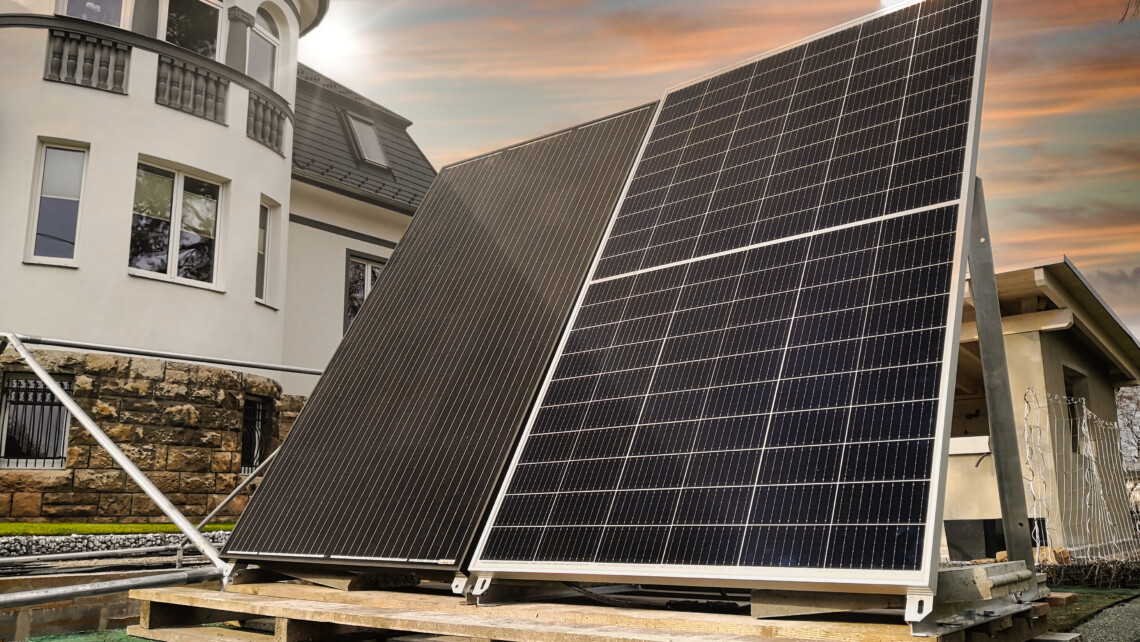
Now I have aligned and attached the module to a 2 meter x 1 meter wooden pallet on my pool house. The old balcony power plant, which was previously mounted transversely, I have rebuilt so that it could also be mounted on edge directly next to the 2nd module.
Now I had both modules standing right next to each other on the wooden pallet.
Zuletzt aktualisiert am 5. July 2025 um 21:02 . Ich weise darauf hin, dass sich hier angezeigte Preise inzwischen geändert haben können. Alle Angaben ohne Gewähr. (*) Bei den verwendeten Produktlinks handelt es sich um Affiliate Links. Ich bin nicht der Verkäufer des Produktes. Als Amazon-Partner verdiene ich an qualifizierten Verkäufen. Dein Preis ändert sich jedoch nicht.
Balcony power plant – series connection or parallel connection?
When adding a second module to my balcony power plant, I was faced with the decision of how to connect the two systems most effectively.
Both types of circuit have their specific advantages and disadvantages, which had to be taken into account in order to optimize the efficiency and performance of the entire system.
Series connection means that the modules are connected in series, whereby the voltages of the individual modules add up while the current remains the same.
The advantage of this circuit was the higher voltage, which can be transmitted more efficiently over longer distances.
One disadvantage, however, is that if one module is shaded, the output of the entire string can drop sharply, as the current flow is limited by the shaded module.
Parallel connection, in which the modules are connected next to each other, maintains the voltage while the currents of the individual modules add up.
This offers the advantage that if one module is shaded, the other modules can continue to supply their maximum current.
One disadvantage, however, is that all modules must have the same voltage and the total current of the system must not exceed the capacity of the cables and the inverter.
After careful consideration, I decided to connect the two inverters in parallel by connecting the output of the inverter from the first photovoltaic module to the input of the second inverter.
This decision was based on the specific advantages and disadvantages of series and parallel connection and the fact that I only had one connection cable from the second inverter to the socket for the power feed.
The advantages of this parallel connection were obvious: by connecting the inverters in parallel, I was able to ensure that if one of the modules was shaded or failed, the power production of the other module would remain unaffected.
This allowed the solar modules to maximize their output independently of each other, resulting in more stable and potentially higher power generation overall.
Another reason for my choice was the ease of installation. As I only had one connection cable to the socket, it was practical to connect the inverters in such a way that only one connection to the power grid was required.
This configuration made installation easier and minimized the risk of cabling errors.
Disadvantages of the parallel connection, such as the potentially higher total current, which could exceed the capacity of the connection cable, were carefully considered.
To avoid this, I made sure that the connection cable and the inverter of the second module were designed for the combined current load of both modules.

- Der Mikro-Wechselrichter EVT360 von Envertech wandelt den von Ihrem Solarpanel erzeugten Gleichstromstrom in Wechselstrom um, der wieder in Ihr Netzwerk eingespeist wird. Empfohlene Modulleistung 180-450W MPPT: 1.
- Maximale Ausgangsleistung 360W (aus zwei Solarmodulen) Individuelles MPPT für jedes Panel. Der Mikro-Wechselrichter wird direkt an 1 oder mehrere Module mit bis zu 360 W angeschlossen. Die Stromumwandlung erfolgt individuell an jedem Panel und ermöglicht so eine optimale Nutzung der Solarenergie.
- Vormontiertes AC-Kabel (mit Anschluss bereit zur Installation), bis zu 360 W Panel, breiter Spannungsbereich 16 – 60 V. An jedem Mikro-Wechselrichter können Sie 1 Solarmodule mit 180 W ~ 450 W anschließen.
- Maximaler Wirkungsgrad 95,6% IP67, Entwickelt für den Betrieb unter schwierigen realen Bedingungen von -40 °C + 65 °C. Nettogewicht 1,8 kg, Abmessungen (B x H x T): 163 mm x 216 mm x 27 mm.
- Zertifikat: VFR 2019, VDE-AR-N 4105, VDE 0126-1-1, CEI 0-21, IEC/EN61000, IEC/EN62109-1/2, EN50549-1/2019, TOR 2019, C19, C11. 0/11: 2019, UTE C15-712-1:2013
Video: Construction, installation and connection of my two balcony power plants
I accompanied the assembly, installation and electrical connection of my two mini PV systems with my camera and published the video on my YouTube channel.
There you can have a look at my procedure in detail.
You can find more videos about power generation by photovoltaics, for example about the construction of my PV island system with 4 modules and 3 large batteries, in my photovoltaic playlist.
If you want to see more of me and my projects, feel free to check out my YouTube channel.


Balcony power station: Plug in and you’re done!
It’s actually as simple as it sounds! Once the mini PV system has been set up, all you have to do is plug the power plug into a socket – that’s it!
In my case, I first connected the two balcony power plants together and connected them in series. Both inverters have an additional input for this purpose.
So I used the 220V AC output from the 1. inverter with the 220V input of the 2. inverter connected. As the plugs are standardized and protected against polarity reversal, you can’t go wrong.
Then I connected the 220V output from the 2nd inverter (with the 5 meter rubber cable) to the outlet on the pool house.
At first, however, nothing happened. The two control LEDs on the inverters were flashing red.

- Energieeffizienz trifft Innovation – Hoymiles Mikro-Wechselrichter verwandelt Sonnenlicht in nutzbare Energie für Ihr Zuhause; ideal für Balkonkraftwerke, um erneuerbare Energie effizient zu nutzen.
- 【Eingebautes WLAN für Smart Control】 Mit dem eingebauten WLAN der Hoymiles UPS können Sie Ihre Stromerzeugung in Echtzeit überwachen; eine praktische Funktion für Tech-Nutzer, die alles im Auge behalten möchten.
- 【Einfache Installation und Verwendung】Hoymiles Wechselrichter bietet eine einfache Installation, perfekt für den Heimwerkergebrauch; Ein großartiges Gerät, um die Energieerzeugung auf Ihrem Balkon zu maximieren und gleichzeitig die Umwelt zu schützen.
- ⚡ 2-in-1-Design für maximale Leistung: Der Hoymiles Mikro-Wechselrichter kombiniert zwei Geräte in einem, um die Energieeffizienz zu erhöhen, ideal für Haushalte, die ihre Energiequellen optimieren und den ökologischen Fußabdruck reduzieren möchten.
- LANGLEBIGKEIT LEICHT GEMACHT - Mit dem Hoymiles Mikrowechselrichter tragen Sie aktiv zum Umweltschutz bei; ein großartiges Beispiel für nachhaltige Technologie, die erneuerbare Energie fördert und die Abhängigkeit von fossilen Brennstoffen reduziert.
No balcony power plant works without electricity
A mini PV system works only on a socket which is already supplied with a 220V voltage.
From a safety point of view, this also makes perfect sense! The plug that comes from the module is a normal Schuko plug with the two open metal contacts.
Contact with the metal pins would result in electrocution if the balcony power plant were to permanently deliver electricity.
To prevent this, a balcony power plant always requires an existing power source.
The red LED on the inverter confirmed to me that power can already be generated, but it is not delivered because there is no connection to the grid.
As soon as the plug is connected to the socket, the inverter starts to convert the direct current from the PV module into 220V alternating current. This synchronizes the frequency of 50Hz of the module and the power grid. This process can take up to 2 minutes.
As soon as the frequency matches, the electricity is fed directly into the house grid.
This method worked fine with my two modules in single operation as well as in series connection!
A possible disadvantage of this approach is that such a balcony power plant does NOT work in case of a blackout! If there is no power at the socket, the inverter cannot synchronize and power can then be fed in.
In this case, a storage unit in the system must provide the voltage or a complete stand-alone system is used.

- [NuaSol] Wir bieten Lösungen für die Erzeugung Ihres eigenen grünen Stroms. Von Balkonkraftwerk, Solarmodulen, Mikrowechselrichter bis hin zu Dachhaken, Z-Winkel und vielen anderen Halterungen für Ihre PV-Anlage finden Sie bei uns.
- [Balkon-Halterung] Mit der NuaFix, Balkonhalterungen ist es Ihnen möglich entweder 1 oder 2 Solarmodule sowie Ihren Wechselrichter an Ihrem Balkongeländer befestigen.
- [Wählbarer Neigungswinkel] Wählen Sie zwischen der 0° Halterung oder der 25-45° Halterung, um den idealen Neigungswinkel, die maximale Effizienz Ihrer Solarmodule an Ihrem Balkon zu erzielen.
- [Kompatibilität] Universell für eine Vielzahl von Solarmodul-Arten nutzbar. Geeignet für eckige Balkongeländer mit einem maximalen Durchmesser von 80 mm.
- [Robust & Stabil] Die aus Edelstahl gefertigten Haken sind witterungsbeständig und höchst strapazierfähig. Die Strebe und Halterung zur Regulierung des Neigungswinkels ist aus hochwertigen AL6005-T5 Aluminium hergestellt. Das Schrauben-Set besteht aus Edelstahl und ist somit rostfrei.
Video: Construction, installation and connection of my PV island system
I have already realized such an island system at the animal house. The electricity is generated by currently 4 PV modules and stored in 3 large solar batteries. An automatic switchover to mains power when the batteries are empty secures the power supply.
You can find the matching video for the construction of my island system on my YouTube channel or directly in my photovoltaic playlist.
If you want to see more of me and my projects, feel free to check out my YouTube channel.
Zuletzt aktualisiert am 5. July 2025 um 20:39 . Ich weise darauf hin, dass sich hier angezeigte Preise inzwischen geändert haben können. Alle Angaben ohne Gewähr. (*) Bei den verwendeten Produktlinks handelt es sich um Affiliate Links. Ich bin nicht der Verkäufer des Produktes. Als Amazon-Partner verdiene ich an qualifizierten Verkäufen. Dein Preis ändert sich jedoch nicht.
Balcony power plant and the right phase
In my household there is an electricity meter with 3 phases. L1, L2 and L3. The current from the house connection is therefore, in simplified terms, divided into 3 current ranges. The balcony power plant is connected to a socket which in turn is connected to a phase.
Now all consumers must also run on the same phase as the PV module so that I can also directly consume my self-generated electricity. The answer is YES!
Basically, your electrical devices consume the current from the phase to which they are connected. If the washing machine is on phase L1 and your PV module is on phase L3, then the washing machine will not consume the “same” power.
Therefore it makes sense, if this can be realized at all, if the balcony power plant is on the same phase as the consumer to be supplied.
But now you don’t need to run a separate cable from the washing machine to your garden or balcony. Because it also works like this. The reason is quite simple: the electricity meter works on a balancing basis.
The electricity meter counts the consumption of L1, L2 and L3 together – the own electricity generation would then be a negative consumption. If the total is positive, that is, you consume more than you produce, the electricity meter continues to turn and you pay the difference.
If the electricity production is higher than the current consumption, then the electricity meter (at least the older meters without a lock) turns backwards. This is not allowed in Germany.
If you now have a new meter with a so-called backstop and you currently produce more electricity than you consume, then you give away the surplus to the EVU. That’s annoying, but you don’t have bureaucracy on your leg for that.
Larger plants have to be registered anyway and also have to be registered in the market master register.
Then things like EEG, input tax deduction, ESt, small business regulation, business registration and so on come to you – and a throttling of your large plant to 70% nominal power!
By the way: According to my research, electricity billing in the Netherlands is done using the simple difference method. The electricity meter there also turns backwards and the customer only pays for the actual electricity from the utility.
With this system, the actual consumption can no longer be traced and also an accounting according to EEG, grid charges, etc. would be more difficult.

- ✅[Mehr Strom erzeugen] Zweiachsige Solartracker sorgen dafür, dass sich die montierten Paneele tagsüber dem Sonnenlicht aussetzen. Im Vergleich zu fest installierten Solarmodulen kann die PV-Stromerzeugung mit dem Tracker um mindestens 40 % gesteigert werden.
- ✅[270°-Drehung] Mit 2-Achsen-Antrieb und empfindlichem Sonnenscheinsensor kann sich der Solartracker um 270 ° drehen und die Paneele so gestalten, dass sie die Sonneneinstrahlung von der Nord-, Süd-, West- und Ostseite absorbieren.
- ✅[Beständig im Wind] Es gibt einen Luftgeschwindigkeitssensor für windige Tage, wenn er starken Wind erkennt (Daten können manuell eingestellt werden), setzt der Solartracker den Winkel zum Horizont automatisch zurück, um stabil zu bleiben. Durch das Bohren der Spreizschrauben in den Boden kann der Sockel auch bei Hurrikan oder Sturm problemlos fest stehen.
- ✅[Für verschiedene Panels] Entworfener Platz für 6 Stück 170W ECO-WORTHY Paneele. Für verschiedene Paneele berechnen Sie bitte nach den angegebenen Längenangaben. Die Querstangenlänge: 114,2 Zoll (2900 mm) Breite: 29,4 Zoll (1000 mm) Vertikale Stangenlänge (jede Seite): 45,6 Zoll (1160 mm) Breite: 30,3 Zoll (770 mm). Mit 1500N Treibgestänge.
- ✅[Für Hof/Hof/Feld] Benötigen Sie nur 114,2 Zoll * 114,2 Zoll Bodenfläche, 3,93 Fuß Höhe. Es kann problemlos auf Hof, Bauernhof, Feld und Flachdach montiert werden.
Summary and conclusion
I looked into the possibility of optimizing my own electricity consumption by using a balcony power plant.
In view of rising electricity prices and the search for cost-effective alternatives, the generation of solar power proved to be a viable solution. My focus was on connecting PV modules to generate solar power efficiently.
After realizing that my house’s electricity consumption remained high despite an existing balcony power station in the garden, I decided to add another module.
I chose a parallel connection in which I connected the output of the first inverter to the input of the second inverter. This method enabled me to use both modules efficiently and still comply with the legal limit of a maximum of 600 watts.
I opted for a parallel connection because of the advantages, such as the independence of the modules from each other in the event of shading and the simpler installation, as only one connection cable to the socket was required.
To avoid potential disadvantages, such as too high a total current that could exceed the capacity of the connection cable, I made sure that the connection cable and the inverter of the second module were designed for the combined current load of both modules.
Overall, it was shown that investing in a balcony power plant is a sensible option not only for homeowners, but also for tenants with suitable conditions.
The parallel connection of my balcony power plants offered an efficient and practical solution to partially cover my own electricity requirements and thus reduce energy costs in the long term.

- % - Dank unseres Upgradebaren Wechselrichter auf 800W, sparen Sie ab sofort 33% mehr. Profitieren Sie noch heute.
- - Die Power Lsung mit 4x 500W Modulen erzeugt maximale Leistung, um lange und konstant mit 800 einzuspeisen! Die Montage ist einfach, schnell und ohne Fachkenntnisse mglich.
- - Das 2000W onPower Solar Balkonkraftwerk besteht nur aus hochwertigen Bauteilen. 4x Bifaziale JA Solar JAM60D40 500W Solarmodule, 1x Growatt NEO 800W Wechselrichter, 6x 2,0m Verlngerungskabel, 4x Y-Verteiler, 1x 5m Kabel zur Steckdose & 2x Wechselrichterhalterung.
- - Mit der Telefon-App berwachen Sie Wechselrichter-Daten per WLAN-Funktion in Echtzeit. Sie sind direkt informiert ber tgliche & jhrliche Solarertrge & CO-Einsparungen! Dank einfacher Einrichtung und intuitiver Bedienung direkt startklar!
- - Die Bauteile der Stecker Solaranlage versprechen eine lineare Leistung bis zu 30 Jahre nach dem Kauf. Somit sind die Ertrge Ihres Balkonkraftwerks gesichert und bereit fr die Zukunft.
Dieser Beitrag ist auch verfügbar auf:
English
Deutsch


