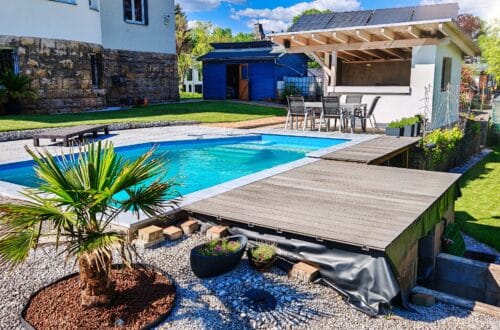
Build your own pool – Masonry walls with reinforcement | Set formwork stones
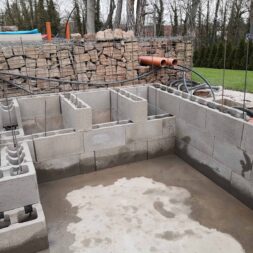
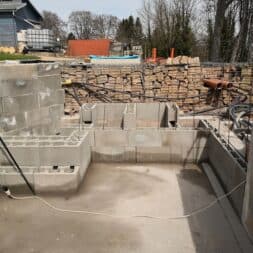
The plans for the construction of our new pool in the garden were finalized and the construction of the pool could continue with the masonry of the pool walls. This step was not particularly complicated, but it was much more time-consuming to implement.
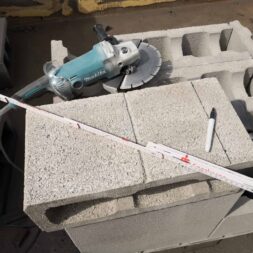
This time the pool was built from solid stones. Of course, these had to be carried to the construction site first. Of course, the formwork blocks also had to be cut and adjusted before installation.
In the following article, I describe how we implemented all of this to build our new pool in the garden.
Concrete or polystyrene formwork blocks for the pool?
When building my garden pool, I was faced with the decision between concrete formwork and polystyrene formwork, whereby both materials have specific advantages and disadvantages as well as differences in processing.
Concrete formwork blocks
Concrete formwork blocks are robust and stable.
They require the use of heavier tools such as hammers, chisels and stone saws for cutting. During installation, particular attention must be paid to precise alignment and the correct mortar mix to ensure stability and durability.
Plastering interior walls with concrete formwork blocks requires careful preparation of the surface, for example by roughening or applying a bonding bridge, followed by several coats of plaster.
Styrofoam formwork blocks
Styrofoam formwork blocks offer the advantage of being lightweight and easier to handle.
They can be processed with simple tools such as a cutter knife and require less physical effort. However, the light nature of these stones requires careful handling to avoid deformation.
When plastering, special plasters or adhesion promoters must be used that are adapted to polystyrene in order to ensure adequate adhesion and elasticity, which is necessary to prevent cracking.
In the end, I opted for concrete formwork blocks, as they promised greater stability and durability despite the need for heavier tools and more intensive work.
This seemed essential to me, especially for the structure of a pool that is permanently exposed to high water pressure.
The decision was also influenced by the fact that I was more familiar with working with concrete formwork blocks and could build on the existing formwork block walls.

- Styroporsteine inkl. Endschuber im Steinformat 100 x 250 x 300 mm Qualität P25
- Innenfolie 0,8mm blau - hochfrequenzverschweißt - mit Keilbiese Aufnahme
- Vliestrennlage inkl. Styropor-Vlieskleber
- Passende Sandfilteranlage mit entsprechender Leistung zur gewählten Poolgröße inkl. Filtersand
- Weithalsskimmer, Wanddurchführung, Verrohrungsmaterial sowie Bodenablaufset Plus
Shuttering blocks for the new pool
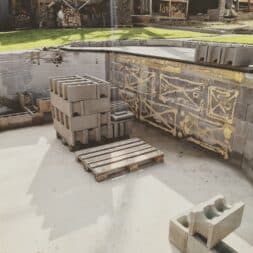
The side retaining walls that held the steel shell of the old pool should continue to be used. At that time, I had built these walls from concrete formwork blocks.
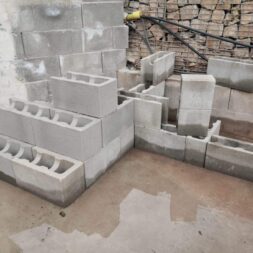
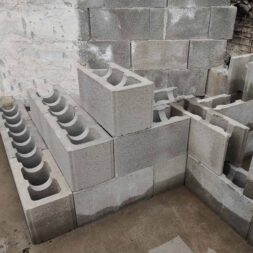
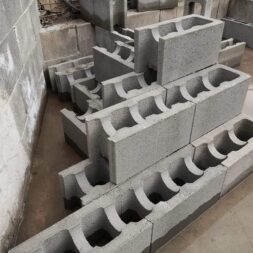
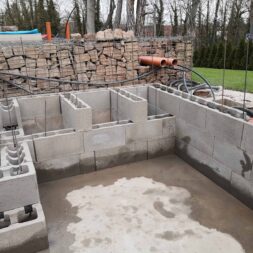
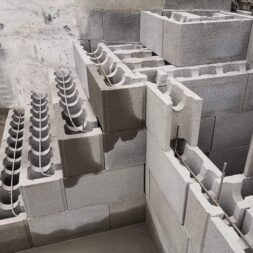
In this process, the hollow concrete formwork blocks are stacked on top of each other in an offset pattern and then filled with liquid concrete. Reinforcement in the walls provides additional stability.
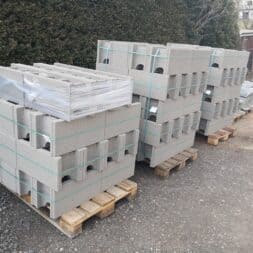
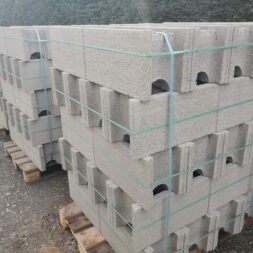
Before I could install the bricks, however, I first had to order them from the building materials dealer. The new wall on the south-west side should be made of 24x25x50 cm stones. The stairs should also be built with 24cm deep stones. This is a good step length.
For the pedestal, I decided on a size of 17.5x25x50 cm because it would already have an enormous stability due to the wall behind it and the filling.
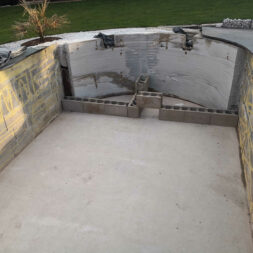
On the south side, things got more exciting. In this area I had already built a smaller, 50cm high, wall with 17.5cm deep stones against the lateral retaining wall. In this way, when the original pool was built, a tub was formed under the pool terrace.
However, this wall, which was about 3 meters long, was not in alignment with the old retaining wall.
To compensate for this shortcoming and at the same time increase the stability of this free wall, the lower area should be widened with 11.5cm deep formwork blocks. From the 3rd row onwards, the 24cm formwork blocks should be installed.
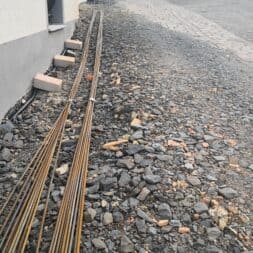
In total, these were already over 60 large stones plus the 17.5 cm stones and the 11.5 cm stones. Over 50 linear meters of reinforcing steel were also on my order list.
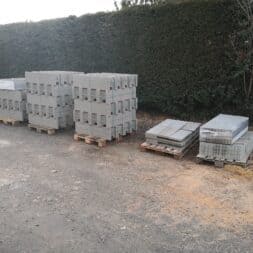
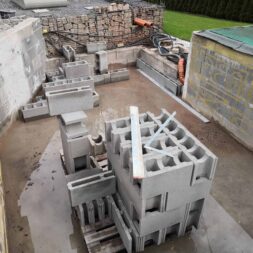
A few days later, the truck came and delivered several pallets of concrete formwork blocks to my driveway and I spent another half day re-stacking the blocks onto pallets in the pool.

- Winkelschleifer mit sehr robustem Gehäuse für den harten Baustelleneinsatz
- Kompakter, flacher Getriebekopf für höhere Schnitttiefe
- mit Anlaufstrombegrenzung verhindert ungewolltes Anlaufen nach Sapnnungsunterbrechung
- Arbeit: Schleifen mit Schleifblatt 2.5 m/s²
The 1st row of pool wall stones is built with formwork stones
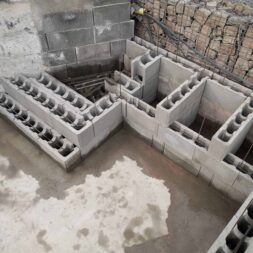
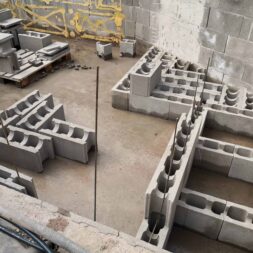
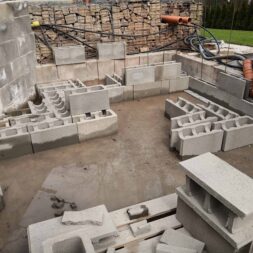
The new pool wall was to be flush with the two old retaining walls and form a rectangular pool area on the west side. In the middle of this wall I wanted to build a cross wall up to the old pool edge.
The whole thing would look like a “T” from the air and would dissipate the water power well.
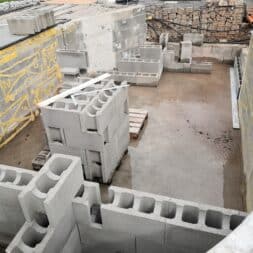
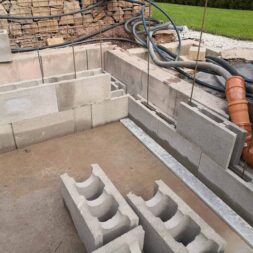
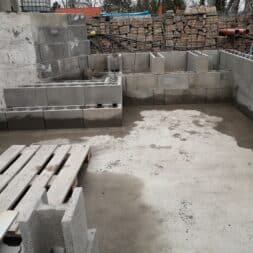
So I first placed the 24 cm deep concrete formwork blocks in a row and experimented a little with the placement of the starting block.
Since the overall length did not match the length of the stone and the wall was to be built offset, it made a difference whether I placed the first stone on the left or the right.
The cross stone for the retaining wall to the rear should also be in the middle if possible – without, however, creating too much waste in the formwork blocks.
This experimentation cost me a lot of time, but I’m sure it saved me a lot of trouble (and money) down the road.

- SDS Bohrer Länge 1 Meter 100 cm für Stein, Beton, Mauerwerk. Bohrer mit SDS Plus Aufnahme Ø 10mm
- Der Steinbohrer zeichnet sich durch eine hohe Standzeit, eine gute Bohrmehl Abtragung und sehr guten Bohrleistung aus
- Lange Bohrungen mit SDS Bohrern benötigen immer eine Führungsbohrung um das Abbrechen des Bohrers an der Maschinen Aufnahme zu vermeiden
- Die Bohrer Spitze ist Hartmetall bestückt
- Gesamtlänge 100 cm | 1 m
Install reinforcing steel in the pool wall
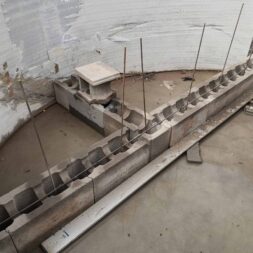
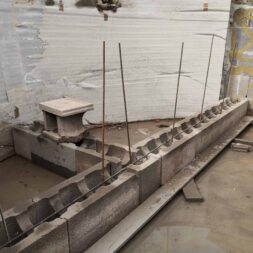
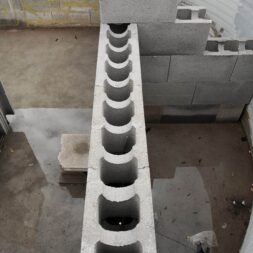
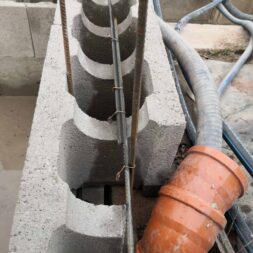
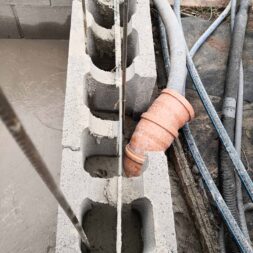
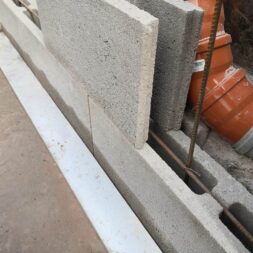
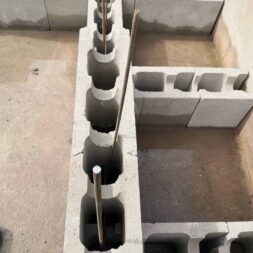
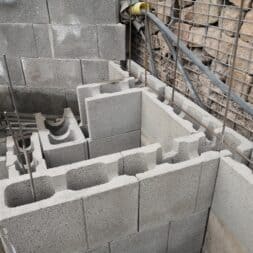
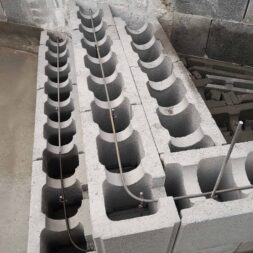
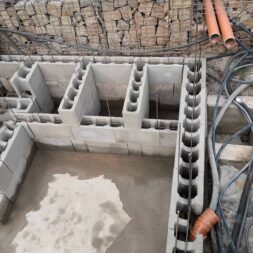
After the first row was laid out, it was necessary to prepare for the installation of reinforcement. My plan was to anchor a rebar in the concrete foundation every 50cm. This was exactly the spacing of the openings in the shuttering blocks.
After each layer of stones should be installed further probationary periods across. Then, in the last row of stones, 2 rebars were provided to build a stable concrete ring.
I now drilled a 10 hole with my drill in every 2 holes of the first row of stones to a depth of a good 15 to 20cm. For this I used a 1 meter long SDS drill. Thus, the work was relatively convenient to do.
After the holes were drilled, I cut the 8mm rebar to a length of about 1.30 meters and inserted the steel into the holes I had just drilled. The reinforcement was then hammered in as far as it would go.
The finished pool walls should be 1.40 meters or 1.50 meters high and one or the other will now ask why does not cut the irons to the appropriate length?
Well, the answer is as simple as simple: each brick of the following row must be lifted over the rebar and threaded. At a height of 1.50 meters, this is only possible to a limited extent, because the steel was not always exactly centered in the holes of the stones. The tension was simply too great.
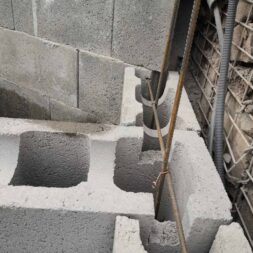
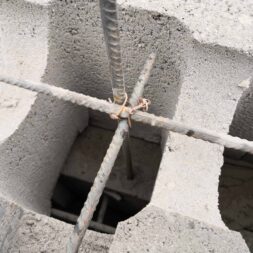
After the irons were plugged in, I cut the iron for the cross brace to length. A further 20cm was added to the left and right as the reinforcing steel was also to be anchored in the two lateral retaining walls.
To do this, I drilled the appropriate holes with the drill and installed the steel. Finally, I twisted the vertical irons with the cross brace. For this purpose, a wire twister or Rödelzange with matching binding wire – so this work is very easy.

- - - Unser Drillapparat besteht aus robustem Carbonstahl und verfgt ber einen mechanisch verstrkten Drahtdreher-Binder-Haken. Der ergonomische, rutschfeste PVC-Griff sorgt fr optimalen Halt und Komfort bei jeder Anwendung.
- & - Dank des integrierten Stodmpfer-Moduls wird Verschlei effektiv reduziert. Die mit einer speziellen Legierung berzogene Carbonspindel gewhrleistet eine dauerhaft leichtgngige und zuverlssige Nutzung Ihres Drahtdrillers.
- - Legen Sie den Draht um die Elemente, stecken Sie den Drahtdreher durch die Verschluss-sen und verdrillen Sie ihn mit 1-3 kurzen Zgen. Sparen Sie Zeit und Mhe gegenber herkmmlichen Methoden wie Drahtzwirbelzangen oder Drehzangen.
- - Ideal fr Floristen, Grtner und Heimwerker. Nutzen Sie den Drillapparat als Eisenflechterzange im Bau, als Rdler-Apparat beim Zaunbau oder als Drahtsackverschluss. Perfekt geeignet fr Drilldraht, Rdeldraht und diverse Bindedrhte.
- - Der speziell geformte Griff liegt bequem in der Hand und reduziert Ermdungserscheinungen bei lngerem Gebrauch. Die hochwertige Verarbeitung und das durchdachte Design machen den Drillapparat zum unverzichtbaren Werkzeug in Ihrem Alltag.
Video: Building pool walls with formwork blocks
I accompanied the conversion of our steel wall pool to a stone pool with the camera and put several videos online. You can also find the video of the construction of the pool walls in my playlist for the project Pool Umbau.
If you want to see more of me and my projects, feel free to check out my YouTube channel.

- Ösenbindedraht verkupfert
- beidseitig mit Schlingen
- ideal für Betonbau, Landwirtschaft, Gartenbau & Industrie
- zum Verschluss von Beuteln, Säcken usw. geeignet
The pool wall on the west side is finished stacking
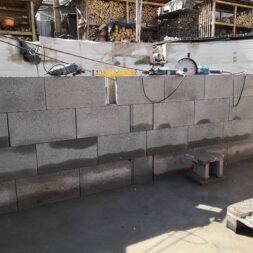
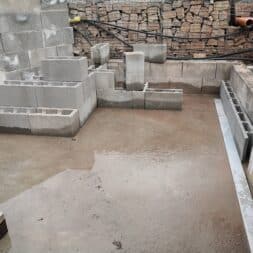
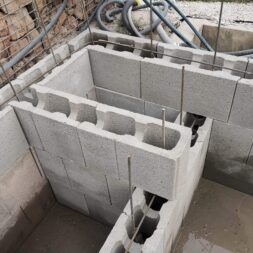
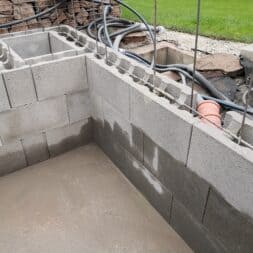
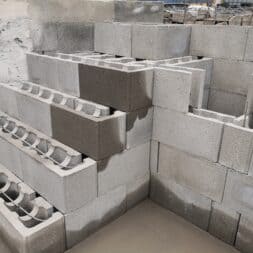
With an offset of half a stone, I then made the 2nd row of formwork blocks stacked flush on top of the 1st row. I used the spirit level to align the stones. So I could be sure that the wall did not get a slope and became absolutely straight.
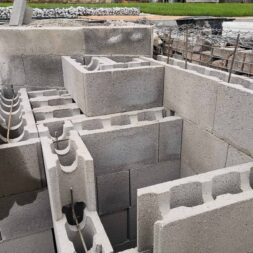
On top of the 2nd row of bricks there was again a cross brace with reinforcing steel which was also anchored here in the lateral retaining walls. In total, I stacked 5 rows of shuttering blocks on top of each other this way.
By the way, no concrete was poured at this stage – that was to happen later.
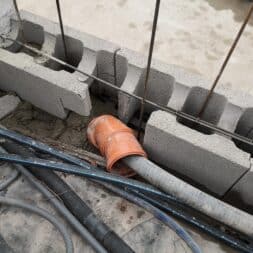
However, the pipes for the inlet nozzles had to be considered already in the 5 row. However, I have written a separate article on this (and on the installation of LED underwater spotlights and skimmers).
The wall on the west side was to be only 1.40 meters high. With a stone height of 25cm I had to shorten the formwork stones of the 6th row by 10cm. But with the large angle grinder and a sharp diamond blade, it was no problem.
Now the two reinforcing bars on the top row of stones were missing, which I also anchored with the two lateral retaining walls. By the way, I extended the short vertical rebars after the 4 row. For this purpose, additional irons were twisted with the existing irons.
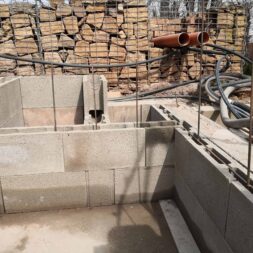
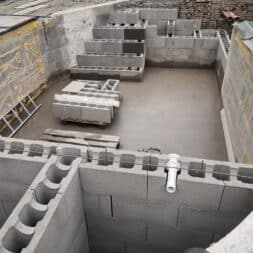
Thus, the pool wall on the west side was finished and only needed to be backfilled.
Zuletzt aktualisiert am 17. December 2025 um 02:54 . Ich weise darauf hin, dass sich hier angezeigte Preise inzwischen geändert haben können. Alle Angaben ohne Gewähr. (*) Bei den verwendeten Produktlinks handelt es sich um Affiliate Links. Ich bin nicht der Verkäufer des Produktes. Als Amazon-Partner verdiene ich an qualifizierten Verkäufen. Dein Preis ändert sich jedoch nicht.
Building a pool wall on an old retaining wall
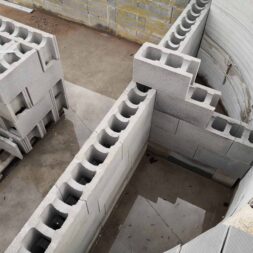
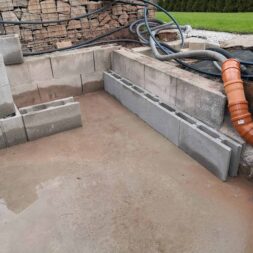
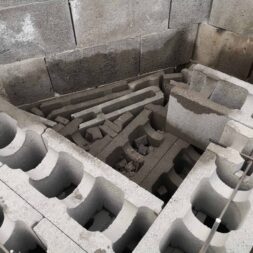
The construction of the pool wall on the south side would be much more complicated. At the bottom there were already 2 rows of 17.5 cm deep concrete formwork blocks. However, these 17.5 cm were too thin for me because this wall was completely free to the rear. 24 cm should be at least.
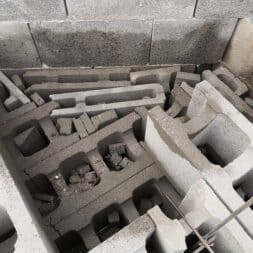
My plan was now to widen the 17.5 cm by facing with the 11.5 cm bricks and then from the 3 row, flush with the inside, to continue building with 24 cm bricks. So I placed the 11.5 cm bricks flush against the old retaining wall in front of the 17.5 cm bricks.
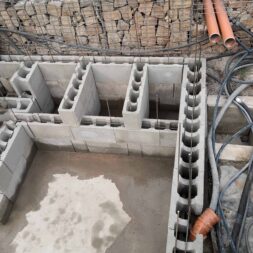
At the same time, however, I had to pay attention to the cross wall for the later platform in order to create a bond. The first row of 11.5 cm stones thus went through to the end of the pool and the second row was interrupted by a stone from the platform wall.
The third row of the platform wall should then become flush with the outer edge of the new 24 cm row of bricks. Thus, all walls in this area were built with offsets and connected to each other.
The reinforcing steel I installed in the same way as I had already done on the west wall, of course, added to the stability. Of course, the reinforcing steel of the platform wall and pool outer wall was twisted together here as well.
Since a pool depth of 1.50cm was planned in this area, I did not have to shorten the top row of stones and could install and twist the two rebars directly.

- Betonstahl im Durchmesser 4 mm bis 16 mm auswählbar
- Bewehrungsstahl in den Längen 50cm, 75cm, 1,00m, 1,25m, 1,50m oder 2m auswählbar
- Längentoleranz +/-3mm
- Streckgrenze 500 N / mm² - Zugfestigkeit 550 N / mm²
- Lieferumfang: 10 Stück je ausgewählter Größe (bei 50cm jeweils 10x 2 Stück)
Build stairs and platform in the pool
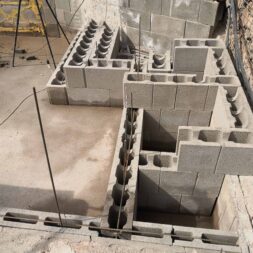
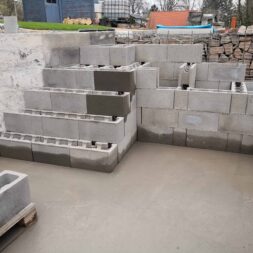
The construction of the staircase with the formwork blocks and the construction of the landing was done in one step with the construction of the south wall and the east wall behind the landing. All sections were interlocked (opening over opening) and twisted together with the reinforcing steel.
The staircase was also built with the 24cm deep concrete formwork blocks. As already mentioned, this dimension represents an optimal mix of footprint and material use. The stairs were set flush with the pool on the inside and offset.
Moving down, I again anchored the iron reinforcement in the concrete foundation and pulled an additional iron on each step.
This crossbar was anchored into the side pool wall, and bent 90° to the landing at the outside edge of the stairs, and then anchored into the wall behind the stairs.
On the transverse wall from the platform this iron was twisted with the reinforcement from the platform wall. The stability should be more than sufficient.
I used the off-cut of the formwork blocks in the area of the stairs. The entire staircase area, with a volume of a good 2x2x1.4 meters, swallowed up a lot of material.
For the pedestal, I made it easier: the cavity between the front wall in the pool and the outer wall had a depth of 75 cm and a width of just under 2 meters.
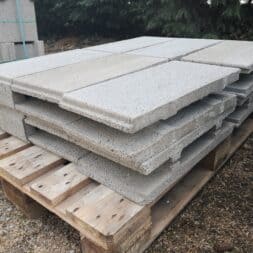
For stability, I have installed 2 cross walls between the inner wall and the outer wall here. I filled the remaining space with 0-32 crushed stone and compacted it in layers. At the top, the platform is then covered with a good 20 cm thick concrete layer incl. installed reinforcement closed.
The installation of the skimmer and the LED underwater spotlight was done at the same time and is described in another blog entry about the pool remodeling.
- Hält bis zu 1,5x länger als eine Bosch Eco for Universal Trennscheibe
- Äußerst effizient für Bauarbeiter: Lange Lebensdauer
- Mit 22,23 mm Bohrungsdurchmesser für Standard Winkelschleifer mit Spannmutter
- Zum Schneiden verschiedener Baumaterialien, z. B. Stein, Ziegel, Stahlbeton und anderer gängiger Baumaterialien und Verbundwerkstoffe
- Lieferumfang: PRO Multi Material Diamanttrennscheibe, 230 x 22,23 mm
Summary and conclusion
The plans to build my new pool in the garden were finalized and I started to build the pool walls. Although this task was not particularly complicated, it was very time-consuming to implement.
I was faced with the choice of building the pool walls using either concrete formwork blocks or polystyrene formwork blocks.
Concrete formwork blocks are known for their robustness and stability. They require the use of heavy tools for cutting and a precise mortar mix to ensure the necessary stability and durability.
Plastering the interior walls with concrete formwork blocks also requires careful preparation and a multi-layer plaster application.
Styrofoam formwork blocks, on the other hand, are light and easy to handle. They can be processed with simple tools, which minimizes physical effort. However, when plastering, they require special plasters that are adapted to polystyrene in order to prevent cracking.
In the end, I opted for concrete formwork blocks, as they promised greater stability and durability despite the heavier processing and more intensive work involved, which is crucial for the structure of a pool that has to withstand high water pressure on a permanent basis.
This decision was also based on the fact that I was more familiar with the processing of concrete formwork blocks.
The side retaining walls of the old steel shell pool, which I had built from concrete formwork blocks, were still used. The formwork blocks were stacked on top of each other in an offset and reinforced by a reinforcement in the walls.
Once the concrete formwork blocks had been ordered and delivered, I started building the pool walls, paying particular attention to the correct anchoring of the reinforcing steel to ensure maximum stability.
The entire construction provided me with a solid base for the further construction of the pool and the subsequent filling with concrete to complete the structure.

- Ösenbindedraht verkupfert
- beidseitig mit Schlingen
- ideal für Betonbau, Landwirtschaft, Gartenbau & Industrie
- zum Verschluss von Beuteln, Säcken usw. geeignet
FAQ on building a pool with concrete formwork blocks
1. why use concrete formwork blocks instead of polystyrene formwork blocks for pool construction?
Concrete formwork blocks offer greater stability and durability, which is crucial for a pool that has to withstand high water pressure. They are more robust, even if they are more difficult to work with.
2. what tools are needed to build pool walls with concrete formwork blocks?
A hammer, chisel, masonry saw, spirit level and cordless screwdriver are required for working with concrete formwork blocks. Drills and diamond cutting discs should also be used for cutting.
3. how is the reinforcement correctly installed in the pool walls?
Reinforcing bars are anchored in the concrete foundation and passed vertically through the formwork blocks at regular intervals, e.g. every 50 cm. Additional cross struts made of reinforcing steel are installed after each layer of bricks.
4 Why is correct alignment of the first row of bricks so important?
The first row lays the foundation for the entire wall. Careful alignment with a spirit level ensures that the walls are straight and stable. Mistakes in the first row continue upwards and can be difficult to correct later.
5 What must be observed when filling the formwork blocks?
The concrete formwork blocks should only be filled with concrete after the entire walls have been stacked and the reinforcement has been installed. This increases stability and the walls can be optimally compacted.
6 What steps must be taken when integrating inlet nozzles and skimmers?
The positions of the inlet nozzles, skimmers and other built-in parts must be taken into account when building the formwork blocks. The corresponding areas are prepared before the stones are filled so that the parts can be installed correctly later.
7. how to build a pool staircase with formwork stones?
The staircase is constructed from concrete formwork blocks at a depth of 24 cm. The reinforcement is anchored both vertically in the floor and horizontally in the steps. An additional bond with the adjacent walls ensures stability.
8. what are the advantages of concrete formwork blocks for pool construction?
Concrete formwork blocks offer high stability and are ideal for pools that are exposed to high loads. They enable a flexible design and can form a very durable pool structure when combined with reinforcing steel.
9 What are the challenges of using concrete formwork blocks?
The processing of concrete formwork blocks requires heavy tools and physical effort. The exact alignment and filling of the stones with concrete are also time-consuming and require precise work.
10. how is the stability of the pool walls additionally increased?
Stability is significantly increased by inserting reinforcing steel into the walls and twisting it with cross bracing. The formwork blocks should also be stacked in an offset pattern to ensure a firm and durable structure.

- Winkelschleifer mit sehr robustem Gehäuse für den harten Baustelleneinsatz
- Kompakter, flacher Getriebekopf für höhere Schnitttiefe
- mit Anlaufstrombegrenzung verhindert ungewolltes Anlaufen nach Sapnnungsunterbrechung
- Arbeit: Schleifen mit Schleifblatt 2.5 m/s²
Dieser Beitrag ist auch verfügbar auf:
English
Deutsch


