Build your own concrete foundation for garden kitchen and garden shed
For over 6 months I have been planning the construction of the new garden kitchen and the Small animal house. But without concrete foundation I can not build a house in the garden. Now came kort-term the promise, that theeton foundation finallyh can be built on the two plateaus in the garden.
I have already prepared the ground so that the outdoor kitchen and the outdoor aviary can be built safely and stably on the slope in our garden.
In this post, I’ll tell you exactly what I’ve already done and what else I had to consider when building the solid foundation.
Why do I needWhy do I need a concrete foundation in the garden?garden?
Due to the slope of my GI have created several levels or plateaus in order tohe garden area to be able to use the garden area optimally. On the south side of the house was already many years ago a 30 square meter plateau was built into the slope.built.
For this I have aringanchor with gabions, so Stone baskets, built. The area within the Rings I had filled with soil and compacted.
On the south–east side, right next to the gabion plateau, there was a slope until a few years ago. slope.
This slope zoThis slope extended over a length of a good 40 meters to the Eing in the north. Also Thisslope was with a massive gabion wall enclosed and filled in.
Partly the Gabion wall is 2 mmeters high and thus forms a nice platform above the underlying surface below.
Although I compacted the backfilled soil in layers with my vibratory plate, I did notplate, but the is really stable and load-bearing.this subsoilround.
So that my new massive garden kitchen but also the new animal house and the bird aviary do not the subsoil with a massive concrete massive concrete foundation stabilisiert be stabilized.

- Gabionenkorb * Breite 1000 mm * Höhe 1000 mm * Tiefe 500 mm
- Frontgittergröße 1000 x 1000 mm * Maschenweite 50 x 100 mm * Drahtstärke 4,5 mm
- Maschenweite der restlichen Gitter 100 x 100 mm * Drahtstärke 4,5 mm
- Verbindungsart * Spiralverbindung
- Ausführung Galfan (95% Zink, 5% Alu)
What is important during Construction of a concrete foundation in thegarden to pay attention to?
You can actually build a solid concrete foundation directly in in an excavated area create. The concrete hardens and the surface is hard and stable. In the long term, this procedure, however, can lead to problems.
If the concrete foundation comes into permanent contact with the contact with the ground, the moisture from the soil migrate into the concrete. In water can freeze under the foundation and lift or shift the floor slab. shift.
Good frost protection is therefore recommended.
Furthermore, the planned Foundations with their surface of some exposure to the environment. In the summer dhe direct sunlight the foundation Heat strongly. The Concrete would sexpand and in the crack in the worst case.
Moisture would penetrate through the cracks and damage the foundation by further harm the formation of ice in winter. To protect the foundation should ae good reinforcement be installed. Also special expansion jointen can provide a remedy here.
Zuletzt aktualisiert am 17. December 2025 um 02:54 . Ich weise darauf hin, dass sich hier angezeigte Preise inzwischen geändert haben können. Alle Angaben ohne Gewähr. (*) Bei den verwendeten Produktlinks handelt es sich um Affiliate Links. Ich bin nicht der Verkäufer des Produktes. Als Amazon-Partner verdiene ich an qualifizierten Verkäufen. Dein Preis ändert sich jedoch nicht.
Concrete fundament for thePrepare kitchen
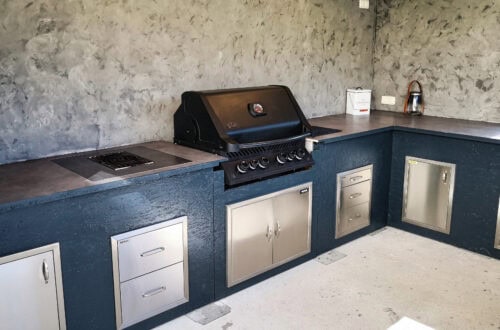
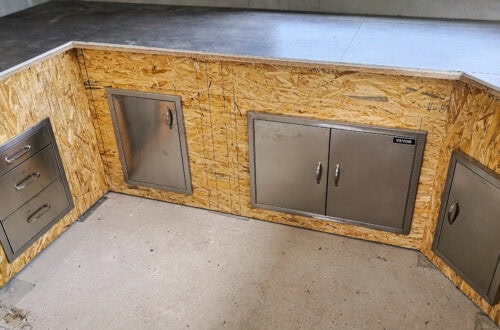
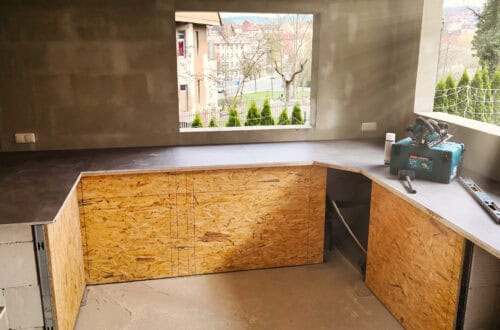
The garden kitchen is to be located on der area directlyly be built right next to the pool. The surfaces should seamlessly with each other and should match the level of the adjacent walkways. sidewalks.
Since I later still terrace boards odeor flagstones later, the Surface of the newn Concrete foundations a good 5cm under the later finished level lie. The plateau was after a good 10 years relativly firmly sunk, but still too high for my plans.
Therefore, the upper area was excavated by a good 50cm
shaved off
.
The excavated material was moved with a shovel and wheelbarrow at another place of the property temporarily stored.
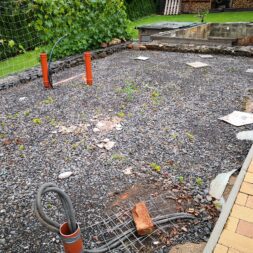
Go to Protection from frost were well gut 15 cubic meters of crushed stone (0–32) installed in layers and with the Rvibratory plate condensed. Total thus arose good 50cm hough frost protection layer.
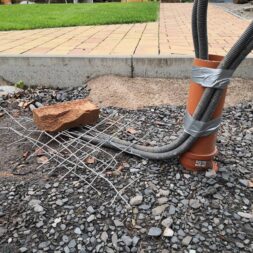
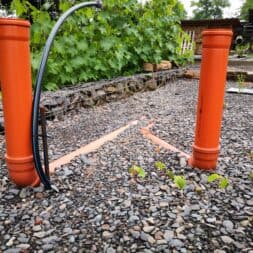
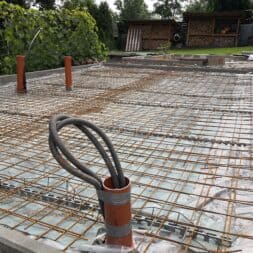
Form installation of the froprotection I have I already laid the lines and pipes that would later be required in the ballast bed. For this I have 2 KG pipes on the west side and one KG pipe on the east side.n dug. These tubes I will later use as empty pipes.
Furthermore, a 25 water pipe was also laid and 2 Electric Empty Tubes. In this way I can later use the Kitchen with electrics, Networkwater and Sewage supply.

- Schneidleistung bis 48 HRC Härte
- Robuste Schneiden zusätzlich induktiv gehärtet, Schneidenhärte ca. 62 HRC
- Angeschmiedeter Anschlag mit komfortablem Dämpfer
- Gute Zugänglichkeit durch sehr flachen Kopf- und Gelenkbereich
- Schenkel ergonomisch abgewinkelt für ermüdungsarmes Arbeiten
Building formwork for concrete foundation with concrete shelves
To ensure that the liquid concrete stayed where it was supposed to, the sides had to be be shuttered, of course. On the gabion plateau, however, this was not so easy.
The subsoil consisted of a solid layer of gravel and on the sides was everything open. With Except for the sidewalk on the north side nowhere could fix the formwork boards.
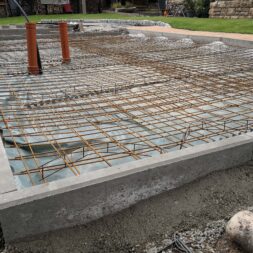
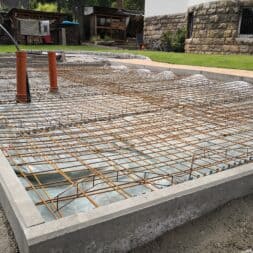
The solution The solution was as ingenious as it was simple: a ring, or better said a ring, was placed on the edge in front of the gabions.gt a U, made of solid concreterten drawn. These braids were set concrete and aligned. Now lacked only the reinforcement.
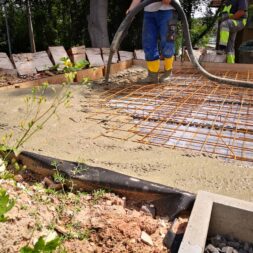
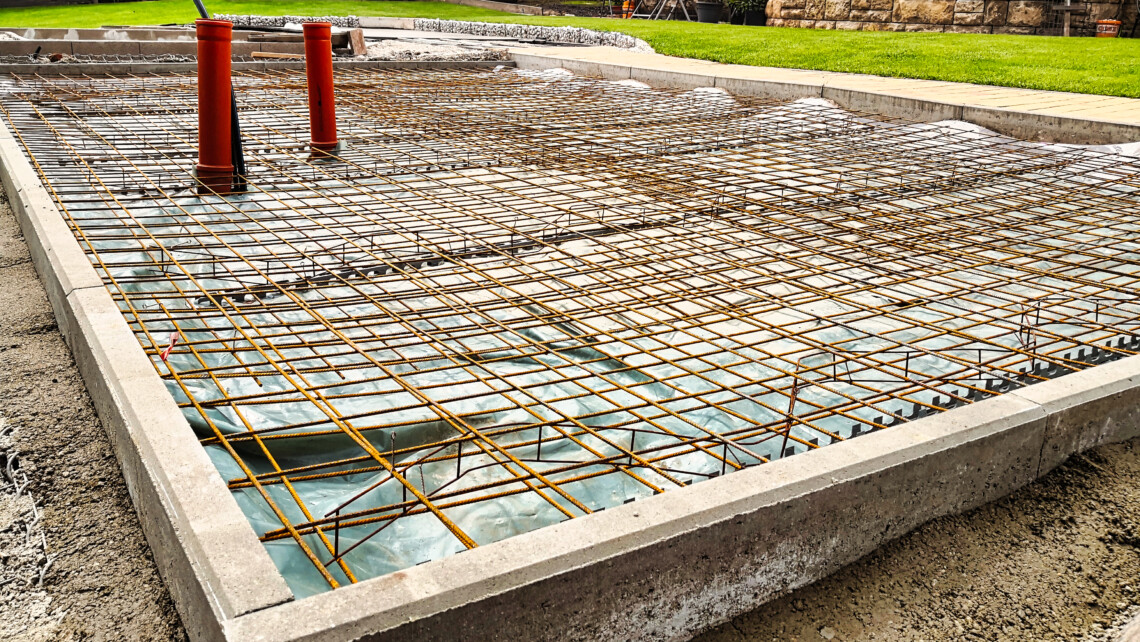
So that the concrete not dry out too quickly on the one hand, and on the other hand through the frost protection, a film was applied to the surface of thefoil was spread over the spread.
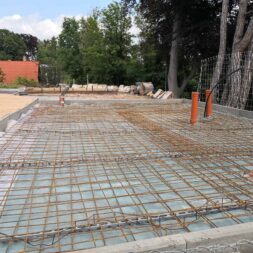
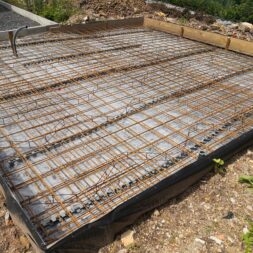
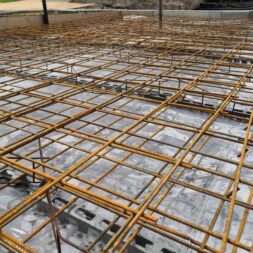
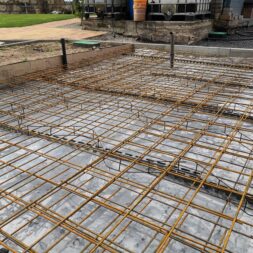
On the foil spacers were then laid out and the first layer of reinforcing mesh installed. The KG Pipes and the water pipes were carefully cut out with the bolt cutter.ted.
Subsequently was a further spacer twisted with the reinforcement mesh before a 2 layer was installed. The
Preparations were thus ready and the concrete pump could get started.

- - - Unser Drillapparat besteht aus robustem Carbonstahl und verfgt ber einen mechanisch verstrkten Drahtdreher-Binder-Haken. Der ergonomische, rutschfeste PVC-Griff sorgt fr optimalen Halt und Komfort bei jeder Anwendung.
- & - Dank des integrierten Stodmpfer-Moduls wird Verschlei effektiv reduziert. Die mit einer speziellen Legierung berzogene Carbonspindel gewhrleistet eine dauerhaft leichtgngige und zuverlssige Nutzung Ihres Drahtdrillers.
- - Legen Sie den Draht um die Elemente, stecken Sie den Drahtdreher durch die Verschluss-sen und verdrillen Sie ihn mit 1-3 kurzen Zgen. Sparen Sie Zeit und Mhe gegenber herkmmlichen Methoden wie Drahtzwirbelzangen oder Drehzangen.
- - Ideal fr Floristen, Grtner und Heimwerker. Nutzen Sie den Drillapparat als Eisenflechterzange im Bau, als Rdler-Apparat beim Zaunbau oder als Drahtsackverschluss. Perfekt geeignet fr Drilldraht, Rdeldraht und diverse Bindedrhte.
- - Der speziell geformte Griff liegt bequem in der Hand und reduziert Ermdungserscheinungen bei lngerem Gebrauch. Die hochwertige Verarbeitung und das durchdachte Design machen den Drillapparat zum unverzichtbaren Werkzeug in Ihrem Alltag.
Video: Concrete foundation in the gardenbuild your own garden
Of course, I captured the construction of the concrete foundation on camera and created an exciting Video shot. In my Youtube–channel you can find the complete playlistcomplete playlist for the construction of my Gkitchen and the garden shed.
If you want to see more of me and my projects, feel free to check out my YouTube channel.

- Ösenbindedraht verkupfert
- beidseitig mit Schlingen
- ideal für Betonbau, Landwirtschaft, Gartenbau & Industrie
- zum Verschluss von Beuteln, Säcken usw. geeignet
Concrete fundament for the Ggardenhouse prepare
The effort for the new Garden house should not be quite so time-consuming. The area above my gabion wall had settled for 2 years and was beready relatively level.
I have the size of the future concrete footingfoundation and defined this area.ereich to approx. 60 to 80 cm depth completely out of cofferdam.
Then I have the later position for the garden house bestimmt and an electric conduit was inserted in such a way that it would later emerge from the concrete foundation exactly from the concrete foundation.ent.
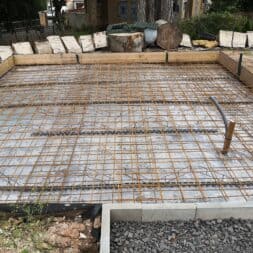
Starting from the sidewalk I have now formwork with 25cm high formworkttern built in the format 4×4 meters. The formwork boards were all installed in balance.
Herehave normal wooden slats from theaunbau into the ground and the boards on it from the outside (!) screwed together. The corners were mit angle plates also from the outside (!) screwed together.
Now a weed fleece was from the outside to thealboards and the the area from the outside filled with the excavated material.
Parallel to thisinside my formwork of my formwork the ballast (0–32) layer by layer up to the lower edge of the of the formwork boards and compacted.
The soil on the outside of the boards should stabilize the form – finally dthe liquid concrete pushes against the boards with an enormous force when it is poured.
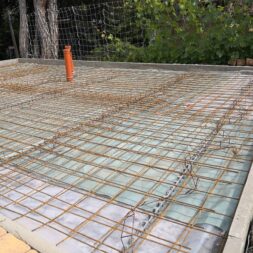
Shuttering boards. Here, too, a foil was now laid out and the spacers placed.
Then followed the first reinforcement mat, the second spacer and finally Finally the second mat.

- KEIN UNKRAUT PFLÜCKEN MEHR - Mit dem hochwertigen Filtervlies von Xabian sparen Sie sich eine Menge Arbeit! Lästiges Pflücken von Unkraut gehört der Vergangenheit an! Pflanzen wachsen Dank dieser Unkrautschutzfolie von nun an dort, wo Sie es möchten!
- INNOVATIVES MATERIAL - Unser Unkrautschutzvlies für Pflanzen ist besonders atmungsaktiv, reißfest und wasserdurchlässig! Die schwarze Farbe des Bodenvlies heizt den Unkraut Vlies bei Sonneneinstrahlung auf und speichert die Wärme und Feuchtigkeit!
- VIELSEITIG & BELASTBAR - Mehr als ein reiner Vlies gegen Unkraut! - Durch die hohe Qualität und Dicke des Pflanzenvlies wird eine außergewöhnlich hohe Reißfestigkeit erreicht! Ideal als Trennvlies, Drainagevlies, Hochbeet Folie, Wurzelvlies, Sandkastenvlies oder als nachhaltige Gartenfolie!
- WITTERUNGSBESTÄNDIG - Dieses Vlies besteht aus hochwertigstem Polypropylen & ist dadurch absolut witterungsbeständig. Starke UV-Strahlen oder Regen und Feuchtigkeit können dem Bodenvlies nichts anhaben. Dieses Unterbodengewebe bleibt beständig!
- 30-TAGE-RÜCKGABERECHT - Sie sind nicht zu 100% mit unserer Mulchfolie zufrieden? Dann schicken Sie das Vlies kostenlos zurück und Sie erhalten ohne Wenn und Aber Ihr Geld zurück. Ganz ohne Risiko! Unternehmenssitz in Deutschland.
Pouring the foundation with the concrete pump
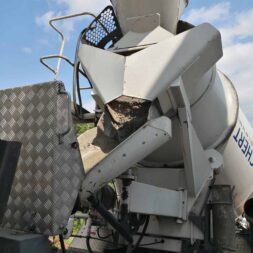
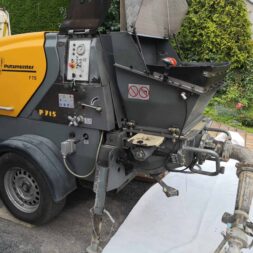
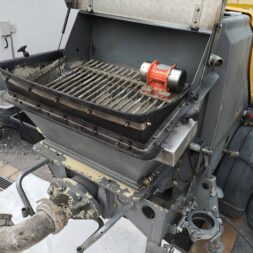
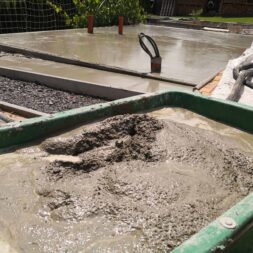
A few days later, the time had come. A mobile concrete pump was already waiting in my driveway on the big concrete mixer that delivered the much-awaited goods. The truck with the mixing drum filled the relatively liquid concrete first into the concrete pump.
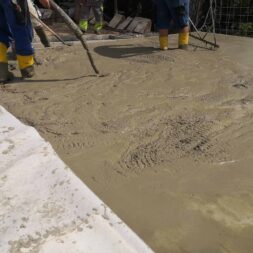
From here it went over an approx. 30m long hose into the Garden. The concrete was now poured into the formwork poured and then smoothly buffed. Due to the Amount of concrete, the truck had to make another trip to the concrete to the concrete plant to reload fresh concrete.
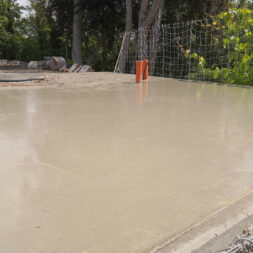
But after a good 3h it was done and the both surfaces were filled with concrete and levelled.
So that the sun did not dry out the concrete too dried out too quickly, thus reducing the risk of crackformation existedthe entire surface was covered with a covered with a film and every 30 minutes with the garden hose watered.
The next day we could already walk on the concrete and start the preparations for the construction of the garden kitchen and the gazebo could start.

- Plattengröße: 540 x 420 mm / Hohe Vorlaufgeschwindigkeit – zur Erhöhung der Arbeitsleistung
- Verdichtungsdruck: 23000 N / Leistungsstarker 5,6 PS Motor
- Inklusive Fahrvorrichtung, zum Transport auch durch eine Person
- Inklusive schwarzer Gummimatte für Pflasterarbeiten
- Automatischer Vorlauf – erlaubt dem Anwender dennoch problemlosen Eingriff in die Bewegungsrichtung
Summary and conclusion
I have been planning and working on the construction of a new garden kitchen and a small animal house for over six months.
A stable concrete foundation is essential for any garden shed, so I was relieved when I finally received confirmation that the foundation could be built on the two plateaus in the garden.
A concrete foundation is essential to stabilize the structure of the garden shed on the sloping plot.
The south side of my house already has a 30-square-meter plateau that was built many years ago and is supported by gabions. Another slope was also stabilized and now offers a flat surface.
Despite the compaction of the backfilled earth using a vibrating plate, the subsoil was not sufficiently stable for the planned solid garden kitchen and the other structures.
The challenge when building a concrete foundation in the garden is to protect it from moisture and the effects of the weather, which could damage the material.
Frost in particular can cause problems if water gets under the foundation and freezes. Effective frost protection and a well thought-out design with reinforcement and expansion joints are essential to prevent long-term damage.
The preparation of the concrete foundation for the garden kitchen required extensive earthworks. The surface of the foundation was deliberately planned 5 cm below the later finished level so that decking boards or stone slabs could be embedded.
In addition, important supply lines for the garden kitchen and the animal house, such as the water and electrical lines, were prepared.
For the actual pouring of the concrete, the side areas were marked out with concrete boards and covered with a film to protect the concrete from direct contact with the substrate. The reinforcement was carefully installed to strengthen the structure.

- Für alle Markierungen auf Asphalt, Beton, Holz und Erde
- Inhalt (ml): 500
- Farbe: neonpink
FAQ on building a concrete foundation in the garden
1. why is a concrete foundation necessary for a garden kitchen or garden shed?
A concrete foundation provides the necessary stability and prevents structures from sinking or shifting, especially on uneven or sloping terrain. It provides a solid base and protects the structure from moisture and frost damage.
2. which steps are important when preparing a concrete foundation?
First, the substrate should be sufficiently excavated and provided with a frost protection layer of compacted gravel. Important supply lines, such as water and electrical lines, must be planned and laid in good time before the concrete is poured.
3. how to protect the concrete foundation from frost and moisture?
A frost protection layer of gravel prevents water from getting under the foundation and freezing there. In addition, a waterproofing layer, such as a foil, should be placed under the concrete foundation to prevent direct contact with the damp ground.
4 What needs to be considered when reinforcing a concrete foundation?
The reinforcement, usually in the form of steel mesh, should be installed in several layers in the concrete foundation. It increases stability and prevents cracking due to stresses in the concrete. Spacers ensure that the reinforcement remains in the right place in the concrete.
5 Why is formwork necessary when pouring the foundation?
A formwork prevents the liquid concrete from leaking and ensures that the foundation has the desired shape and height. If the terrain is uneven or the sides are open, the formwork must be particularly stable and well sealed.
6 How is a foundation protected against frost?
To avoid frost damage, the foundation is constructed at a frost-free depth and a frost protection layer of gravel is installed. This prevents moisture from rising and water from freezing under the concrete.
7. what measures are necessary after pouring the concrete?
After watering, the foundation should be protected from drying out too quickly to prevent cracking. This can be achieved by covering the concrete with foil and watering it regularly.
8 Why is it important to maintain the correct level for the concrete foundation?
The foundation should be about 5 cm below the planned finished level so that decking boards or stone slabs can be laid on it later without exceeding the final height.
9 What are the challenges of building a concrete foundation on sloping terrain?
On a slope, the foundation must be particularly stable to prevent movement or slipping. Solid preparation of the substrate, suitable formwork and correct reinforcement are crucial here.
10. how long should the concrete harden before further construction?
The concrete should harden for at least one day before it is walked on and dry for several weeks before further construction work is started. Complete curing can take up to 28 days.

- - - Unser Drillapparat besteht aus robustem Carbonstahl und verfgt ber einen mechanisch verstrkten Drahtdreher-Binder-Haken. Der ergonomische, rutschfeste PVC-Griff sorgt fr optimalen Halt und Komfort bei jeder Anwendung.
- & - Dank des integrierten Stodmpfer-Moduls wird Verschlei effektiv reduziert. Die mit einer speziellen Legierung berzogene Carbonspindel gewhrleistet eine dauerhaft leichtgngige und zuverlssige Nutzung Ihres Drahtdrillers.
- - Legen Sie den Draht um die Elemente, stecken Sie den Drahtdreher durch die Verschluss-sen und verdrillen Sie ihn mit 1-3 kurzen Zgen. Sparen Sie Zeit und Mhe gegenber herkmmlichen Methoden wie Drahtzwirbelzangen oder Drehzangen.
- - Ideal fr Floristen, Grtner und Heimwerker. Nutzen Sie den Drillapparat als Eisenflechterzange im Bau, als Rdler-Apparat beim Zaunbau oder als Drahtsackverschluss. Perfekt geeignet fr Drilldraht, Rdeldraht und diverse Bindedrhte.
- - Der speziell geformte Griff liegt bequem in der Hand und reduziert Ermdungserscheinungen bei lngerem Gebrauch. Die hochwertige Verarbeitung und das durchdachte Design machen den Drillapparat zum unverzichtbaren Werkzeug in Ihrem Alltag.
Dieser Beitrag ist auch verfügbar auf:
English
Deutsch


