Build your own carport – embedding post anchors in concrete
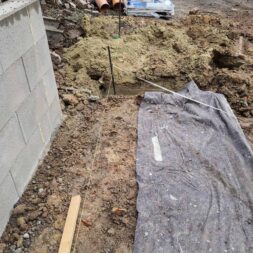
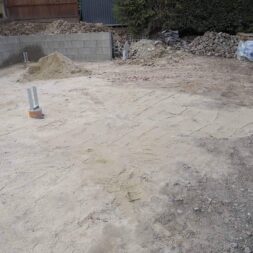
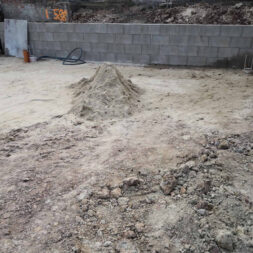
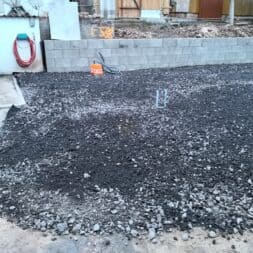
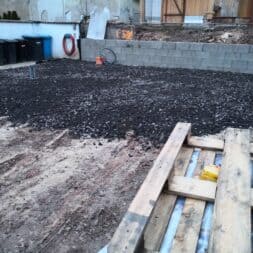
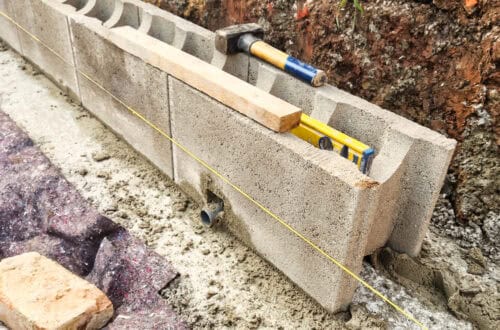
Within a few weeks, we had prepared the excavation pit for our future double carport. The retaining wall on the slope was also built with formwork stones and has already been backfilled. The earth now had to subside and the frost from the winter months had to disappear first.
I have described the details for preparing the ground for the new carport in the article Building a carport yourself – preparing the building site, and you can find my entry on building the slope stabilization with formwork stones in the article Building a carport yourself – securing the slope with formwork stones.
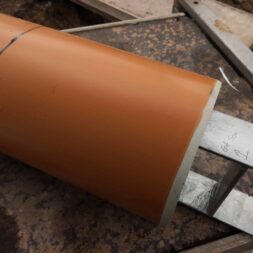
In the meantime, we were able to take our time to order the carport and make further preparations. Among other things, we used the time to concrete in the H-post anchors, which were to anchor the double carport securely in the ground, using KG pipes.
In this article, I describe how we made the right choice for our carport, how the order was processed in the online configurator and how we set the large, heavy H-post anchors in concrete safely and stably.
Requirements for the carport
There are various types of carports, which differ in terms of design and materials. The most common designs are the single carport, the double carport and the row carport. A single carport offers space for one vehicle, while a double carport, as the name suggests, can accommodate two vehicles. Terraced carports are ideal for apartment buildings or terraced housing estates, as they offer space for several vehicles side by side.
Designs
- Single carport: Space for one vehicle, ideal for smaller properties.
- Double carport: Space for two vehicles, without center post in the driveway.
- Row carport: Several parking spaces next to each other, ideal for apartment buildings.
Materials
The choice of material for the carport not only influences the appearance, but also the durability and ease of maintenance. The most common materials are wood, metal and plastic.
- Wood: Carports made of wood blend in well with their natural surroundings and look warm and inviting. However, they require regular care in order to remain protected against the weather.
- Metal: Carports made of metal, especially aluminum or steel, are robust and durable. They are largely maintenance-free and offer a modern look.
- Plastic: Plastic carports are easy to clean and weather-resistant, but less robust than wood or metal. They are well suited for smaller carports and offer an inexpensive alternative.
Our new carport
Our new carport should be able to accommodate at least two vehicles and not have a center post in the driveway. A flat roof was also a requirement, as we wanted to install a photovoltaic system on the carport roof later.
It therefore had to be at least a double carport.
Due to our residential location, an increased load-bearing capacity for the snow load was not absolutely necessary, but was a further selection criterion due to the additional weight of the PV system.
The carport therefore had to be stable and very strong, which is why a plastic carport was ruled out.
Ultimately, the new carport also had to fit in with our planned outdoor facilities and match the charm of our villa, which was built in 1900. A modern metal carport was not really suitable for this.
Instead, a seemingly simple but attractive wooden carport was exactly what we needed.
The offer on site was rather manageable. Although the local DIY store offered several models, none of them met our requirements and expectations.
Alternatively, it would have been possible to have it made by the local carpenters and joiners, but the necessary structural calculations alone were far too expensive for me.

Configure and order carport online
On the Internet, however, the choice was overwhelming. We opted for a model from the manufacturer “Easycarport” due to the uncomplicated and immediate quotation and the promising possibilities. The manufacturer offers various standardized kits that can be adapted on site.
Due to the standardized construction method, the carports on offer were very attractively priced. I can now also confirm that the quality of the kit is very good.
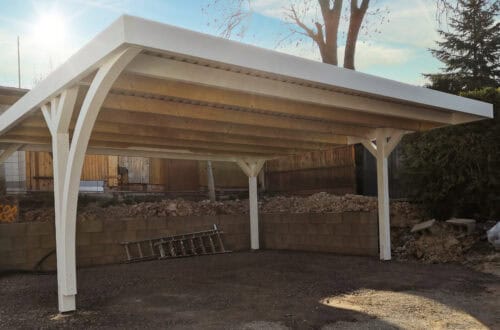
We opted for a freestanding wooden model measuring 6 x 6 meters with just four posts. We did not choose the side walls and storage room.
The chosen carport was to be painted white, and the design perfectly matched the Prefa shingles of the same color on our mansard roof thanks to a surrounding roof edge made of anthracite-colored aluminum.
Various packages, such as the rain gutter set, the paint package and the snow load reinforcement, rounded off our package. At our request, delivery was not to take place until two months later, so that we had enough time for further preparations.
H-post anchor concreting itself
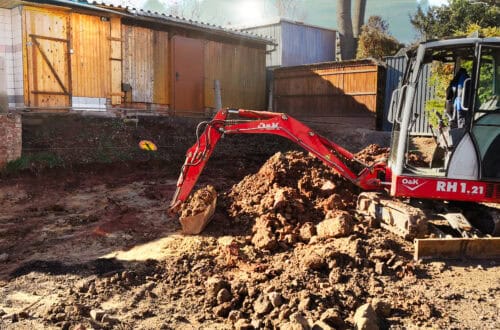
However, since the construction drawings and the H-post anchors were sent immediately, I was already able to set the foundation points. The subsoil was already prepared and the excavator was still at my disposal.
Based on the construction drawing, the locations for the posts were described very well. I only had to set the first point and then I could set the other 4 foundation points.

- Kanalsystem PVC-U
- KG Rohr (i x a) DN 160
- Farbe orange
- Hohe chemische Widerstandsfähigkeit
- Gefertigt vom führenden deutschen Hersteller
Determine the position and angle of the posts
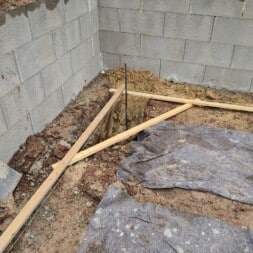
I marked the foundation points with tension cords and a spirit level and dug the holes with a mini excavator. To determine the right angles, I built a large triangle out of roof battens.
Thanks to Pythagoras, this was no problem.
I then measured the diagonals with a tape measure. Since the measurements matched the specifications in the construction drawing, everything should fit later.
I then carried out the finishing work with a spade and shovel to a depth of a good one meter. However, the rainy weather made working on the clay soil very difficult, so that the work took longer than planned.

- Brand: Heunert
- 6 x Heunert H-Pfostenträger H-Anker Pfostenanker Set 6 Stück 91, 101, 121 oder 141 verzinkt mit CE Zeichen extra stark (6 Stück 141 x 600 x 6 mm)
- Product Type: BOLTS
- Size: 6 Stück 141 x 600 x 6 mm
Empty conduits for electricity, photovoltaics, network and multimedia
I dug a trench from the house to the rear post to accommodate the cables for electricity and photovoltaics later using empty conduit.
I decided to use two 120 mm KG pipes and two 32 mm electric empty pipes to have enough reserves for the future. I laid the 32 mm empty conduits directly into the KG pipes. This would have been possible at a later date, but it saved me a lot of time.
The KG pipes were sanded in well and the trench was then backfilled with frost protection and gravel and compacted.

- HOHE DRUCK- & SCHLAGFESTIGKEIT: Das Schutzrohr weist eine hohe Schlagfestigkeit von 2kg/10cm und eine hohe Druckbeständigkeit von 750N/5cm auf und bietet dadurch eine hervorragende Stabilität und Trittfestigkeit.
- UNIVERSELL EINSETZBAR: Das Wellrohr eignet sich für die Verlegung auf und unter Putz, in Beton, in Estrichen, in Hohlwänden und Zwischendecken sowie auf Holz als auch für die Verlegung im Erdreich und Außenbereich.
- HOHE TEMPERATURBESTÄNDIGKEIT: Unser Elektroinstallationsrohr verfügt über eine hohe Temperaturbeständigkeit (dauernd) von -25°C bis hin zu +120°C und kann dadurch in vielen Bereichen Einsatz finden.
- FLEXIBEL & HOHE BIEGEFESTIGKEIT: Neben hoher Druck- und Schlagfestigkeit sind unsere Leerrohre flexibel und leicht zu verarbeiten. Sie besitzen eine hohe Biegefestigkeit und sind durch diese Eigenschaften leicht zu handhaben.
- HOCHWERTIGES MATERIAL & BRANDSCHUTZKLASSE: Das Leerrohr besteht aus einem flammwidrigen Polyethylen mit hoher Dichte (PE-HD). PE-HD ist gegen nahezu alle Medien wie z.B. Alkohole, Fette, Mineralöle oder Kraftstoffe beständig. Das Kabelschutzrohr verfügt über die Brandschutzklasse V2 nach UL94 und bietet somit höchste Sicherheit.
- INTEGRIERTER ZUGDRAHT: Das Leerrohr ist mit einem integriertem Zugdraht ausgestattet, mit dem sich auch nach der bereits abgeschlossenen Installation Kabel leichter und unkompliziert einziehen lassen.
Video: Embedding H-post anchors for the carport in concrete
I have recorded all the steps in the following video. In this way, you can better understand the individual steps involved in concreting the post anchors for the carport.
You can find my videos about building the carport in my playlist Project Carport – Building a Carport on a Slope by Yourself.
If you want to see more of me and my projects, feel free to check out my YouTube channel.
Zuletzt aktualisiert am 16. February 2026 um 20:35 . Ich weise darauf hin, dass sich hier angezeigte Preise inzwischen geändert haben können. Alle Angaben ohne Gewähr. (*) Bei den verwendeten Produktlinks handelt es sich um Affiliate Links. Ich bin nicht der Verkäufer des Produktes. Als Amazon-Partner verdiene ich an qualifizierten Verkäufen. Dein Preis ändert sich jedoch nicht.
Concreting post anchors into KG pipes
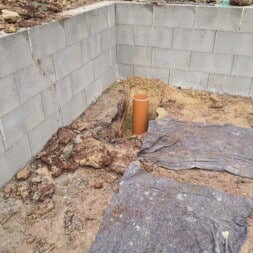
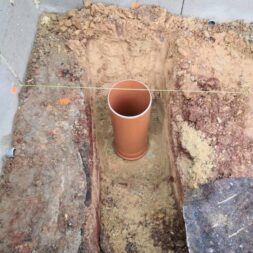
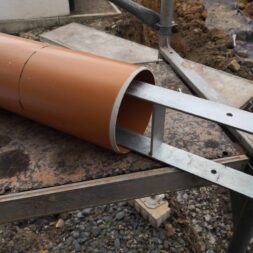
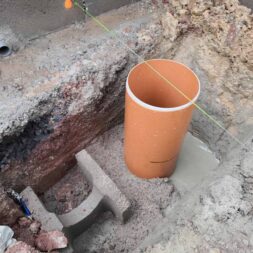
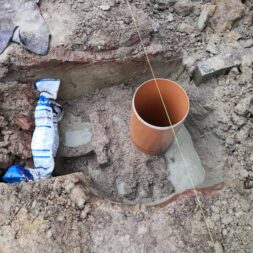
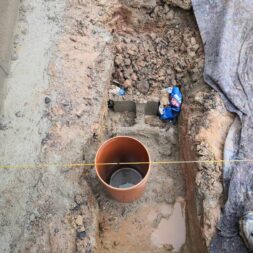
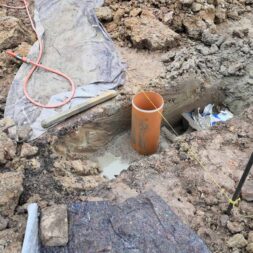
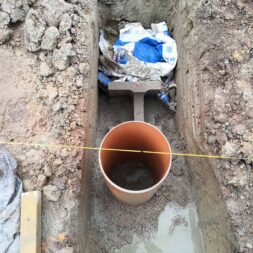
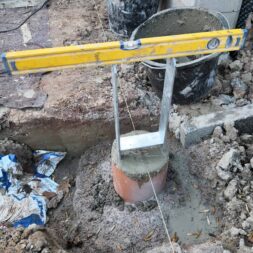
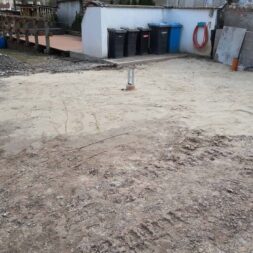
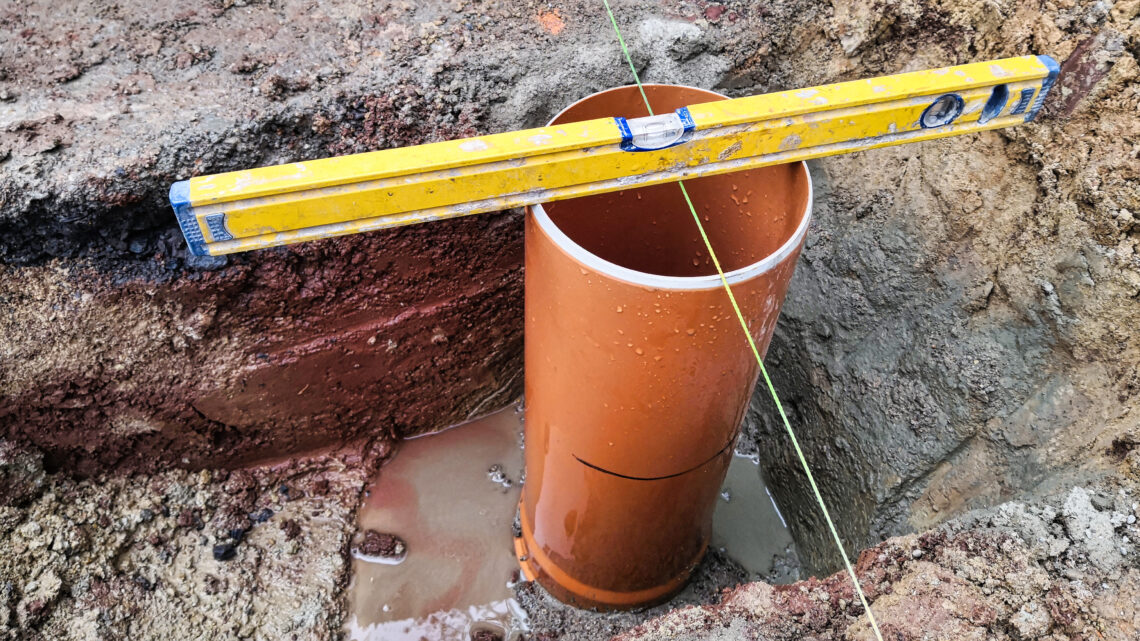
To install the four H-post anchors, I reverted to my tried-and-tested principle of KG pipes. To do this, I first aligned the KG pipes across all four corners and fixed them with concrete.
Construction of point foundations with KG pipes
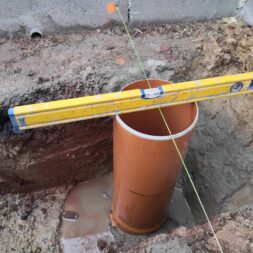
Once the positions of the foundations were marked, I dug out the holes for the KG pipes. The KG pipes serve as formwork and ensure a clean, uniform shape of the point foundations.
The pipes should be anchored at least 80 cm deep in the ground to ensure sufficient frost depth and prevent subsidence.
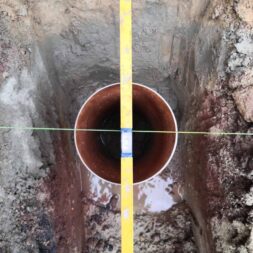
I aligned the KG pipes precisely with the help of tensioning cords and a spirit level. Once the pipes were in the right position, I fixed them temporarily and then poured concrete around the pipes to fix them permanently.
Setting the H-post anchors in concrete
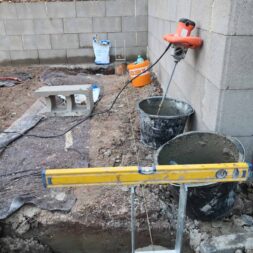
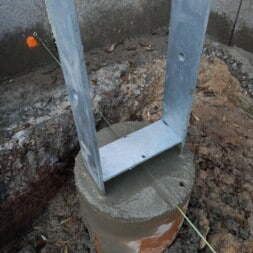
The H-post anchors were then concreted into the openings of the KG pipes. To do this, I marked the appropriate places on the anchors in advance. These markings enabled me to align the anchors directly to the tensioning cords without having to measure again.
The concrete then only had to harden.
What to look out for during construction
- Precise alignment: The KG pipes must be precisely aligned to create a stable foundation for the post anchors.
- Frost depth: The pipes should be placed deep enough to avoid frost damage.
- Concrete quality: High-quality concrete is crucial for the stability of the foundations.
Influence on the statics
The use of KG pipes as formwork for point foundations has a positive influence on the statics of the posts and the entire carport.
The tubes provide a stable and even base that distributes the weight evenly and prevents subsidence. This leads to increased stability of the post anchors and thus of the entire carport.
Advantages
- Clean and precise foundations: The use of KG pipes enables exact and even point foundations.
- Easy handling: KG pipes are easy to handle and place.
- Time saving: The prefabricated pipes and markings speed up the construction process.
Disadvantages
- Material costs: The purchase of the KG pipes and the concrete can cause additional costs.
- Size and depth of the holes: Digging the holes for the pipes can be labor-intensive.
Overall, the use of KG pipes for point foundations offers a reliable and efficient method of creating stable foundations for H-post anchors.
This method has proved successful for me and ensures that the carport stands securely and permanently.

- Plattengröße: 540 x 420 mm / Hohe Vorlaufgeschwindigkeit – zur Erhöhung der Arbeitsleistung
- Verdichtungsdruck: 23000 N / Leistungsstarker 5,6 PS Motor
- Inklusive Fahrvorrichtung, zum Transport auch durch eine Person
- Inklusive schwarzer Gummimatte für Pflasterarbeiten
- Automatischer Vorlauf – erlaubt dem Anwender dennoch problemlosen Eingriff in die Bewegungsrichtung
Fill the subsoil with geotextile and crushed stone
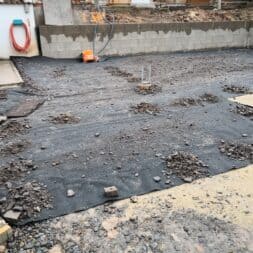
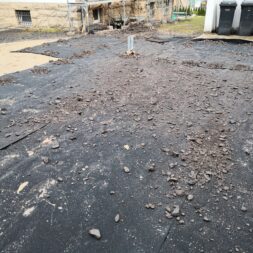
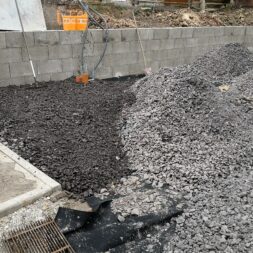
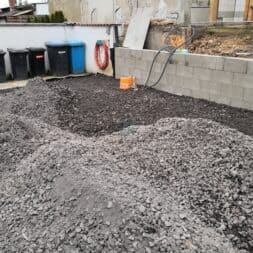
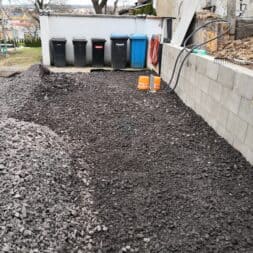
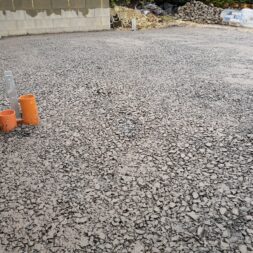
I then applied heavy geotextile over the entire surface and applied an approx. 20 cm thick frost protection layer in layers and leveled it. In between, I repeatedly compacted the surface in layers with my vibrating plate.
Now you could already see what would be built here one day.
Why I installed an additional geo-fleece
I installed the geotextile to create a stable and durable base for the carport. It serves as a separating layer between the soil and the frost protection layer, which offers several advantages:
- Prevention of mixing: The fleece prevents the soil and the frost protection layer from mixing, resulting in a more stable and durable foundation base.
- Prevention of weed growth: The fleece suppresses the growth of weeds, which could otherwise grow through the frost protection layer.
- Improved drainage: geo-fleece supports drainage by allowing water to pass through but retaining fine particles. This reduces the risk of waterlogging and frost damage.
Influence on the later use of the carport
The use of the geotextile and the careful construction of the frost protection layer have proven to be extremely beneficial in the long-term use of the carport.
- Stability and durability: The geotextile separation layer provides a stable and load-bearing base that retains its shape and strength even in changing weather conditions.
- Less maintenance: By suppressing weed growth and improving drainage, the area under the carport remains clean and dry, which significantly reduces the amount of maintenance required.
- Longer service life: The precise and thorough preparation of the substrate ensures that the carport remains stable and secure for years to come.
Now that I have been using the carport for over two years, I can say that this approach has absolutely proved its worth.
The base is stable, there is no subsidence, rutting or moisture problems, and the carport can be used without any problems.

- ✔ Hochwertiges Geotextilvlies/Drainage- u. Filtervlies 150g/m² - Profi Qualität - MADE IN GERMANY
- ✔ MATERIAL: Qualitätsvlies aus 100% Polyester, SPEZIELL FÜR DEN AUSSENBEREICH - äußerst strapazierfähig
- ✔ EIGENSCHAFTEN: sofort wasserdurchlässig, UV-Stabil, reißfest, verrottungsfest, beständig gegen Bitumen + Folien, atmungsaktiv, metallfrei (detektorgeprüft)
- ✔ EINSATZBEREICH: Drainage- und Filtervlies im GaLa-Bau: für Wege-, Pflaster- u. Terrassenbau, Dachbegrünung, Wärmespeicher für Beete und Gewächshäuser, Steingärten, Schutz unter Teichfolien, WINTERVLIES: Schutz vor Frost und niedrigen Temperaturen
- ✔ ANGEBOT: 300g (bohrbar), 300g, 500g, 1000g / 2m-Breite/ Groß-Mengen
Summary and conclusion
Once the ground had been prepared and the post anchors for our future double carport had been installed, we were able to order the kit.
We opted for a carport from “Easycarport”, which would accommodate at least two vehicles, without center posts in the driveway and with a flat roof so that we could install a photovoltaic system later.
The on-site selection did not meet our requirements, so we chose an online offer that provided an immediate and uncomplicated quotation.
I concreted the H-post anchors myself after the construction plans and the anchors were sent to me immediately.
The ground had already been prepared with the help of an excavator. I used tension cords and a spirit level to accurately mark the foundation points and then dug out the holes.
Using a large triangle I built myself from roof battens and measuring the diagonals, I made sure that everything was correctly aligned.
I also dug a trench from the house to the rear post for laying the cables for electricity and photovoltaics, which were housed in empty conduits.
This preparatory work made the subsequent installations considerably easier.
Delivery of the carport kit was scheduled for two months later, which gave us enough time for the preparations.
The entire process was documented in a video that can be found on my YouTube channel.
After more than two years of using the carport, I can confirm that the chosen approach has proved successful.
Dieser Beitrag ist auch verfügbar auf:
English
Deutsch


