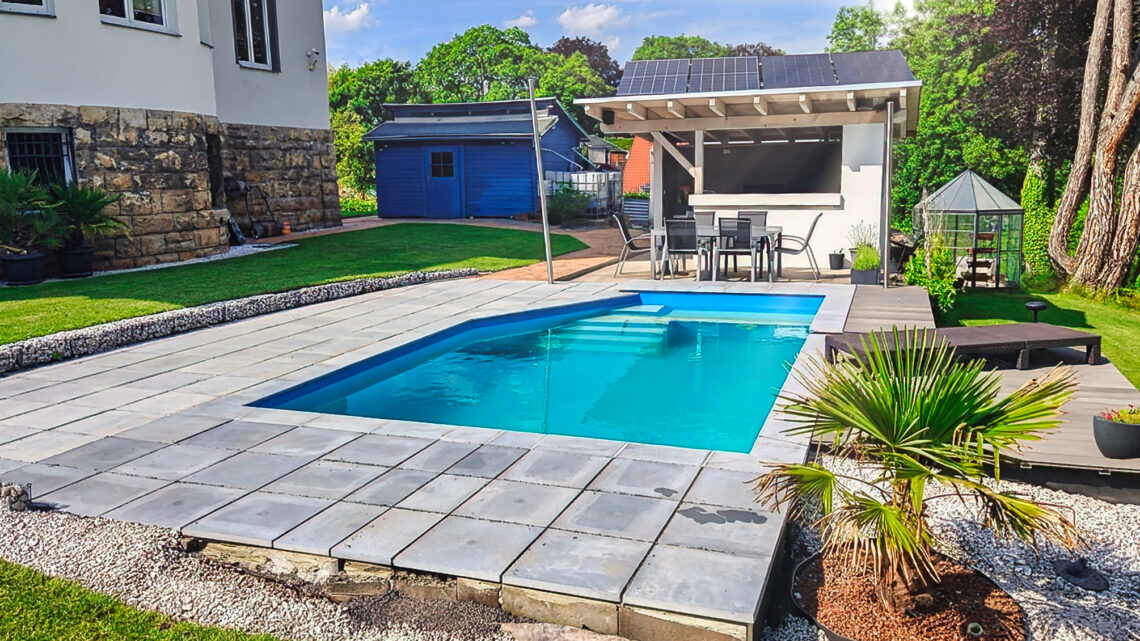
Build your own pool terrace with stone slabs on a slope
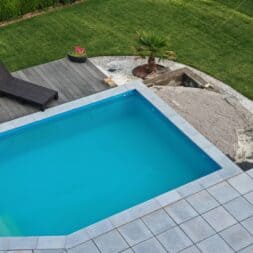
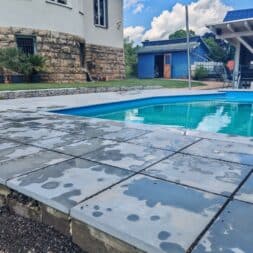
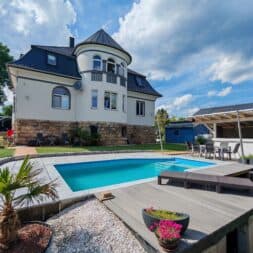
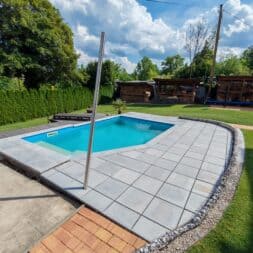
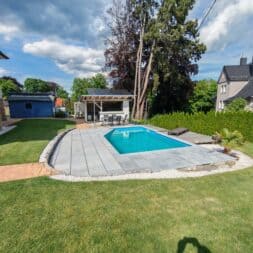
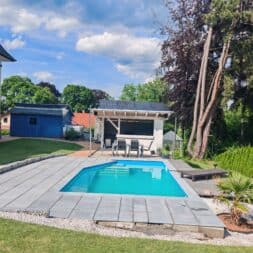
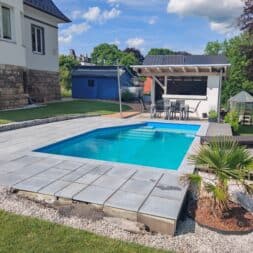
Building a poolside terrace on a slope is a real challenge – especially when there is hardly any space for a classic substructure. In this article, I show you how I created a stable, long-lasting plateau using formwork stones, gravel, chippings and patio slabs. I document the entire construction process in detail, from excavation to setting the formwork stones and laying the slabs – including all tips on material selection, height adjustment and joint filling. Ideal for anyone who wants to upgrade their pool area in the garden both functionally and visually.
What you can expect in this blog post:
- Initial situation: Slope at the pool and lack of space for a classic substructure
- Planning and preparation of the terrace construction with a focus on stability and drainage
- Construction of a stable plateau with formwork stones, chippings and laying gravel
- Bonding the edge panels for a permanently stable border
- Loose laying of the terrace slabs in the gravel bed – ideal for subsidence
- Detailed tips on aligning, cutting and grouting the tiles
- Advantages and alternatives for joint filling – with a focus on flexibility and durability
- Links to the previous construction phases relating to the pool conversion
Planning and preparation of the terrace with pool on a slope
Why a terrace on a slope needs special planning
The terrain at the front of my pool is slightly sloping. This slope directly influences the subsequent height and orientation of the terrace. From the very first time the pool was built, it was clear that more would have to happen here in the long term than just a simple border. A permanent solution needs a stable, water-resistant base – especially in places where water collects quickly when it rains.
The current terrace at the front was the last major phase of a multi-year renovation project. The area was rebuilt from scratch – more on this later. This section will initially focus on the development of the entire project: from the old steel wall pool to the new pool complex with solid formwork construction, foil lining, technical area and functional surrounds.
From steel wall pool to solid formwork stone construction
I started with a 6.30 x 3.60 x 1.50 meter steel wall pool – classically oval, simply constructed, but with a limited lifespan. The first step was to completely dismantle the building. Not only was the pool itself removed, but also the solid retaining walls and the adjacent BPC terrace. The dismantling and the decision for a new foundation and a completely different construction method are documented in my article “Pool conversion: dismantling the steel wall pool”.
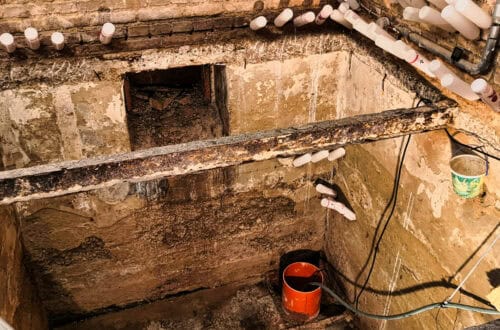
The new swimming pool was built with formwork blocks on a concrete base slab. The existing retaining walls of the steel wall pool were integrated into the construction, as was the directly adjacent underground pool house, which also represents an interesting idea for the garden design. The pipework was completely restructured and the substructure of the old BPC decking also had to be completely rethought. I have described how I went about this in the article “Converting the pool: BPC planks, substructure and technology”.
Planning and installation parts in detail
A key issue in the construction of the new solid concrete pool was the precise positioning of the built-in parts. The pool needed to be technically tidy, easy to maintain and visually coherent. In contrast to the old steel wall pool, the pool was also to have proper steps and a platform in the water. I therefore planned the entire area digitally in advance, created a 3D floor plan and precisely coordinated all the installation parts – from the skimmer to the inlet nozzle. I have recorded the considerations regarding positioning and later operability in the article “Planning the pool: 3D floor plan and selection of installation parts”.
Laying the foil, setting the kerbs, preparing the surface
Once the shell of the pool had been built and the pool walls plastered, the pool liner was installed. The film was not only inserted, but completely sealed. This ensures that the basin is permanently sealed – even at the transition to stairs or lamps. I have described the complete process in the article “Laying, gluing and welding the pool liner correctly”.
New pool edge stones were then laid. These had to match the planned terrace height exactly – both visually and functionally. The most important thing here was a clean finish to the subsequent surface. I explain step by step how I laid and glued the stones in the article “Laying pool edge stones and building a pool terrace yourself”.
Extension of the upper terrace area
The new terrace on the south side was built at the same time as the pool extension. Here I used the BPC and WPC boards from the old pool terrace – mounted on a stable substructure made of aluminum profiles and larch wood. The area is also on a slope and complements the pool area with an easy-care, weatherproof sunbathing area with privacy screen and storage space. Although the construction on one level with the pool edge stones does not yet result in an infinity pool, the result looks really beautiful. Details on implementation can be found in the article “Building a BPC and WPC terrace on a slope”.
Next construction phase: The front terrace
With the completion of this work, the foundation was laid – the pool was finished, the technology installed and the upper terrace area was ready for use. What was still missing was the terrace on the south-western front side: an area that was particularly challenging due to the slope. In the next part, the construction with formwork stones, chippings, laying gravel and slabs is shown step by step – including all the details for planning and implementation.

- Winkelschleifer mit sehr robustem Gehäuse für den harten Baustelleneinsatz
- Kompakter, flacher Getriebekopf für höhere Schnitttiefe
- mit Anlaufstrombegrenzung verhindert ungewolltes Anlaufen nach Sapnnungsunterbrechung
- Arbeit: Schleifen mit Schleifblatt 2.5 m/s²
Building the substructure with formwork stones, grit and laying gravel
Building a sturdy case on a slope
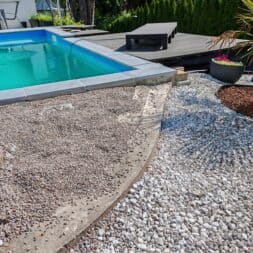
The terrain at the front slopes down around 70 cm across the width of around 3.60 m – clearly enough to make building a terrace a challenge. There was simply no room for a classic substructure with wooden beams or aluminum profiles. My aim was therefore to lay the terrace slabs directly onto a solid surface. To do this, I first had to create a stable, load-bearing plateau.
The subsoil in this area was loamy and grown. During rainfall or thaw, this means that the soil stores a lot of moisture and only releases it slowly – a risk of subsidence and waterlogging under the terrace. In order to avoid this, the area should be encased – i.e. bordered at the sides and filled with material that can be well compacted.
As I still had some building materials left over from the conversion, I wanted to use as much of them as possible. This not only saves costs, but also finally creates some space on the property.
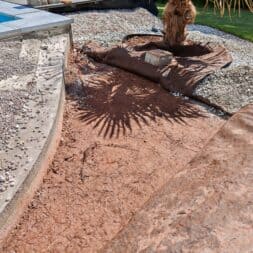
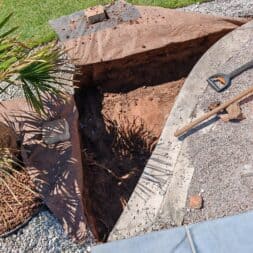
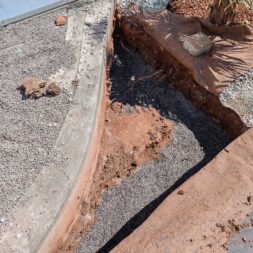
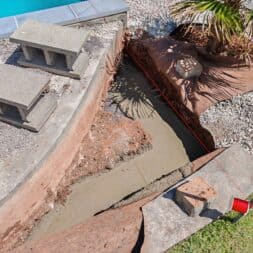
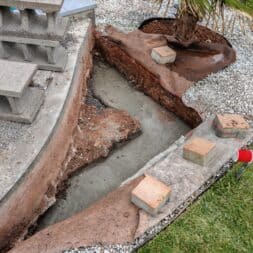
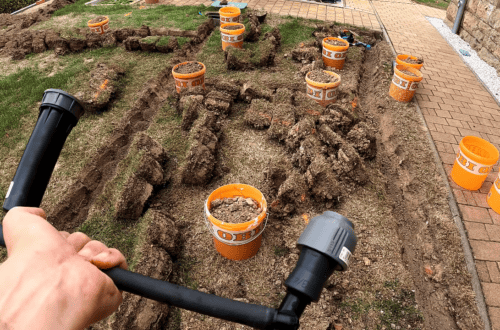
I first measured the two alignments of the pool and the adjoining upper terrace using a spirit level and a straightedge. This enabled me to determine the exact position of the formwork blocks. The area was then excavated. I based the depth on the top edge of the existing pool formwork stones – plus a small foundation.
A thin layer of frost protection gravel was placed in the excavated pit. This is important to prevent rising moisture from accumulating in the ground during frost and to prevent the concrete from freezing through later. I poured relatively liquid concrete on top to create a smooth and level surface for the formwork stones.
Shuttering blocks as slope support around the pool
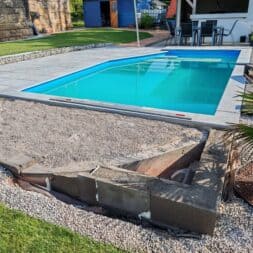
Once the foundation had hardened, I aligned the 50 × 25 × 25 cm concrete formwork blocks on the strip foundation. Some of the stones had to be adjusted – the large angle grinder was used for this. I sealed the gaps at the ends and at the transition to the existing formwork stones of the pool and the old retaining wall of the oval pool with construction foam.
The construction foam serves as a joint filler and prevents backfill materials from being washed out later. For further stabilization, I inserted metal rods as reinforcement to additionally secure the connection between the individual formwork blocks – this is a clear advantage, especially in the case of point loads or slight earth movements.
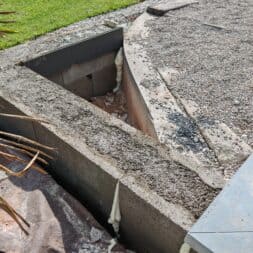
Concrete was then mixed again and the formwork blocks were completely filled in. The result was a closed, solid box that supports the terrain and at the same time forms a stable side border for the terrace.
Grit and laying gravel as a stable foundation
The interior of the case was first filled with coarse material – including the fragments and remnants of the cut formwork stones. This allowed me to make good use of existing building materials and create a solid foundation at the same time. I filled the gaps with laying gravel and chippings, but haven’t leveled them exactly yet. Initially, it was only a matter of roughly leveling the surface before the final alignment was carried out.
Before I could start stripping, I first had to prepare the terrace slabs at the edges. These should later be glued to the formwork blocks filled with concrete and form the outer edge of the surface.
- Hält bis zu 1,5x länger als eine Bosch Eco for Universal Trennscheibe
- Äußerst effizient für Bauarbeiter: Lange Lebensdauer
- Mit 22,23 mm Bohrungsdurchmesser für Standard Winkelschleifer mit Spannmutter
- Zum Schneiden verschiedener Baumaterialien, z. B. Stein, Ziegel, Stahlbeton und anderer gängiger Baumaterialien und Verbundwerkstoffe
- Lieferumfang: PRO Multi Material Diamanttrennscheibe, 230 x 22,23 mm
Video: Building a terrace by the pool on a slope
I have recorded the construction of the new terrace at the front of our pool – including the planning, setting of the formwork stones, filling with gravel and gravel for laying and the first steps in laying the slabs – in a compact and practical video.
The video is part of my project series “Project Pool“. You can find more videos on dismantling our steel wall pool and building our new formwork pool in the garden in the Pool category.
If you want to see more of me and my projects, feel free to check out my YouTube channel.
-
Price: € 28.09instead of: € 35.51
-
Price: € 47.16instead of: € 48.99
-
Price: € 22.90instead of: € 28.63
-
Price: € 15.99instead of: € 16.95
-
Price: € 13.95instead of: € 16.42
-
Price: € 55.54
Laying patio slabs and fixing edges
Laying patio slabs correctly on a slope
I only started laying the terrace slabs once the plateau had been fully prepared and the gravel bed had been roughly leveled. The slabs should not only lie flat, but also form an even surface without height differences – particularly important for a terrace on a slope. Due to the sloping terrain, I had to make sure that the slabs didn’t slip or tip over later.
I deliberately opted for loose laying in the chippings. This construction method is more flexible than rigidly bonding the entire surface – especially in the event of slight subsidence or frost movements. This has clear advantages, especially on slopes. Only the edge area was fixed to give the surface stability.
Secure edge areas with concrete or adhesive
I first glued the edge slabs to the newly placed formwork stones that had been filled with concrete. It was important to choose the right material: I used a frost-resistant flexible adhesive for outdoor use – suitable for extreme temperature changes and permanent loads in the patio area.
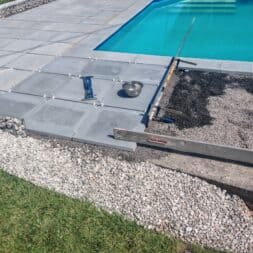
The adhesive was applied to the formwork stones with a trowel. I then placed the panels in the fresh bed of adhesive and adjusted them with light pressure. The first row of bonded bricks on the south side consists of three slabs, including the corner slab. A further 3.60 m or so follow to the north, which with 50 × 50 cm slabs results in a good seven rows of stones in the first row – all set with 10 mm joint spacing.
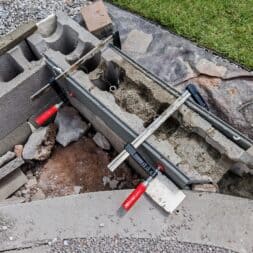
Before continuing with the gluing of the other slabs, I wanted to make sure that the level matched the existing terrace, which had already been laid the previous year. To do this, I used a long straightedge and attached a second, smaller straightedge lengthwise to the large straightedge with screw clamps with an overhang of 3 cm downwards – i.e. exactly the thickness of the panels. This allowed me to level the gravel bed to the subsequent laying height and ensure that the heights met exactly.
Laying on your own: this is how I did it
The other panels were laid from the inside to the outside. I always worked with a spirit level and ensured the distance with 10 mm joint crosses. I placed the slabs in the middle of the plateau loosely in the gravel. Thanks to the open structure, the panels can also be removed or corrected later if necessary.
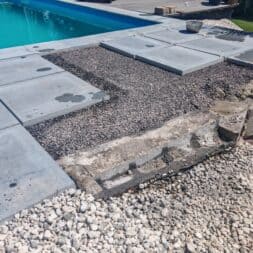
Finally, an approximately 60 cm wide gap remained open on the plateau. As the grid dimensions of the 50 × 50 cm slabs didn’t quite fit in the original pool construction, I used two 30 cm wide slabs at the edges instead of a 50 + 10 cm combination – which looked better. I have now continued this dimensional logic on the new section.
I cut the 30 mm panels to size with the large angle grinder. The sharp edges were slightly rounded with a grindstone to prevent injuries and achieve a clean look. Alternatively, a wet cutting machine or a stone cutter could have been used – but with the angle grinder and a bit of feeling, this could be done quickly and cleanly.
The cut slabs were laid in the gravel bed. Finally, I also glued the two remaining edge panels. On the west side, I used the level and alignment of the already bonded corner edge stone and the existing terrace to align the height. The spirit level fitted surprisingly well. At the same time, I made sure that these edge panels were exactly in the visible alignment of the outer edge. This line is clearly visible, especially at the front, so precise alignment was very important.

- 6-stufig verstell- und arretierbar: 30 - 35 - 40 - 45 - 48 - 50 cm, mit Sichtfenster zur präzisen Maßeinstellung.
- Hochwertiges Material: Aus verzinktem 2,0 mm starkem Stahlblech gefertigt, robust und langlebig.
- Hohe Tragkraft: Max. Belastbarkeit von 30 kg, ideal für verschiedene Anwendungen.
- Sicherer Halt: Verzinkte Metallteile mit Krallen sorgen für eine feste Fixierung auf unterschiedlichen Oberflächen.
- Ergonomisches Design: Der ergonomisch geformte Griff ermöglicht komfortables Arbeiten und steigert die Effizienz bei Fliesen- und Pflasterarbeiten.
Filling joints – the classic way with chippings
Once all the slabs had been laid and aligned, I filled the joints in the traditional way with fine chippings. The chippings were spread generously over the surface and then swept diagonally into the joints with a broom. I made sure that all the gaps were filled evenly and that there were no cavities.
The excess grit was then rinsed off with a water hose. The water also compacts the material in the joints and causes it to sag slightly. Any remaining material on the surface can simply be swept up after drying.
I deliberately avoided using a solid joint filler such as synthetic resin, paving joint mortar or polymer-bound materials. Firstly, because these materials are not permanently durable on water-permeable surfaces such as gravel or grit – they can crack or come loose again due to frost. Secondly, I wanted to keep the option open of being able to lift or replace individual slabs at a later date if necessary – which is much more difficult or even impossible with solid jointing compounds.
If you still want to seal the joints more permanently, you can alternatively use bound grit systems (e.g. joint gravel mixed with binding agents). These are permeable to water and air, but do not settle as quickly. Special hydraulically setting paving joint mortars are also possible, but must be precisely matched to the substrate and the joint dimensions. For my application, however, the flexible variant with loose chippings was the best and most practical solution.

- [Verwendung]: Wird zum Verlegen von Fliesen verwendet und zum Verlegen großer Platten.
- [Besonderheit]: Genaue 10mm Verbindungen für ein perfektes Oberfläche, keine Fehler oder Grate.
- [Leicht und langlebig]: Es handelt sich um eine hohle Struktur, eine innere Verstärkung, die es ihnen ermöglicht, Belastungen standzuhalten und zu verhindern, dass sie gequetscht werden.
- [Hohe Qualität]: Hergestellt aus PP-Material, umweltfreundlich und geruchlos.
- [Einfach zu bedienen]: Es ist unsichtbar, sobald es mit dem Zeigen bedeckt ist. Die Arbeitseffizienz wäre schnell und einfach.
Summary: Build your own pool terrace on a slope – with formwork stones, gravel & slabs
In this blog post, I document step by step how I built my poolside terrace on a slope myself. The starting point was a terrain gradient of around 70 cm over a width of 3.60 m – too little space for a classic substructure. Instead, I built a stable plateau with formwork stones, laying gravel and terrace slabs, which is not only stable but also visually appealing.
After dismantling my old steel wall pool, I created a new pool system with a solid formwork pool, pool liner, built-in parts and pool edge stones, the construction of which is described in several separate articles. The terrace that has now been built at the front forms the next logical construction phase.
The central elements of the terrace construction were the construction of a cemented base with concrete and frost protection, the precise placement of the formwork stones as slope support, the filling with gravel and gravel for laying and the precise laying of the terrace slabs with flexible adhesive in the edge area. The interior slabs were laid loosely in the gravel bed to ensure a flexible and frost-proof construction.
I deliberately didn’t fill the joints with mortar, but with traditional chippings – a long-lasting, maintenance-friendly solution that also allows corrections to be made later. Alternatives such as grout or bonded chippings are also discussed in the article.
The project is part of my “Project Pool” series and shows in a practical way how you can build a stable and low-maintenance pool terrace yourself, even on a difficult slope.

- Anwendungen: Schwarzer Kopf = mittelweich: z.B. für Pflasterhandwerk, Fliesen verlegen, Trockenbau. Orangener Kopf = hart: z.B. für Montage- und Demontagearbeiten, Bauhandwerk, Werkstattarbeiten.
- Leichteres Arbeiten und optimale Schlagwirkung bei vermindertem Kraftaufwand.
- Made in Germany: Hohe Wiha Qualität aus Deutschland.
- Sowohl die Schlagköpfe als auch der Hickory Stiel sind einzeln als Ersatzteil erhältlich - somit schonen die Wiha Safety Hammer nicht nur Werkstück und Anwender, sondern auch die Umwelt.
- Lieferumfang: 1x Stiel aus Hickoryholz, 2x Sicherheitsschalen, 1x Schlagkopf schwarz / mittelweich (z.B. für den Trockenbau), 1x Schlagkopf orange transparent / hart (z.B. für Werkstattarbeiten)
FAQ – Pool surround: Building a terrace by the pool on a slope
1. why was the terrace on a slope not built with a classic substructure?
The terrain dropped around 70 cm over a width of 3.60 m – too small and too steep for a classic substructure with wood or aluminum. Instead, a stable plateau was built with formwork stones and laying gravel, which is permanently load-bearing and frost-resistant.
2. what are the advantages of building with formwork stones and chippings?
The construction is extremely stable, water-permeable, durable and particularly suitable for difficult terrain. It provides a firm border, prevents subsidence and can be flexibly adjusted – ideal for slopes.
3. how were the formwork blocks installed?
The formwork blocks were placed on a concrete strip foundation, aligned, reinforced and then completely filled with concrete. This created a closed case as a load-bearing base.
4 Why was loose laying in a grit bed chosen?
Loose laying is flexible and frost-proof. Movements in the substrate do not lead to stresses or cracks, as would be the case with firmly bonded terrace slabs – particularly advantageous on slopes.
5. how was the height of the terrace coordinated with the existing area?
Using a straightedge and screw clamps, an exact height was determined that corresponded to the dimensions of the panels. This meant that the gravel bed could be adapted to the subsequent laying height and seamlessly transferred to the existing terrace.
6. what was taken into account when grouting the slabs?
The joints were filled with fine chippings – a durable, water-permeable and maintenance-friendly solution. This means that the panels remain flexible and can be lifted or replaced as required.
7. how was the edge fastening solved?
The edge slabs were bonded directly to the formwork blocks using a frost-proof flexible adhesive. This ensures that the edges stay in place, prevents slipping and creates a visually clean finish.
8. which materials were used?
We used 50 × 50 cm terrace slabs, concrete formwork blocks 50 × 25 × 25 cm, laying gravel, chippings and a flexible adhesive for outdoor use. The design combines inexpensive, durable materials with high stability.
9. how high-maintenance is the terrace?
The loosely laid tiles are easy to clean. Moss or dirt can be removed with a broom or high-pressure cleaner. Individual panels can also be easily replaced if required.
10. is the terrace barefoot-friendly?
Yes, the panels were laid with narrow joints and the cut edges were carefully sanded. This creates an even, pleasant surface – ideal for use by the pool without the risk of injury.

- Sehr hoher Ausführungskomfort, 90 min Verarbeitungszeit, nach 4 Stunden begehbar.
- Sehr hohe Ausblühsicherheit.
- Effektive kristalline Wasserbindung.
- Kleberbettdicke 1 - 20 mm.
- Verbrauch - verwendete Zahnung:
- 8 mm ca. 2,1 kg
- 10 mm ca. 2,4 kg
- Ergiebigkeit* - verwendete Zahnung:
- 8 mm ca. 9,5 m²
- 10 mm ca. 8,3 m²
Dieser Beitrag ist auch verfügbar auf:
English
Deutsch


