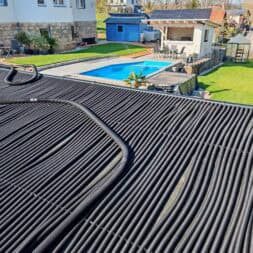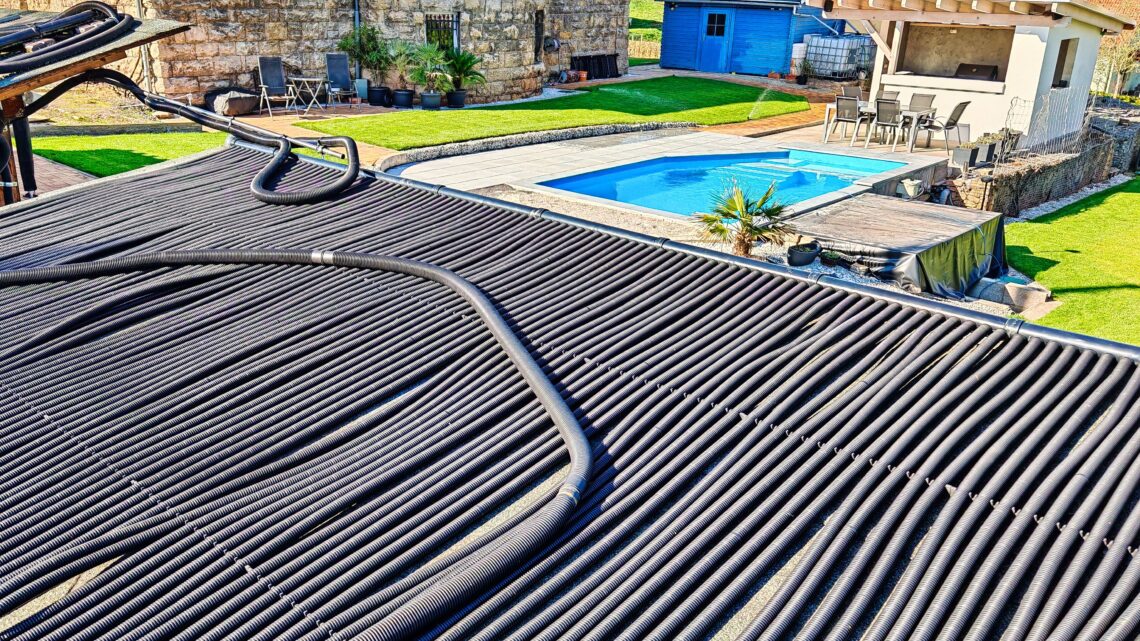
Pool heating with ribbed pipe systems – Build your own solar heating for the pool
Pool heating, solar absorber, Ripp pipe system and the efficient use of solar energy – in this article I document the complete conversion of my old EPDM pool heating system into a modern Dolphi-Ripp solar heating system. After more than ten years of practical experience with EPDM mats, I will show you why the change was necessary, which system is convincing today and how the new solar-based pool heating is proving itself in everyday life. Step by step, I describe the planning, installation and initial results – including technical details, comparisons and practical tips for installing a solar absorber on the roof.
What you can expect in this blog post – at a glance:
- Reasons for replacing my old EPDM pool heater
- Comparison of different heating systems for pools (heat pump, electric, solar)
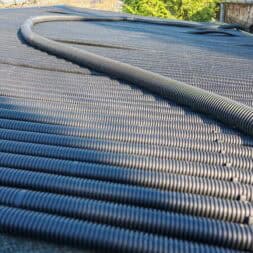
- Presentation of the Dolphi-Ripp ribbed pipe system and its properties
- Planning and preparing the new solar heating system
- Installation in Z-design with vertical installation on the roof
- Step-by-step instructions for installation and bonding
- Tips for correct fastening and consideration of thermal expansion
- Initial empirical values for heating performance in spring temperatures
- Advantages and disadvantages in direct comparison: EPDM vs. ribbed pipe
- Recommendations for practice and possible optimizations for implementation
Why have a pool heater at all? – A comparison of the possibilities
When I built my pool, it quickly became clear that a pool heater is not a luxury, but a real necessity. Without them, you are completely dependent on the weather – and that often means cold water, a short swimming season and little use despite a beautiful garden. Even in direct sunlight, it takes days for the water to warm up significantly – and after a cool night, these degrees are quickly lost again. A heater ensures constant water temperatures and a much more relaxing bathing experience.
To help you find the right solution for you, I have compared the most common heating systems here – including my experiences with different variants.
Comparison of heating systems for the pool
1. no heating (only sunlight and cover)
The pool water is heated exclusively by natural sunlight and, if necessary, a solar foil as a cover.
- Acquisition costs: none
- Installation effort: none
- Running costs: none
- Advantages: free of charge, maintenance-free
- Disadvantages: very weather-dependent, slow heating, hardly any temperature stability
2. heat pump
Extracts heat from the ambient air and transfers it to the pool water via a heat exchanger. Also works at lower outside temperatures.
- Acquisition costs: approx. 1,000-3,000 €
- Installation costs: medium (power connection, foundation if necessary)
- Running costs: 100-300 € per season (electricity)
- Advantages: independent of the weather, constantly warm temperatures
- Disadvantages: high purchase costs, ongoing electricity costs, audible during operation
3. electric immersion heater / instantaneous water heater
Electric heating elements heat the water directly in the flow.
- Acquisition costs: approx. 200-800 €
- Installation costs: low (power connection required)
- Running costs: very high (purely electric operation)
- Advantages: easy to install, fast heating
- Disadvantages: extremely high power consumption, unsuitable for large pools
4. solar heating systems
Use the energy of the sun to heat the water in black surfaces. There are several variants with different properties:
- Ripp-tube solar absorber systems (e.g. Dolphi-Ripp)
Flexible pipes with ribbed structure that are inserted into manifolds. Ideal for roof mounting or flat surfaces.- Acquisition costs: low to medium
- Installation effort: medium, but easy to implement yourself
- Running costs: none
- Advantages: durable, frost-resistant when emptied, low-maintenance, wind-resistant
- Disadvantages: dependent on sunlight, needs sufficient space
- EPDM mats
Black rubber mats with integrated channels for the water. Flexible installation on roof or floor.- Acquisition costs: low to medium
- Installation effort: low to medium
- Running costs: none
- Advantages: easy to install, simple handling
- Disadvantages: limited service life (UV-sensitive), susceptible to animal bites, can become porous
- Hard plastic modules (e.g. solar modules made of polypropylene)
Rigid panels with high efficiency, similar to solar collectors for hot water.- Acquisition costs: medium to high
- Installation effort: higher, often with bracket
- Running costs: none
- Advantages: high efficiency, robust
- Disadvantages: expensive, more difficult to assemble, inflexible in shape
- Solar collectors (flat absorber plates with glazing)
As with domestic hot water preparation.- Acquisition costs: high
- Installation effort: high
- Running costs: none
- Advantages: maximum energy yield
- Disadvantages: expensive, complex integration, rarely in the pool area
- Coiled black pool hose
DIY solution: A black garden hose is rolled up in a spiral and warmed by the sun.- Acquisition costs: very low
- Installation effort: minimal
- Running costs: none
- Advantages: inexpensive, simple assembly
- Disadvantages: low performance, limited durability, not suitable for large pools
10 years of experience with EPDM mats – Why I switched now
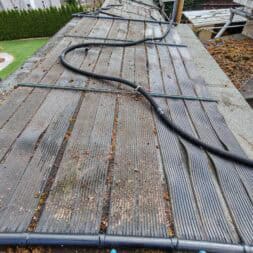
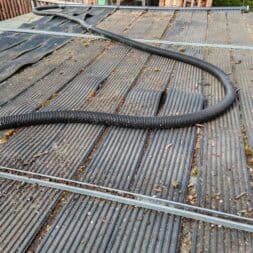
I have been using EPDM mats to heat my pool for over ten years. The mats are located on the roofs of my three timber storage racks, each covering an area of approx. 2.20 m × 4.00 m – i.e. a total solar absorber area of around 26 m². The connection to the pool is made via a 50 mm FlexFit pipe, which I divided between the three mat strands using a distributor. Thanks to individual stopcocks, I can open or close each zone separately – this is particularly practical during maintenance work or when individual areas get sun earlier than others.
The heating is controlled via a temperature difference circuit which controls the heating fully automatically. A sensor on the roof measures the surface temperature of the EPDM mats, while a second sensor in the return flow behind the skimmer measures the water temperature of the pool. As soon as the roof temperature is 5°C above the pool temperature, an electric stopcock opens the bypass – the water is then fed through the EPDM mats, where it heats up noticeably. You can find more details and the circuit in use in my blog:
-
Pool construction – plan and install piping in the technical building yourself
-
Pool construction project: Construction and connection of the solar heating system
- Control pool heating automatically with TDR 2004 temperature difference controller
The system has proven itself over the years – but it has not been free of problems. Animal bites from martens or birds in particular have repeatedly caused damage to the hoses. Fortunately, it has always been easy to repair so far – I’ve also written a separate article on how to repair the EPDM solar heater quickly and easily yourself:

- 2x Schlauchverbinder Adapter 4-9mm Reduzierstück Aquarium KfZ Schlauch Druckluft
- Hersteller: Old-Harvest / Art: Verbinder /
- Durchmesser: 4mm, 6mm, 9mm /
- Geeignet für Schläuche von 4-9mm Innendurchmesser
But new problems are now emerging: some of the mats are beginning to disintegrate. The rubber feels greasy and I notice more and more often that small particles get into the pool water. This is not only unsightly, but also a long-term problem for the water quality and the pool technology. A permanent solution was therefore needed – robust, durable, animal bite-proof and without plasticizers.
During my research, I came across the ribbed pipe system from Dolphi-Ripp. The technology is based on a completely different structure, is modularly expandable and significantly more resistant to external influences. I was particularly impressed by the easy emptying in winter and the stable but flexible construction – ideal for roof mounting.
In the next section, I’ll show you how I actually implemented the conversion to the ribbed pipe system – step by step from removing the old mats to the final installation on the roof.


How much heating power does a solar absorber heating system really provide?
Many pool owners rightly ask themselves whether the expense of a solar heating system is worth it at all – and how much heat such a system can actually provide. I myself live in central Germany, in a region with average sunshine, but without the extreme conditions of the coast or the Alps. Nevertheless, I can say that a well-designed solar heating system can deliver remarkable results even here.
The absorber area of my previous solar system is spread over three roofs, each measuring approx. 2.2 m × 4.0 m = 8.8 m², i.e. just under 26 m² in total. This is slightly more than the size of my pool surface, which is approx. 24 m². The angle of the roofs to the sun is around 30 degrees – a very good value for using solar energy efficiently, especially in summer. While the surface is completely unshaded in midsummer, in spring and fall approx. 5 m² are in the morning shade of a neighboring tree, which reduces the efficiency of the solar surface.
The pump runs daily from 11:00 a.m. to 5:00 p.m., i.e. 6 hours a day – exactly during the time with the highest solar radiation. During this time, the water is pumped through the solar absorbers and can be optimally heated. Even with the old EPDM system, I was able to achieve a temperature increase of 4 to 6 °C per day – provided the sun shines constantly.
Estimation of performance
As a guideline:
A heating output of approx. 0.5 to 0.7 kWh per hour can be achieved per m² of solar absorber surface in direct sunlight.
This corresponds to around 500 to 700 watts per m².
With a well-positioned area of 20 m² (minus the shaded area), the following results:
- 10 to 14 kW heat output with optimum sunlight
- With 6 hours of operation per day, this corresponds to 60 to 84 kWh of heating energy per day
This amount of energy is enough to noticeably heat my 24 m³ pool water – and all with free solar energy, without any electricity costs for additional heating.

- UMWELTFREUNDLICHES ERHITZEN: Unsere tillvex Pool Solarheizung ist besonders umweltfreundlich und sorgt für angenehme Badetemperaturen. Der Sonnenkollektor ist beliebig erweiterbar und kann je nach Wunschtemperatur mit mehreren Elementen in Serie verbunden werden. Durch die natürliche Sonnenenergie wird das Poolwasser erwärmt, ohne dass zusätzliche Stromkosten entstehen.
- EINFACHE FUNKTION: Die schwarzen Solarmatten vom Solarkollektor absorbieren die Sonnenstrahlen und werden durch diese sehr heiß. Das dem Pool entnommene Wasser fließt durch die Solarmatten und nimmt von diesen wiederum die Wärme auf, bevor es dann zurück zum Pool geführt wird.
- SCHNELLER AUFBAU / MONTAGE: Schlauchanschluss Ø 32/38 mm. Die sehr einfache Montage, ermöglicht es Ihnen die Poolheizung direkt in den Wasserkreislauf einzubauen, sodass dieser direkt an die Pool-Filterung angeschlossen werden kann.
- AUSREICHEND FASSUNGSVERMÖGEN: Unsere Pool Solarheizung bietet ein Fassungsvermögen von 4 - 12,6 Litern, welches für Pools von 12000 - 37900 Litern geeignet ist.
- HOCHWERTIG: Der sehr robuste LDPE-Kunststoff, bietet eine UV-Beständigkeit, den Einsatz in Salzwasser und ist besonders witterungsbeständig und langlebig.
EPDM vs. ribbed pipe system – Which absorber is better?
I worked with EPDM mats for a long time, but I had reached the point where I had to replace the old system. When deciding on a new system, I compared both variants in detail – and deliberately opted for the ribbed pipe system from Dolphi-Ripp. I’ll show you why here in a direct comparison:
EPDM mats
Advantages:
- Comparatively low acquisition costs
- Easy to install (even on uneven surfaces)
- Flexible cutting to size
- Good heat output in direct sunlight
Disadvantages:
- Limited service life (UV radiation, frost, animal bites)
- Material becomes porous and brittle over time
- Repair costs increase over the years
- Increased risk of dirt entering the pool water (due to rubber residue)
- Not ideal for permanent roof mounting
Ribbed pipe system (e.g. Dolphi rib)
Advantages:
- Robust, durable construction (UV-stabilized, temperature-resistant from -45 °C to 130 °C)
- Resistant to chlorine and other pool care products
- No dissolving, no smearing, no rubber residue in the water
- Modular design – easy to assemble and extend
- Very good heat transfer due to large surface area of the ribs
- Wind-resistant and stable roof installation without additional safety devices
- Easy emptying in winter thanks to integrated drain
Disadvantages:
- Higher installation effort (gluing, installation of seals)
- less flexible than EPDM in terms of surface adaptation
- higher initial costs compared to inexpensive EPDM systems
The decision to change was not difficult for me. The EPDM mats were getting on in years, material fatigue and repairs were accumulating – and the entry of rubber residue into the pool water was the decisive point for me to take action.
In the course of the conversion, I completely removed the EPDM mats from the third roof. Two of the segments were still intact and could be saved. I connected these to the existing mats on the first roof – there was still enough space there. Unfortunately, the remaining EPDM elements were so badly damaged that they could only be disposed of.
Vertical or horizontal mounting? – This is how I set up my new solar heating system
When planning the new finned tube heating system, a fundamental decision had to be made first: How should the finned tubes be laid on the roof – vertically or horizontally?
Vertical vs. horizontal mounting – a comparison
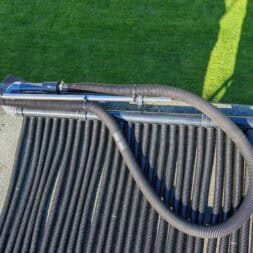
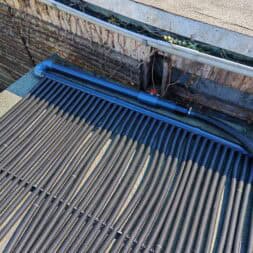
I deliberately opted for vertical installation, in which the ribbed pipes run vertically from the lower to the upper collector pipe – i.e. at right angles to the roof eaves. This was not only suitable for the construction of my roof, but also offers several advantages from a technical point of view.
Vertical installation (vertical from flow to return):
- Advantages:
- Gravity supports emptying in winter
- Even flow through the pipes, as air bubbles reliably escape upwards
- Less shading of individual pipes by neighboring lines
- Good stability due to continuous fastening in clip strips
- Visually tidy, ideal for regular roof structures
- Disadvantages:
- Somewhat more complex alignment, as each tube is mounted individually
- Less surface area may be usable on narrow roofs
Horizontal installation (parallel to the eaves, running sideways):
- Advantages:
- Faster assembly due to fewer direction changes
- Better use of space possible with wide roof surfaces
- Disadvantages:
- Draining more problematic in winter as water can build up in the pipes
- Greater risk of air pockets
- Higher shading of individual tubes with flat sun position
- Often visually more restless
As my roof area is rather narrow and deep, vertical installation was ideal. I was also able to align the entire construction so that it is easy to empty and harmonizes perfectly with my existing pipe system.

- : Nutzen Sie mit dem umweltbewussten KESSER Sonnenkollektor die grne, umweltschonende Energiequelle der Sonne, um Ihren Pool oder Ihr Outdoor Schwimmbad zu erwrmen und dabei gleichzeitig kologisch zu handeln.
- : Unsere Poolheizung ist einfach so herrlich unkompliziert im Aufbau und der Bedienung, sodass Sie sich gar nicht lange aufhalten mssen um Ihr erwrmtes Poolwasser in ,,Null Komma Nichts' auf den Weg gebracht zu haben.
- : Sparen Sie mit unserem Sonnenkollektor weitere Kosten fr die herkmmliche Stromversorgung ein, und profitieren Sie von der Betriebsart unseres Sonnenkollektors durch natrliche Solarenergie.
- : Genieen Sie herrlich temperiertes Wasser in Ihrem Schwimmbecken oder Outdoor Schwimmbad, und fhlen Sie sich einfach rundum wohl! Unser KESSER Solarabsorber hilft Ihnen dabei die Badesaison, um mehrere Wochen zu verlngern und Ihr Badevergngen so lange wie mglich auszuschpfen.
- : Profitieren Sie von der groen Vielfalt der Schwimmbadsolarheizung und whlen Sie Ihre richtige Gre und Variante, sowie ein mgliches DUO Set aus unserem Angebot aus, um jegliche Poolgre zu versorgen und zu erwrmen. Unsere Solarheizung bietet dazu die ntige und perfekte Auswahl an!
Z-design or U-design? – Choosing the right pipe run
Another important decision concerned the piping design – i.e. the way in which the water flows through the collecting pipes and finned pipes. There are two proven options here: the Z-design and the U-design.
Z-Design:
In the Z design, the water is fed in at the bottom on one side, then runs through the vertically running finned pipes, is collected at the top and returned on the opposite side. The pipes therefore run in a zigzag pattern from bottom to top.
- Advantages:
- The inlet is at the lowest point, the return at the highest point – ideal for venting
- No air pockets, the water can circulate freely
- Easy emptying in winter
- Very uniform flow
- Ideal for my existing pipe installation (inlet at the bottom right, return at the top left)
- Disadvantages:
- Two separate pipe strings required (inlet and outlet side)
- Slightly more installation effort for bonding and alignment
U-Design:
In the U-design, the water is fed in at the top on one side, runs down through the pipes and back up again, and then exits the system on the same side. The manifolds are therefore located directly next to each other.
- Advantages:
- Only one pipe connection to the technical system required (supply and return on one side)
- Compact design, ideal for confined spaces
- Fewer pipes required
- Disadvantages:
- Increased flow resistance due to change of direction
- Air can accumulate more easily – venting more difficult
- More time-consuming emptying in winter
- A special partition wall is required in the collecting pipe
The choice was quickly made for me: The Z-design fitted perfectly with the geometry of my roof and, above all, with my existing pipework, where the inlet was already mounted at the bottom right and the return at the top left. I was therefore able to work without making any changes to the pipe routing – a clear advantage in terms of time, effort and use of materials.
In addition, the Z-design offers the advantage that gravity helps with emptying, air bubbles are not trapped and the water can really flow evenly through all pipes. Especially in combination with vertical mounting, this results in a technically very clean and maintenance-friendly solution.
Construction phase by construction phase: how the assembly went
Fitting the ribbed pipe to the manifolds
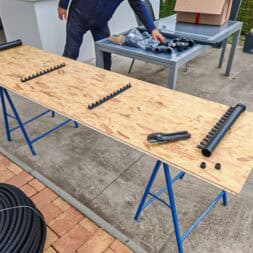
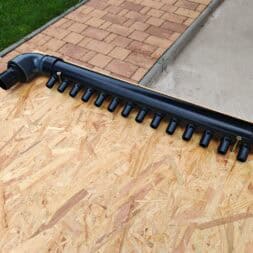
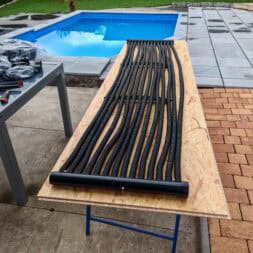
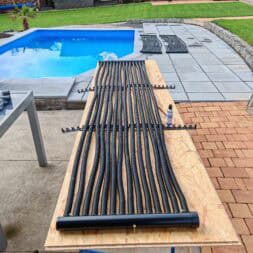
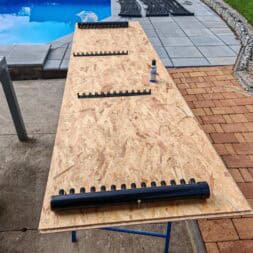
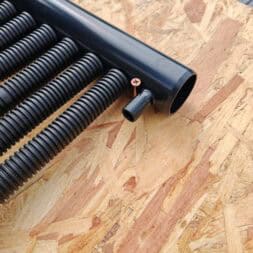
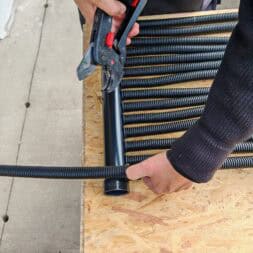
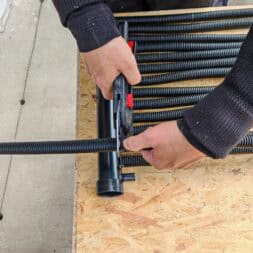
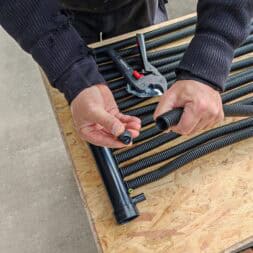
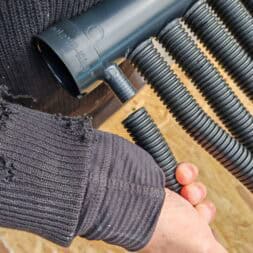
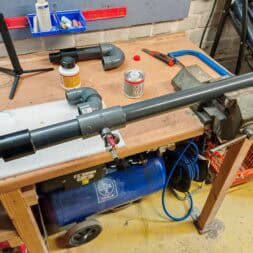
To prepare the individual modules, I used a 2.5 m long OSB board – exactly as long as the roof in depth. I was able to pre-assemble the segments of the solar heating system exactly to size on this plate. To ensure that the distance between the two manifolds remained constant over the entire length, I built two brackets on the OSB board into which I could clip the manifolds securely. This ensured that all the finned tubes could be cut to size precisely and that the subsequent installation on the roof went smoothly.
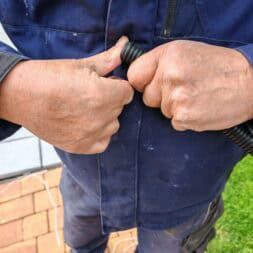
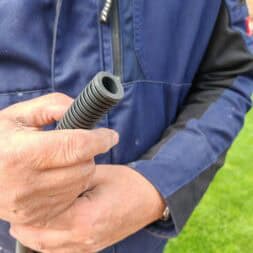
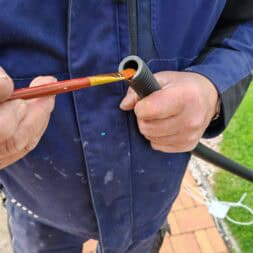
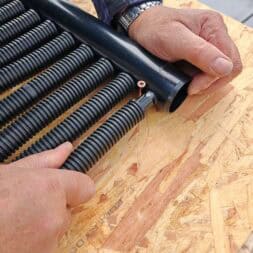
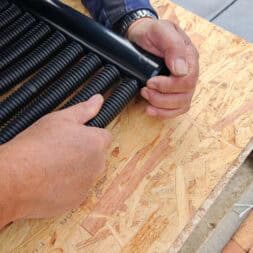
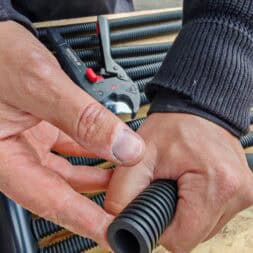
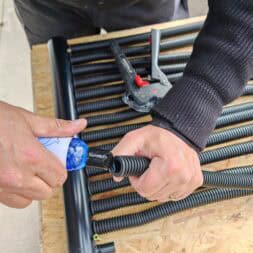
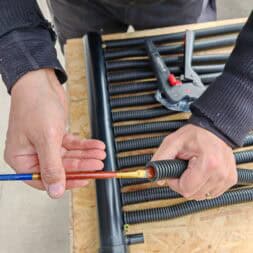
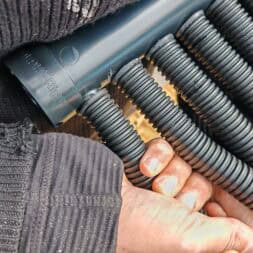
The individual finned tubes were then fitted with rubber seals (lip seals) and clicked into the corresponding clip strips, which were also fixed to the OSB board. A little dexterity is required to install the seal: The seal is pressed together with the fingers in a “pretzel shape” and carefully inserted into the end of the pipe. The nipple of the manifold and the inside of the seal are then carefully brushed with lubricant. A narrow, clean brush is particularly suitable for this – it keeps your hands dry and distributes the lubricant evenly.
The finned tubes are pushed onto the manifold with a slight turning movement, making sure that the tube is positioned straight. Even slight inclinations cause the pipe to tilt and make it difficult to push on. In this case, it helps to pull the pipe off briefly, realign it and repeat the process. With sufficient lubricant and even pressure, the pipe can usually be installed without any problems.
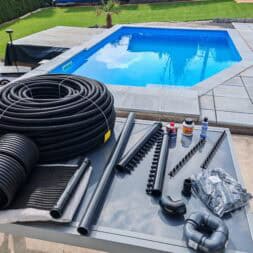
The following materials and tools are required for this step:
- Ribbed tubes cut to size
- Collector pipes with pre-assembled connectors
- Lip seals
- Lubricant (included in the scope of delivery)
- Brush for lubricant distribution
- Cutter or pipe cutter for cutting the finned tubes to length
- Clip strips to stabilize the pipe installation
There are two common methods for installing the Dolphi-Ripp solar heating system: either the manifolds are glued directly to the roof and then the finned tubes are attached there piece by piece – or the segments are prefabricated on the ground and then attached to the roof as a unit.
Due to the limited space on my roof and the restricted freedom of movement, I opted for the second option. The segments were prepared on the ground and then connected and glued together on the roof. This not only enabled precise alignment of the components, but also reduced the risk of assembly errors under difficult conditions.


Bonding the collecting pipes and integrating the drainage system
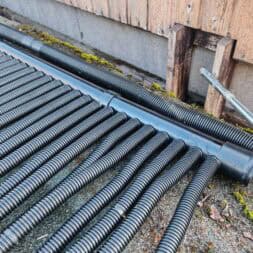
Once the prepared segments of the ribbed pipe heating system had been positioned on the roof, the manifolds now had to be glued together. The individual pipe sections were connected and the end cap at the top right and the end cap with integrated drainage function at the bottom left were professionally installed. Bonding was carried out using the Griffon UNI-100 XT adhesive recommended by the manufacturer – a THF-free special adhesive that is approved for the pipe materials used.
Careful preparation of the bonding areas is essential before bonding. The surfaces to be bonded were first treated with a special acetone-based cleaner to completely remove grease, dirt and release agent residues. Lint-free special cleaning cloths were used to ensure a clean and even result. Only this combination of a suitable cleaner, suitable cloths and the right adhesive makes a permanently tight and stable connection possible.
The bonding itself is carried out in the following steps:
- Clean both pipe ends thoroughly and allow to dry
- First apply adhesive to the sleeve, then to the outer pipe
- Push the pipes together deeply and straight without rotating them
- Wipe off any excess adhesive with a clean cloth
- Leave the joint to rest for at least 10 minutes before continuing to work on the other end
The flow and return connections were then installed. To do this, I glued two 90° IA angles made of PVC-U together to achieve a stable and precisely aligned pipe run from the manifold to the connection point. A transition sleeve was glued to the end of each pipe, into which the grommet for the 38 mm pool hose could be inserted.
A T-piece with a ½” internal thread on the side was also glued into the flow. I screwed a KFE valve (ball valve with drain function) into this thread. This allows the entire system to be drained quickly and in a controlled manner in winter without leaving any water residue in the pipe system.
I deliberately made sure to cut the PVC pipes slightly longer than necessary for the piping. The reason: Bonding PVC is a permanent connection that can no longer be removed. Bonding errors – be it due to incorrect alignment or obliquely positioned sockets – can no longer be corrected, as once a component has been bonded, it can only be replaced by cutting it out completely.
The additional pipe length gives me the option of integrating additional components such as sensors, air vents or shut-off valves into the system at a later date. This reserve creates flexibility for later adjustments – a simple but effective precautionary step in planning.


Windproof without screws: this is how the solar heating remains stable on the roof
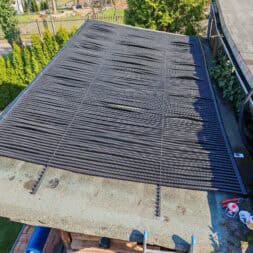
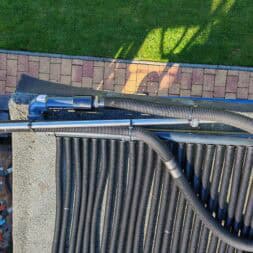
The entire construction of the ribbed tube solar heating system lies freely on the roof, without additional fastening. I deliberately decided not to use any screws or fixings, as the system is sufficiently stable and wind-resistant due to its own weight and the connection of the tubes to each other. Even with strong gusts of wind and typical weather conditions in my region, the system shows no signs of movement or instability.
The system is designed to be storm- and wind-resistant – a clear advantage over many other types of solar absorber, which require additional safety devices.
However, fixing the upper collecting pipe may be useful or necessary on very steep roofs, especially if the pitch exceeds a certain value or the roof covering is very smooth. In such cases, the system can easily be set in motion by its own weight. In this case, it is sufficient to secure the uppermost collecting pipe at certain points with perforated straps or pipe clamps to prevent it from slipping.
Important: Only the upper manifold may be fastened – all other manifolds and the ribbed elements must remain movable. The reason for this is thermal expansion: the pipes expand when exposed to sunlight and contract again when cold. If the system is fixed at several points, the material can no longer move freely. The resulting stresses lead to material fatigue, leaks or, in the worst case, to the finned tubes tearing out of the sockets – especially in heavy frost.
Recommendation for vertical mounting
If the ribbed pipes are installed vertically, as I have done, they would be fixed as follows in the case of a very steep roof pitch:
- Only the upper manifold is secured with perforated tape, pipe clamps or aluminum profiles
- Fasten at several points (e.g. 2-3 per manifold), preferably close to the rafters or substructure
- The lower manifold and all ribbed connections remain unclamped and movable so that the material can move freely when the temperature changes
- Under no circumstances should the finned tubes or lower connections be screwed or fixed in place
This type of fastening offers sufficient protection against slipping on smooth or steep roof surfaces, but at the same time allows the components the necessary freedom of movement to reliably prevent thermal stresses and consequential damage.
Fastening for horizontal mounting
The same principles also apply if the finned tubes are laid horizontally – i.e. parallel to the roof eaves. In this case, the fixing is also only carried out on one of the two collecting pipes, preferably on the pipe that is located in the upper area of the roof (i.e. on the “return”). The finned tubes themselves and the opposite manifold remain freely movable in order to avoid stresses caused by linear expansion.
Please note the following:
- The upper manifold can be fixed with perforated tape or a sturdy rail
- The clip strips for the finned tubes must not be mounted rigidly, but must allow a slight amount of play
- For very large systems, an additional lateral boundary may be recommended to prevent the system from moving sideways on smooth surfaces
- The following also applies to horizontal installation: No double-sided fixing to allow thermal movement
With these measures, the system remains securely on the roof without being damaged by temperature changes – regardless of whether it is installed vertically or horizontally.
Video: Dolphi-Ripp solar heating in a practical test – My pool heating conversion step by step
In my video, I show the complete conversion of my pool heating system from EPDM mats to a modern ribbed pipe system from Dolphi-Ripp. I explain why I opted for this solution and what advantages the system offers during installation and operation.
The video shows the planning, the preparation of the individual modules on the ground and the installation of the solar absorbers on the roof of my timber storage rack. I will go into detail about the Z-design of the piping, the vertical alignment of the finned tubes and the special features of the bonding. I also explain how I implemented the drainage and what to look out for when fixing.
The practical test provides a comprehensive insight into how the Dolphi-Ripp solar heating system works and shows how efficiently the system works with the free energy of the sun – ideal for anyone who wants to heat their pool sustainably and cost-effectively.
You can find more videos about my projects around our pool on my YouTube channel COMMAIK.
Zuletzt aktualisiert am 28. January 2026 um 16:05 . Ich weise darauf hin, dass sich hier angezeigte Preise inzwischen geändert haben können. Alle Angaben ohne Gewähr. (*) Bei den verwendeten Produktlinks handelt es sich um Affiliate Links. Ich bin nicht der Verkäufer des Produktes. Als Amazon-Partner verdiene ich an qualifizierten Verkäufen. Dein Preis ändert sich jedoch nicht.
Initial results & efficiency: this is how warm my pool got in the sun
The new Ripp tube solar heating system was installed at the end of March 2025 – at a time when the weather was not yet really spring-like. The outside temperatures during the day were between 5 °C and 15 °C, and there was even light frost on the ground at night. Despite these rather unfavorable conditions, there were clear effects immediately after commissioning: The water temperature in my pool rose by around 4 to 5 °C every day as long as the sun shone for several hours.
This development surprised me – in a positive way. Because under realistic conditions in the transition period, such heating is clear evidence of the efficiency of the ribbed pipe system. Even though the heating output was naturally reduced due to the low solar radiation and night-time cooling, the system was able to noticeably heat the water during the day.
Particularly noteworthy: the solar heating worked purely passively – without additional electricity costs, without noise development and without mechanical wearing parts. The circuit was controlled automatically as planned via the temperature sensor and the differential controller. The bypass opens when the roof temperature is high enough so that the pool water circulates via the finned tubes, heats up and flows back into the pool. Alternatively, I can also open the bypass manually if I want to take advantage of specific hours of sunshine.
Taking into account the relatively low ambient temperatures and the still shallow sun positions in spring, the result is a complete success in my view. Solar heating is already effective in cool conditions – and that gives confidence for the height of summer, when the radiation is much more intense.
Practical tips: What I would do differently next time
Looking back, I would do a few things differently when installing the solar heating – especially with regard to the bonding process and the handling of the finned tubes.
The biggest learning effect: gluing the manifolds first and then attaching the finned tubes would have been much less stressful. I pre-assembled the segments completely on the ground – including the ribbed tubes – and then connected them together on the roof. What initially sounded like a practical solution actually presented some challenges in practice.
Due to their material tension and inherent elasticity, the finned tubes exert a constant tensile force on the manifolds. This tension is particularly noticeable if the manifolds are not yet firmly glued together. During bonding, the pipes tend to warp slightly or even push apart again – especially when working on the roof with limited space.
It is therefore essential that the manifolds are fixed in a stable and steady position for at least 10 minutes after gluing, ideally with a suitable weight, a strap or a temporary clamping device. In my case, I fixed the pipes by hand for 10 minutes to hold the position while the glue cured. This basically worked and was useful, but this method proved to be very impractical and physically strenuous – especially on the roof, in confined spaces and with components under tension.
If the fixation is released too early, the bonded joint may warp or even come loose again before the adhesive has fully set. This not only leads to leaks, but can also require extensive reworking later on, as bonded components can no longer be separated non-destructively.
Another point: The finned tubes should be precisely aligned before gluing. Even minor stresses or bevels later ensure that the manifolds can no longer be joined correctly. The pipes are under tension and any inaccuracy makes it difficult to join them together precisely on the roof.
In retrospect, it would have been advantageous to glue the manifolds directly to the roof first and then attach the finned tubes individually. Handling is much easier, especially on smaller roofs or in confined spaces. The disadvantage of this method is that installation takes longer, as you have to switch between the roof and the ground more frequently, and the ribbed tubes are not cut to size in a comfortable, level environment, but directly at the installation site.
What also helps: An unrolling aid for the ribbed pipe material. The pipes are stretched tightly on the roll and constantly roll up again. Without a proper unrolling device, the material quickly becomes unruly when cut to length and laid – which costs time and puts a strain on nerves.
All in all, it is clear that those who prepare properly and plan the process logically not only save time, but also ensure a long-lasting and leak-proof result.

- Durch das Bypass Set Basic Deluxe 45° können Sie den Wasserdurchfluss in Ihrem Schwimmbeckenkreislauf gezielt regulieren und somit Ihren Pool effizient optimieren
- Das 19-teilige Bypass Set Basic Deluxe 45° ist optimal aufeinander abgestimmt. Die Materialien bestehen aus hochwertigem PVC (keine ABS Schlauchverbinder)
- Das Bypass Set Basic Deluxe 45° wird in Einzelteilen geliefert und erfordert eine Selbstmontage. Durch das mitgelieferte Benutzerhandbuch ist die Montage schnell und einfach erledigt
- Das Bypass Set Basic Deluxe 45° kann vielseitig eingesetzt werden, wo der Wasserdurchfluss reguliert werden muss (Solaranlagen, etc.)
- Durch die hochwertigen PVC Druckschlauchtüllen ist eine Verbindung von 32 mm und 38 mm Schläuchen möglich
Summary: Solar heating for the swimming pool
After around ten years, the EPDM pool heater was no longer reliable: porous material, damage caused by animal bites and leaks made it necessary to replace it. The choice fell on the Dolphi-Ripp solar heating system, a ribbed pipe system that works with free solar energy, is durable and is well suited for roof installation.
The article compares common pool heating systems – including heat pumps, electric heating rods, classic EPDM solar absorbers, hard plastic modules and solar collectors – and evaluates acquisition costs, installation and operation. The focus is on solar pool heating, in particular the Ripp pipe system from Dolphi-Ripp, which is characterized by UV and temperature-resistant material, modular expandability, easy draining in winter and high efficiency.
The existing piping could be taken over. The new system was installed in a Z-design with vertical installation. The installation was carried out step by step: from the planning and pre-assembly on an OSB board, to the exact alignment of the finned tubes and the professional bonding with special adhesive, to the attachment to the roof, taking thermal expansion into account. The use of reserve lengths for PVC pipes enables later extensions.
Despite outside temperatures of between 5 °C and 15 °C at the end of March, it was possible to heat the pool water by 4 to 5 °C every day – purely passively, without electricity costs or noise. The result confirms the performance of the system even with weaker solar radiation.
The Dolphi-Ripp solar heater offers a robust, low-maintenance and efficient solution for pool heating with solar absorbers. It is particularly suitable for anyone looking for an environmentally friendly alternative to a heat pump or who wants to replace an existing EPDM system with a swimming pool solar absorber.
Frequently asked questions about the ribbed tube solar heater for the pool
1. why was the old EPDM solar heating system replaced?
After more than ten years, material fatigue, animal bite damage and an increasing amount of dirt entering the pool water due to decomposing rubber mats became apparent.
2 What makes the Dolphi-Ripp ribbed tube system special?
It is made of UV and chlorine-resistant material, frost-proof when emptied, durable, modularly expandable and ideal for roof installation.
3. how high is the heat output of the solar heating?
With direct sunlight, daily temperature increases of 4-5 °C were achieved in the pool in spring – without any electricity costs.
4. is the system winter-proof?
Yes, thanks to the vertical installation in the Z-design and the built-in drain cock, the system can be completely drained and safely overwintered.
5 Why was the Z-design with vertical installation chosen?
It enables optimum ventilation, even flow and easy draining in winter – technically the best solution for the existing roof.
6. is self-assembly possible?
With a little manual skill, the system is easy to install yourself. Pre-assembly on the floor simplifies the process considerably.
7. does the system have to be screwed to the roof?
No, as a rule the dead weight is sufficient for a stable position. For very steep roofs, it may be advisable to fix the upper collecting pipe at certain points.
8. how do the costs compare with other heating systems?
Cheaper than a heat pump, more expensive than simple EPDM mats – but significantly lower maintenance and more durable, with zero operating costs.
9. can the system be expanded later?
Yes, the design is modular. Reserve lengths for the piping enable later additions such as additional modules or sensors.
10 Who is the Dolphi-Ripp solar heater particularly suitable for?
Ideal for anyone who wants to heat the pool with solar energy efficiently, quietly and without running costs – especially as a replacement for older EPDM systems.

- ALGENHEMMENDE SOLARPLANE Das mitternachtsblaue Material reduziert photosynthetische Lichtanteile und verhindert Algenbildung im Pool, ideal fr klare Wasserqualitt im Rundbecken.
- EFFIZIENTE WASSERERWRMUNG Die Solarfolie nutzt die Sonneneinstrahlung zur Erwrmung des Poolwassers und hlt die Temperatur lnger warm fr mehr Badezeit und weniger Energieverlust.
- STARK VERRINGERTE VERDUNSTUNG Als direkt aufliegende Poolabdeckung minimiert die Folie die Wasserverdunstung und senkt den Bedarf an Wasserpflegemitteln deutlich.
- LANGLEBIGE 500 m FOLIE Robuste GeoBubble-Struktur mit UV- und chemikalienstabilen Pigmenten sorgt fr hohe Widerstandskraft und eine jahrelange Nutzung.
- PASSGENAUE FERTIGUNG Jede Solarplane wird in Deutschland in sorgfltiger Handarbeit produziert und passend zur gewhlten Gre gefertigt sofort einsatzbereit und hochwertig verarbeitet.
Dieser Beitrag ist auch verfügbar auf:
English
Deutsch


