Draining the basement with a new horizontal barrier – conclusion after 9 months
It is now nine months since our old damp cellar was drained with a retrofitted horizontal barrier – time to take stock.
In a building over 100 years old like ours, which was built without the foundation waterproofing that is common today, moisture in the basement is a real challenge. As the rising damp in our cellar became increasingly visible, I installed a new horizontal barrier with injection cream in the thick cellar walls to create a barrier against the ground moisture.
In this article, I show in detail what effect the moisture barrier has had, where problems still exist and what other measures seem sensible to keep the cellar permanently dry.
What you can expect in this article:
- Results after 9 months: How the horizontal barrier has changed the cellar climate.
- Before and after comparison: Visible improvements and continuing problems.
- Moisture measurements: Exact values before and after draining in comparison.
- Efflorescence and salt rings: causes, effects and what they reveal about moisture.
- Additional measures: Sealing slurry and infrared wall heating as the next steps.
Our cellar from 1900: high standard, but moisture remains a problem
Our house, built around 1900 by a factory owner, is of exceptional construction quality for its time. Compared to many other buildings of this era, which were often built simply and without special protective measures against damp, our house was built to a higher standard.
It not only has walls up to 60 cm thick, but also an old horizontal barrier that was installed in the lower layers of the brick walls. At the time, this horizontal barrier was an advanced measure to prevent rising damp and keep the walls in the cellar dry.
However, the years and the effects of moisture and weathering are now leaving their mark: the original horizontal barrier is leaking in places and no longer provides adequate protection.
As the walls stand directly in the ground without modern waterproofing, the moisture can now rise and settle in the masonry.
This problem becomes particularly noticeable during heavy rain or damp periods, as the walls increasingly absorb moisture and damage such as efflorescence, mold and discoloration becomes visible. Even the subsequently applied restoration plaster did not bring the desired improvement.
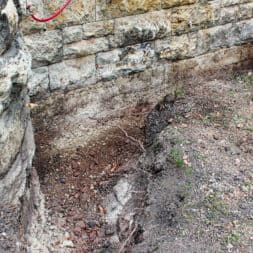
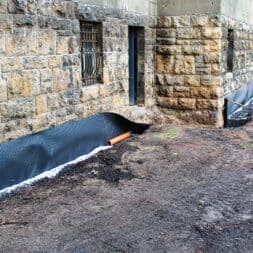
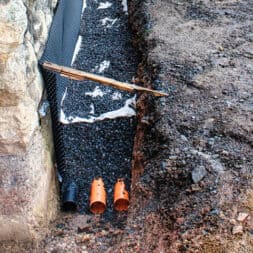
To alleviate the problem, we had already laid drainage around the building. Although this measure minimizes the direct inflow of water, it does not prevent rising damp in the masonry.
The decision was therefore made to install a new horizontal barrier at a later date.
In addition to the injection solution or the injection method, which is injected into the walls using funnels or bottles, I have also used the sticks and the injection cream in various areas of the cellar.
An overview of the measures can be found here:
- Drying out an old house yourself – planning and preparation
- Draining the cellar – test drilling for the injection solution
- Drainage – retrofitting a horizontal barrier yourself
- Draining the cellar – pump sump | Build your own soakaway
Modern new buildings are now better equipped to deal with such problems, as they are often fitted with insulation panels and effective external waterproofing. Thanks to technical advances in construction methods, the foundation is usually provided with bitumen waterproofing and multi-layer barrier layers, which effectively prevent moisture from rising and thus keep the building permanently dry.
Such sealing techniques create an effective barrier against moisture and provide long-term protection for new buildings against the typical moisture damage that older buildings often have to contend with.


Horizontal barrier with injection cream: how the process works
Horizontal waterproofing using injection cream is a common method for subsequent basement waterproofing when rising damp threatens the masonry.
The principle is simple: by injecting a special cream, a water-impermeable barrier layer is created inside the wall, which prevents moisture from rising from the floor.
Step by step: Installing the horizontal barrier
1. drill holes
First, I drilled holes in the affected cellar walls at intervals of about 10 cm to serve as injection points for the injection cream. For this I used a powerful impact drill with a special 12 mm drill bit for masonry, which is particularly suitable for drilling clean, deep holes in the brickwork.
The depth of the drill holes was approx. 80 % of the wall thickness so that the cream could penetrate the masonry optimally.
2. clean the drill holes
An important step before the actual injection was the cleaning of the drill holes, as dust and residues could impair the distribution of the injection cream.
I used a special borehole cleaner consisting of a compressed air pump and brush attachments to completely remove the drilling dust.
3. injection of the cream
The cream was then injected. For this step of the basement renovation, I used a cartridge gun for mortar and injection creams, which enables precise dosing and even injection of the cream.
I also attached a hose from an old hose scale to the front of the cartridge press. The hose made it possible to inject the injection cream right to the back of the drill hole so that the cream reached the entire depth of the hole evenly and could be optimally distributed in the masonry.
This ensured that the water-repellent layer in the capillaries was built up consistently and reliably.
4. distribution in the masonry
After injection, the cream liquefies and spreads primarily over the bed joints, as it is optimally absorbed in these horizontal and vertical joints and forms a continuous barrier against rising damp.
Only after penetrating the bed joints does the liquid slowly migrate into the bricks, thus increasing the protection of the entire masonry.
The effect therefore unfolds layer by layer and increases with the distribution in the porous structures of the bricks.
5. sealing the drill holes
After successfully injecting the cream, I quickly closed the drill holes again. I used a ready-made mortar mix that is available in cartridges and is particularly easy to work with.
Using the cartridge gun, I was able to apply the mortar precisely to the drill holes and seal the openings quickly and cleanly.

- Universell einsetzbar: Die gebrauchsfertige Mörtelmasse lässt sich dank der standfesten Konsistenz leicht verarbeiten und bietet eine hervorragende Beständigkeit, sodass sie sich sowohl für den Innen- als auch den Außenbereich verwenden lässt
- Nahezu geruchslos: Der spritzbare Fertigmörtel eignet sich aufgrund der geringen Geruchsbildung optimal für Ausbesserungen in geschlossenen Räumen und schafft dank seiner Mörteloptik ein unauffälliges Fugenbild, etwa beim Verschließen von Bohrlöchern oder bei abgeplatzten Kanten
- Ohne aufwendiges Anmischen: Der Reparaturmörtel ist gebrauchsfertig und lässt sich mit einer Kartuschenpistole schnell und einfach verarbeiten ohne eine vorherige Anmischung mit der Zugabe von Wasser, das spart Zeit und sorgt für ein sauberes und effizientes Arbeiten
- Anwendungsgebiete: Die zementgraue Spachtelmasse bessert Fugen zuverlässig aus, egal, ob bei der Sanierung von Mauerwerken, dem Schließen von Rissen oder der Fixierung von Dachziegeln, auf Baustoffen, wie u.a. Beton, Bims, Keramik, Putz und Zement
- Lieferumfang: 1 x 310 ml Repair AC Reparaturmörtel (Art.-Nr. 534474), grauer Schnellmörtel für den sofortigen Einsatz von fischer
Video: Draining the cellar – conclusion after 9 months
In this video I show the results of draining the damp cellar after 9 months. I show the successes and also the weak points of the method, give hints and tips and draw a conclusion at the end
You can find the entire playlist of my videos here: “Draining the basement”.
If you want to see more of me and my projects, feel free to check out my YouTube channel.
Zuletzt aktualisiert am 6. January 2026 um 10:32 . Ich weise darauf hin, dass sich hier angezeigte Preise inzwischen geändert haben können. Alle Angaben ohne Gewähr. (*) Bei den verwendeten Produktlinks handelt es sich um Affiliate Links. Ich bin nicht der Verkäufer des Produktes. Als Amazon-Partner verdiene ich an qualifizierten Verkäufen. Dein Preis ändert sich jedoch nicht.
Before and after comparison: Visible changes to the walls
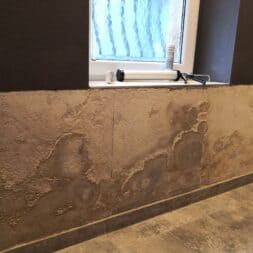
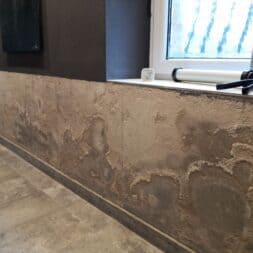
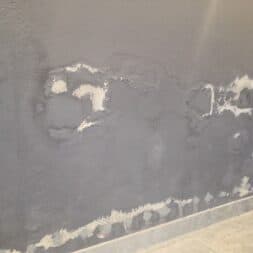
In addition to the metrological results, a key aspect of the drainage process was the visual before-and-after comparison of the walls. At the beginning, the cellar was characterized by heavy salt deposits and dark stains on the walls due to the high humidity.
Efflorescence: Causes and disadvantages
Efflorescence on the walls is a typical sign of moisture in the masonry. They are caused by a chemical reaction in which water-soluble salts are dissolved from the brick or mortar material and reach the wall surface with the rising damp.
When the water evaporates, the salts remain as white or grayish deposits. These salts often originate from the soil or the building material itself and frequently consist of calcium, sodium or magnesium compounds.
This efflorescence has a number of disadvantages:
- Visual impairment: The white and grayish deposits look unsightly and give the walls a dirty appearance.
- Pore blockage in the masonry: Salt deposits can block the pores of the walls, which restricts the masonry’s natural ability to breathe.
- Moisture binding: Salts have hygroscopic properties, i.e. they can attract and bind moisture from the air. This can cause the wall to remain damp in affected areas, making it more difficult to dry out and encouraging further moisture damage, especially if the walls in the basement are not treated properly.
Changes after the injection
After applying the injection cream, we noticed significant changes to the walls:
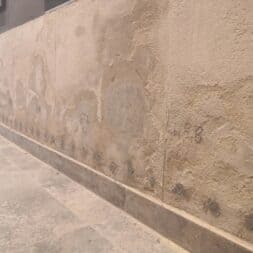
- Reduction of efflorescence: The salt deposits, which had originally formed heavily in the upper area of the wall, have now moved about 10 cm downwards after the application of the injection cream. This indicates that the rising damp has been at least partially stopped.
- Drier wall surfaces: The treated wall surfaces show overall improved dryness compared to the untreated areas, indicating that the new horizontal barrier is successfully retaining moisture.
- Reduction in humidity: The humidity has also decreased noticeably, which is confirmed by the readings from my hygrometer.
These changes were visible after just a few months and initially gave us cause for optimism, although complete drainage was of course not to be expected after a single procedure.

- SCHUTZ VOR FEUCHTIGKEIT - Die Creme schützt Ihren Keller vor aufsteigender Feuchtigkeit & Nässe. Fehlt Ihrem Haus die Mauersperrbahn, schaffen Sie mit der Injektionsmasse nachträglich eine Abdichtung.
- WAND TROCKENLEGEN - Neben der Feuchtigkeits-Abwehr eignet sich das Injektionsverfahren, um bereits vollständig durchfeuchtete Wände dauerhaft auszutrocknen.
- FÜR JEDE WAND - Die Horizontal-Sperre eignet sich für Lagerfugen in allen mineralischen Wänden (auch in Hohlwänden) - z.B. für Ziegel, Gitterstein, Sandstein, Hohlkammerstein uvm.
- EINFACHES ANBRINGEN - Das Einsetzen der Feuchtigkeitssperre ist auch Laien möglich - ohne schweres Gerät & Ausschachten: Löcher bohren & langsam das Bohrloch mit Schlauchbeutelpresse befüllen.
- BKM.MANNESMANN - Für ein trockenes Zuhause! In unserem Sortiment finden Sie verschiedenste Produkte, um Ihr Zuhause von Feuchtigkeit zu befreien & nachhaltig zu schützen.
How effective is the horizontal barrier? A comparison of the humidity values
In order to better understand the effectiveness of the horizontal barrier, I documented the moisture values at various points on the cellar walls before and after application.
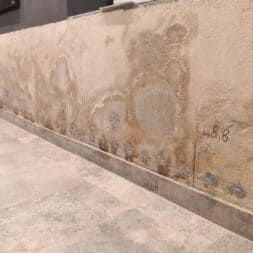
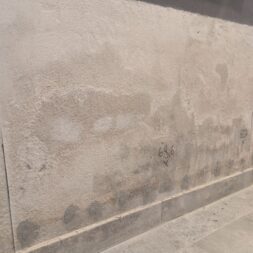
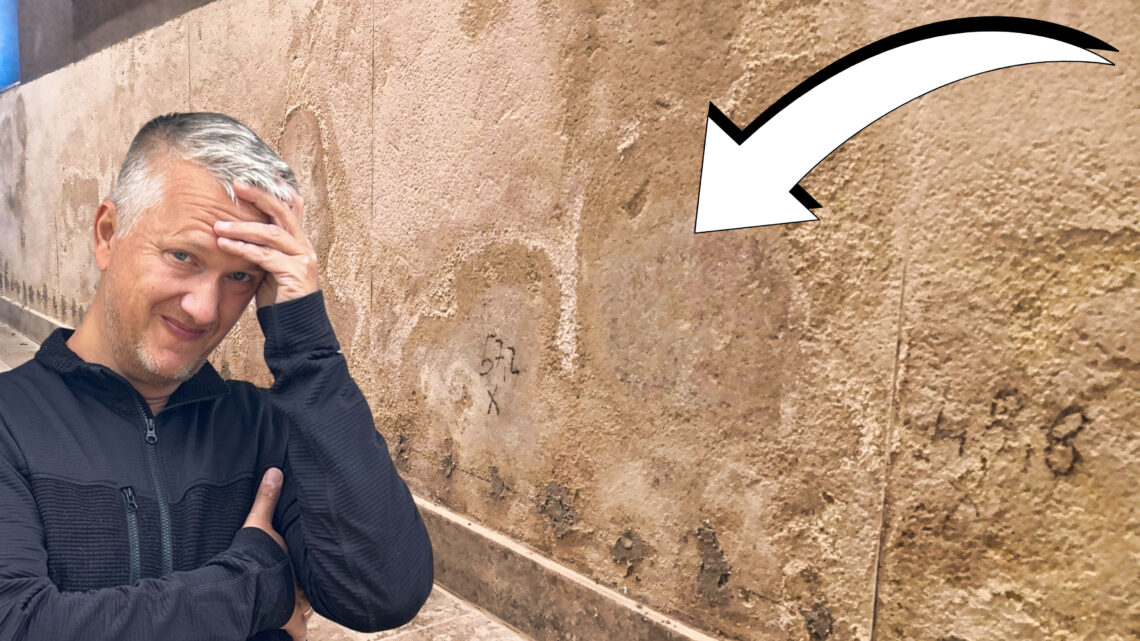
Even before injecting the horizontal barrier, I measured the moisture at several points and wrote the values directly on the wall at the respective measuring points.
Nine months later, I was able to take a second control measurement at exactly the same points and thus compare the two series of measurements precisely.
Moisture measurement in detail
For the moisture measurements, I used the RDINSCOS MT68 measuring device, which is especially suitable for building materials such as masonry and plaster.
This device displays the moisture values on an LCD scale from 0 to 90, which in most cases can be converted directly into the moisture content of the material.
The following conversion scale applies:
- LCD 30 = 0.25% moisture – dry
- LCD 40 = 0.4% moisture – dry to slightly moist
- LCD 50 = 1% humidity – moist
- LCD 60 = 1.7% moisture – very humid
- LCD 70 = 2.05% moisture – wet
- LCD 80 = 2.35% moisture – very wet
- LCD 90 = 2.65% moisture – extremely wet
According to this scale, wall areas up to a value of LCD 30 are considered dry, values between 30 and 60 indicate a damp wall, and from a value of LCD 60 the wall is to be classified as wet.
Measured values before and after draining
I used the RDINSCOS MT68 to document the humidity values at various points and was able to observe a clear change over the months:
- Measured values before drying: In some areas, the moisture values were above LCD 80, indicating a high level of moisture penetration, corresponding to around 2.35% water content.
- Measured values after nine months: In a particularly damp area, the value fell from LCD 82 to LCD 60.9 – a reduction to around 1.7% moisture and therefore to a medium moisture level, which makes it much easier to dry out our cellar. Similar improvements were seen in other areas of the walls.
Overall, the measurements show a noticeable reduction in moisture, which indicates the effectiveness of the subsequently installed horizontal barrier.
Nevertheless, the values are still elevated in certain areas, especially where the injection cream has not been applied.
These results indicate that additional measures are required to dry out the cellar in order to ensure a dry cellar climate in the long term and to further reduce the moisture in the entire masonry.

- Zerstörungsfreie Feuchtemessung: Sphärischer induktiver Feuchtigkeitsmesser, zerstörungsfreie Messung der Holzfeuchte. Keine Notwendigkeit, die Sonde in das Messmaterial einzuführen. Messtiefe 5-40MM, Sondenlänge 58MM, Messbereich 0-100%.
- Schnelle und einfache Messung: Dreifarbige Anzeige: Drei farbige Analogstreifen erleichtern die Identifizierung der Messwerte. Eingebaute Taschenlampe: Zusätzliche Taschenlampe ermöglicht es Ihnen, schnell und einfach zu erkennen, die Oberflächenfeuchtigkeit der dunklen Arbeitsplatz.
- Breite Messung: 3 Haupttypen von Messbereich, Gips / zementartigen Substrat / Holz und anderen Materialien, Papier / Pappe / Fliesen / Gipskarton. Einsatzszenario: DIY Holz während der Konstruktion oder Dekoration.
- Haltefunktion: Mit der "Hold"-Taste kann der aktuelle Messwert aufgezeichnet werden. Außerdem wird der maximale und minimale Feuchtigkeitswert angezeigt.
- Einstellungsparameter: 3 Arten von Wassergehalt Ebene. Die Wand Hygrometer kommt mit einstellbaren Feuchtigkeit Alarmwerte nach Ihren Bedürfnissen.
Efflorescence and salt deposits: A persistent problem
A common problem with damp cellars is the so-called efflorescence, which has already been described above and which can be remedied by professional measures.
These are formed when water rises through the walls and transports salts and minerals to the surface as it evaporates. The remaining salt often forms light-colored stains and rings on the wall surface, which impair the appearance and attract dirt.
Development of efflorescence and formation of “salt rings” after draining
Before the horizontal barrier was applied, there was heavy efflorescence in the upper wall area. After application, however, there were some striking changes:
- Displacement of the efflorescence: The salt deposits have shifted downwards from their original area by around 10 cm, indicating that the injection cream is starting to take effect. The cream seems to interrupt the rising of the moisture, causing the salts to escape at lower points.
- Formation of salt rings and auras: In addition, “salt rings” or auras have formed around some areas of the wall, indicating a concentrated deposit of salts and minerals. These rings often form when moisture evaporates in a certain area of the wall, leaving an increased concentration of salt on the surface. The rings show how the injection cream has spread in the masonry and mark areas of the cellar wall where the moisture is specifically blocked.
Effects and maintenance of the affected wall areas
Unfortunately, these “salt rings” and auras also pose a challenge as they attract dirt and dust and can detract from the appearance of the wall.
Thanks to their hygroscopic properties – i.e. their ability to attract moisture from the air – the salts can bind moisture and keep the wall damp in these areas.
This can affect the indoor climate in the cellar and makes regular cleaning of these areas necessary in order to reduce salt deposits and keep the walls in good condition both visually and hygienically.
Overall, the downward shift of the efflorescence indicates a partial success of the horizontal barrier. Nevertheless, the challenge remains to remove the salt deposits and rings, as these can otherwise permanently attract dust and dirt and impair the cellar climate.

- Arbeitsbereich: Dieser kompakte Raumentfeuchter arbeitet kontinuierlich in einem Bereich zwischen 35 und 85 % r.F. und lässt sich über das übersichtliche Bedientableau einschalten
- Leistung: Der große 3-Liter-Wasserauffangbehälter und eine satte Entfeuchtungsleistung von bis zu 30 l/Tag bieten ausreichend Kapazität für die Entfeuchtung von Räumen bis zu 90 m² bzw. 230 m³
- Einsatzbereich: Ob zu Hause, im Büro oder im Keller– der Luftentfeuchter TTK 96 E ist flexibel einsetzbar und entfeuchtet zuverlässig in den verschiedensten Bereichen
- Wäschetrocknung: Der TTK 96 E kann auch als Raumluft-Wäschetrockner zur Unterstützung der Trocknung von nasser Wäsche in Wohn- oder Haushaltsräumen eingesetzt werden
- Funktionen: Der Luftentfeuchter TTK 96 E sorgt durch seine hygrostatgesteuerte Entfeuchtungsautomatik mit Echtwert-Feuchtevorwahl, wahlweise Vollautomatik- oder Permanent-Betrieb und Timer-Funktion jederzeit für optimales Raumklima
Sealing slurry and heating foil as further measures to improve the cellar climate
As the horizontal barrier was successful, but could not completely eliminate the moisture, we are planning additional measures to keep the cellar dry in the long term and improve the indoor climate.
Sealing slurry as additional waterproofing
The sealing slurry is a special waterproofing layer that is applied to the basement walls to create an additional protective barrier against penetrating moisture.
This waterproofing usually consists of a cementitious or plastic-modified compound that forms a waterproof coating once it has been applied to the wall surface and dried. The sealing slurry is applied in several layers to create a continuous protective film that provides both water repellency and compressive strength.
- Advantages of sealing slurry in the renovation of old buildings: It is an effective addition to the horizontal barrier, as it also prevents moisture from penetrating the wall. Sealing slurries adhere well to mineral substrates and can therefore be applied to plaster or brick. The layer is resistant to moisture and pressing water and, depending on the product, can also be used in problem areas such as corners and joints.
- Disadvantages of sealing slurry when renovating old buildings: It can seal the masonry to the outside and thus restrict the wall’s ability to breathe, which is important to prevent cracks. Once the wall is completely sealed, moisture that is already inside the masonry can only escape with difficulty, which underlines the need to seal the basement. It can therefore make sense to combine this measure with other measures such as wall heating to prevent condensation and moisture build-up.
Installation of infrared wall heating
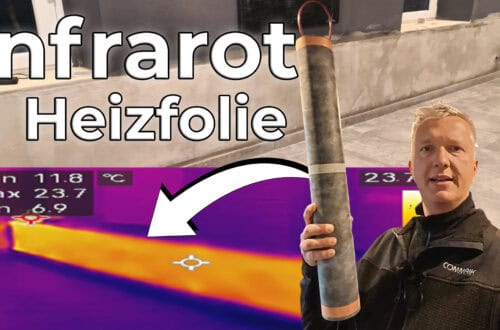
In addition to sealing, we are planning to install infrared wall heating. This type of heating heats the surfaces directly using infrared radiation instead of primarily heating the room air.
This allows the wall to be heated evenly, which supports drainage and reduces condensation. At the same time, drying the wall also reduces the risk of mold in the wall.
We plan to install the heating foil on the lower wall area (plinth) with a height of approx. 60 cm and a length of approx. 5 meters, so that the heating power is concentrated specifically on the areas at risk of moisture.
- How the heating foil works: The infrared heating foil is applied to the wall and emits radiant heat evenly. This heat penetrates the wall surface, warms the masonry and promotes the evaporation of residual moisture in the upper layers of the wall. Heating encourages the masonry to release moisture, which can then escape into the room.
- Expected results and efficiency: The aim is to ensure moderate and even heating of the wall with a power consumption of around 400 W. To keep operating costs low, we plan to set the heating so that it is only activated for short periods every 10 to 15 minutes. The aim is to achieve a constant base heat that prevents condensation and moisture without driving up energy costs. This targeted, economical control promises to keep operating costs low while maximizing the effect.
The combination of sealing slurry and infrared wall heating should help to sustainably reduce moisture in the cellar walls and keep the indoor climate stable. I am curious to see how these additional measures will work and whether they can efficiently retain the remaining moisture.

- 2-komponentige flexible Reaktivabdichtung für Kellerwände, Fundamente und Betonbauteile
- gegen Bodenfeuchtigkeit, aufstauendes Sickerwasser und drückendes Wasser.
- Einfach zu verarbeiten: roll-, streich- und spachtelbar.
- Schnell abbindend: Für Arbeiten unter Zeitdruck.
- Haftsicher: auf mineralischen und bituminösen Untergründen einsetzbar.
Summary and conclusion
In this blog article, I share my experiences of draining a damp cellar and the success of the horizontal barrier used.
By applying an injection cream, a waterproof layer was created in the masonry to stop rising damp in the cellar wall.
After nine months, there are clear improvements: The wall moisture has decreased in most places and the typical salt deposits (efflorescence) have shifted downwards, indicating the effectiveness of the injection cream.
However, the horizontal barrier was not able to completely eliminate the moisture, which is why additional measures are planned.
An additional sealing slurry should further prevent the penetration of moisture, and an infrared wall heater with 400 W output will help to heat the masonry in a targeted manner and reduce the remaining moisture.

- SCHUTZ VOR FEUCHTIGKEIT - Novusticks schützen Ihren Keller vor aufsteigender Feuchtigkeit & Nässe. Fehlt Ihrem Haus die Mauersperrbahn, schaffen Sie mit den Stäbchen nachträglich eine Abdichtung.
- WAND TROCKENLEGEN - Neben der Feuchtigkeits-Abwehr eignen sich die Sticks, um bereits feuchte oder nasse Wände mit bis zu 95% Mauerwerksfeuchtigkeit auszutrocknen.
- FÜR JEDE WAND - Die Horizontal-Sperre eignet sich für alle mineralischen Wände mit Lagerfuge (auch Hohlwände) - für Ziegel, Gitterstein, Sandstein, Hohlkammerstein uvm.
- EINFACHES ANBRINGEN - Das Einsetzen der Mauerwerkssperre ist auch Laien möglich - ohne schweres Gerät & Ausschachten: Löcher bohren, Sticks einlegen & die Wand verschließen!
- BKM.MANNESMANN - Für ein trockenes Zuhause! In unserem Sortiment finden Sie verschiedenste Produkte, um Ihr Zuhause von Feuchtigkeit zu befreien & nachhaltig zu schützen.
FAQ on retrofitting an old cellar with a horizontal barrier
1. why was a horizontal barrier installed in our cellar?
In our house, which is over 100 years old, there was originally no modern foundation waterproofing. The horizontal barrier was installed to stop rising damp in the basement after moisture damage such as efflorescence and discoloration had appeared in the walls. The new barrier is designed to reduce moisture absorption in the walls and improve the indoor climate.
2 How does a horizontal barrier with injection cream work?
When injecting special cream, drill holes are made in the affected walls through which the injection cream is injected. The cream spreads in the masonry, especially in the bed joints, where it forms a waterproof barrier. This layer prevents soil moisture from rising and thus protects the wall structure in the long term.
3 What were the results of the horizontal barrier after nine months?
After applying the injection cream, the walls were noticeably drier and the salt deposits (efflorescence) shifted downwards, indicating a reduction in rising damp. The measured values for wall moisture have fallen compared to the initial values, but there are still residual moisture problems in some areas.
4. what causes salt deposits (efflorescence) on cellar walls?
Salt deposits occur when rising damp transports salts out of the masonry and these are deposited on the surface as the water evaporates. This efflorescence can affect the appearance of the walls and retains moisture, making drainage more difficult.
5. what additional measures are planned for the horizontal barrier?
In addition to the horizontal barrier, we plan to coat the cellar walls with a sealing slurry to keep the moisture out. In addition, infrared wall heating should warm the walls evenly and promote the evaporation of residual moisture. These measures are intended to further stabilize the indoor climate and keep the walls dry in the long term.
6. is a sealing slurry suitable as the sole solution for basement waterproofing?
A sealing slurry provides a strong seal against penetrating moisture and is often used as a supplement to other sealing methods. In old buildings without foundation waterproofing, however, it is usually used together with other measures, such as a horizontal barrier, to comprehensively block moisture.
7 Which measuring devices are suitable for wall moisture measurement?
The RDINSCOS MT68 and similar devices, which display moisture values in building materials such as bricks and mortar on a scale, were used for wall moisture measurement. These devices provide helpful information for monitoring the development of moisture and evaluating the success of the sealing measures.
8 Why does moisture penetrate old cellar walls?
Older buildings often lack modern waterproofing, so that walls stand in the ground without protection and moisture from the ground rises capillary into the masonry. Over time, this leads to moisture damage, mold growth and salt efflorescence, which stress the masonry and impair the indoor climate.
9. what are the advantages of infrared wall heating for damp basement walls?
Infrared wall heating heats the masonry directly and stimulates the evaporation of moisture from the walls. Residual moisture can thus be effectively reduced, particularly in the lower area, which supports drainage and reduces the risk of mold growth. An infrared heater is also energy-efficient and can be switched on as required to keep energy costs low.
10. how long does it take for a horizontal barrier to take effect against moisture in order to restore the building fabric?
The effectiveness of a horizontal barrier with injection cream often becomes apparent after just a few months, depending on the material and wall thickness. The moisture barrier builds up with the distribution of the cream in the masonry and gradually reduces the moisture. Regular moisture measurements help to document the progress of drying and to assess whether further measures are required.

- TOBOLIN HORIZONTALSPERRE bietet einfache Anwendung und schnelle Durchführung mit dem wasserfreien Injektionssystem - absolut dicht. Ergiebigkeit: Reicht für 4,80 m Wandlänge bei einer Wandstärke von 30 cm.
- HOCHPROFESSIONELLES ABDICHTUNGSSYSTEM wirkt gegen aufsteigende Feuchte in Mauerwerken. Perfekt zur Selbstanwendung geeignet - Sie können eine nachträgliche Horizontalsperre selber machen mit TOBOLIN!
- KEINE SALZFRACHT: Das TOBOLIN Verkieselungsmittel sorgt dafür, dass keine wasserziehenden Salze in das Mauerwerk gelangen - die Wand bleibt dadurch "atmungsaktiv".
- TOP VERTEILUNGSVERMÖGEN: Daher ist ein Bohrlochabstand bis zu 20 cm möglich. Die Anwendung ist für innen und außen geeignet - ideal zur Bekämpfung von aufsteigender Feuchtigkeit.
- EINFACHES NACHFÜLLEN: Die Wiederbefüllung der Trichter-Flaschen ist mit dem Nachfüllkanister ganz einfach möglich. Im Set sind 24 x 500 mL Flaschen mit jeweiligem Injektionsaufsatz enthalten.
Dieser Beitrag ist auch verfügbar auf:
English
Deutsch


