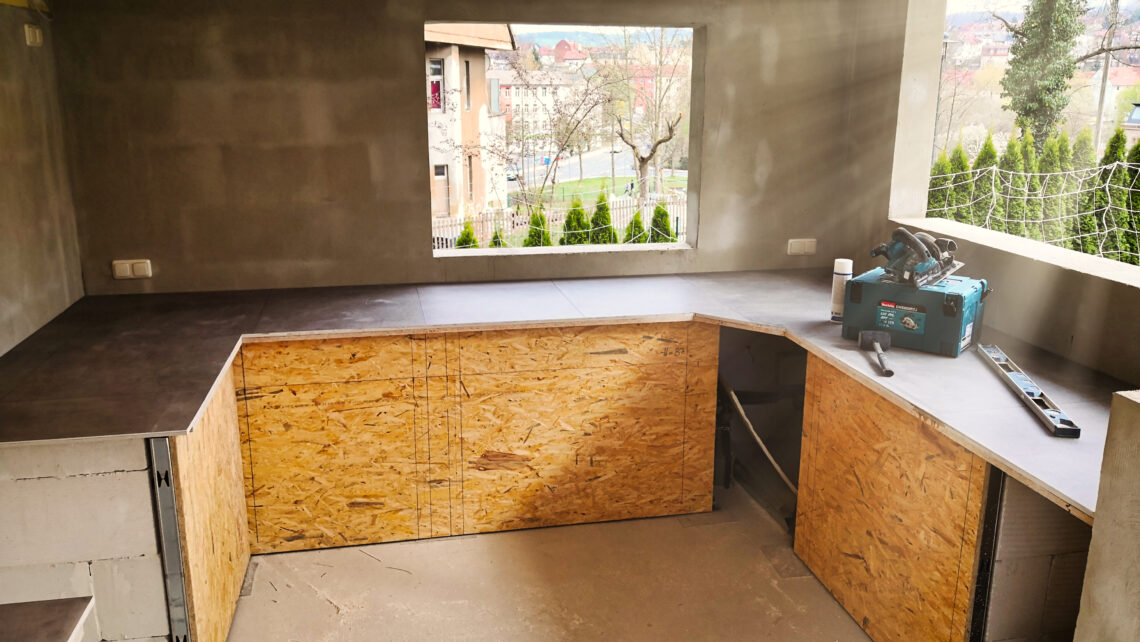
Build your own garden kitchen – worktop and jamb for the outdoor kitchen
After completing the electrics and water supply in my outdoor garden kitchen, it was now time to install the worktop. I wanted to build the work area of the outdoor kitchen in such a way that I would have individual zones to work in for the barbecue, the bar and also the washbasin area.
In this post, I describe in a step-by-step guide how I used OSB boards and Fermacell boards to create a stable and moisture-resistant base for the vinyl tiles.
These measures were necessary to make the worktop robust, scratch-resistant and easy to clean, so that it meets the requirements of an outdoor kitchen.
Initial situation, planning and building instructions for the outdoor kitchen
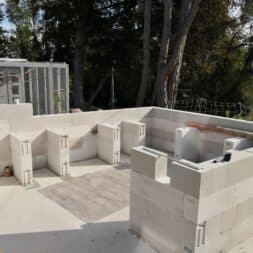
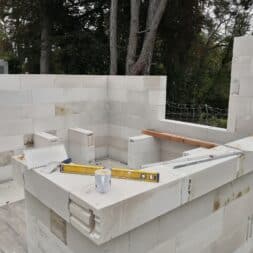
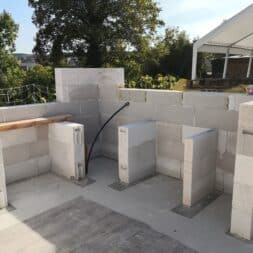
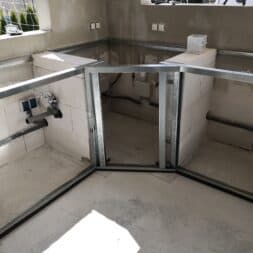
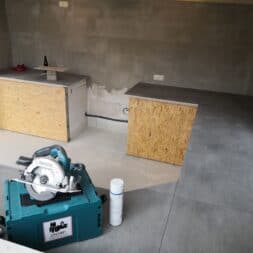
I had built the walls of the garden kitchen from solid aerated concrete blocks and constructed matching niches with a height of 75 centimeters and a depth of 50 centimeters. My Napoleon PHANTOM P500 gas barbecue was to be permanently installed in the large alcove. I wanted to install the built-in BBQ furniture in the other niches.
The building instructions, which I had already created with the Sketchup program before building the foundation, once again proved to be a great help. You can find the video for planning my garden kitchen on YouTube and here on the blog Planning your own garden kitchen – 3D.
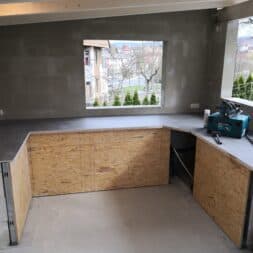
The entire work surface, which I wanted to divide into a grill zone, water zone and work zone, was designed like a large U. I have described the details of how to lay the bricks in my article“Building your own garden kitchen – laying and gluing walls with aerated concrete“. The niches were large enough to be able to install the matching modules of the built-in furniture for the kitchen unit and the sink later on.
The worktop was to be installed above the niches so that it could rest directly on the aerated concrete blocks. The worktop had to be robust enough to withstand environmental influences such as UV light and increased humidity. It should also be stable enough to support the weight of the kitchen appliances without wobbling or shaking.
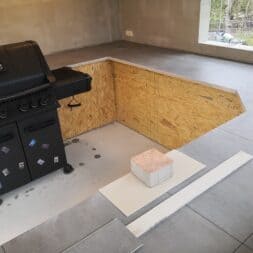
To the left of my gas barbecue, I wanted to install the sizzle zone, which was previously permanently installed on my Napoleon PHANTOM P500, directly into the worktop. The worktop not only had to bear the weight, but also be able to withstand the enormous heat.
Zuletzt aktualisiert am 16. February 2026 um 20:34 . Ich weise darauf hin, dass sich hier angezeigte Preise inzwischen geändert haben können. Alle Angaben ohne Gewähr. (*) Bei den verwendeten Produktlinks handelt es sich um Affiliate Links. Ich bin nicht der Verkäufer des Produktes. Als Amazon-Partner verdiene ich an qualifizierten Verkäufen. Dein Preis ändert sich jedoch nicht.
The right materials for the worktop in my garden kitchen
Originally, I wanted to brick the cupboards on the front of the jamb and close them with matching doors and drawers made of wood or stainless steel. However, due to the corona situation, there were extreme delivery difficulties with the materials I wanted, which meant that the original plans had to be adapted.
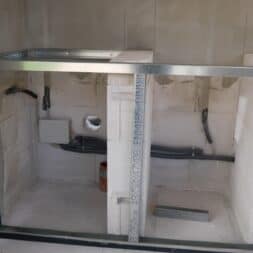
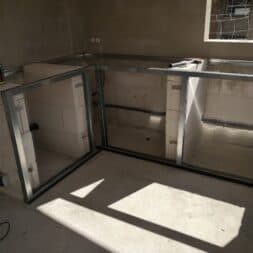
I therefore decided to build the interior of my outdoor garden kitchen with drywall profiles. The stainless steel metal profiles inherently offered a certain degree of protection against rust.
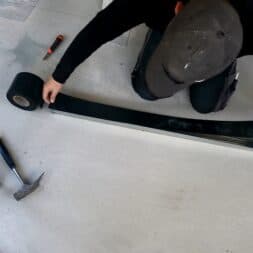
I further increased the resistance to moisture with zinc spray and bitumen tape, which I attached between the UW profiles and the concrete floor. Drywall profiles are lightweight yet offer high stability, which makes them weatherproof and therefore ideal for use in protected outdoor areas.
They also enable flexible and fast installation, which was an advantage given the delivery difficulties.
The fronts should then be faced with 18 mm OSB boards. OSB boards (Oriented Strand Board) consist of several layers of wood chips glued lengthwise and crosswise, which gives them high stability and strength.
They are suitable for outdoor use as they are protected against moisture and UV light by special gluing. At the same time, they are very stable and extremely easy to work with.
However, OSB boards should always be well sealed to prevent moisture from penetrating, otherwise they can swell and lose their shape.
The OSB boards also formed the basis of my worktop. However, as I couldn’t tile directly onto the wooden boards, I decided to install an additional intermediate layer.
I chose Fermacell panels for this. Fermacell boards are made from recycled paper and gypsum and are reinforced with glass fibers, which gives them high stability and moisture resistance.
These boards are also suitable for damp environments and are relatively easy to process. They provide a smooth, stable surface that is ideal as a substrate for tiles or vinyl.
However, the use of OSB and Fermacell boards in outdoor areas involves a number of risks. Despite their moisture-resistant properties, OSB boards can swell and lose their structural integrity if exposed to moisture over a long period of time.
Although Fermacell boards are moisture-resistant, they can also be damaged if they are not properly sealed. To minimize these risks, I thoroughly sealed the OSB boards and also treated the Fermacell boards with a waterproof primer.
In addition, the joints and edges were carefully sealed to prevent water ingress.

- Präzises Schneiden: Die 125 mm S&R-Trennscheibe für INOX-Stahl ermöglicht exakte und saubere Schnitte dank der dünnen 1-mm Flexscheibe – ideal für den Einsatz mit Winkelschleifern bei Metallarbeiten.
- Hochleistungs-Abrasion: Gefertigt aus abrasivem Aluminiumoxid, sorgt die Flexscheibe für schnellen und effizienten Materialabtrag beim Trennen von Stahlblech, Edelstahl und weiteren Metallarten.
- Maximale Stabilität: Die robuste Glasfaserarmierung und hochwertige Harzmischung (Dispergier- und Anreibeharz) gewährleisten hohe Sicherheit und Langlebigkeit selbst bei anspruchsvollen Trennarbeiten.
- Universell einsetzbar: Optimal für den Einsatz in der Karosserie- und Behälterbauindustrie, bietet die Trennscheibe hervorragende Leistung beim Schneiden und Trennen von Edelstahl und Metallblechen.
- Profi-Qualität: Diese Flexscheiben für Winkelschleifer überzeugen durch ihre hohe Beständigkeit und Leistung, perfekt für Metall-Schneider und Metall-Trenner, die auf zuverlässige Ergebnisse setzen.
Installing drywall profiles in the garden kitchen
The installation of drywall is relatively self-explanatory and easy to implement with a little practice. I had already built a lot of drywall during the renovation of our Art Nouveau villa.
You can find suitable examples in my posts“Build your own toilet in the basement | drywall construction with plasterboard” and“Build your own estate agent’s office in the basement“.
Until now, however, I had only planked the walls with plasterboard. The planking with OSB boards was basically nothing else.
First, I built a substructure from the matching metal profiles.
Use of metal profiles as a basic framework
The metal profiles are available in various designs, lengths and widths.
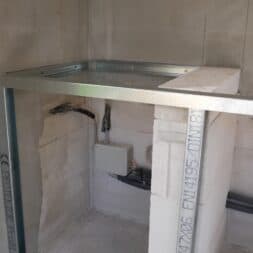
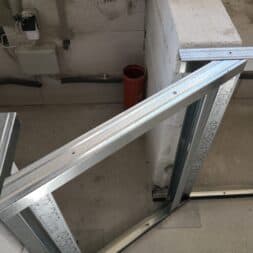
For my garden kitchen, I used UW profiles and CW profiles with a width of 50 millimeters. UW profiles are horizontal profiles that are attached to the floor and ceiling, while CW profiles are installed vertically between the UW profiles to create a stable carcass.
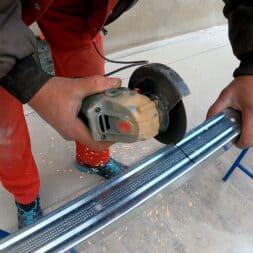
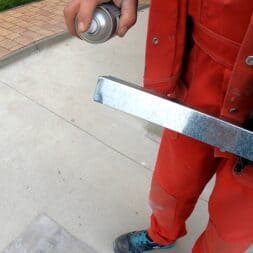
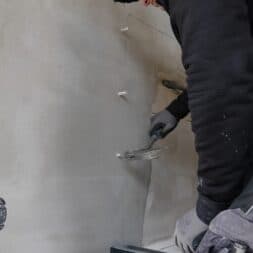
I used an angle grinder, my Flex, with a thin metal blade to cut the profiles. As cutting with an angle grinder could damage the protective alloy of the metal profiles, I treated the cut edges with zinc spray after cutting to prevent corrosion.
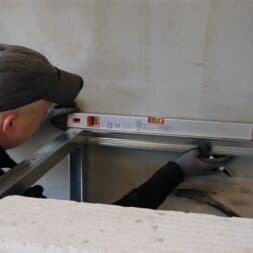
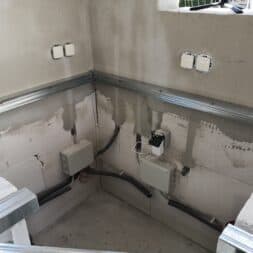
I attached UW profiles at the bottom of the floor and at the top end and additionally protected the lower profiles with a 100-millimeter-wide bitumen tape, which I stuck to the underside and folded upwards over the sides. The bitumen tape was absolutely waterproof and stuck extremely well.
Assembly of the substructure for storage space and drawers
CW-50 profiles were then used as upright profiles, which fitted exactly into the UW profiles. At the wall ends, I screwed the CW profiles directly to the wall.
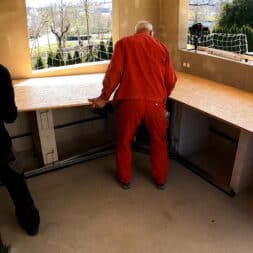
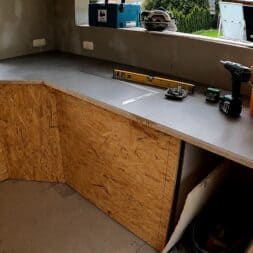
I used these profiles to build a metal skeleton onto which I could screw the OSB board of the worktop directly from above.
I was also able to screw the OSB boards that went on the front directly to the profiles.
By keeping the right distance from the rear wall, I was able to build a large and continuous surface. The gas concrete blocks of the niches absorbed additional loads.
Processing OSB wood panels
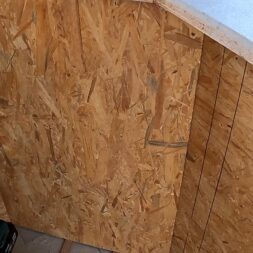
The worktop consisted of 18-millimeter-thick OSB boards. OSB boards (Oriented Strand Board) are made of wood chips glued lengthwise and crosswise and offer high stability and strength. They are protected against moisture and UV light and are very easy to process.
I used my Makita DHS660RTJ cordless hand-held circular saw to cut the OSB boards to size. Thanks to the rechargeable battery, the saw did not need a power cable, which gave me extreme flexibility.
I used my Festool PS 300 EQ-Plus TRION jigsaw for small cuts and curves.
Installing the OSB boards
Before I installed the OSB boards, I made a few preparations.
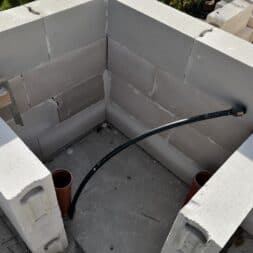
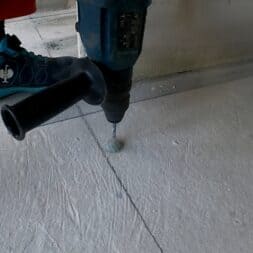
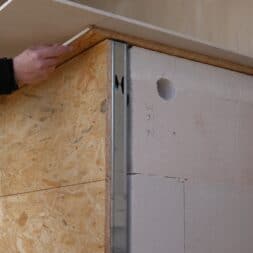
Firstly, I marked the positions of the aerated concrete blocks on the rear wall so that I could clearly determine their position even after the planking. Secondly, I have already drilled a core hole in the niche wall to the left of where my gas barbecue stands.
I wanted to feed the gas hose and the electric cable for the automatic ignition through here later.
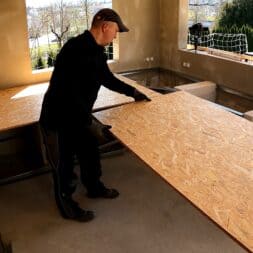
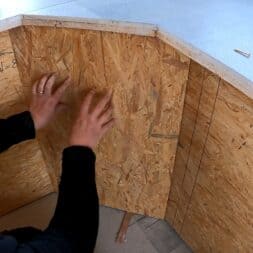
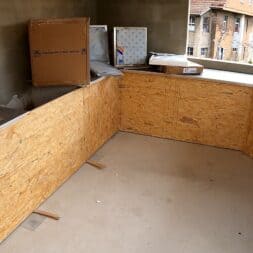
Once everything was ready, I first laid the OSB boards on the substructure from above and screwed them in place.
Due to the tongue and groove system of the OSB boards, I had to calculate the cutting of the boards precisely beforehand so as not to make any mistakes. The entire surface was all the more stable afterwards.
Once the worktop was fully planked, I attached the OSB boards to the front. The panels were screwed directly to the metal profiles at a distance of a good 5 millimeters from the floor.
Only the front panel on the niche, which was to house my gas barbecue, was not screwed down. This plate had to remain mobile so that I could easily reach the grill later.
Here I needed a special solution that offered me an invisible mounting for the panel. But more about that later.


Video: Build your own outdoor kitchen – building a jamb and worktop
While building my outdoor kitchen, I kept my camera running. I then published the individual stages in various films on my Youtube channel in a separate playlist for the construction of my garden kitchen. In each of these films I show you how you can build your own outdoor kitchen.
There is also a selection of informative instructions for building my outdoor kitchen in my blog category Garden Kitchen.
I also filmed the construction of the jamb and the installation of the worktop and published it in my video.
If you want to see more of me and my projects, feel free to check out my YouTube channel.
-
Price: € 17.07instead of: € 20.83
-
Price: € 399.99instead of: € 520.84
-
Price: € 13.83instead of: € 14.57
-
Price: € 55.62instead of: € 64.99
Installing Fermacell boards and vinyl tiles as a work surface
The garden kitchen was already looking really good at this point. The worktop was closed and the fronts were also planked with OSB boards.
Now all that was missing was the built-in BBQ furniture in the fronts and, of course, a stable, scratch-resistant and easy-to-clean surface. I originally wanted to tile the worktop.
Stoneware tiles are extremely abrasion-resistant and are also easy to clean. Unfortunately, at that time I lacked the necessary experience and tools for laying tiles – or rather for cutting the tiles to size.
But I had already considered another alternative: Vinyl tiles.
Reasons for the additional use of Fermacell boards
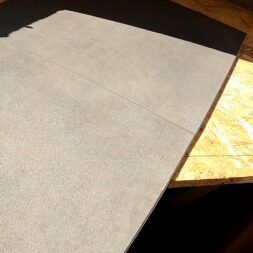
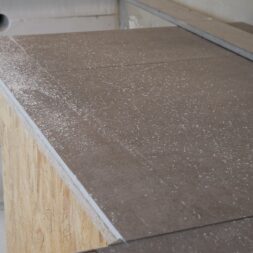
I also laid the Fermacell boards on top of the OSB boards because the adhesion and bonding properties of OSB boards are limited.
OSB boards have a relatively rough and uneven surface, which makes it difficult to bond vinyl tiles directly to them. In addition, OSB boards tend to swell when exposed to moisture, which can further impair the adhesion of adhesives.
By using Fermacell boards as an intermediate layer, I was able to create a smooth, stable and moisture-resistant base that was ideal for gluing the vinyl tiles.
Use and processing of Fermacell boards
Fermacell boards are made from recycled paper and gypsum and reinforced with glass fibers. This combination gives them high stability and moisture resistance, making them ideal for use in a weatherproof outdoor kitchen.
Fermacell boards are available in different sizes; the ones I used measured 150 x 100 centimeters and were more manageable than the 250 x 125 OSB boards.
During processing, it should be noted that the panels must be cut precisely to ensure a perfect fit.
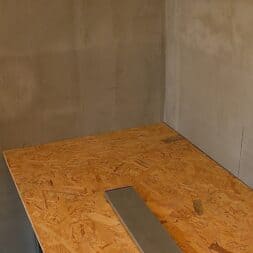
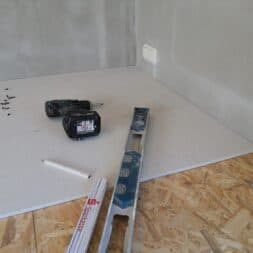
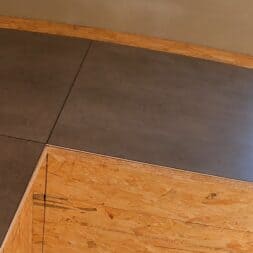
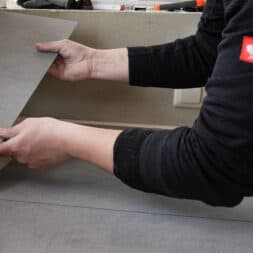
I first laid the Fermacell boards directly onto the OSB boards and checked the gap dimensions at the corners. For the cutting, I used my Makita DHS660RTJ cordless circular saw, which offered me a high degree of flexibility thanks to its battery operation.
I cut the edges cleanly and precisely. I then screwed the Fermacell boards directly to the OSB boards underneath.
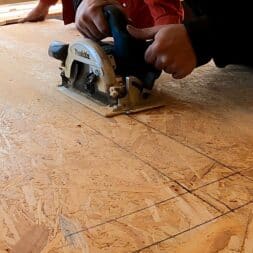
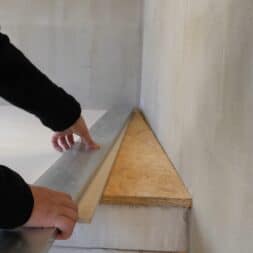
In order to fit the Fermacell boards precisely to the front edges of the worktop, I took measurements from the OSB board of the kitchen front and drew a cut edge with an overhang of 10 centimeters on the Fermacell boards.
This overhang was important to obtain a clean and flush edge that would later support the vinyl tiles.
The panels were then sawn cleanly along these cut edges with my Makita circular saw.
Preparation of the surface
Once the Fermacell boards had been cut to size and screwed in place, I primed the surface with a suitable primer. This was important to ensure optimum adhesion of the vinyl tiles. While the primer was drying, I planned the installation of the vinyl tiles to minimize waste and achieve a symmetrical installation pattern.
Use and processing of vinyl tiles
Vinyl tiles are particularly suitable for use in damp environments as they are water-resistant and durable.
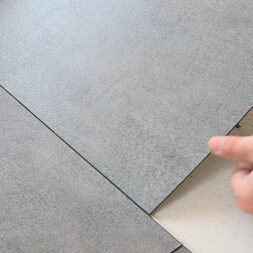
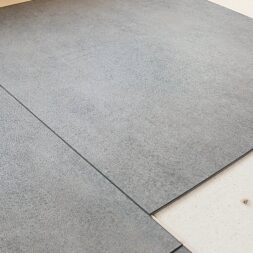
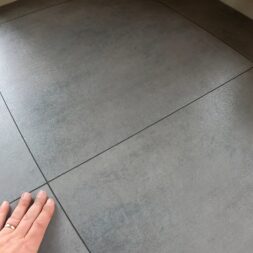
The tiles I used had a format of 60 x 30 centimeters. They have a click system that enables simple and stable connection of the tiles.
All I needed for processing was a cutter knife, which I used to score the tiles and then break them off at the cut edge.
Laying the vinyl tiles
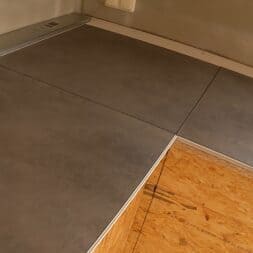
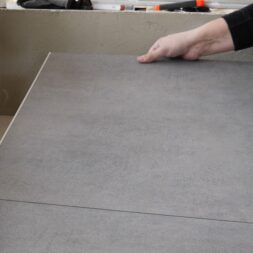
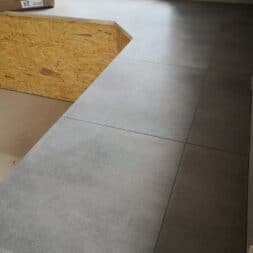
My aim was to reduce waste and achieve a visually appealing laying pattern with symmetrical distances to the wall and the outer edge. However, the click system of the tiles only worked in one continuous direction, which made planning a little more complicated.
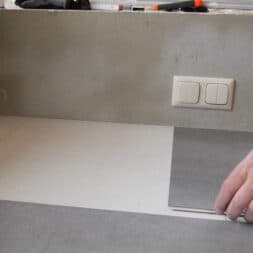
Ultimately, whole tiles should be positioned directly at the front. The 25 centimeter gap to the wall should then be covered by a second tile cut to size.
I was then able to use the remaining piece of the second tile as a wall piece on the opposite worktop, as the click system fitted here. In this way, I was able to optimize the waste.
Only on the middle area, my water zone, did the game no longer work. Here, some half tiles remained unused at the end.
Once the laying pattern was clear, I sprayed the substrate generously with the spray adhesive and laid the tiles.
With a light tap of my rubber mallet, I made sure the click connections clicked into place.
The work was completed in the evening.
Stainless steel built-in furniture, sink and barbecue for the kitchen in the garden
The surface of the worktop of my garden kitchen was finished and I was already looking forward to installing the built-in BBQ furniture and the sink as well as my Napoleon PHANTOM P500 gas barbecue and, of course, installing my sizzle zone directly into the worktop of my garden kitchen.
The worktop still offered enough space to install a small pizza oven later.
I have described the installation of the BBQ catering furniture in my blog entry Build your own outdoor garden kitchen: Installing stainless steel BBQ furniture.

- & : Unsere selbstklebenden Fliesen aus PVC sparen Zeit und Handwerker: Schutzfolie abziehen, Fliese ausrichten, aufkleben fertig! Perfekt fr DIY-Projekte oder schnelle Renovierungen.
- & : Die Klebefliesen fr den Boden sind kratzfest, abriebfest, halten tglicher Beanspruchung problemlos stand. Vor allem sind sie besonders pflegeleicht: einfach absaugen oder feucht wischen.
- & : Die strapazierfhigen PVC-Klebefliesen sind resistent gegen Feuchtigkeit und knnen als Vinylboden Fliesenoptik auch problemlos mit Fubodenheizungen kombiniert werden.
- : Ob als Klebefliesen Bad, in der Kche, im Flur oder im Keller die selbstklebenden Bodenfliesen eignen sich ideal fr Mietwohnungen und sorgen berall fr ein modernes Raumgefhl.
- : Jede Klebefliese ist ein Unikat mit authentischer Struktur. Packungsinhalt: 24 selbstklebende Fliesen 30,48 60,96 cm, Strke 1,5 mm, insgesamt ca. 4,46 m.
Summary and conclusion
In the last few days, I finished the electrics in my garden kitchen. Now it was time to install the worktop and the jamb. The worktop should accommodate the Napoleon PHANTOM P500 gas barbecue, while the side burner should be integrated into the worktop.
Due to the coronavirus situation, there were extreme delivery difficulties, which meant that the original plans had to be adjusted. I decided to build the interior of my garden kitchen with drywall profiles and construct a pre-wall from OSB boards and Fermacell panels.
The garden kitchen was made of solid gas concrete blocks, with matching niches for the gas barbecue and built-in BBQ furniture. The entire work surface was designed like a large U and had to be robust enough to withstand environmental influences such as UV light and increased humidity.
It also had to be stable enough to bear the weight of the kitchen appliances. I wanted to install the sizzle zone of the gas grill directly in the worktop, which also had to withstand the enormous heat.
For the fronts, I used 18 mm OSB boards, which are made of glued wood chips and are protected against moisture and UV light.
As the OSB boards have a rough surface and can swell when exposed to moisture, I also laid Fermacell boards to create a smooth and moisture-resistant base for the vinyl tiles. Fermacell boards are made from recycled paper and gypsum, reinforced with glass fibers, and are ideal for humid environments.
Vinyl tiles, which are water-resistant and durable, were glued to the Fermacell panels. They have a click system that enables a stable connection.
I planned the installation carefully to minimize waste and achieve a symmetrical laying pattern. I scored the tiles with a cutter knife and broke them off at the cut edge.
Finally, I stuck the tiles on with spray adhesive and used a rubber mallet to ensure that the click connections clicked into place. It was not always easy to click in the tiles and keep the gap as small as possible, especially at the joints to the wall. This last process required some patience and manual dexterity.
In the end, the worktop surface was finished and I could look forward to assembling the built-in BBQ furniture, installing the gas grill and fitting the sizzle zone.

- VIELSEITIG – Ideal für Papier, Karton, Stoff, Schaumstoff, Metall, Filz, Gummi u. v. m. eignet sich der WEICON Sprühkleber extra stark für viele Heimwerker- & Bastelprojekte.
- SCHNELL – Das Klebespray trocknet schnell & ermöglicht so zügiges Arbeiten ohne lange Wartezeiten, auch auf rauen & unebenen Flächen.
- DAUERHAFT – Die extra starke Formel des Permanent-Sprühklebers sorgt für dauerhafte Ergebnisse, die auch unter Belastung zuverlässig halten.
- PRAKTISCH – Der Kraftsprühkleber haftet auch bei extremen Temperaturen zuverlässig & ist ideal für Anwendungen in anspruchsvollen Umgebungen.
- ANWENDUNG – Oberflächen reinigen. Dose schütteln, aus 15-30 cm kreuzweise vollflächig sprühen (bei porösen Flächen beide Seiten). 5-10 Min. ablüften lassen. Teile kurz & kräftig zusammendrücken.
FAQ about the outdoor kitchen: worktop and materials
1 Why were OSB and Fermacell boards chosen for the worktop?
The combination of OSB and Fermacell boards provides a stable and moisture-resistant foundation. OSB panels consist of glued wood chips, which are known for their stability and moisture resistance. Fermacell boards, which are made of gypsum and glass fibers, provide a smooth, robust surface that is ideal for bonding vinyl tiles, ceramic tiles or porcelain stoneware.
2. how were the OSB boards prepared to ensure long-term durability?
To protect the OSB boards from moisture, they were thoroughly sealed. This prevents them from swelling and losing their structural integrity. In addition, the Fermacell boards were treated with a waterproof primer to provide further protection.
3. why were vinyl tiles chosen as the surface material?
Vinyl tiles are water-resistant, durable and easy to clean. These properties make them ideal for use in a garden kitchen that is exposed to external influences such as moisture and heat. The click system of the tiles also ensures a stable connection.
4 What are the advantages of Fermacell boards compared to other materials?
Fermacell boards offer high stability and are moisture-resistant, making them ideal for outdoor use. Compared to plasterboard, they are more robust and less susceptible to moisture damage. They are also easy to work with and provide a smooth surface for bonding tiles.
5. how was it ensured that the worktop can withstand the weather conditions?
The worktop was thoroughly sealed to prevent moisture from penetrating. The joints and edges were carefully sealed and the panels were given a waterproof primer. In addition, the worktop has been designed to rest on the aerated concrete blocks, which provide additional stability.
6 Is the worktop heat-resistant enough for the installation of a grill?
Yes, the worktop has been designed to withstand the weight and heat of a barbecue. The sizzle zone of the grill has been integrated directly into the plate, and the materials used are robust enough to withstand high temperatures.
7. how was the installation of the drywall profiles carried out?
The stainless steel drywall profiles were used for the substructure to ensure high stability and corrosion resistance. UW profiles were attached to the floor and ceiling, while CW profiles served as vertical upright profiles. All cut edges were treated with zinc spray to prevent corrosion.

- Bis zu 2-mal präziser als eine Bosch 2607019473 Ceramic Diamanttrennscheibe
- Saubere, hochwertige Schnitte mit Bosch Diamond Technology
- X-LOCK Schleifer und 22,23 mm Standardschleifer
- Ideal für saubere, gerade Schnitte in Hartkeramikfliesen, schneidet Wandfliesen in Bädern und Küchen sowie Bodenfliesen auf Terrassen und Gärten, aber auch im Innenbereich
- Lieferumfang: EXPERT HardCeramic Diamanttrennscheiben, 125 x 22,23 x 1,4 x 10 mm
Dieser Beitrag ist auch verfügbar auf:
English
Deutsch


