Winterizing Your Pool: Drain the Water, Store the Equipment, and Cover the Pool
To winterize my pool and protect the equipment from frost, I cleaned the pool, backwashed the filter, and lowered the water level. I also moved the BAYROL dosing system and other components to the basement for the winter. I’ll describe my process, including how I stored the sensors in a humid environment and how I protected the pipes. New this time was the winter cover with aluminum struts and water bags: it was meant to solve the problems I’d had with my previous tarp and pool cushions.
At a Glance: What I Did to Prepare My Pool for Winter
- Preparing Your Pool for Winter: Timing and Deciding on Passive Winterization.
- Cleaning the Pool: Clean the floor, walls, and steps before the winter break.
- Backwash the filter: Increase the pump speed using the variable-frequency drive and flush out the debris.
- Lower the water level: Expose the inlet jets and take the pool spotlight into account.
- Storing the dosing system: Flush the hoses separately and store the pH and redox probes in a moist environment.
- Protect pool equipment from frost: Remove equipment, disconnect the power supply, and drain the lines.
- Covering the pool: Install the ice-pressure pads and test out the new winter cover with aluminum struts and water bags.
- Classifying Winterizing Products: Effects, Pros and Cons, and My Experience Without Using Them.
When is the right time to winterize the pool?
I prepared my pool for the winter break well before the first frost. The key factors were the water temperature, the weather forecast, and how much longer I could realistically use the pool before I had to winterize it.
My pool heater used solar collectors made of finned tubes. During the summer months, the solar energy was enough to warm the water to a comfortable temperature. Starting around October, however, the solar heating system at my location no longer provided enough heat to compensate for the heat loss caused by the cooler nights. That also marked the end of my swimming season. With a properly sized heat pump and an insulated pool enclosure, however, you can extend the swimming season well into the fall.
A water temperature consistently below about 15 °C served as a guideline for permanent closure. The pool chemical manufacturer BAYROL, for example, distinguishes between end-of-season preparations and the subsequent winter phase. A single cold night is therefore not enough on its own to determine the right time. At the same time, forecasted periods of frost should not be overlooked, even if the water is still warmer.
I continued my pool water maintenance right up until it was shut down for the season. Even as temperatures dropped, maintaining proper water parameters and ensuring the filtration system was working properly remained important. After all, I wanted to send the pool into its winter break with clean water.
Passive Pool Winterization: My Plan for the Cold Season
There are essentially two methods for winterizing a pool: passive winterization, in which the system is shut down, and active winterization, in which the water treatment system continues to operate. Which option is best depends on the location, the equipment, and the expected winter temperatures.
I decided to go with passive overwintering. To do this, I lowered the water level, turned off the circulation, and drained the water-carrying parts of the system. I stored the sensitive components in the basement, where they would be protected from frost, while the pool was covered with a winter cover.
With active overwintering, however, the system remains in operation. Water maintenance and regular inspections are still required. This method is particularly suitable for regions with mild winters. During periods of frost, a protection plan tailored to the entire system is necessary. A pump that runs occasionally does not, on its own, provide reliable protection against frost damage.
| Procedure | What will happen to the facility? |
|---|---|
| Passive Pool Winterization | The circulation system will be shut down. Water-carrying system components will be drained, and sensitive equipment will be stored in a frost-free location. |
| How to Prepare Your Pool for Winter | The water treatment system will remain in operation. Water parameters, operating times, and antifreeze levels must continue to be monitored. |
Temperatures in my unheated utility shed can drop well below freezing in the winter. That’s why I removed sensitive equipment and prepared the remaining piping so that as little residual water as possible would remain inside. For me, this one-time effort in the fall was a better solution than keeping the system running continuously throughout the winter.
Cleaning the Pool: Removing Dirt Before the Winter Break
Before I shut down the system, I gave my pool one last thorough cleaning. Leaves, insects, and debris should not be left in the pool for months on end, if at all possible. Organic residues pollute the water and can cause discoloration. Furthermore, once the circulation is turned off, the continuous filtration that would normally trap the stirred-up debris is no longer active, which could promote the growth of algae and bacteria in the pool during the winter.
So I had my pool robot clean the floor and walls one last time. I also swept the steps so that the loosened debris could be collected while the filter system was still running. Otherwise, quite a bit tends to get left behind, especially on the steps and in corners where water doesn’t circulate well.
A thorough cleaning at the end of the season should also make it easier for me to get started in the spring. The less dirt that remains under the winter cover, the less I’ll have to remove from the ground and the pool surfaces later on. However, that’s no guarantee of consistently clean water.
That is why, prior to decommissioning, it was also necessary to monitor and, if necessary, adjust the water parameters. I carried out this work while the system was still fully operational and the added treatment chemicals could be distributed effectively. Only then did I lower the water level and remove the equipment.
Preparing BAYROL Automatic Cl-pH for the Winter Break
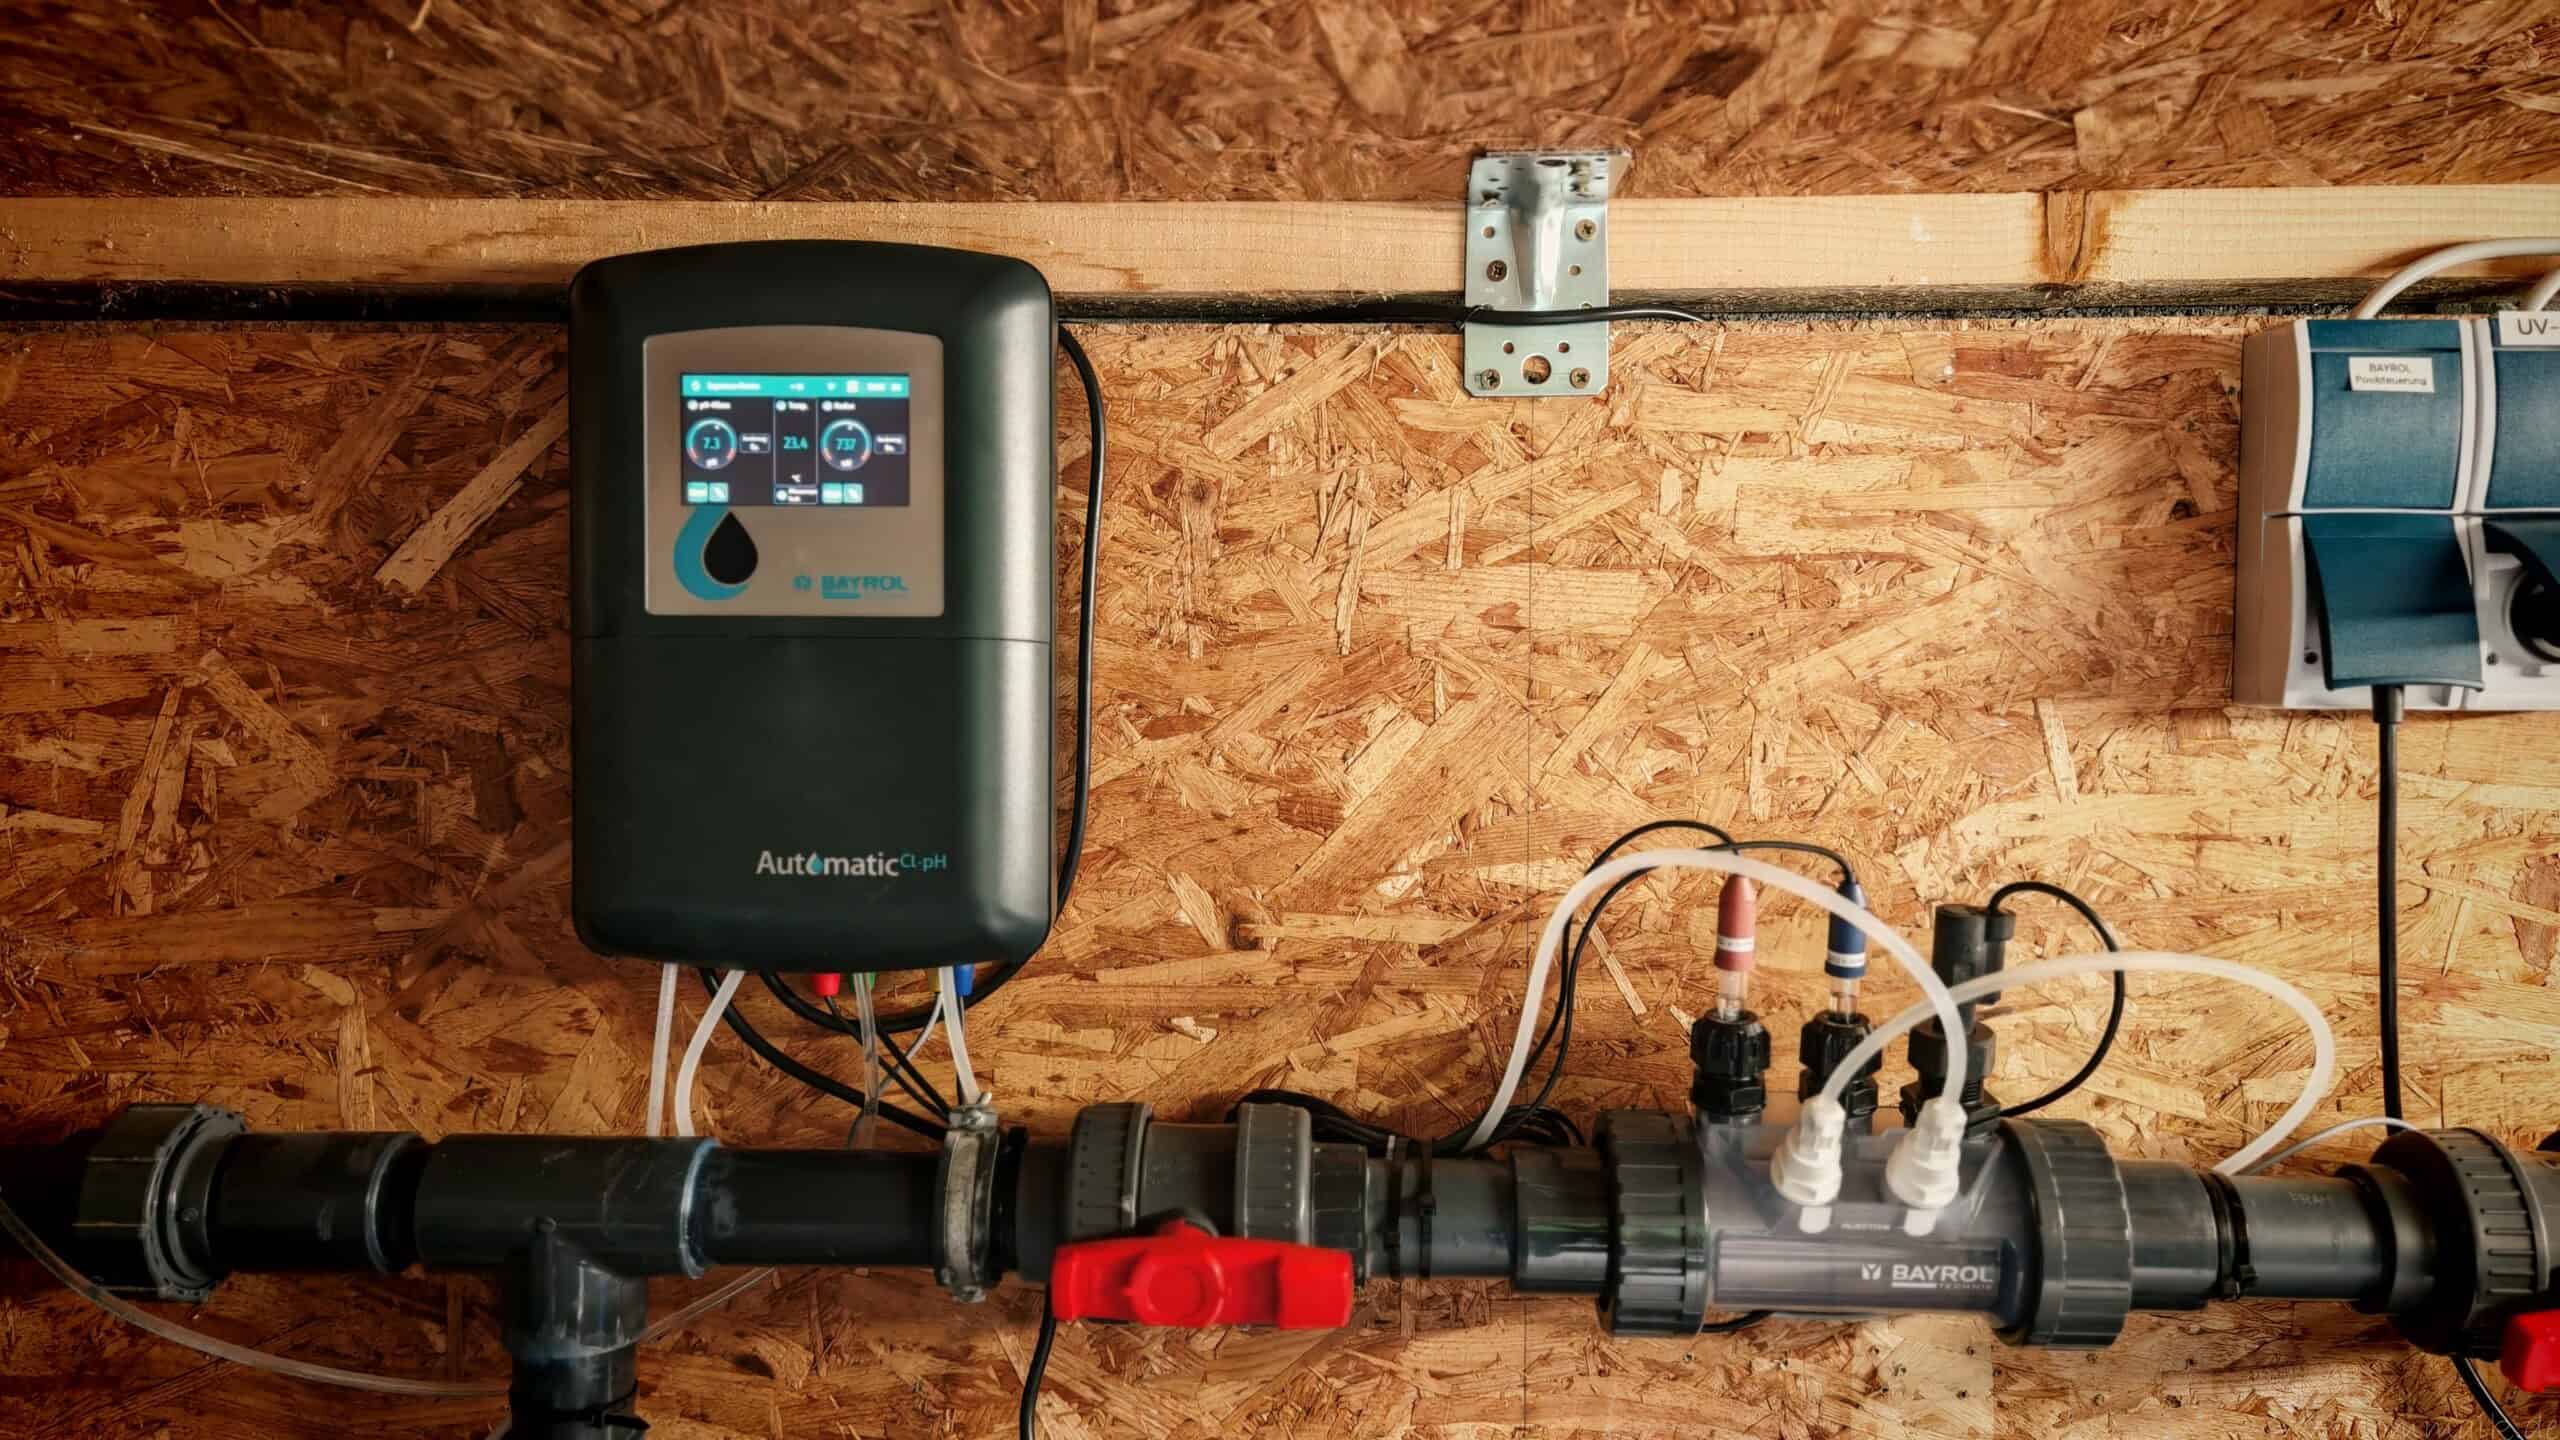
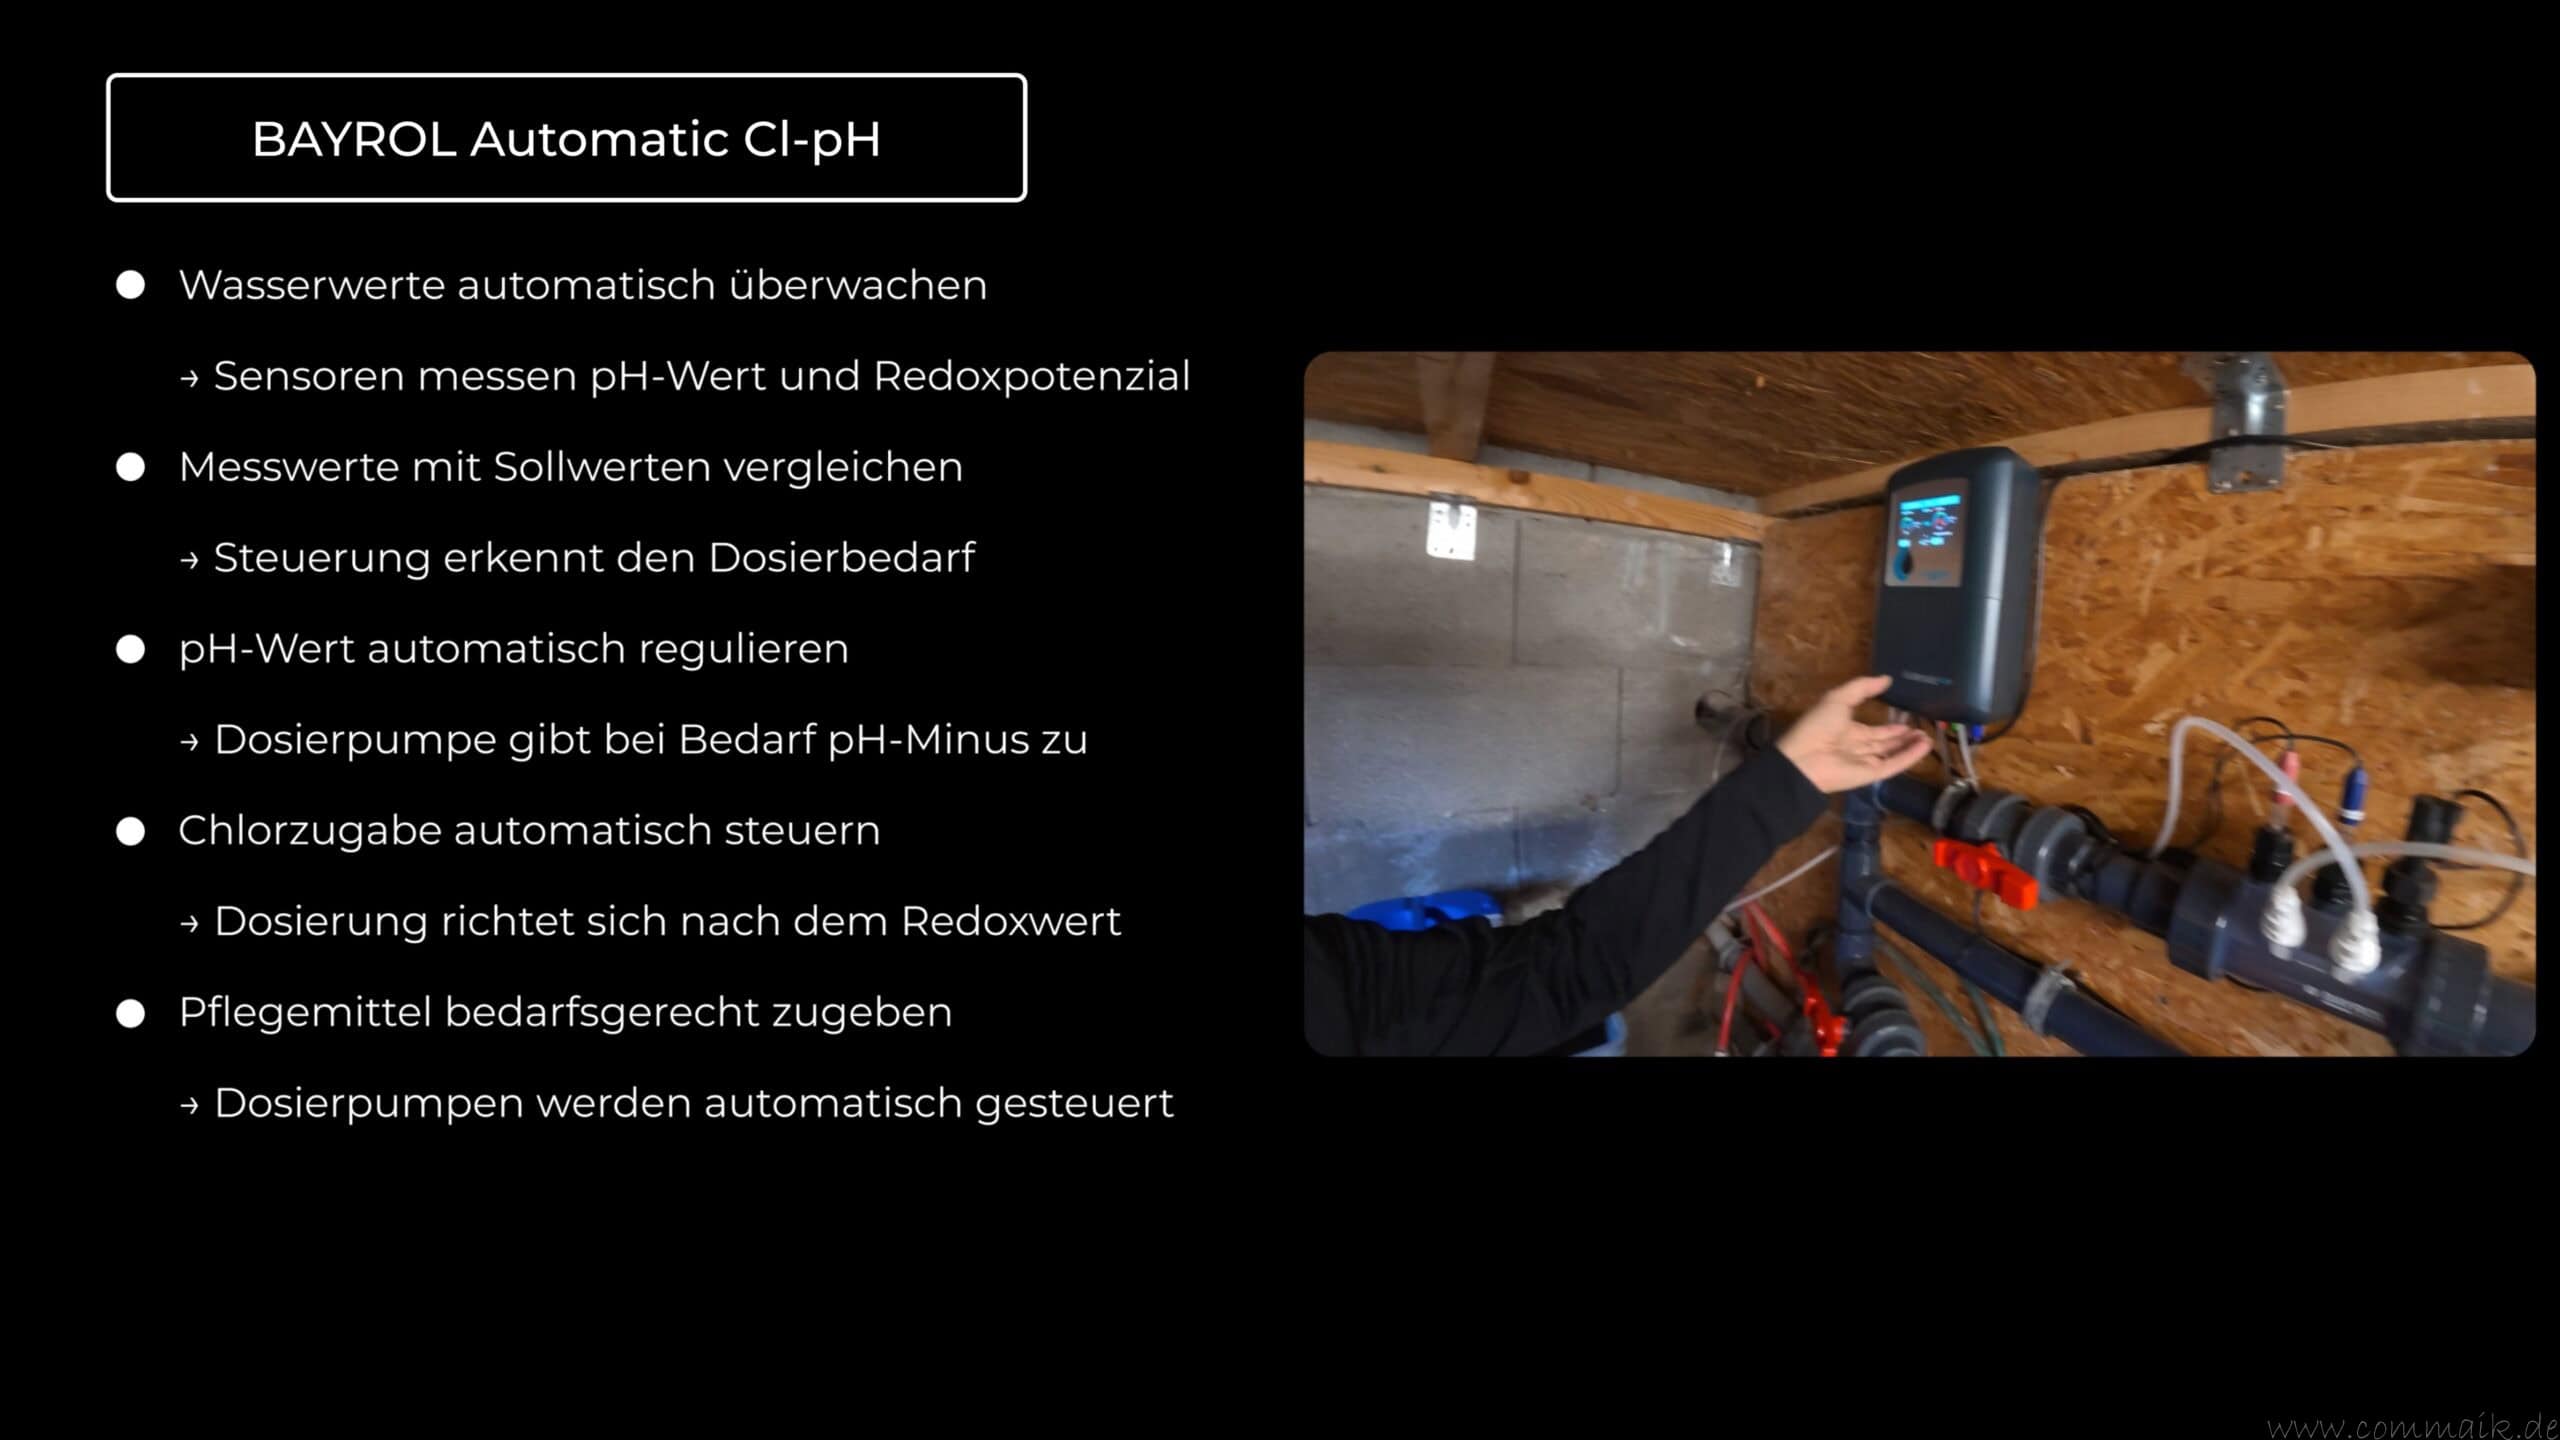
I had just installed my automatic dosing system this season. It monitors the pH and the redox potential and uses those readings to control the two dosing pumps. The redox value is not a direct measurement of chlorine content in milligrams per liter.
I had already described the complete setup in the post “Installing the BAYROL Automatic Cl-pH and Retrofitting a Temperature Sensor.”
I had three tasks to complete during the winter break:
- Remove any chemical residue from the dosing lines.
- Remove the measuring probes and store them in a humid environment.
- Store the control unit and other sensitive components in a frost-free location.
Rinse the dosing hoses separately with water
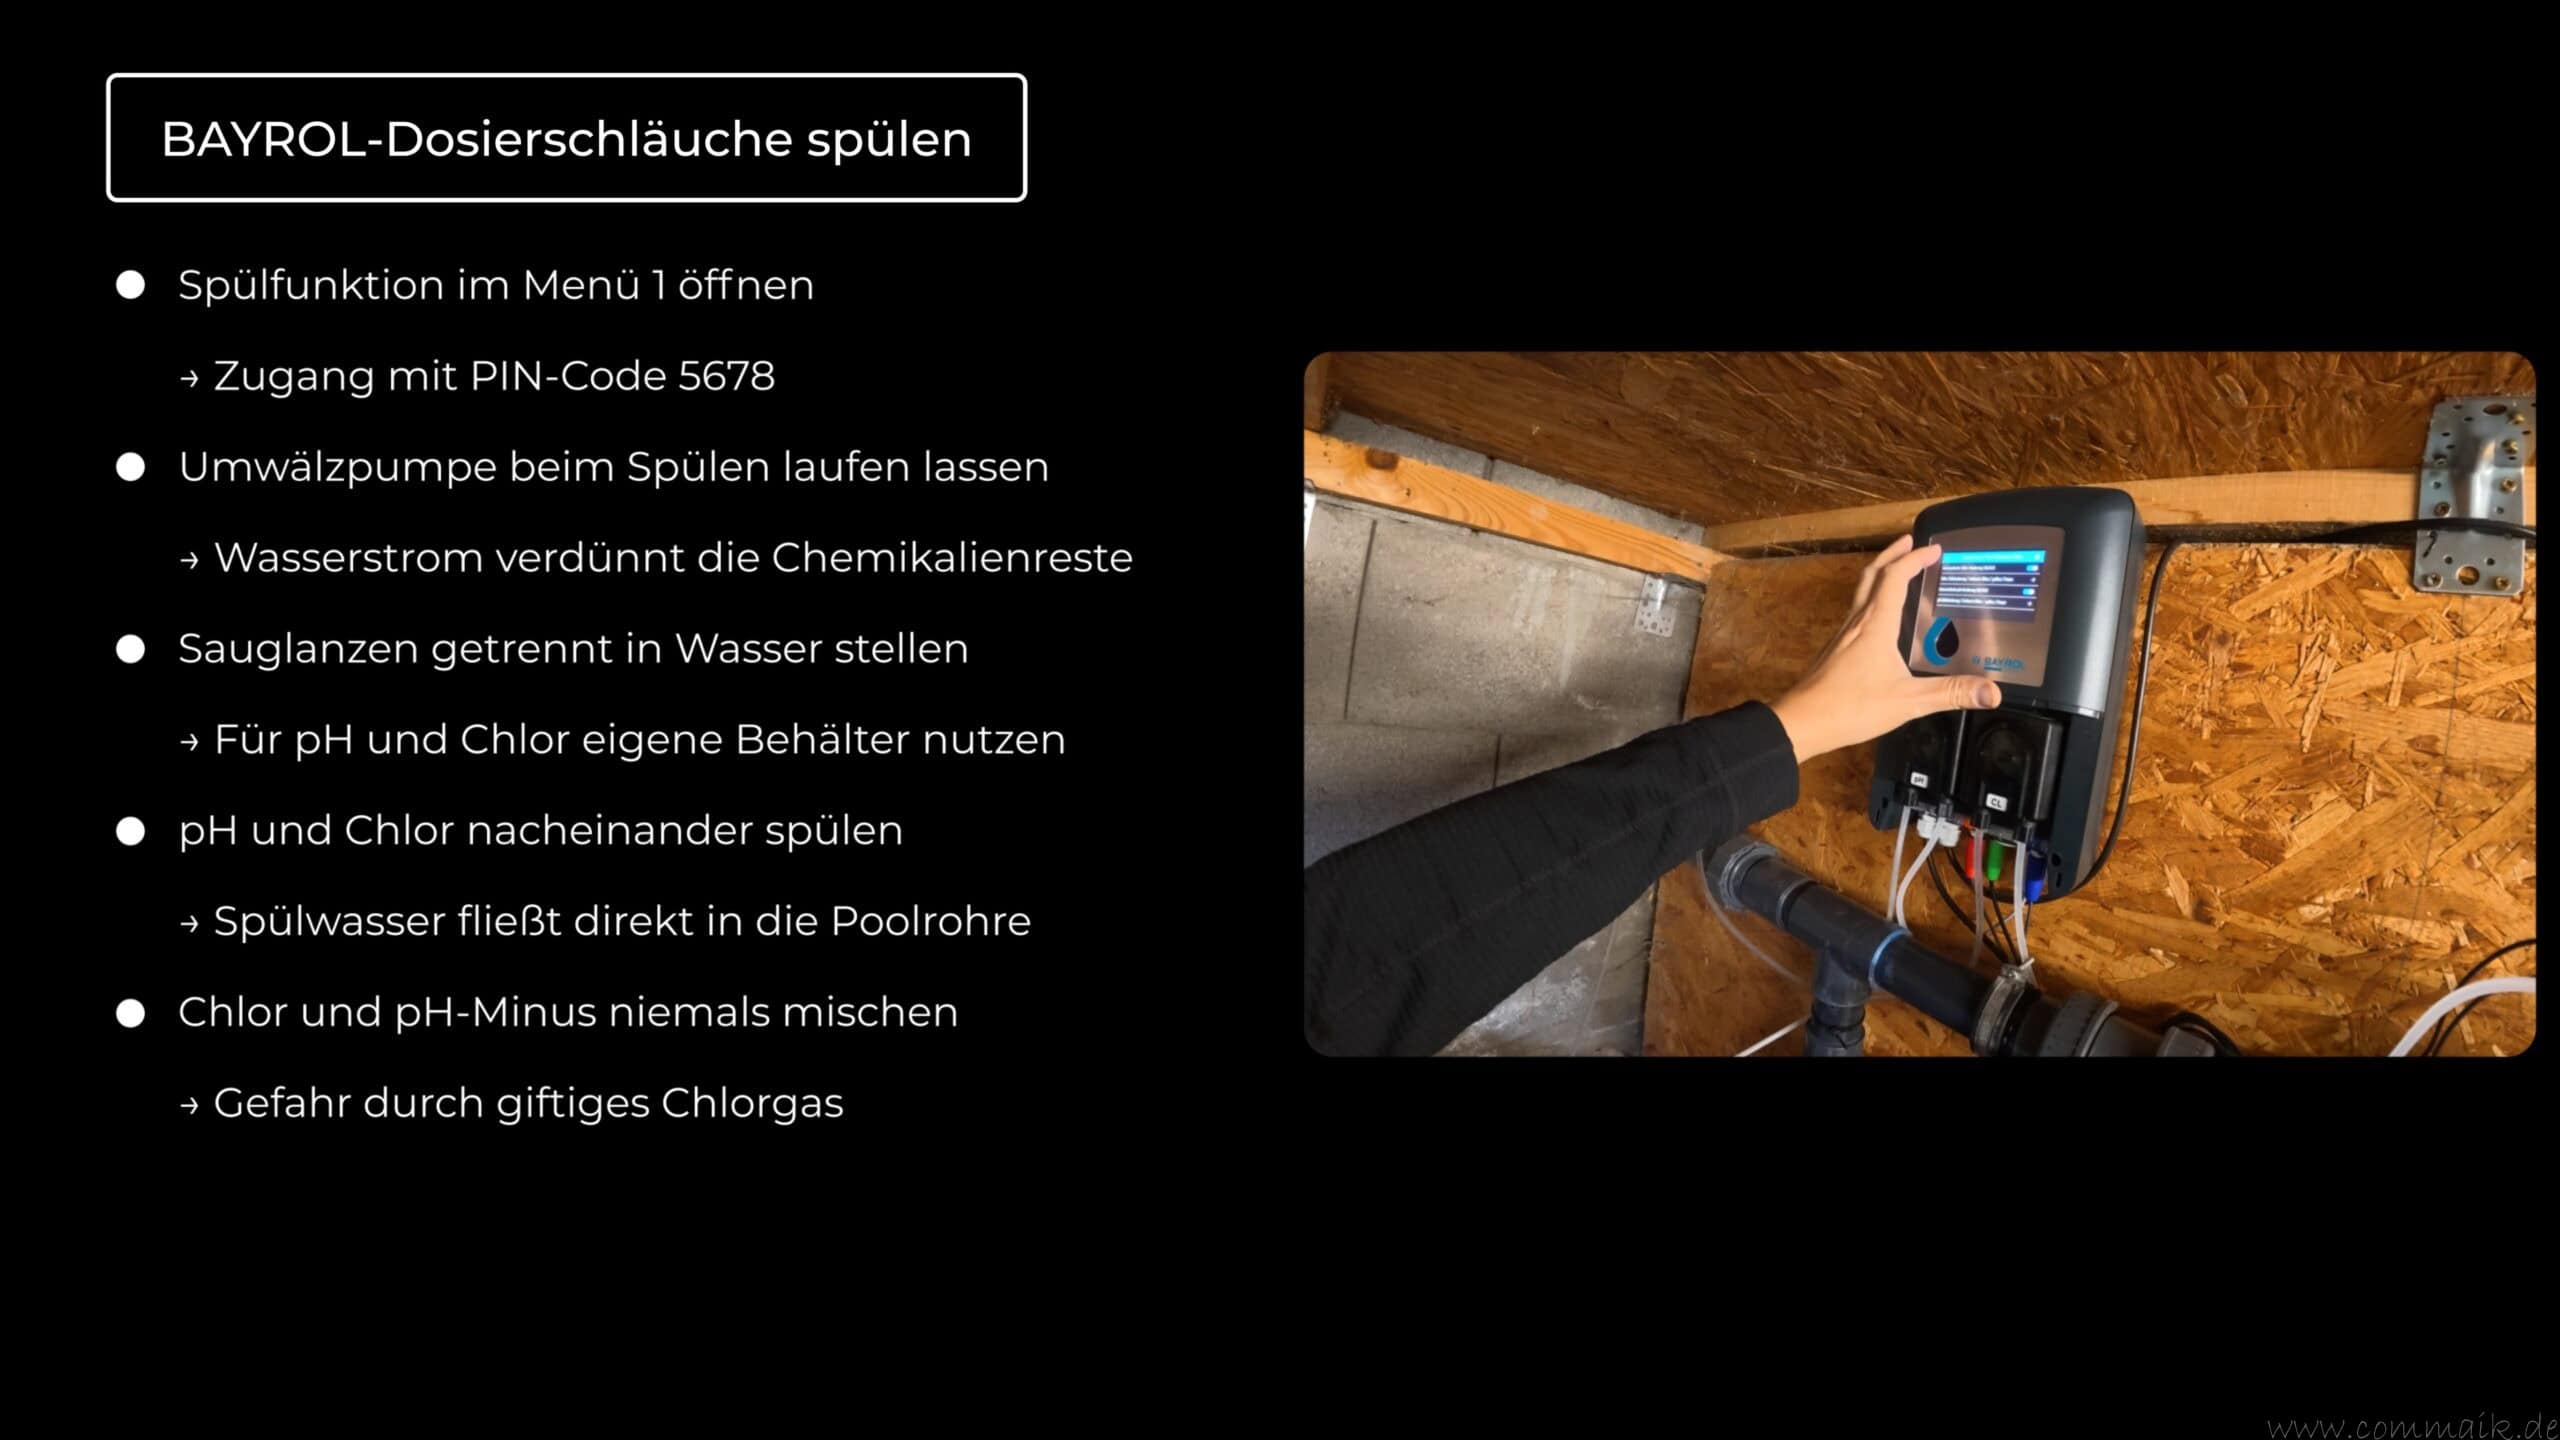
To flush the system, I used the dedicated function on the BAYROL control unit. On my unit, it was located in Menu 1, under “Operating Modes and Timer Functions.”
I set the rinse time to five minutes. That was my chosen setting, not a general time specification for every hose length or installation.
For this process, I removed the suction lances from the chemical containers and placed each one in clean water. I made sure to keep the two processes strictly separate: a separate water container for the pH side and a separate one for the chlorine side.
For protected settings, service code 5678 may be required if the factory default setting has not been changed. Of course, this does not affect a code that has already been changed. The instructions distinguish this service code from normal user access.
Liquid chlorine and pH-Minus must never be mixed together.
When a chlorine solution containing hypochlorite comes into contact with acid, toxic chlorine gas can be produced. For this reason, suction hoses, rinse tanks, and residual amounts of chemicals must not be mixed up or combined. Appropriate protective gloves and eye protection are required when handling these substances.
Direct connection to the pool pipes: The water flow had to be correct
In my system, the rinse water flowed directly through the injection points into the pool piping. It was important that water continue to flow through the pipes during this process. That’s why I left my circulation pump running while flushing. The water flow carried away the flushed-out chemical residues and diluted them.
I rinsed the pH and chlorine sides one after the other, using a separate container of clean water for each. This prevented the chemical residues from mixing in the rinse container.
Only after both dosing lines had been thoroughly flushed did I drain the pump and dosing hoses and prepare the system for disassembly.

- KCL 3mol/l Elektrolytlösung zur Aufbewahrung von pH- und Redoxelektroden bei Nichtbenutzung
- Kein Anmischen nötig
- Lange Haltbarkeit
- Passend für Geräte aller Hersteller
- Sehr ergiebig
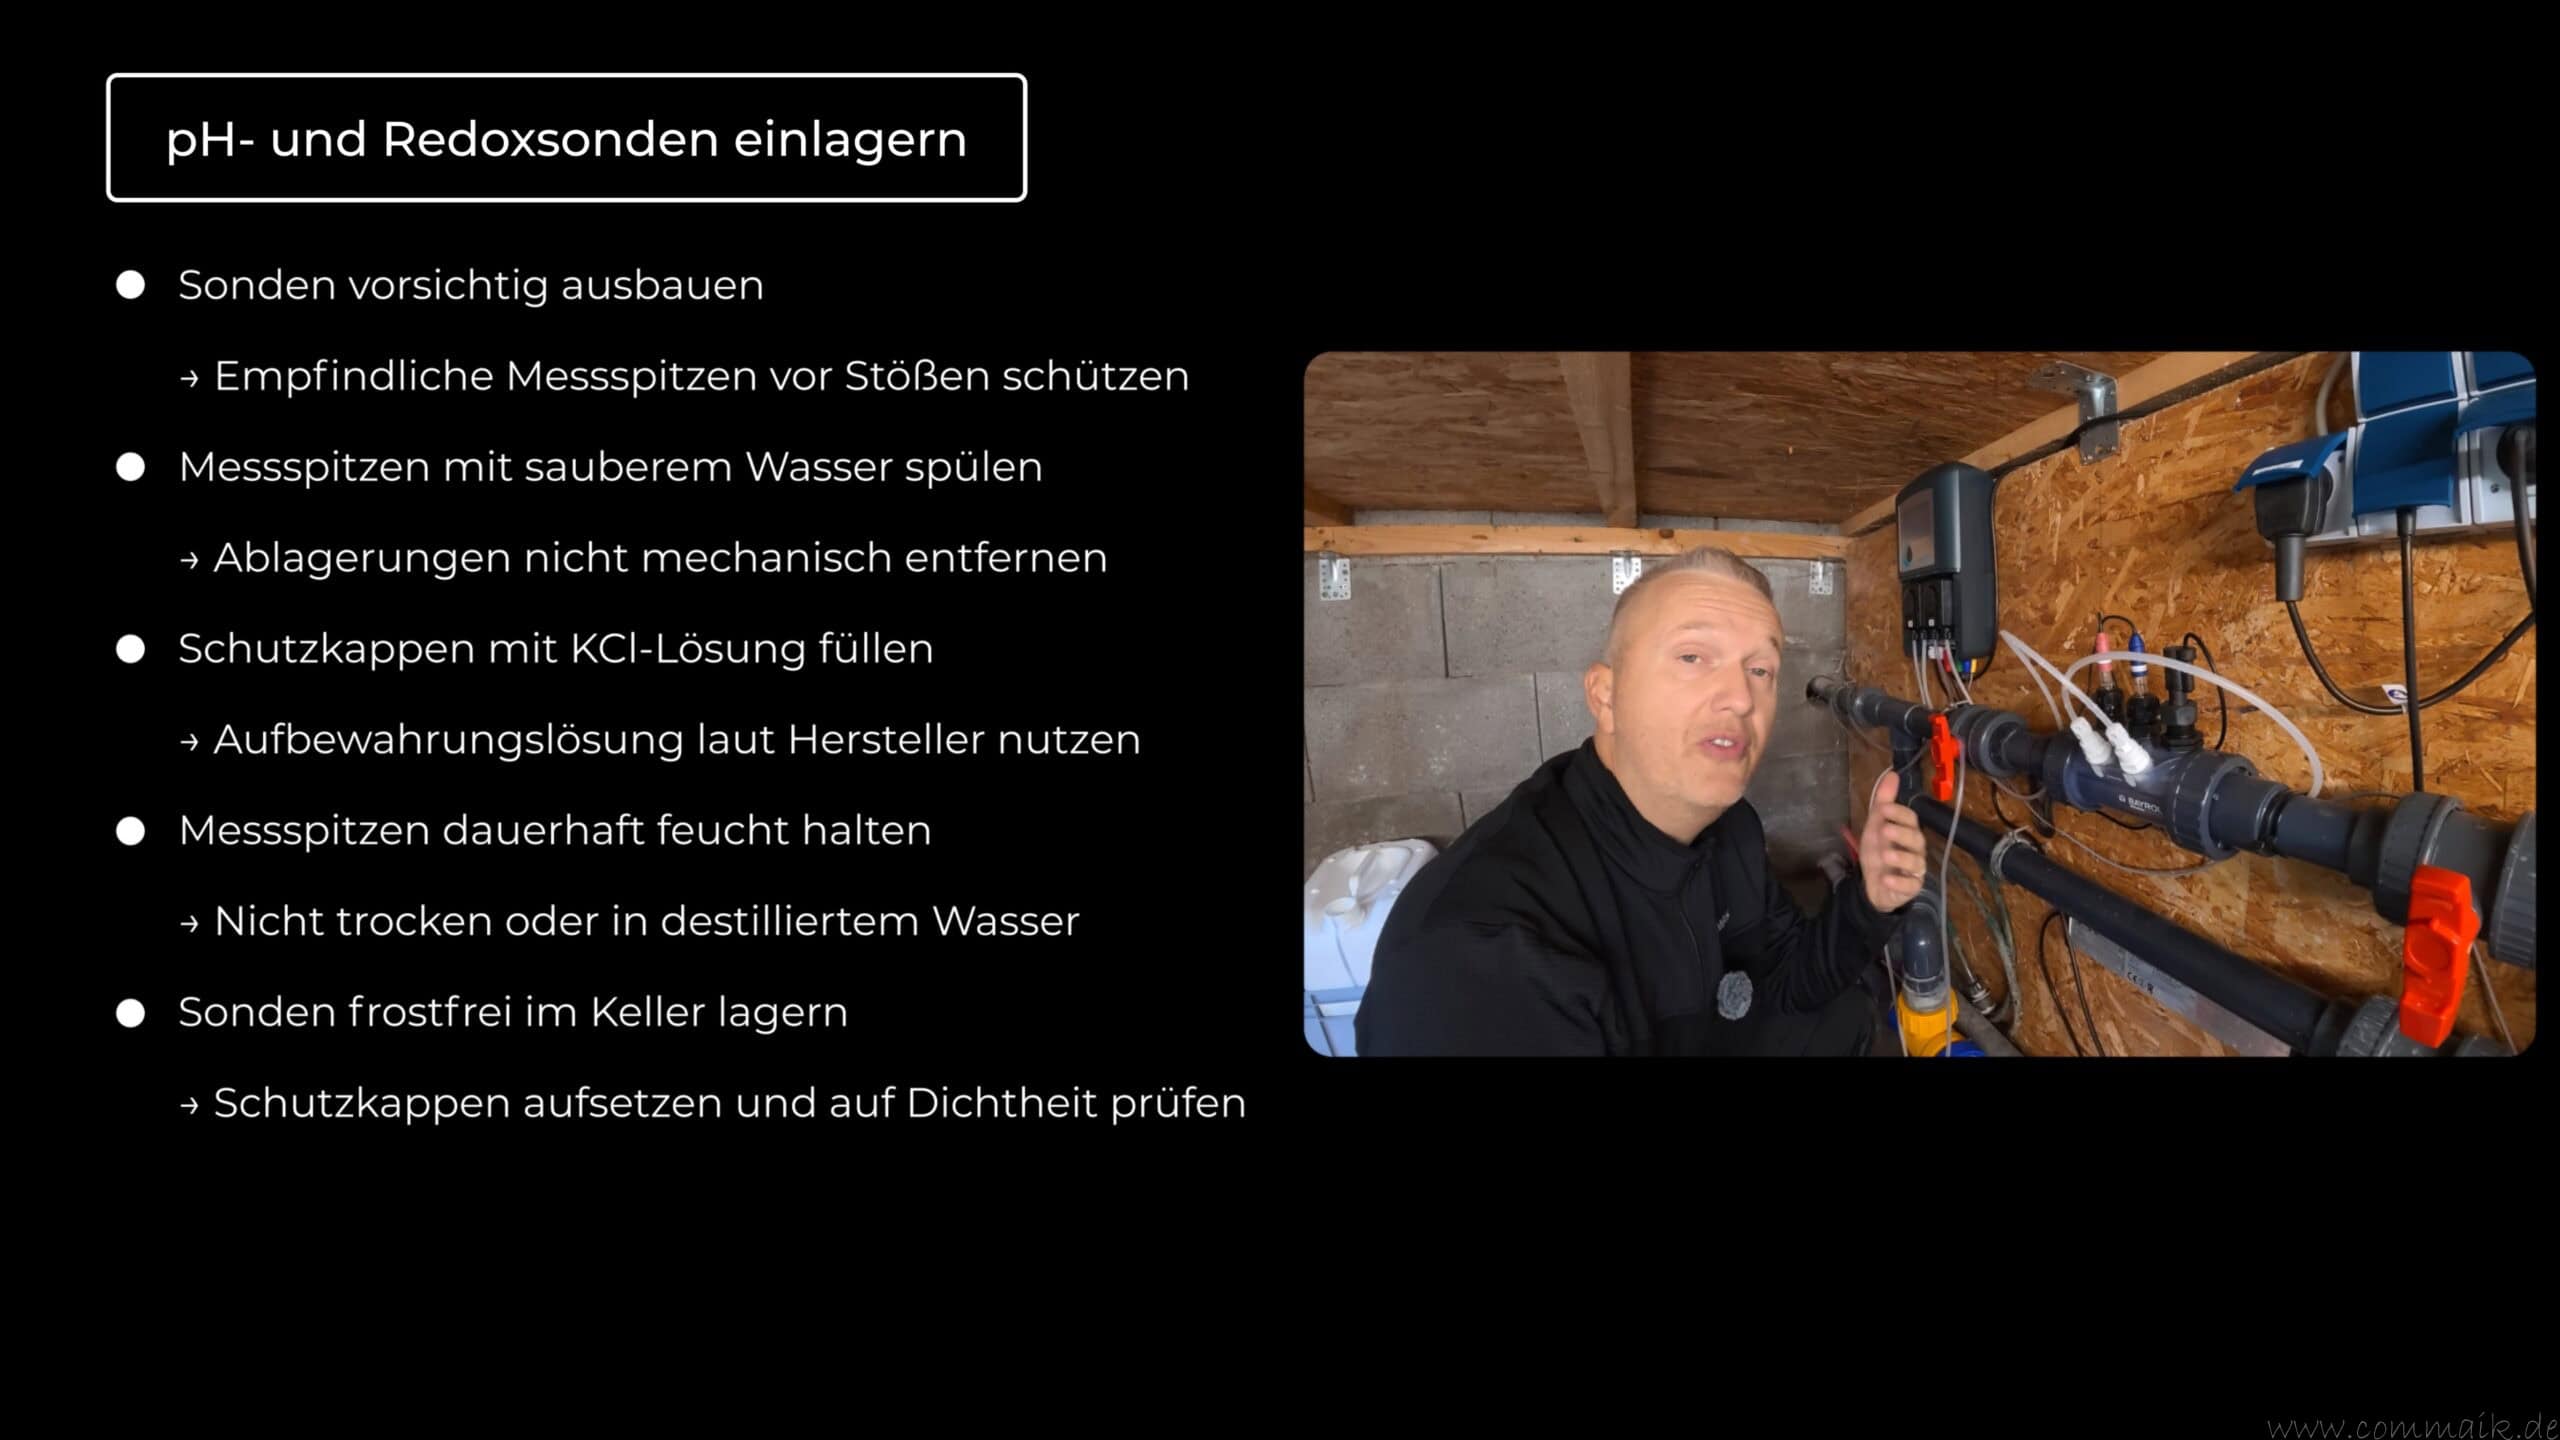
Remove pH and redox probes and store them in a humid environment over the winter
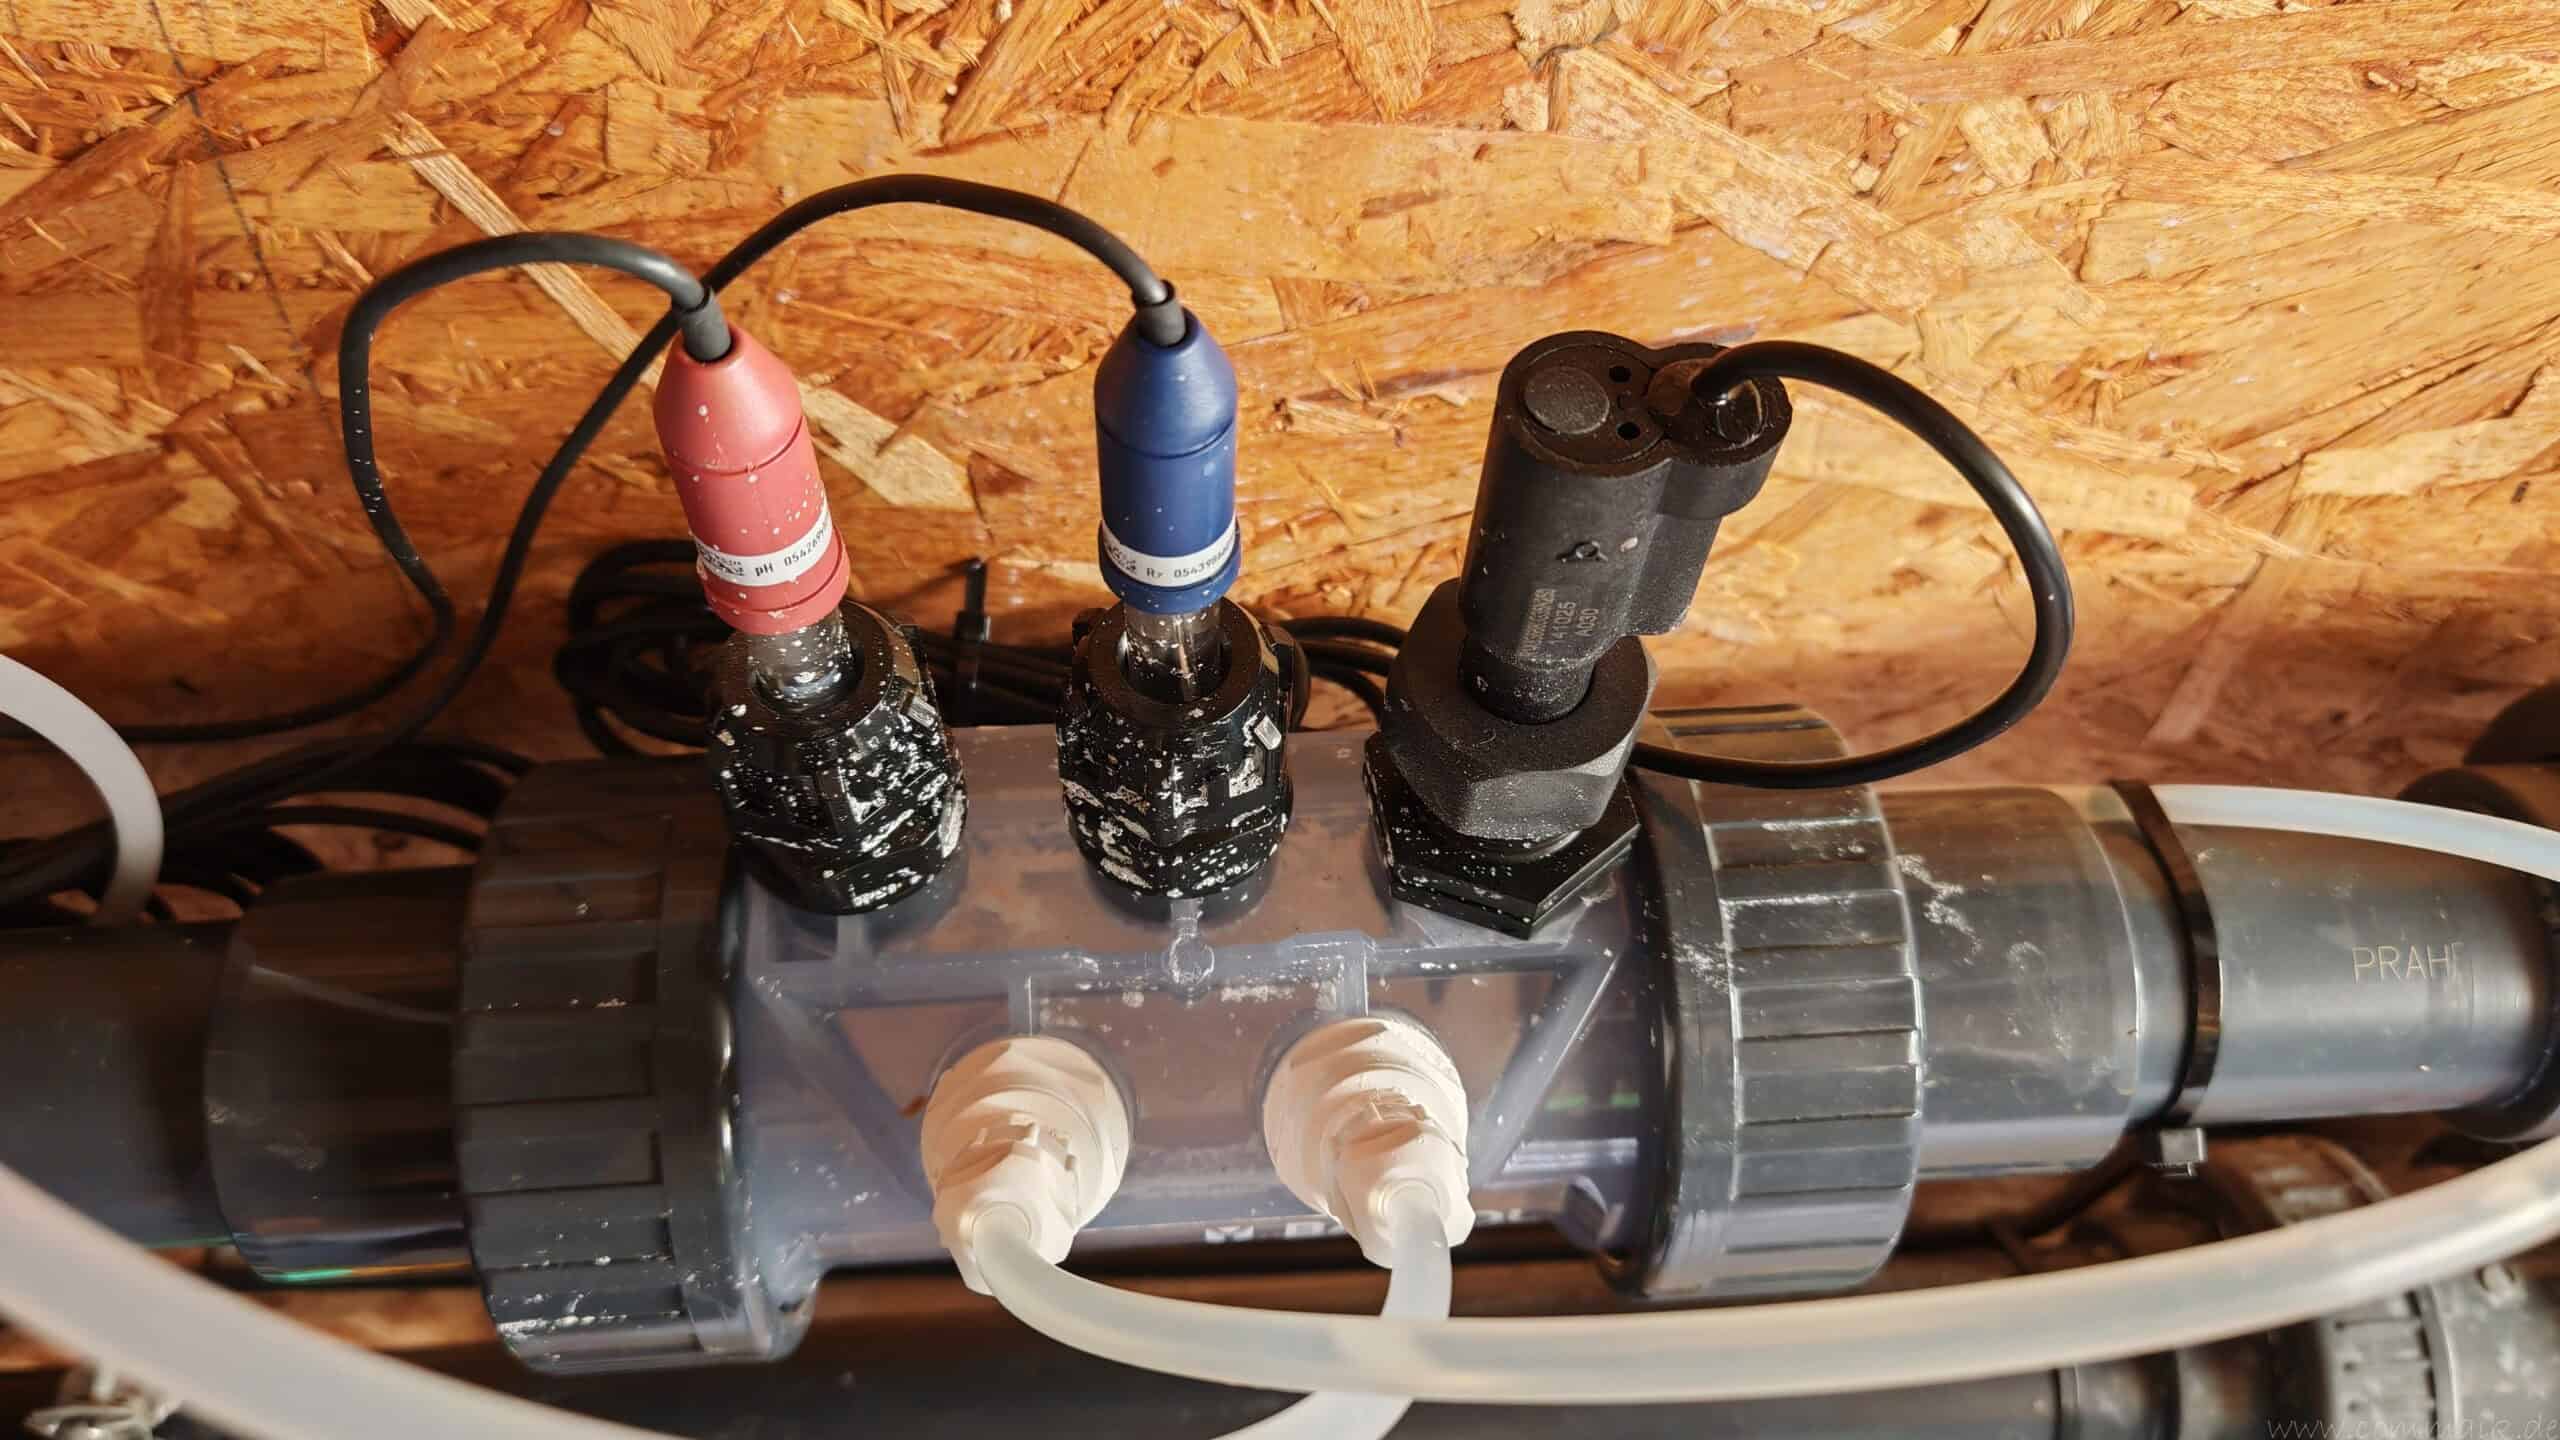
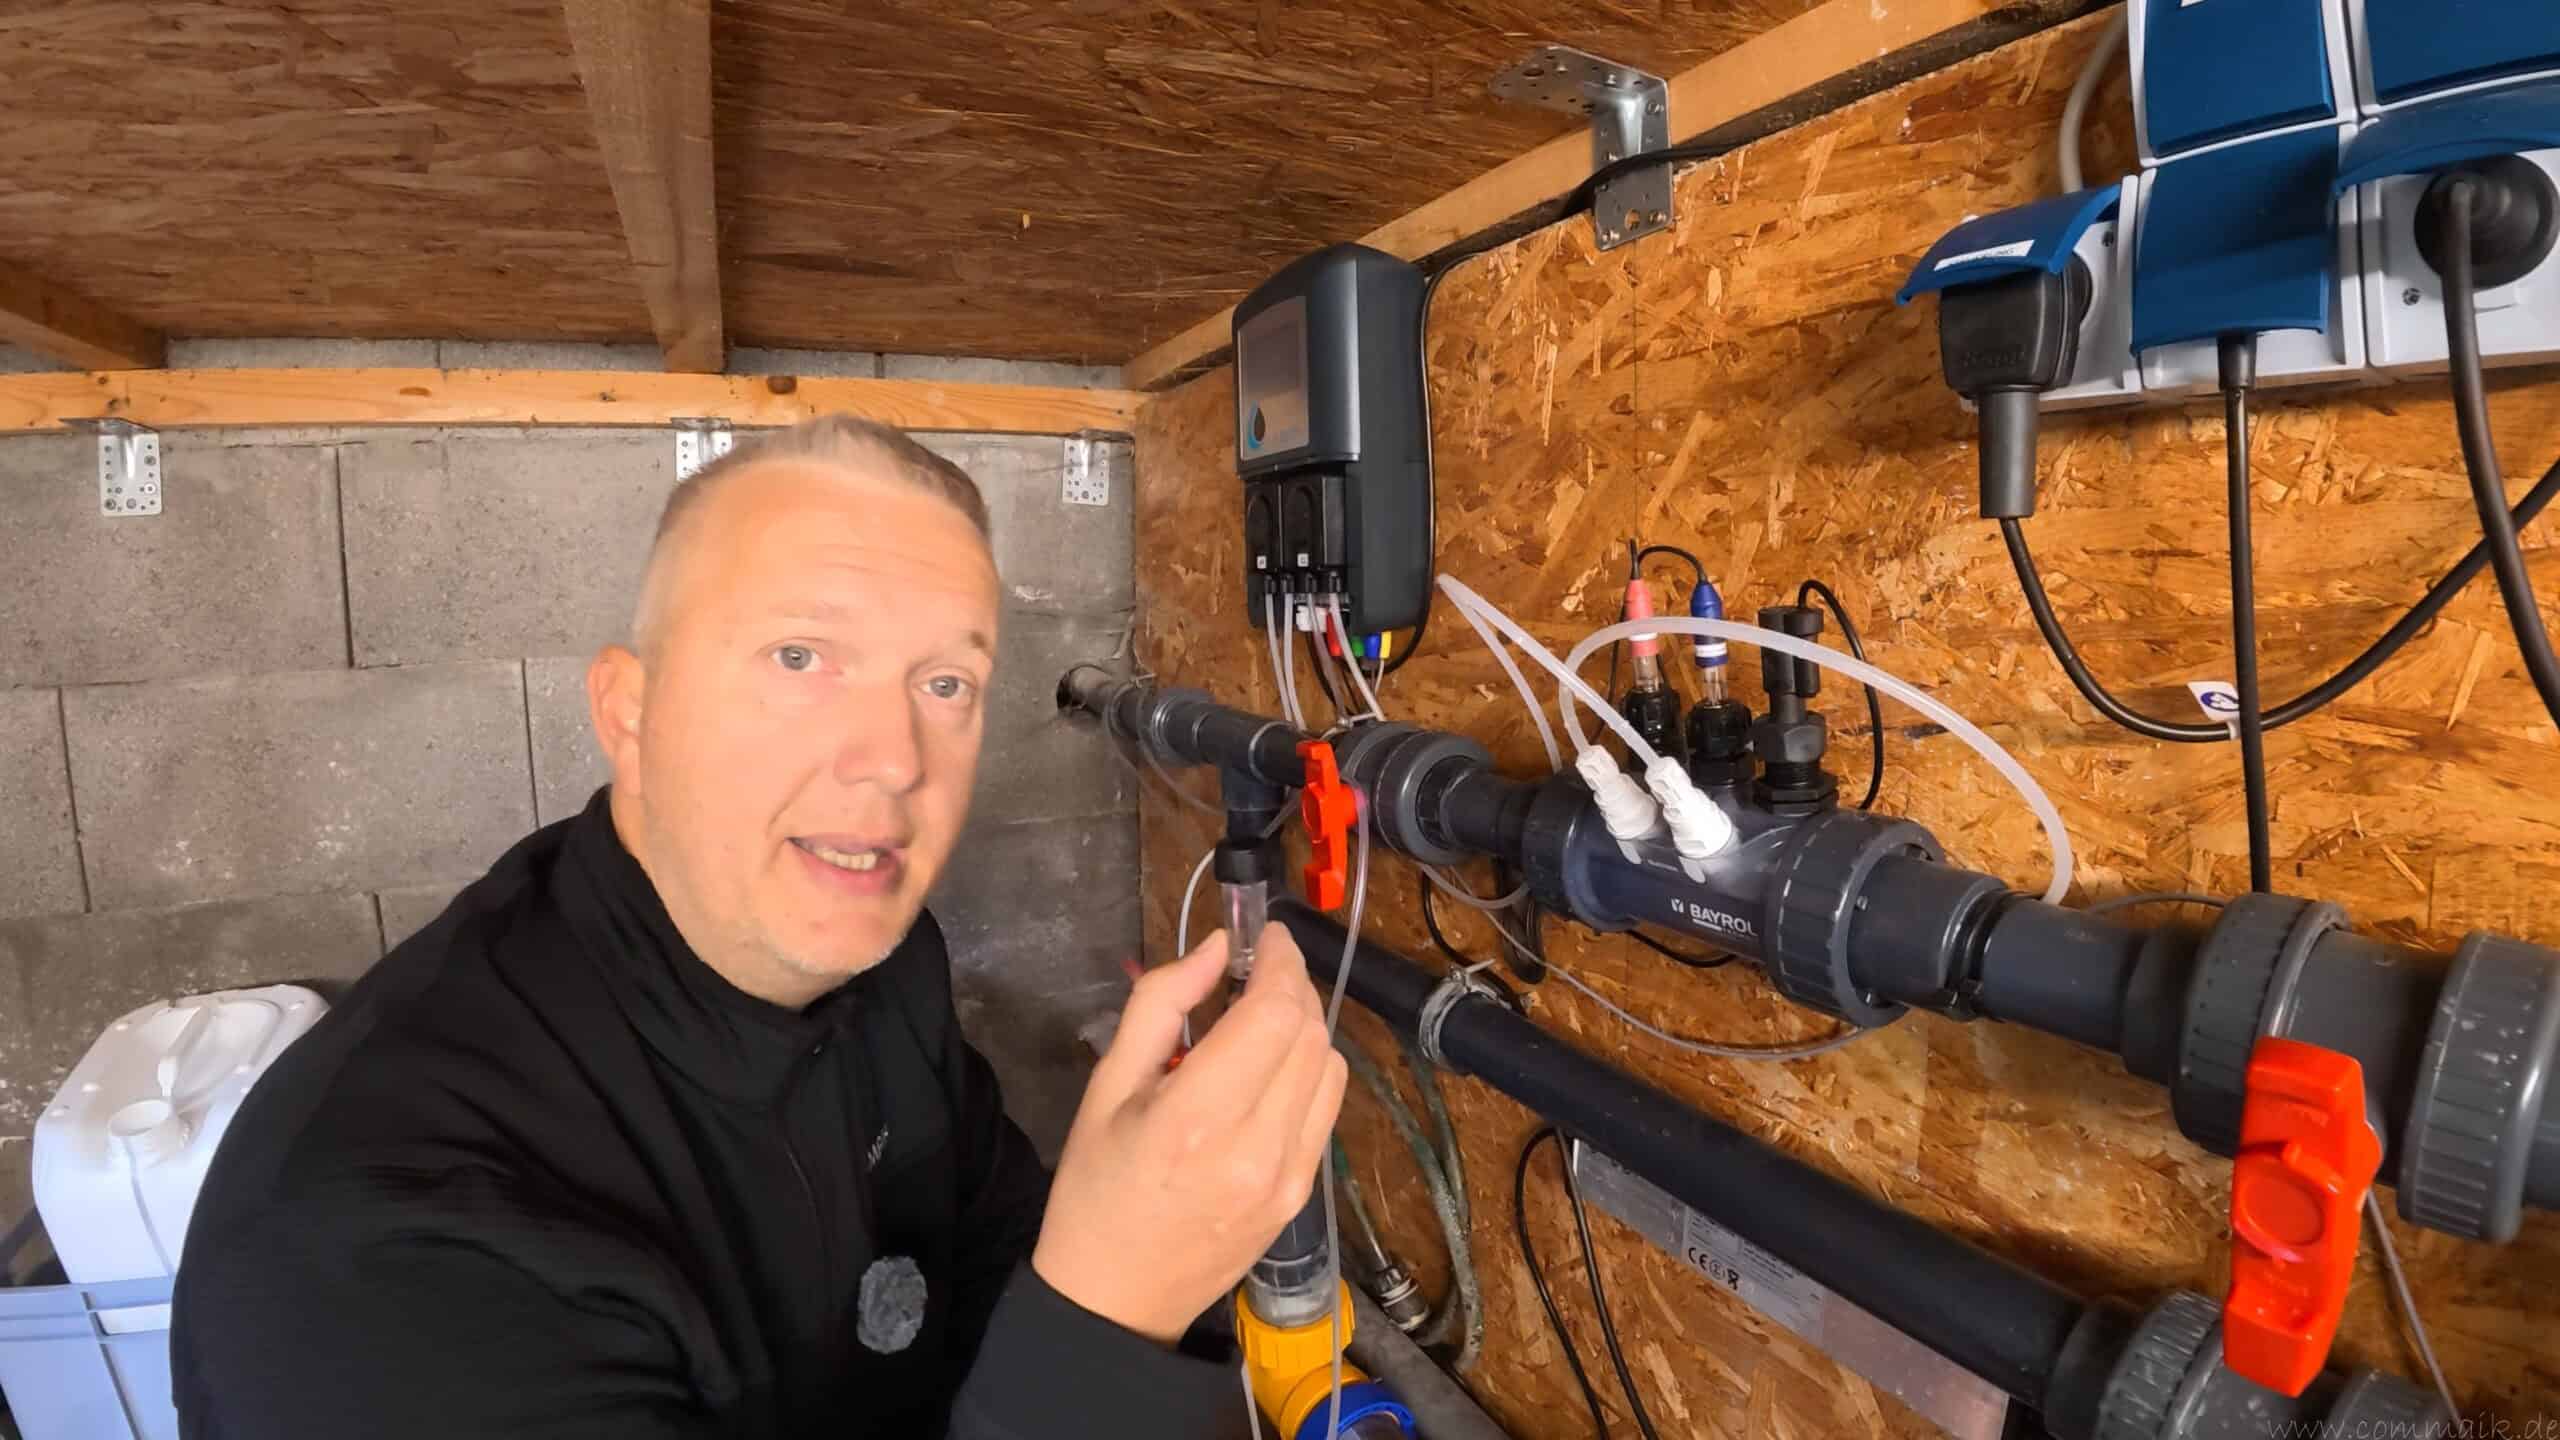
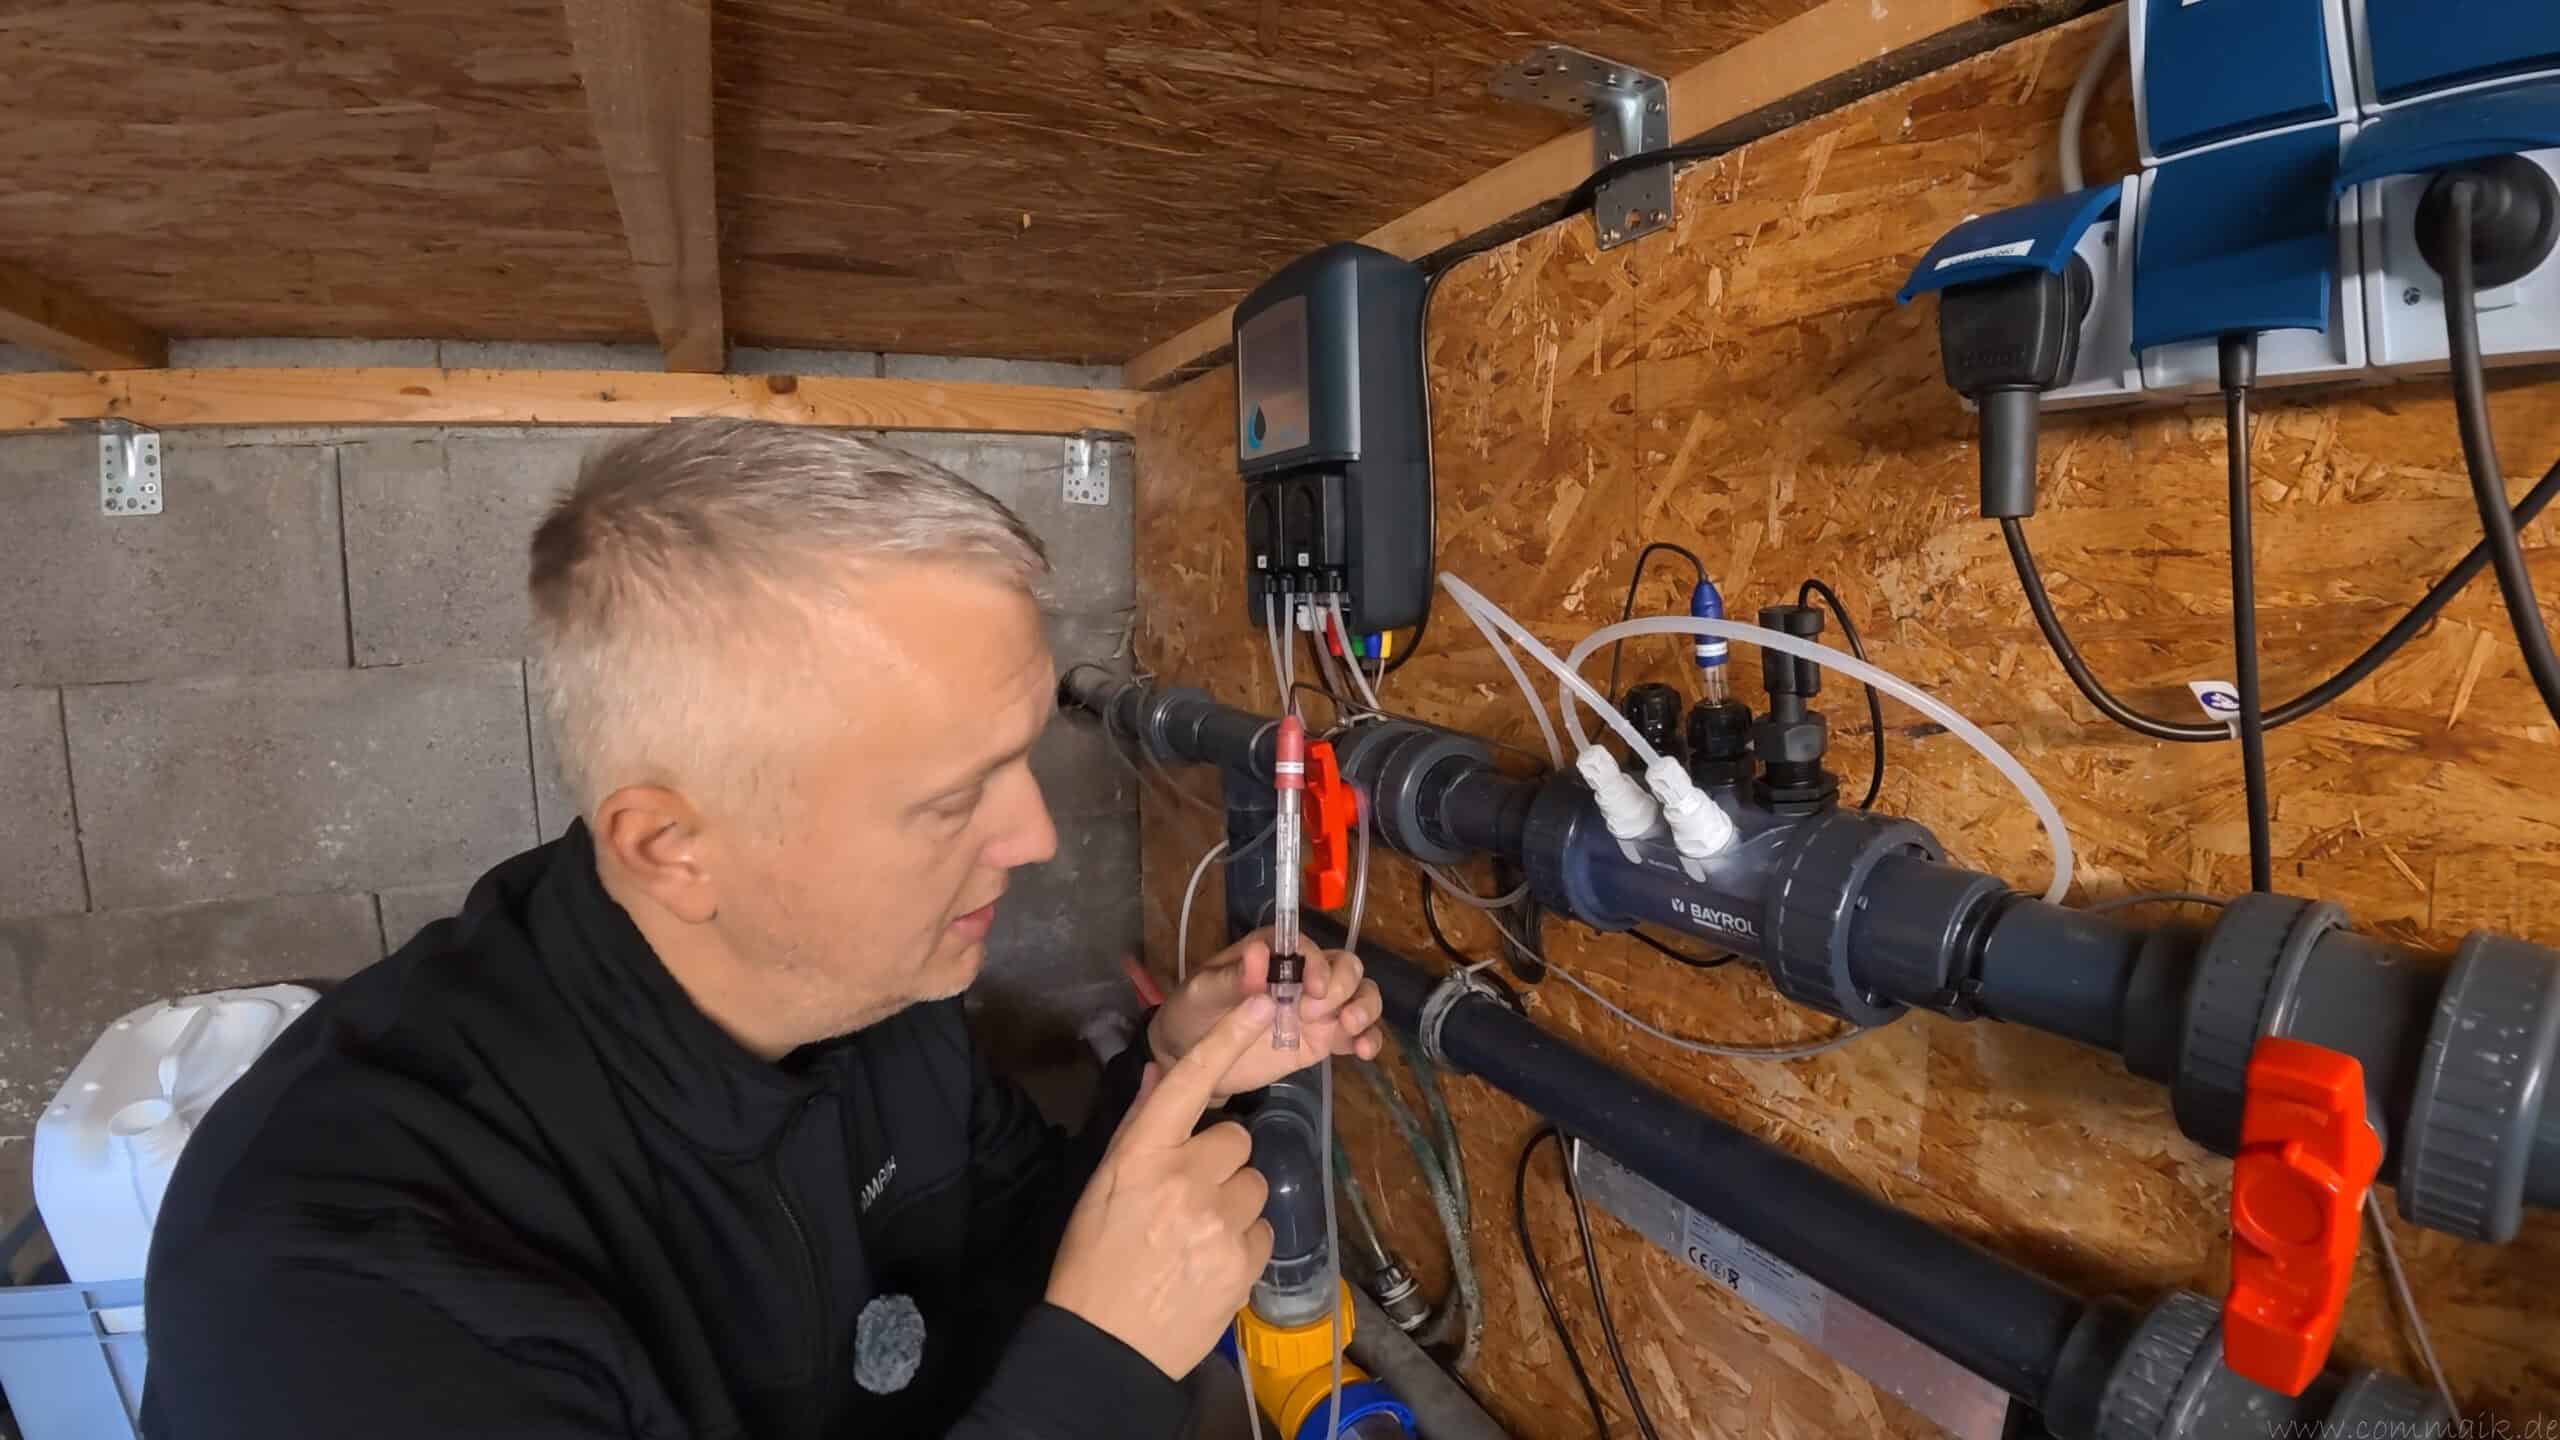
I removed the two measurement probes from my BAYROL Automatic Cl-pH during the winter break and stored them in the basement, protected from frost. To do this, I first turned off the system and depressurized the relevant section of piping. Then I carefully removed the probes from their mounts. Care must be taken to ensure that the sensitive measuring tips do not come into contact with the piping or other hard objects.
The measuring tips must remain moist throughout the entire storage period. Therefore, I placed the probes in their liquid-filled storage containers immediately after removing them.
KCl solution or clean basin water for storage
I used clean pool water for my probes. BAYROL explicitly permits this in the instruction manual. However, a suitable potassium chloride solution—or KCl solution for short—that is specifically intended for storing measuring electrodes is preferred.
I filled the containers so that the measuring tips were completely submerged in the liquid. Then I carefully screwed the caps on and checked to make sure everything was sealed. This prevented the storage fluid from leaking and protected the probes from drying out.
Store probes in a cool, frost-free place in the basement
I stored the sealed containers upright in the basement, where they were protected from impacts. There, they were protected from frost and direct sunlight. No additional heating was necessary: BAYROL recommends a cool, dry, and frost-free storage location.
The dry environment protects the connections and cables. The measuring probes, on the other hand, remain submerged in their storage fluid. During the winter break, I made a point of checking occasionally to see if there was still enough fluid in the containers.
Zuletzt aktualisiert am 4. November 2026 um 10:21 . Ich weise darauf hin, dass sich hier angezeigte Preise inzwischen geändert haben können. Alle Angaben ohne Gewähr. (*) Bei den verwendeten Produktlinks handelt es sich um Affiliate Links. Ich bin nicht der Verkäufer des Produktes. Als Amazon-Partner verdiene ich an qualifizierten Verkäufen. Dein Preis ändert sich jedoch nicht.


Backwashing the Filter: Why I Increased the Frequency Converter’s Speed
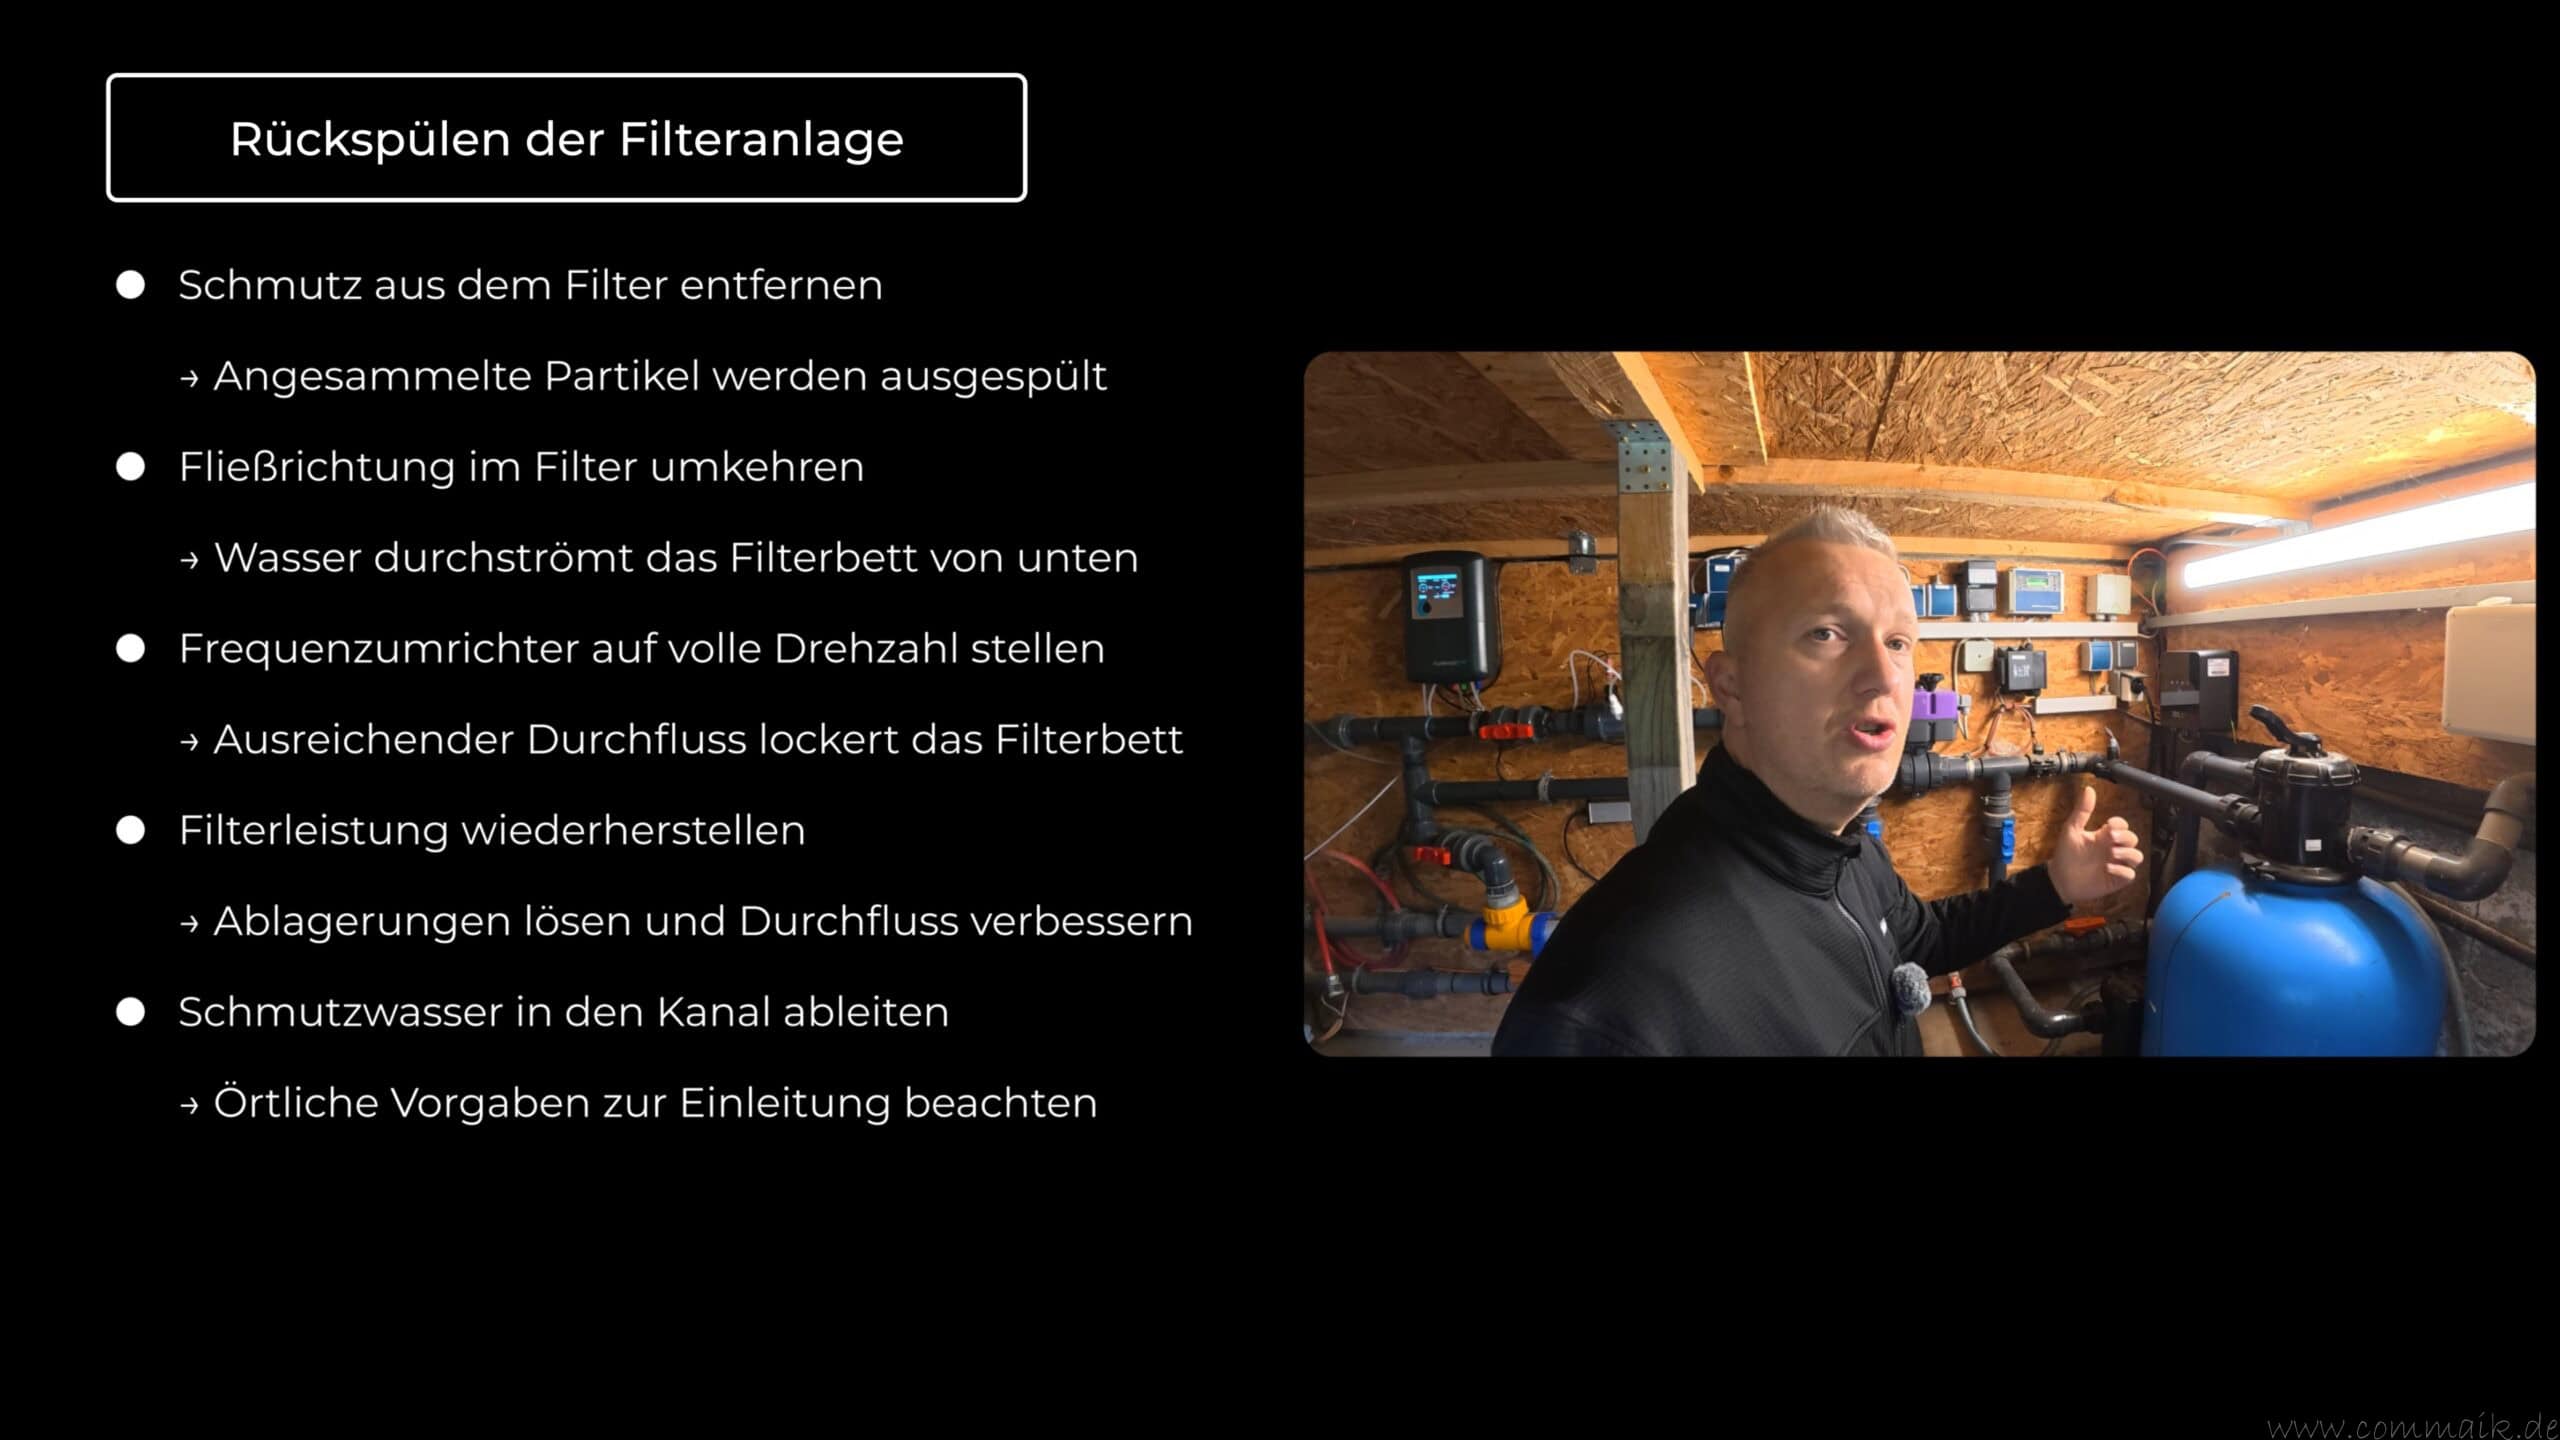
During normal filter operation, my pool pump ran at a reduced speed. This saved electricity and was sufficient for daily circulation. For backwashing, however, I set the variable-frequency drive back to about 2,900 revolutions per minute. This caused my pump’s power consumption to rise from about 220 to around 600 watts.
The higher flow rate was needed to loosen the filter bed and flush out accumulated debris. The water flowed through the filter glass in the opposite direction of the normal flow. The dislodged debris was then discharged from the system through the wastewater outlet.
I described my experiences with speed control, settings, and power consumption in detail in the post “Variable Frequency Drive for the Pool Pump: Installation, Settings, and Saving Electricity.”
Prepare for backwashing with the pump turned off
First, I turned off the pump and set the multi-way valve to “backflush.” The valve may only be adjusted when the pump is turned off. I then started the pump at the higher speed I had set earlier.
Through the sight glass, I checked to see how the dirty water was being drained and becoming increasingly clear. At the same time, I kept an eye on the falling water level in the tank, since I was already using the backwash to lower it.
The approximately 2,900 revolutions per minute were a good fit for my system. The key is to ensure that the flow rate is appropriate for the filter tank and the filter media being used, and that the manufacturer’s specifications are followed.
Backwashing and draining water are two different tasks
I took advantage of the necessary water drainage to perform the final backwash at the same time. This way, some of the drained water still served a useful purpose.
Nevertheless, a distinction should be made between cleaning the filter media and further lowering the pressure. During normal operation, backwashing is followed by a rinse before filtering resumes. In my subsequent shutdown, however, there was no return to normal operation.
As soon as there was no longer a sufficient water supply, I turned off the pump. I didn’t let it keep running in an attempt to squeeze out the last bit of water. The remaining water had to be drained using a suitable method.
In addition to the skimmer, I also took advantage of the unique features of my piping at the inlet nozzles and then used a separate pump.
Where should the drained water go?
In my setup, the backwash water was discharged into the sewer. However, local regulations governed its disposal.
Chemically treated pool water and contaminated backwash water must not simply be allowed to seep into the ground or be discharged into a storm drain. In Germany, the Federal Environment Agency emphasizes the need to dispose of such water through the sewer system and to follow the instructions provided with the products used. In Austria and Switzerland, the respective local regulations must be observed.

- Winterkappe für Einlaufdüse
- Gewinde 1 1/2" Außengewinde mit Gummidichtung
- passend für eine handelsübliche Skimmer und Einlaufdüsen
Water Level in the Pool: Why I Didn’t Drain It Completely
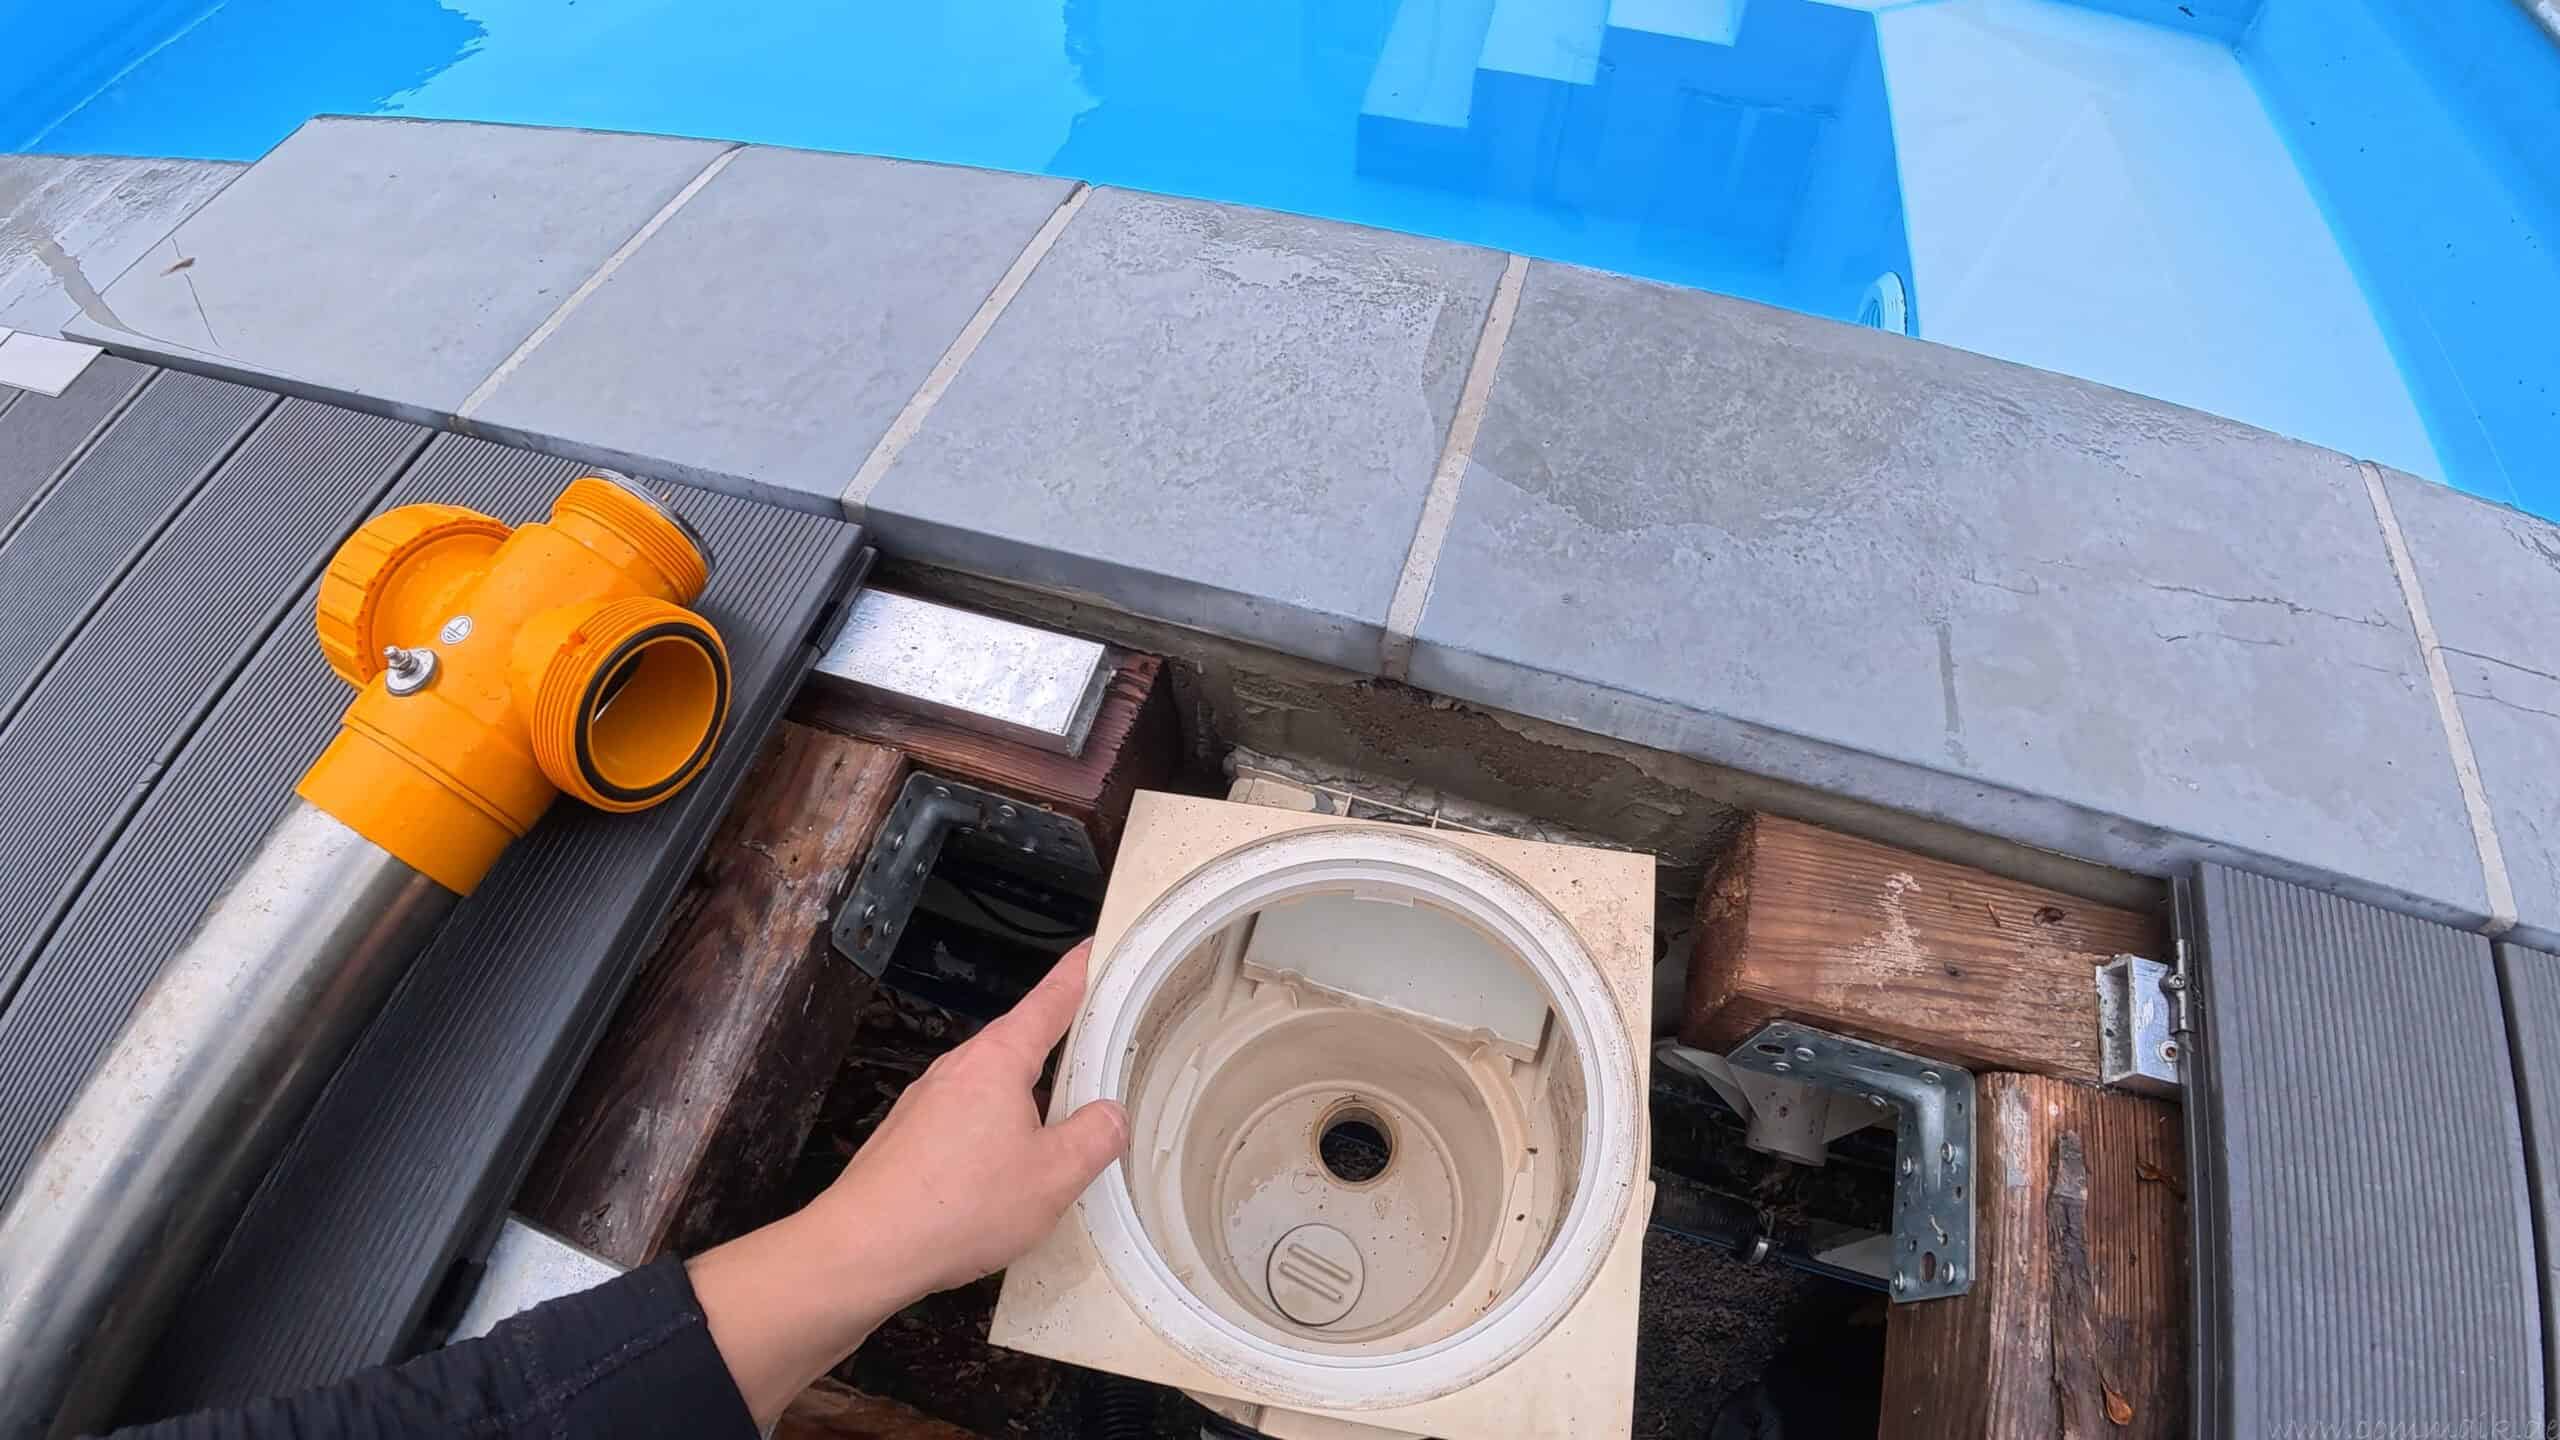
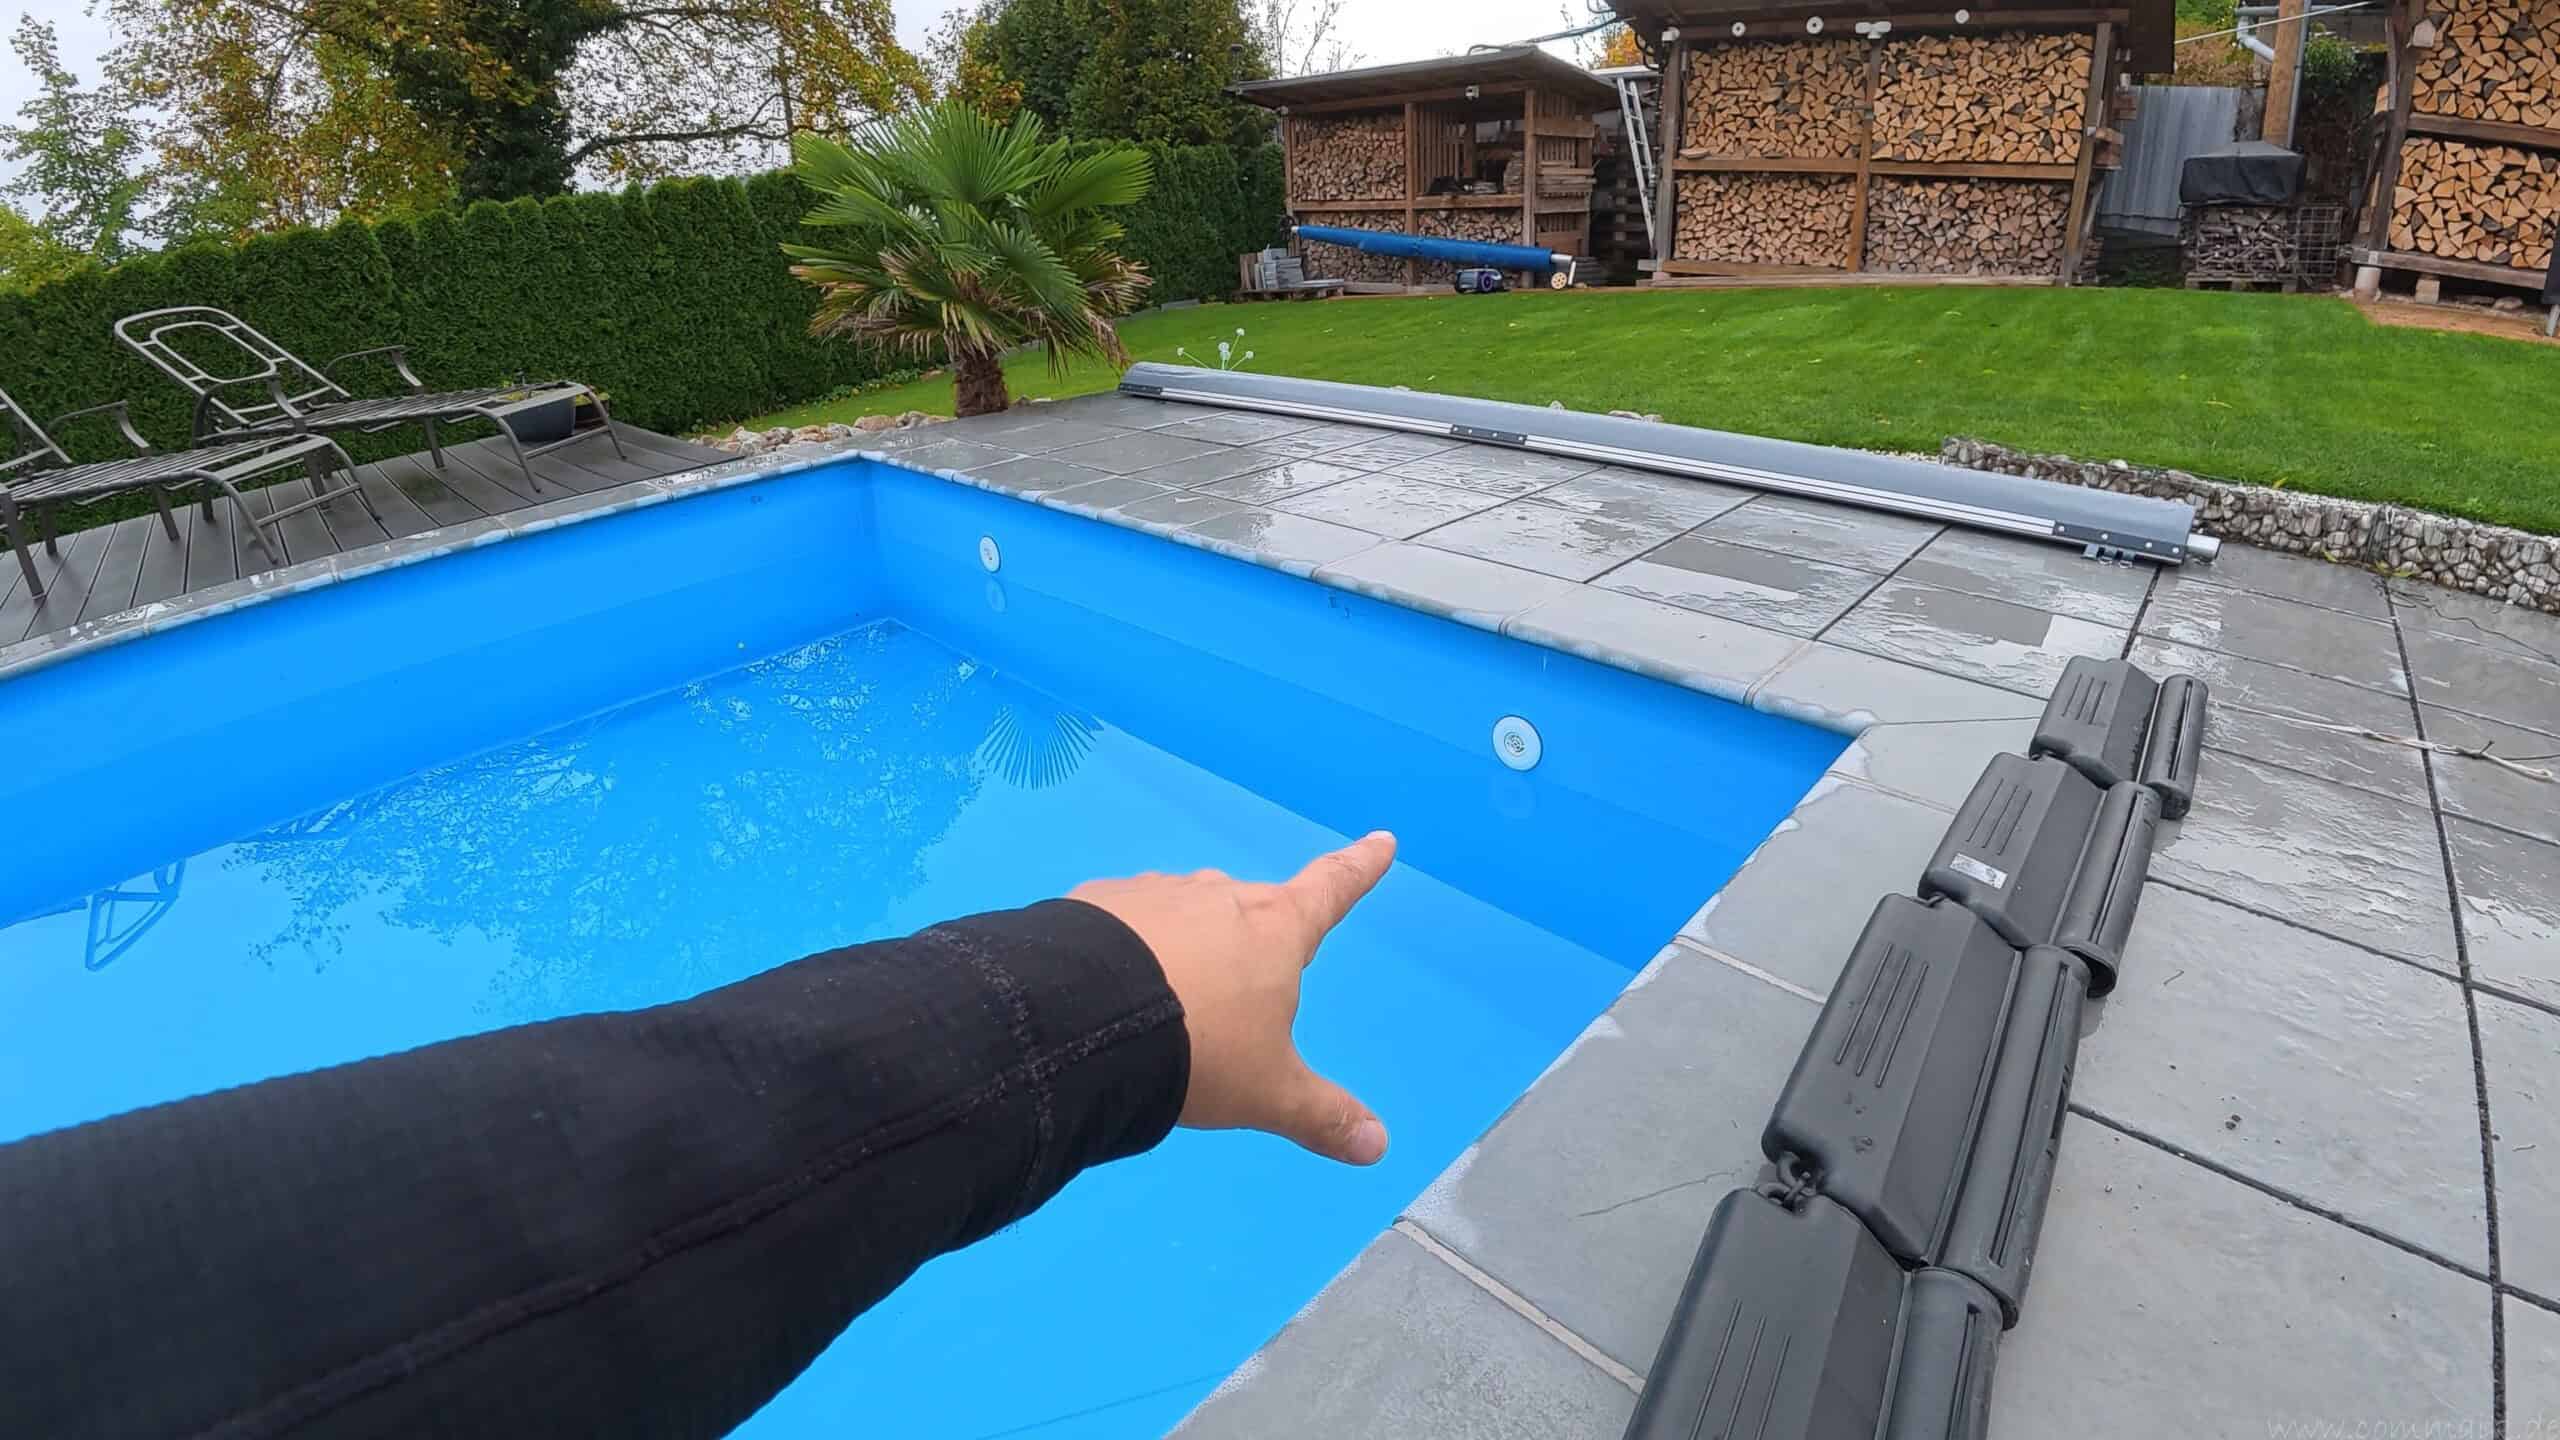
I drained the water until it was about 5 to 10 centimeters below the inlet nozzles. This left the nozzles exposed, and I was then able to seal them with the appropriate winter plugs. This prevented water from re-entering the drained pipes.
Most of the water remained in the pool over the winter. This approach had worked well for my pool for several years. In the spring, all I have to do is raise the water level back to its normal operating level.
Should you drain the water completely or just lower the water level?
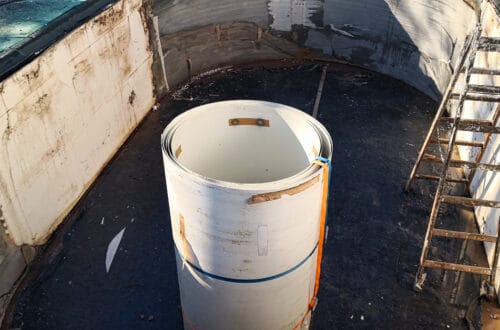
I didn’t drain my pool completely for the winter break. I just lowered the water level enough so that I could plug the inlet jets and drain the connected pipes. Most of the water remained in the pool.
Water plays an important role in this process: it counteracts the pressure exerted by the surrounding soil and groundwater. If an in-ground pool is completely drained, this counterpressure is lost. As a result, the pool walls can become deformed, or the entire structure can be lifted by rising groundwater.
| Variant | Advantages | Disadvantages |
|---|---|---|
| Empty Completely | The tank surfaces and components are easily accessible for cleaning and repairs. | There is no stabilizing water pressure. A complete refill is required in the spring. |
| Lower the water level | A large portion of the fill remains in place and supports the basin structure. | Pipes and components at risk of freezing must still be drained or protected. |
For my pool, partially draining the water has proven effective over several winters. Small above-ground pools that aren’t winter-ready, on the other hand, are completely drained, cleaned, and stored dry.
Water Level and Pool Spotlights: Why I Didn’t Let the Water Drain Any Further
When lowering the pool, I didn’t just focus on the inlet nozzles. I also had to take into account my PAR56 pool spotlight with its water-filled recessed housing. This recessed housing isn’t frost-proof in my setup.
There is water behind the headlight assembly. If I had lowered the water level to the height of the headlight, parts of the assembly and the mounting pot would have been directly in the area where ice would later form. If the water freezes there, it can exert pressure on the housing, the windshield, and the seals. This could result in cracks or leaks. The position of the lights relative to the expected ice zone was therefore a key consideration during winter preparation.
So I kept the headlight deep enough underwater and didn’t lower the water level all the way to its upper edge. The ice forming on the surface should remain above the light and its mounting socket. The key factor here was the distance to the potential underside of the ice—just a few centimeters of water above the headlight would not have provided reliable protection.
In my setup, the water level was about 5 to 10 centimeters below the inlet nozzles: The nozzles were exposed, while the headlight, which was mounted lower, remained clearly covered with water. Removing the lights would have been another option for winter preparation, but I didn’t take advantage of it with my setup.
Consider other components involved in the water drainage process
In addition to the lighting, other openings and water-carrying components were also included in the planning for the winter water level:
- Skimmer: I lowered the water level below the intake opening and drained the connected pipe. In addition, I left the designated overflow open in my setup so that any rainwater or meltwater that might enter later could drain out.
- Inlet nozzles: After lowering the water level, I sealed the nozzles with the appropriate winter plugs. This prevented water from entering the already drained pipes should the water level rise again.
- Pool vacuum connections and counter-current systems: These connections may be located deeper than the inlet nozzles and remain submerged. Their pipes and housings therefore require their own drainage system or suitable winter seals. Simply lowering them below the upper nozzles is not sufficient.
- Ladders and removable attachments: These can be removed before the winter break. This ensures they are no longer within the area that will later be covered by ice.
The winter cover was also a factor in these considerations. Some structures require a specific water level for support or additional winter supports. Therefore, the desired lowering height and the design of the cover must be compatible.

- Zertifizierte Sicherheit: Typengeprüft nach französischer Norm NF P 90-308, Traglast mindestens 100 kg (mit optionalem Schneeträger verdoppelbar) - verhindert unbeaufsichtigten Zugang von Kindern unter 5 Jahren und Haustieren zum Pool.
- Robuste Materialien: Einteilige PVC-Plane mit 650 g/m² Gewebestärke, witterungsfest, UV-beständig und fungizidbehandelt; eloxierte Aluminiumprofile (rund, Durchmesser 45 mm) unter der Folie integriert.
- Kinderleichte Handhabung: Aufrollen mit inkludierter Handkurbel in unter 3 Minuten (1 Person), Abrollen per Zuggurt ebenso in unter 3 Minuten. Motorisierte Aufrollvorrichtung optional erhältlich.
- Ersetzt mehrere Produkte: Übernimmt die Funktion von Luftpolsterabdeckung, Aufroller und Winterabdeckung, reduziert zudem die Algenbildung; Überstand 25 cm pro Seite gegenüber den Beckeninnenmaßen.
- Passgenau und langlebig: Befestigung über Gurte mit Edelstahl-Ratschen und Stiften, geschweißte Säume mit Schutzlappen gegen Laub, 3 Jahre Herstellergarantie. Nicht geeignet für Becken mit Leiter.
Winterizing Pool Equipment: Removal and Disconnecting the Power Supply
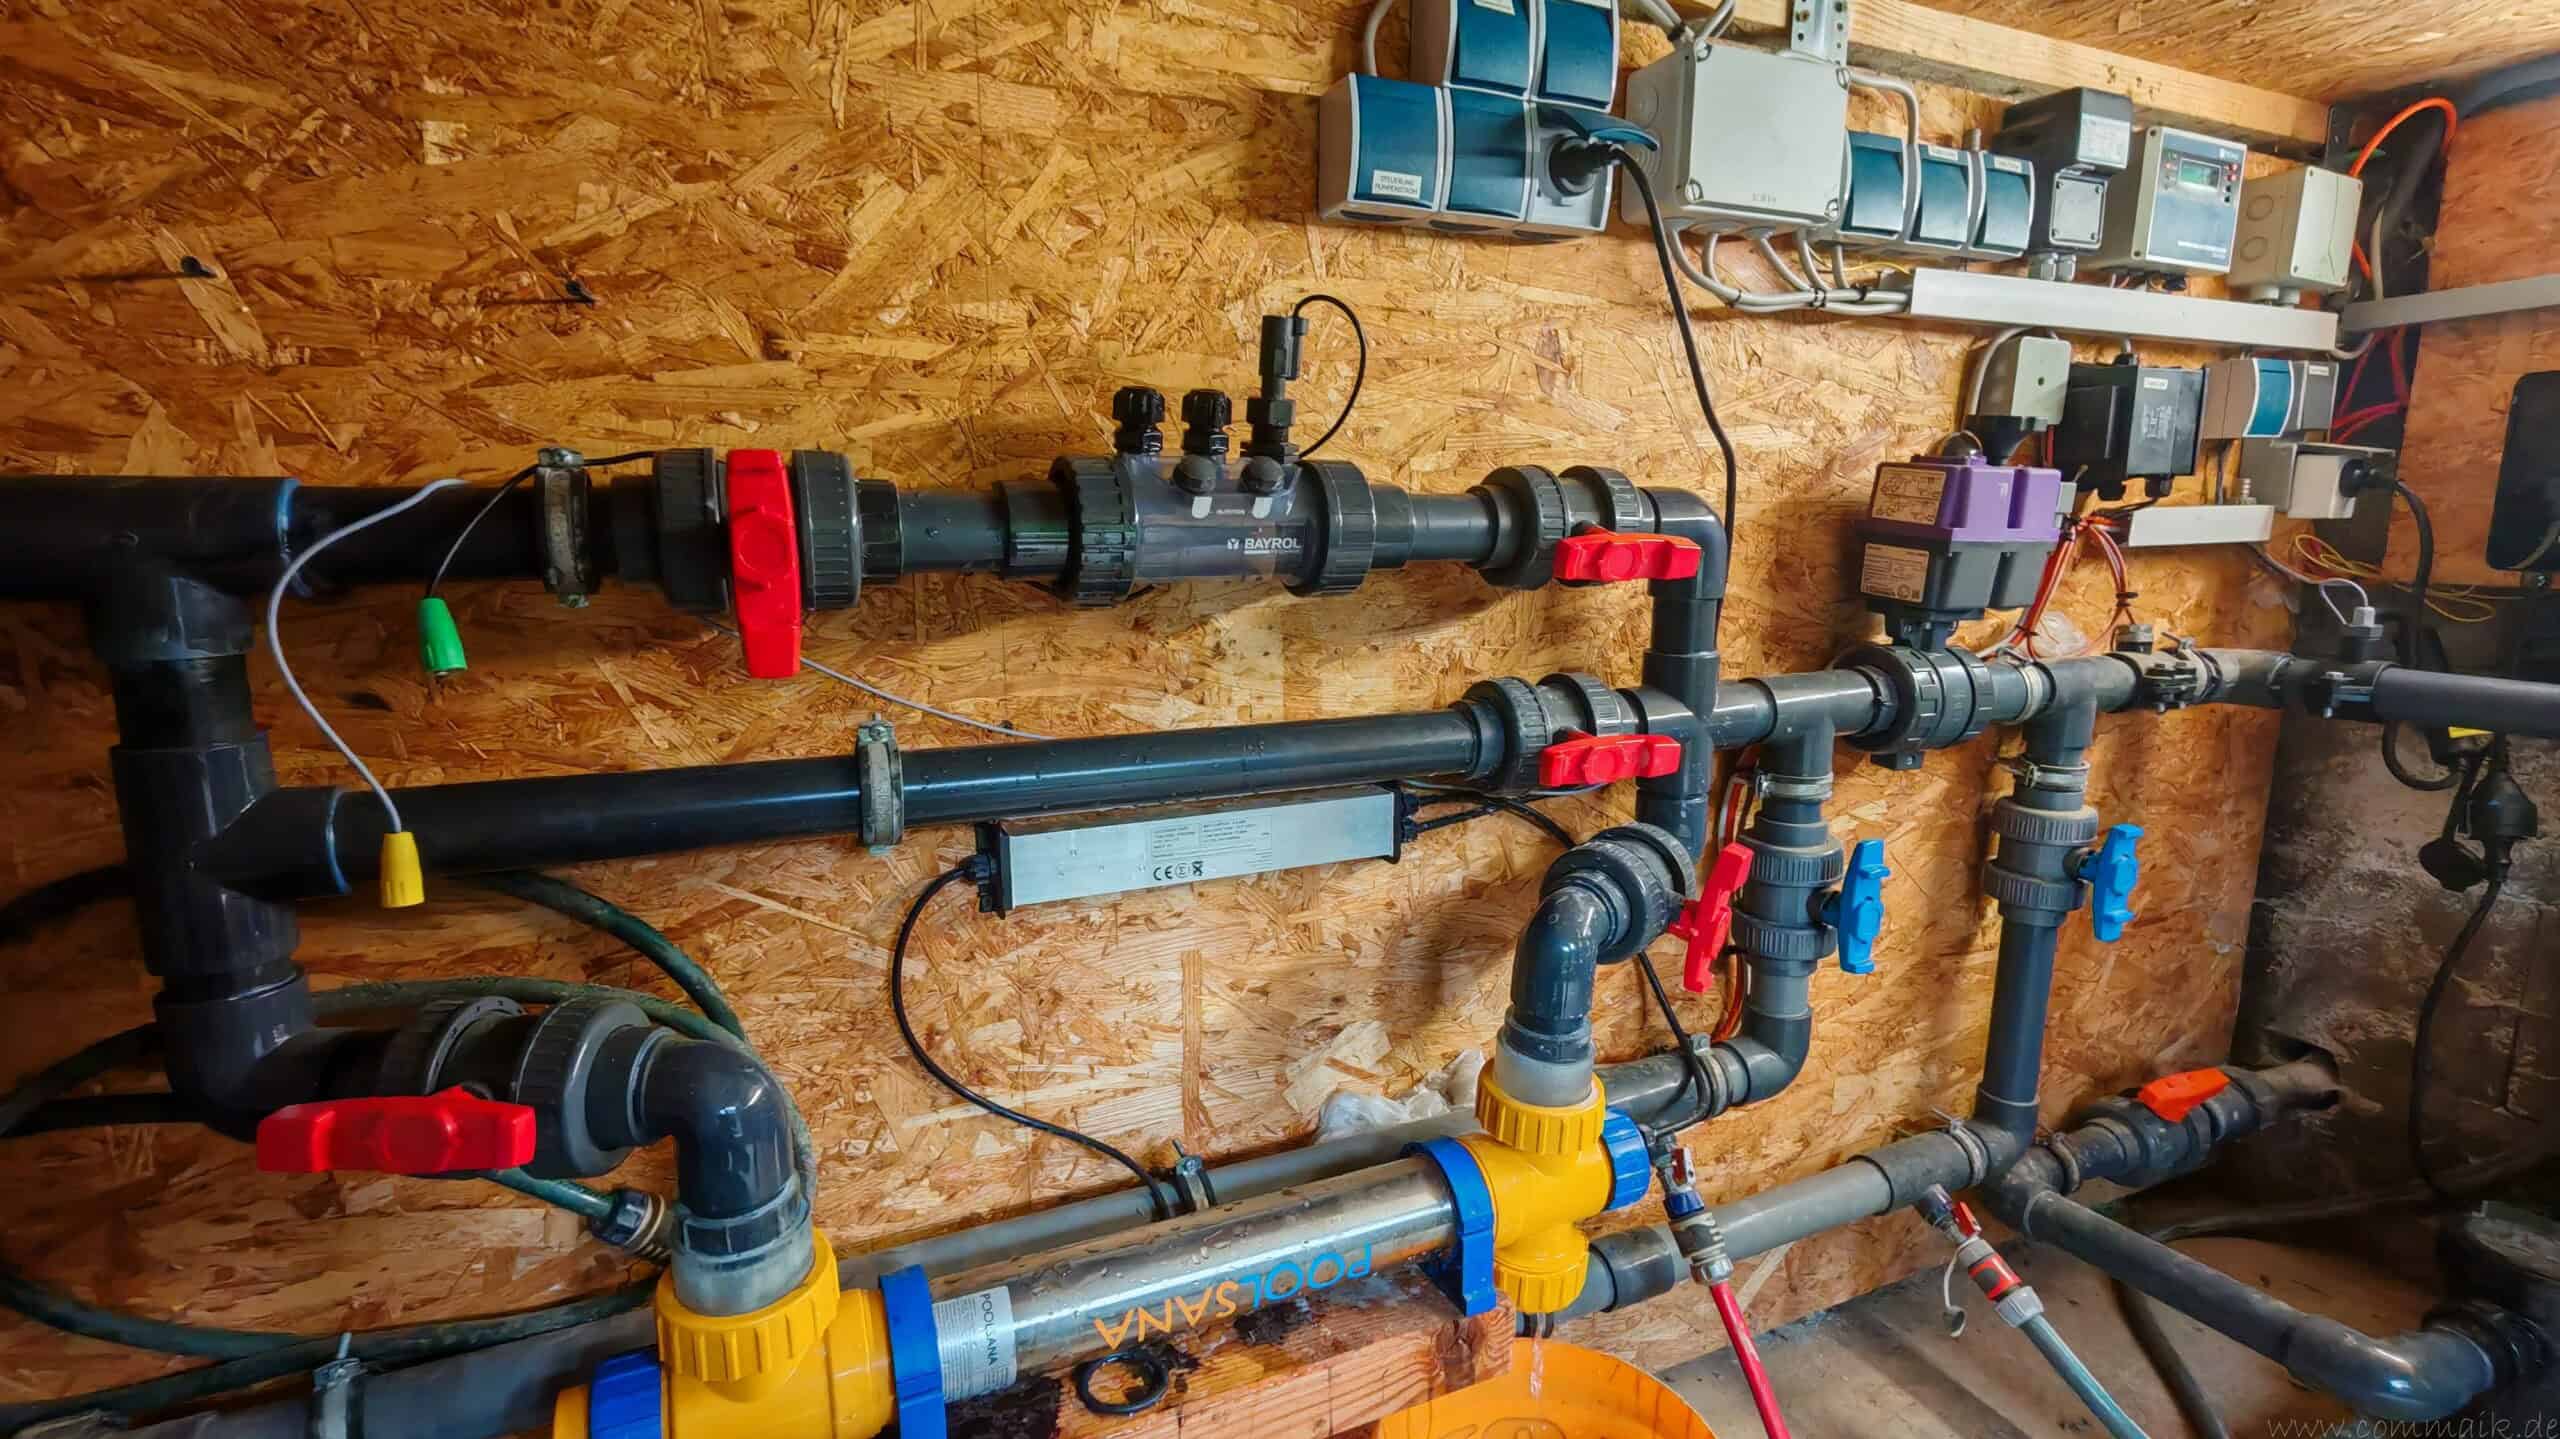
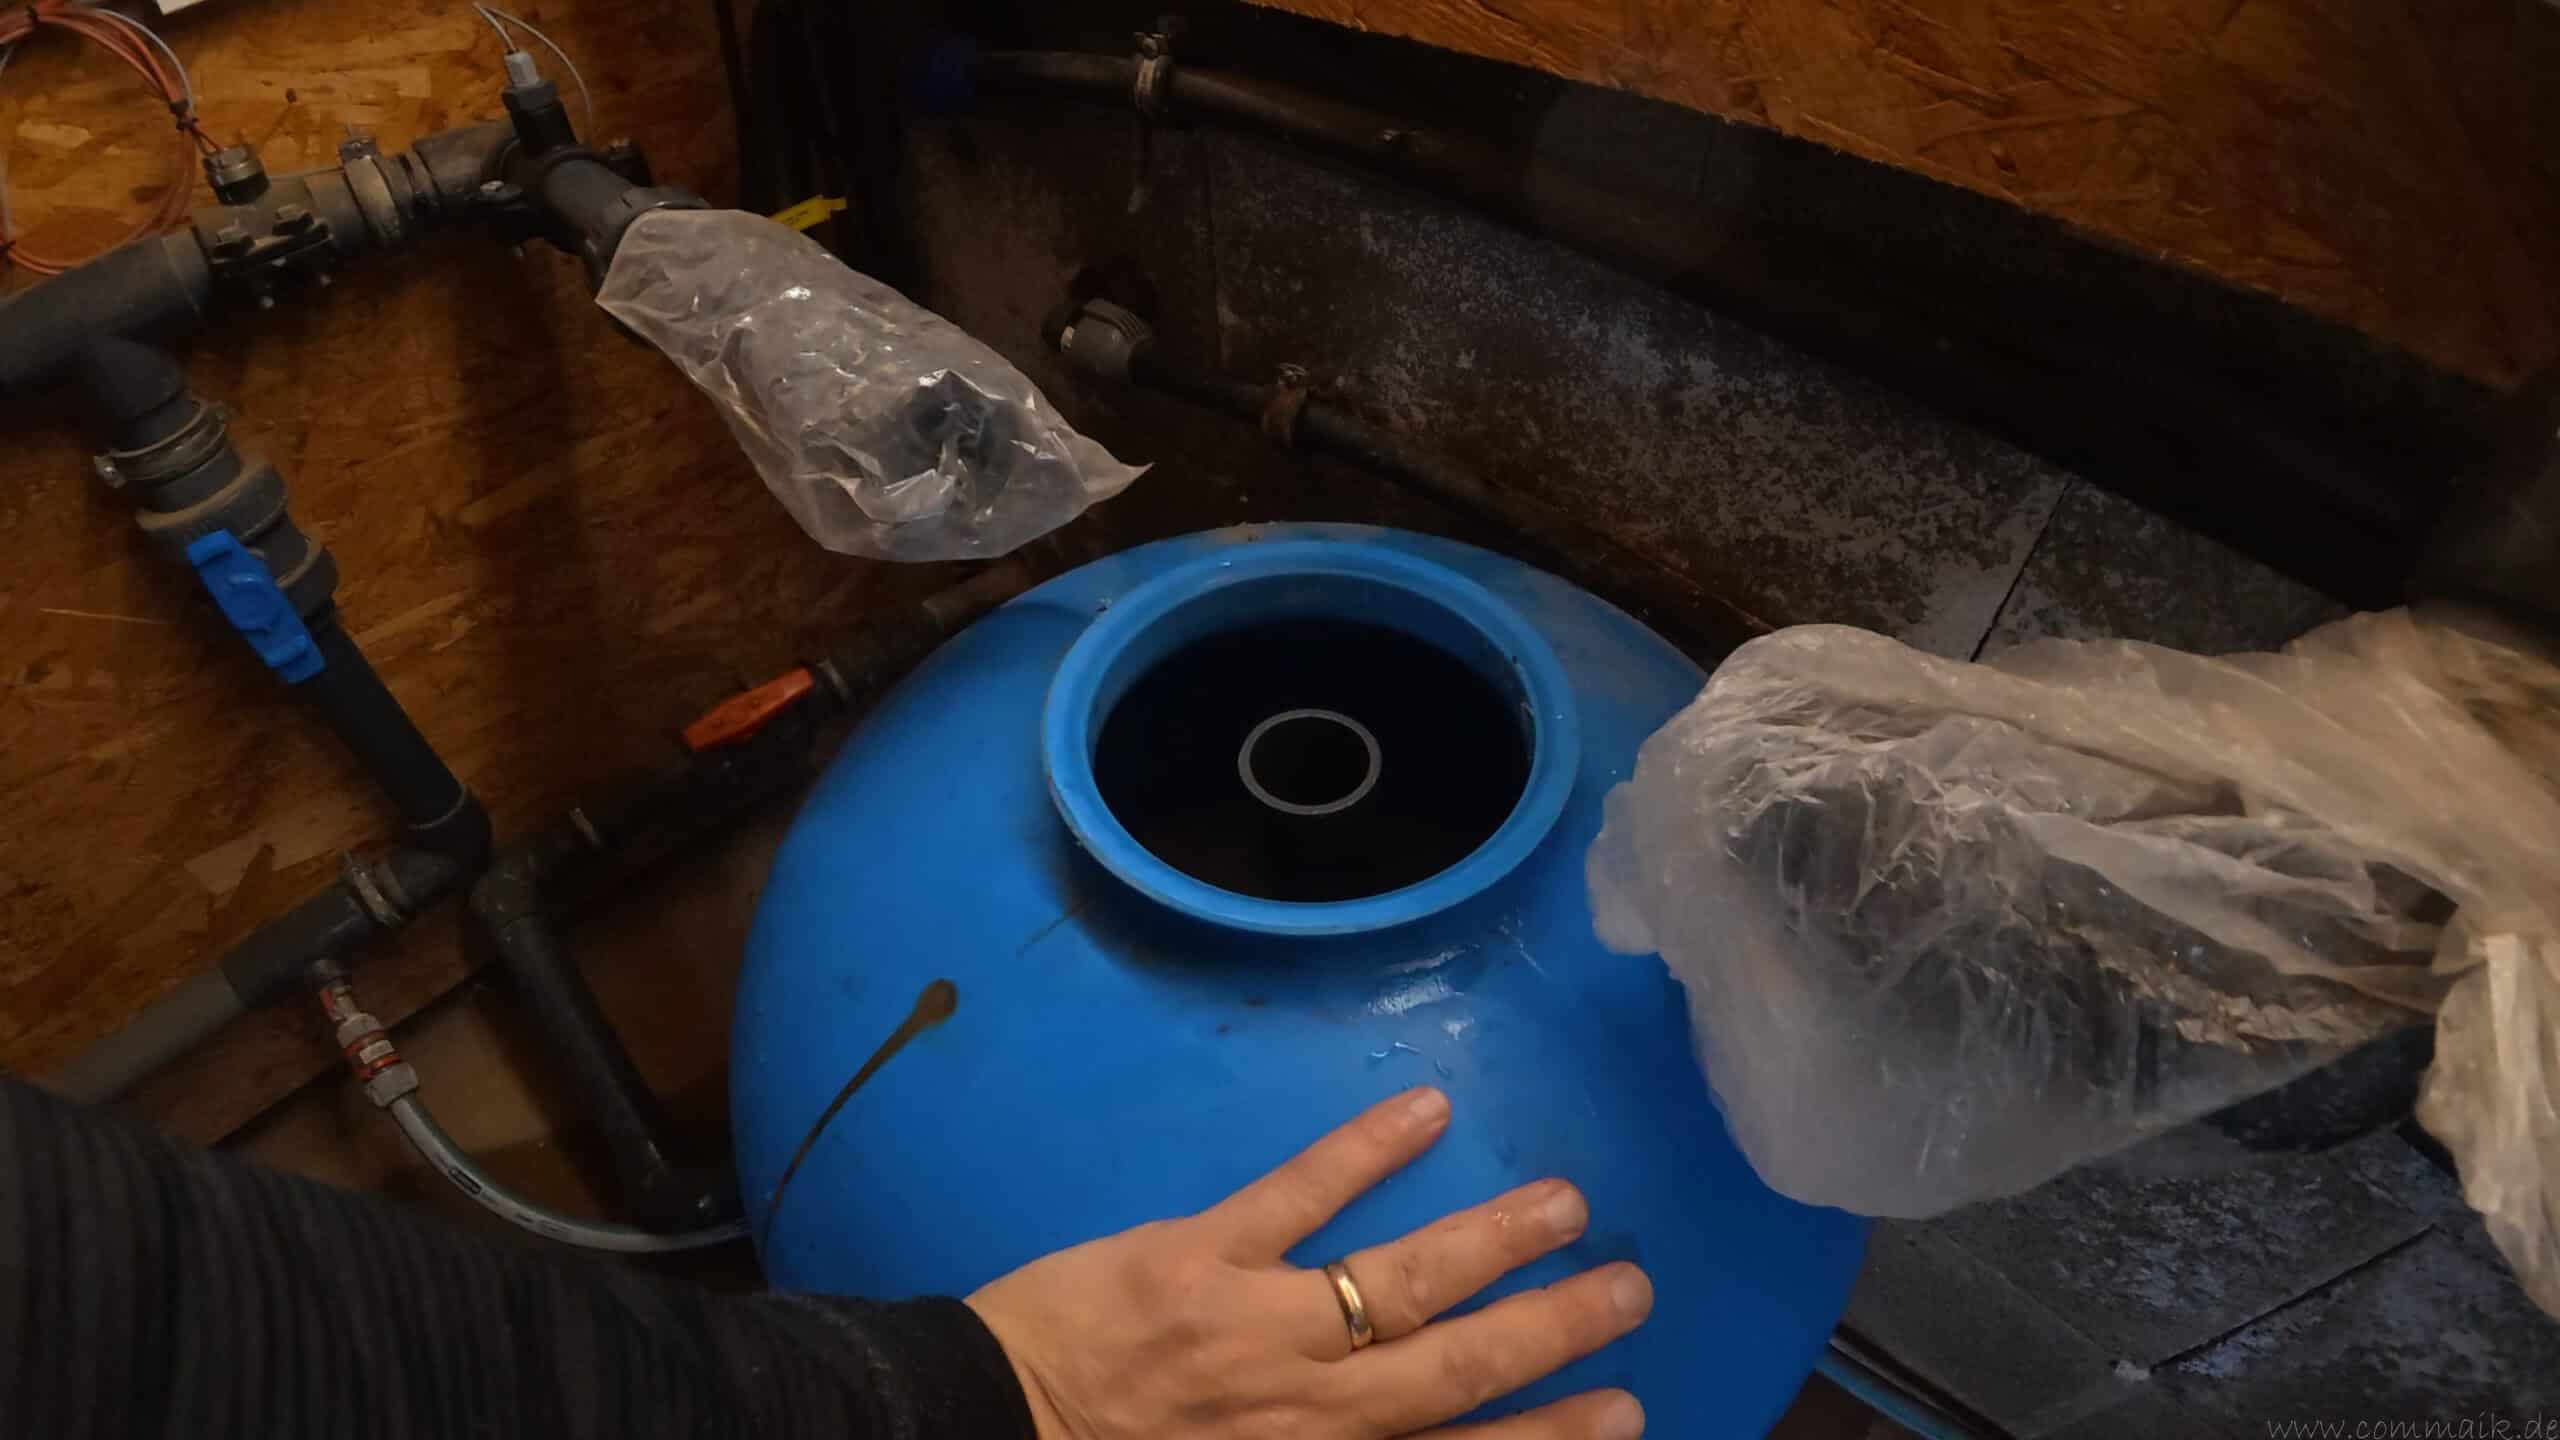
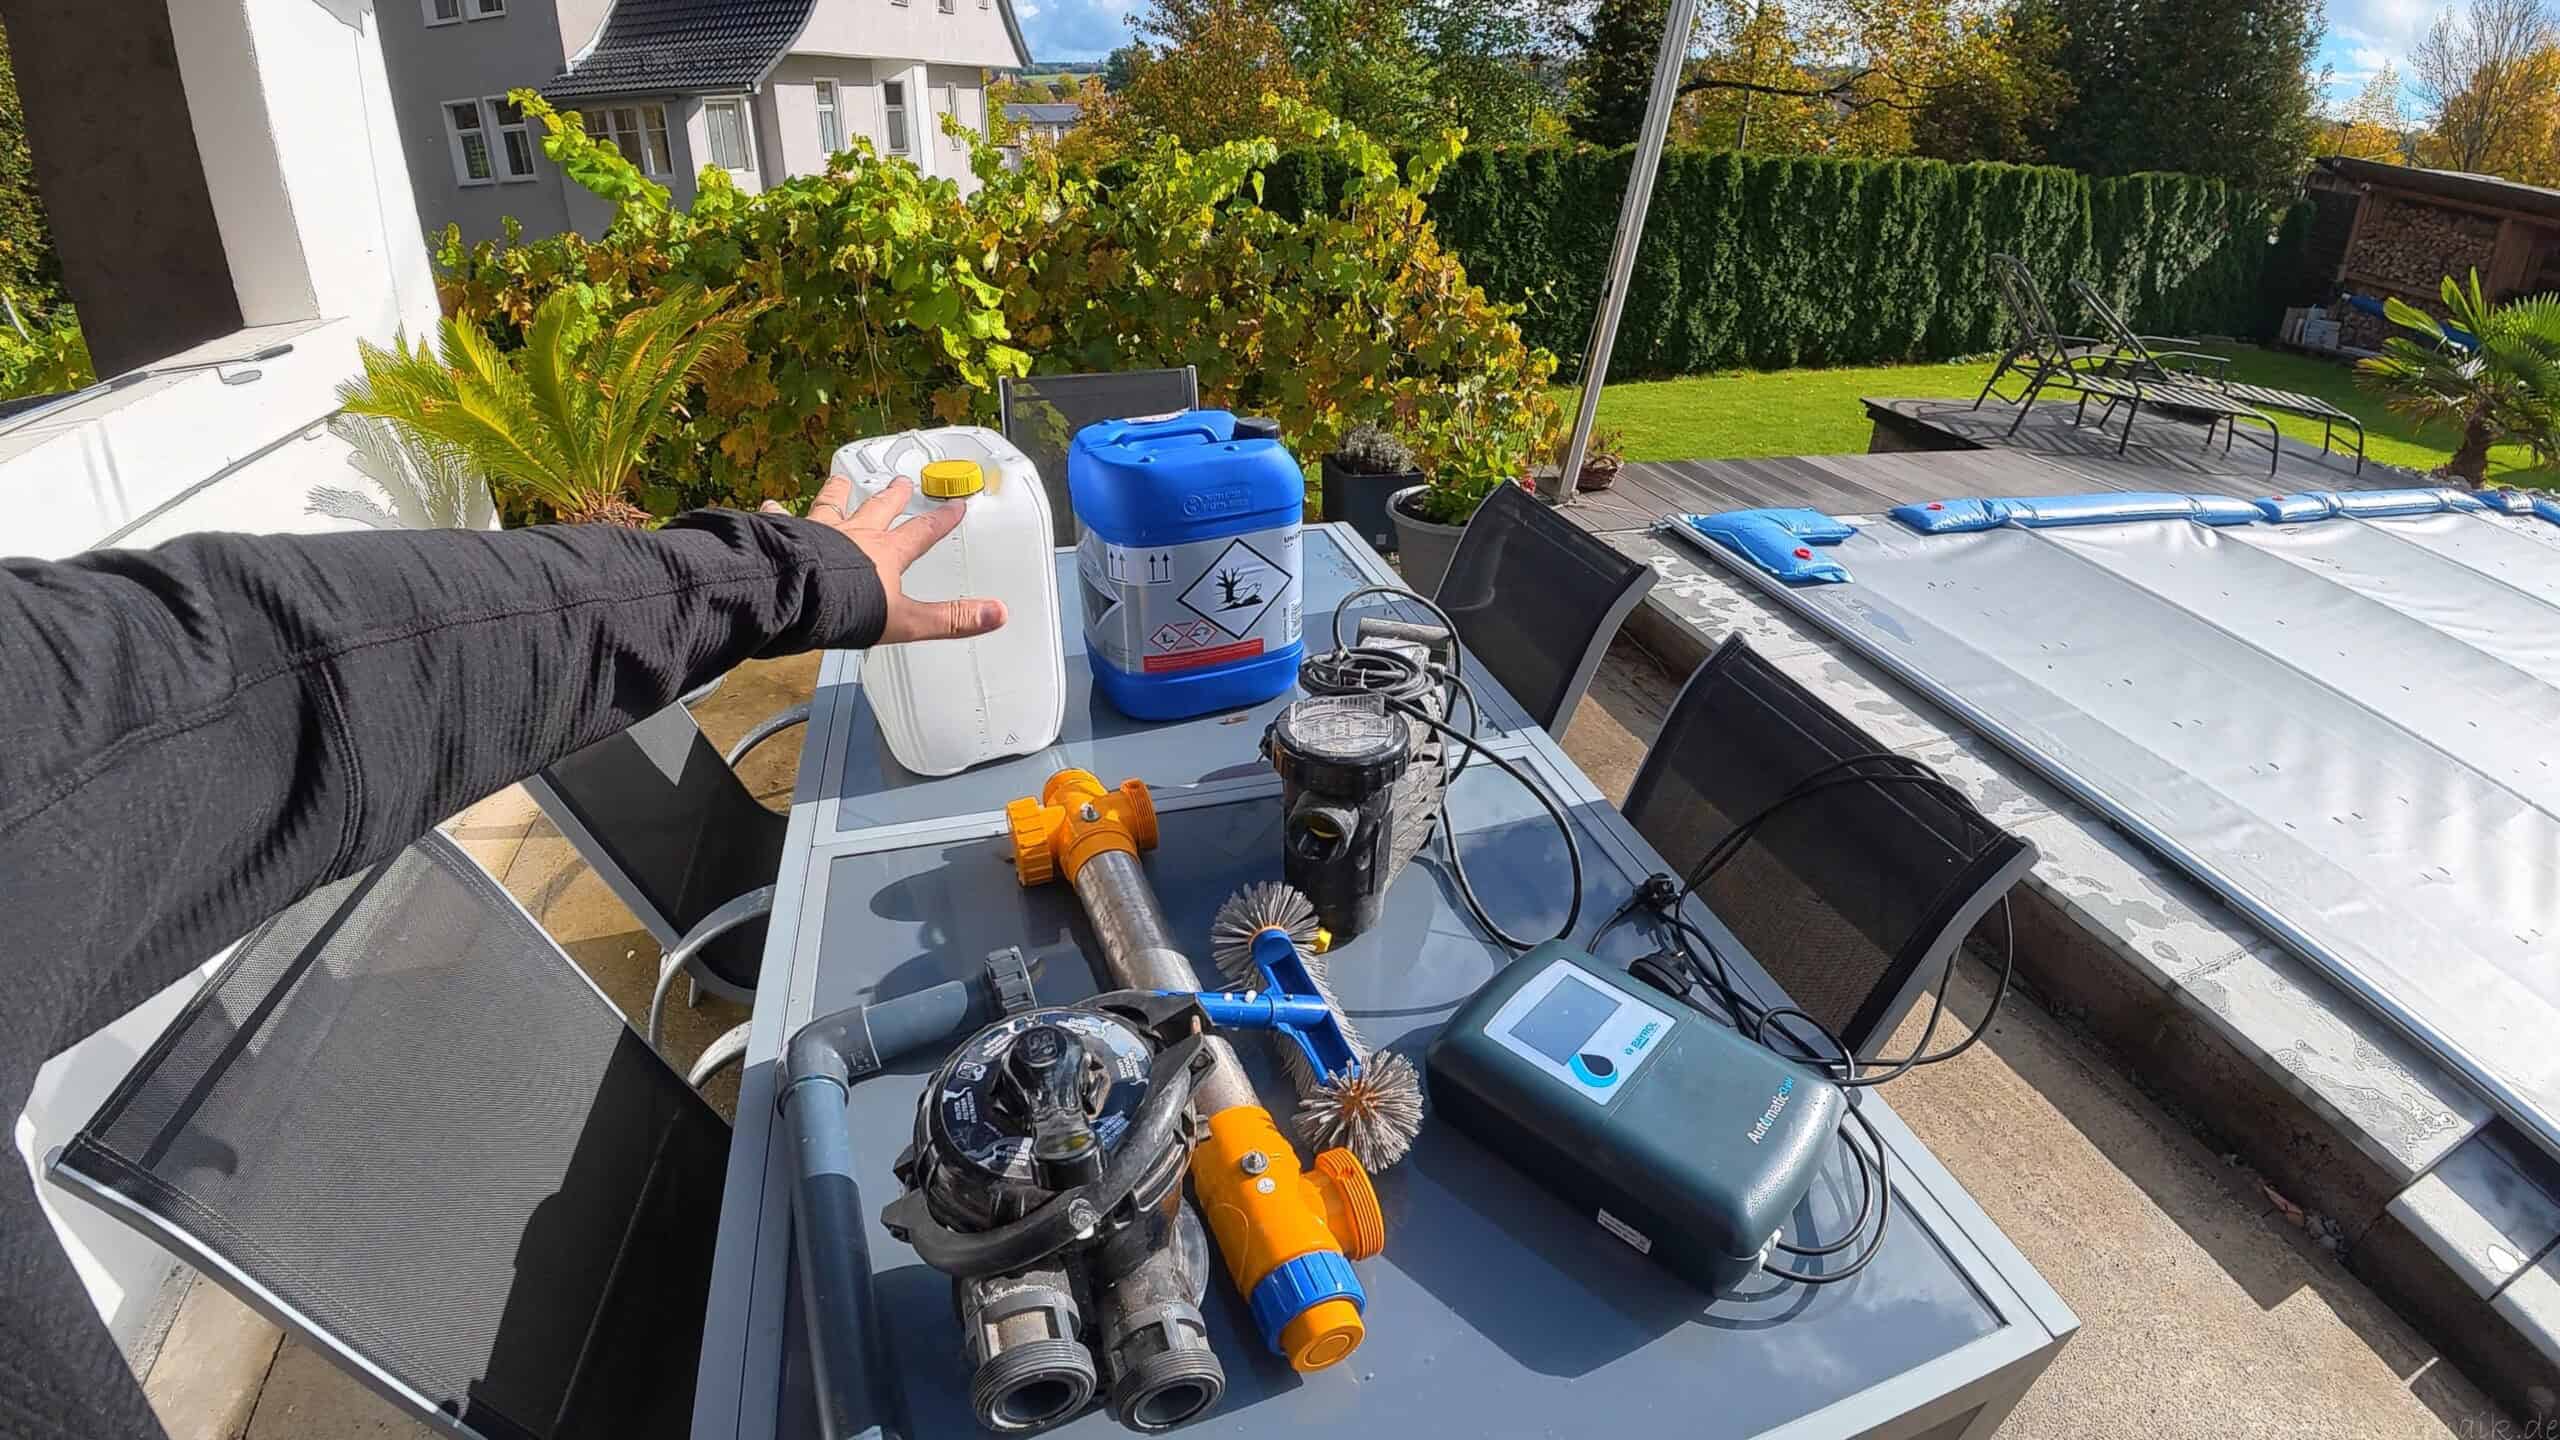
After draining the water, I disconnected the pool equipment that was no longer needed from the power supply. I then removed the sensitive and water-carrying components. I stored the following parts in the basement in a dry, frost-free place for the winter:
- BAYROL control unit with dosing technology.
- pH and redox probes in their filled storage containers.
- Circulation pump.
- Multi-way valve.
- UV-C unit.
Before storing them, I drained the remaining water from the removed components. The probes, however, remained submerged in the storage fluid with their measuring tips.
Protect the BAYROL control unit and touchscreen from frost
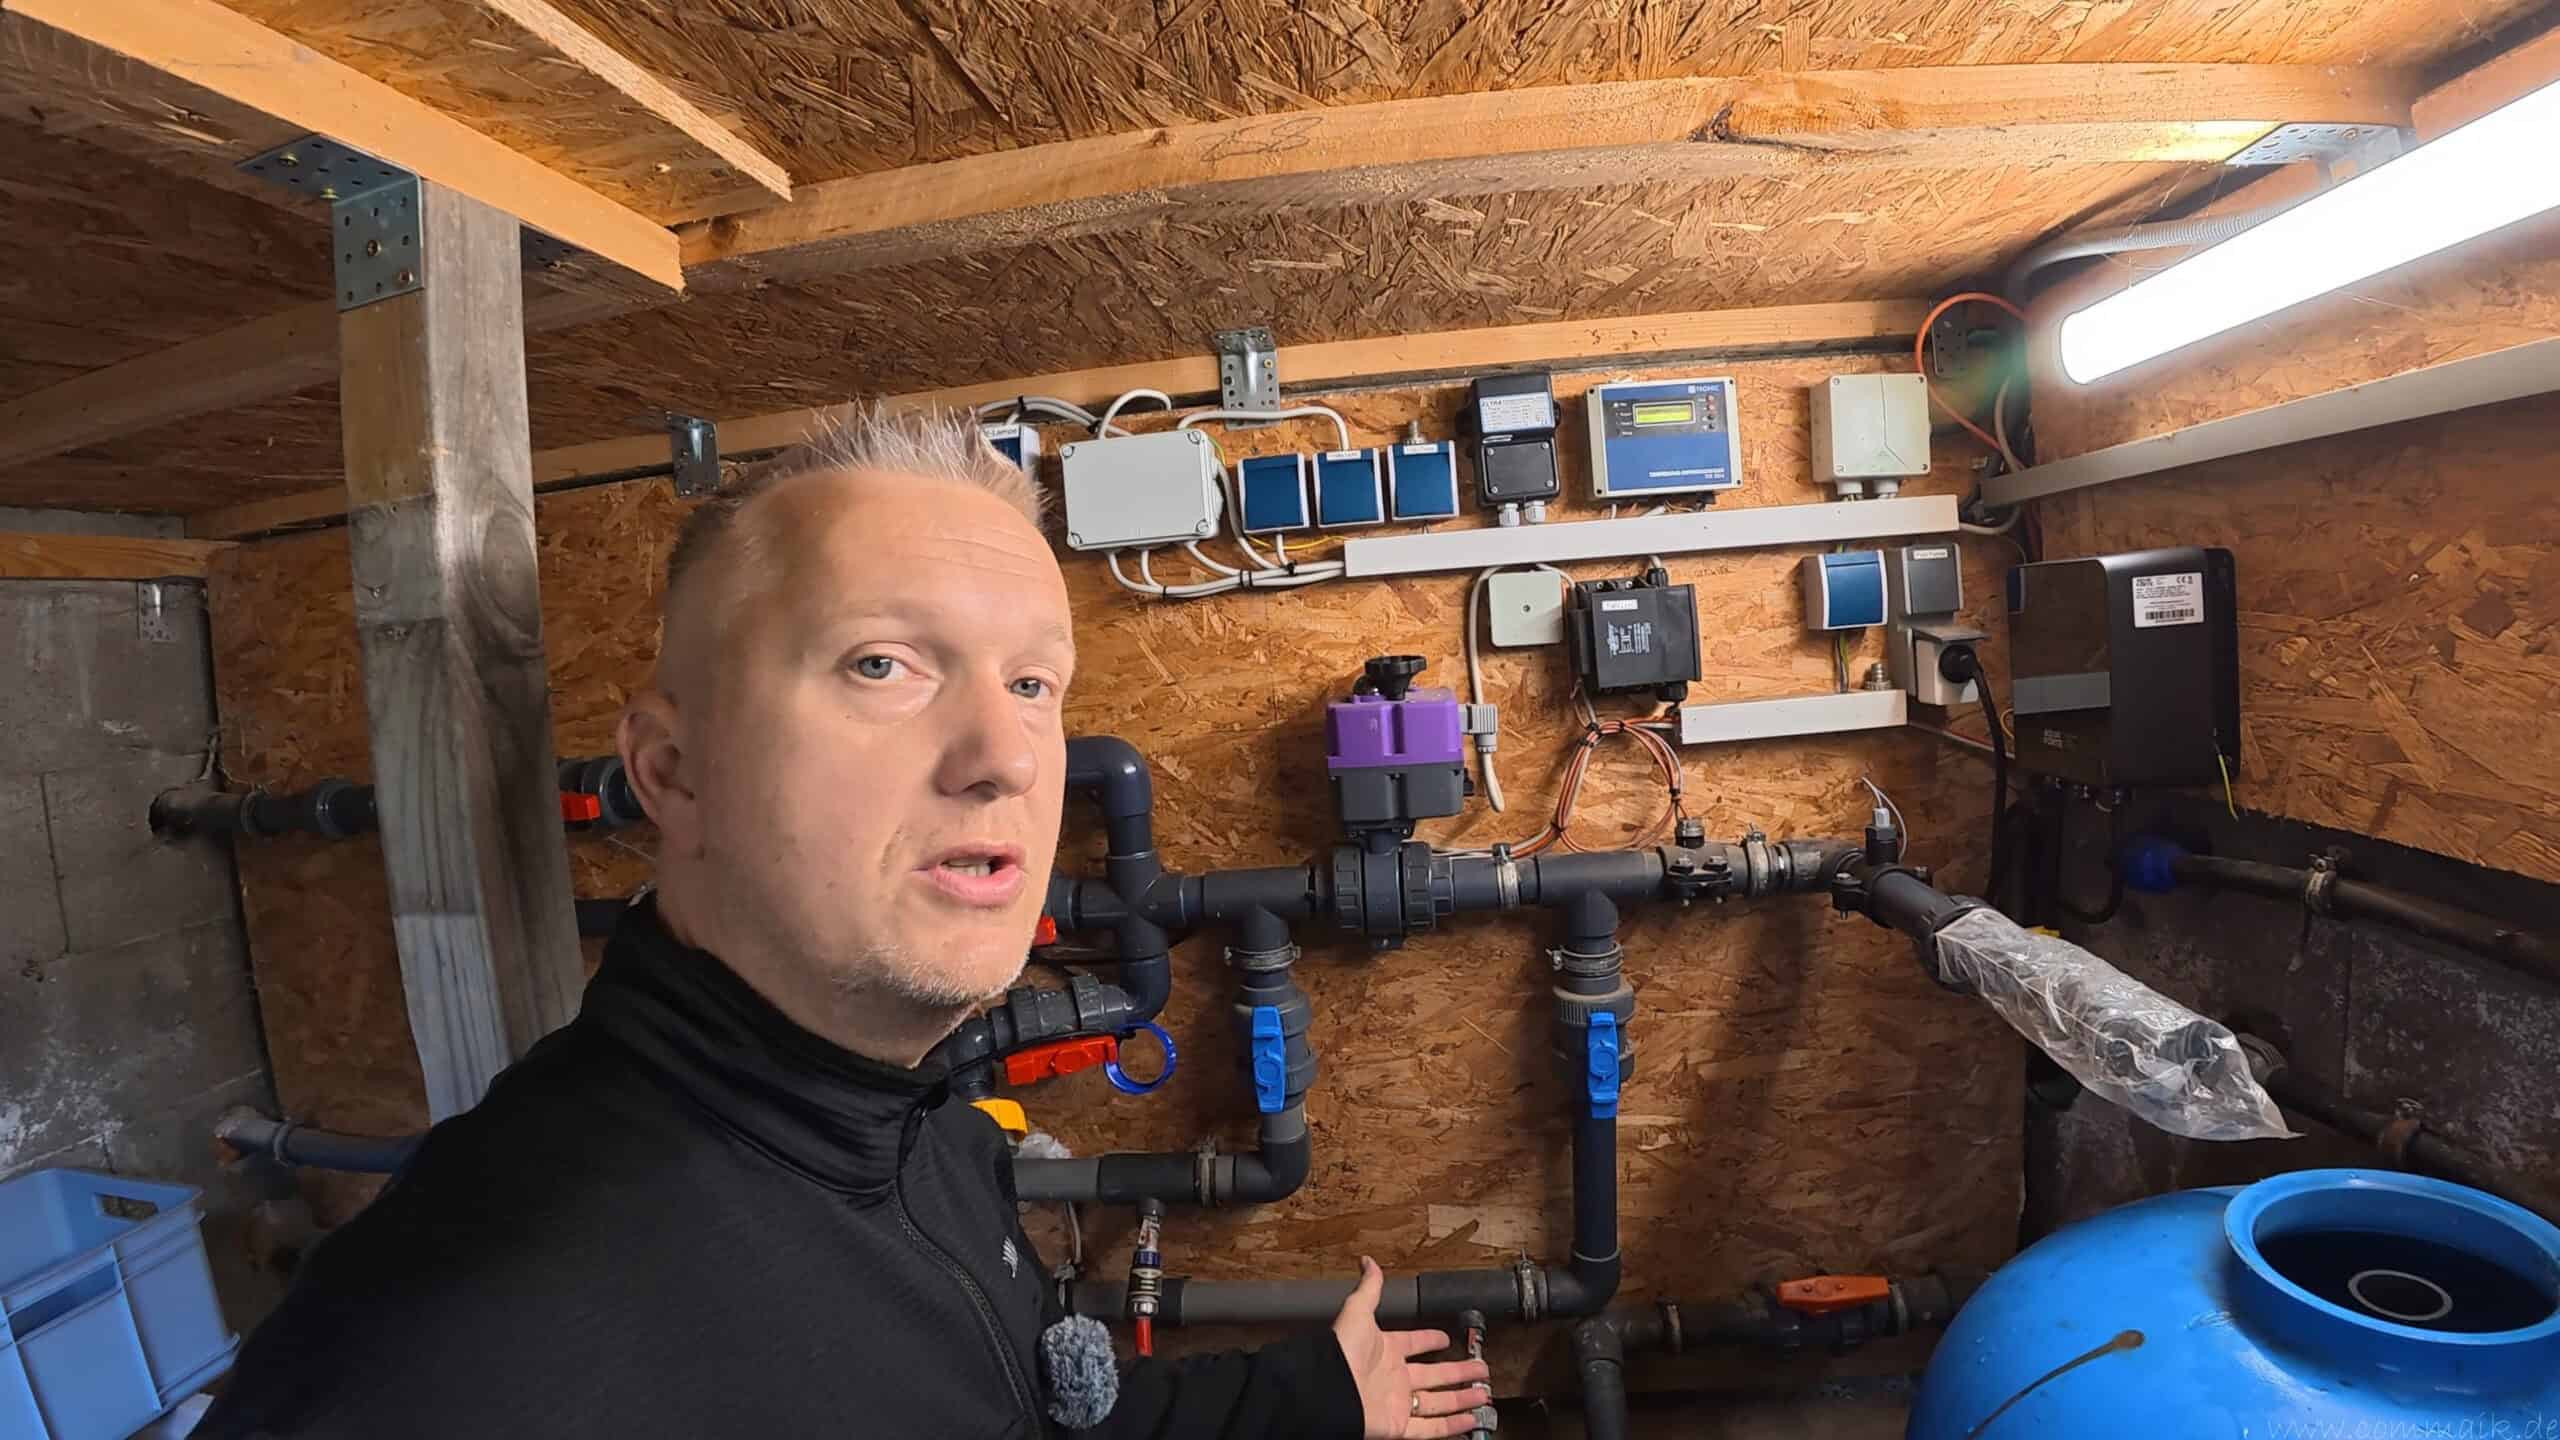
The BAYROL Automatic Cl-pH has a 4.3-inch TFT touchscreen display. I didn’t want to expose this particular component to sub-zero temperatures. Since my utility room isn’t frost-free in the winter, I took the entire unit off the wall and stored it in the basement.
The manual specifies an operating temperature range of 0 to 40 °C for the controller. While it does not specify a specific frost damage threshold for the display, this range does not allow for winter operation at sub-zero temperatures. By removing the unit, I therefore protected both the display and the rest of the electronics.
TDR2004: The solar control system remained turned off in the technical building
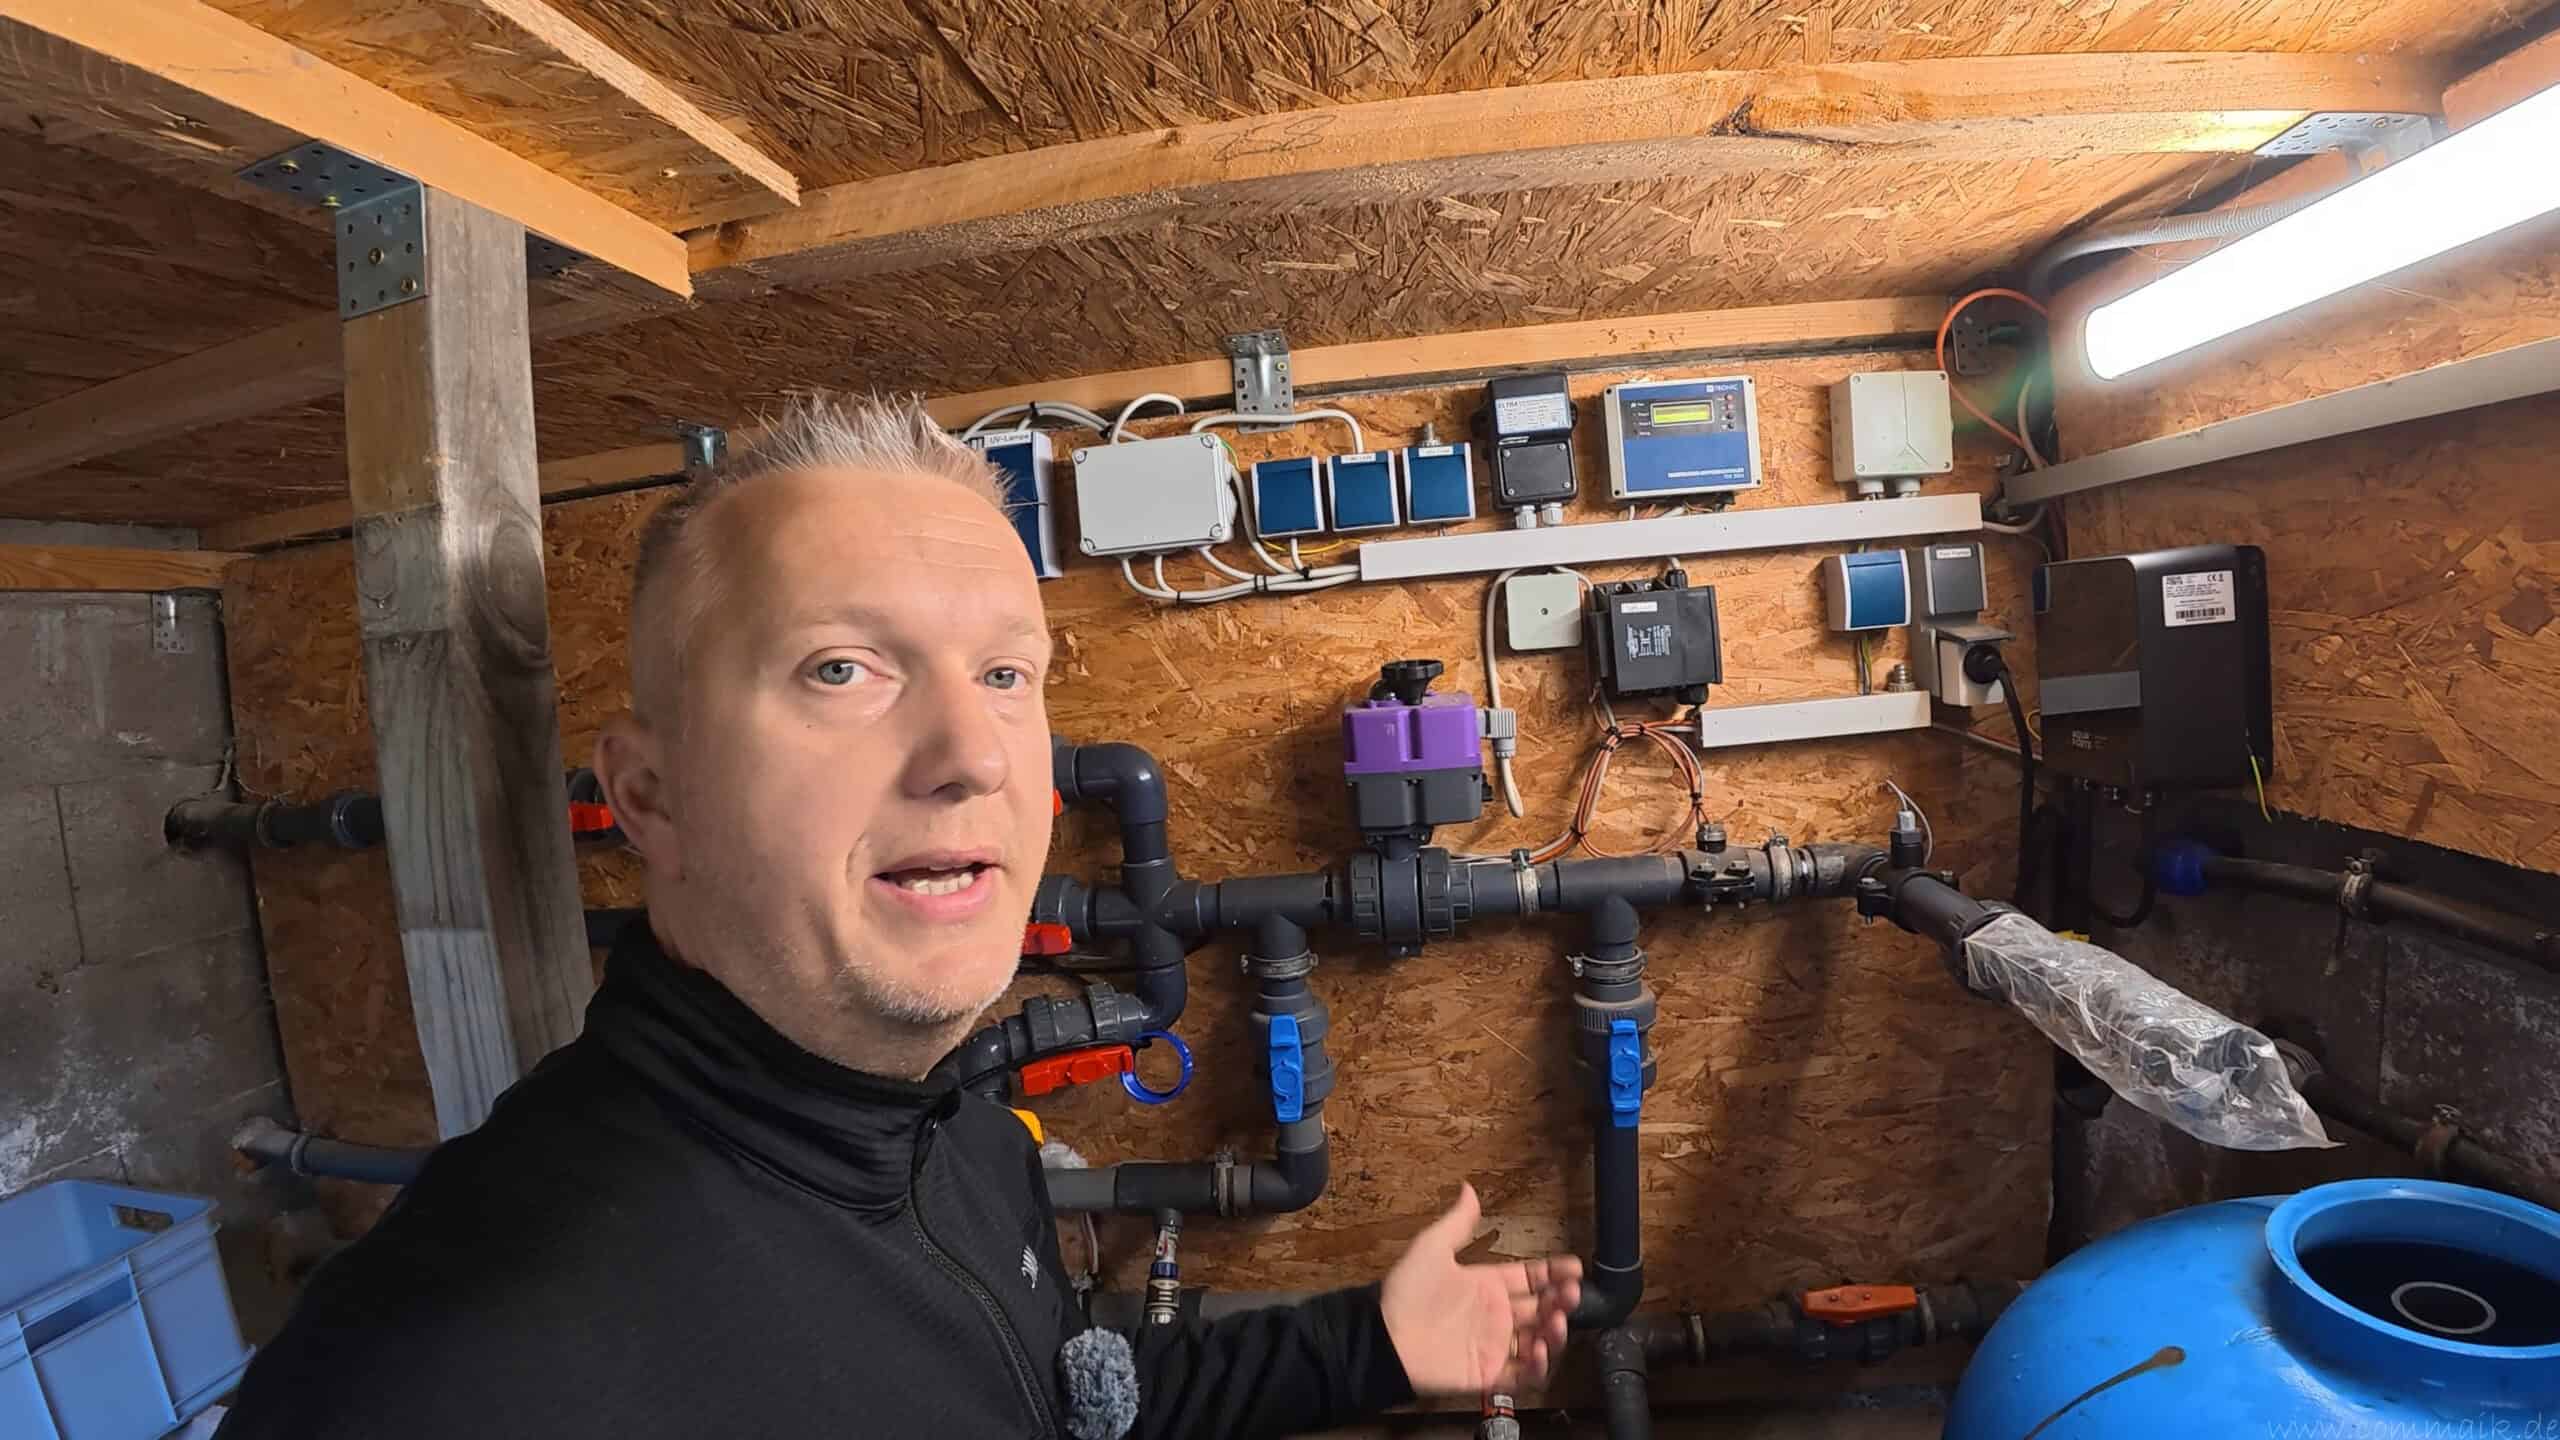
My TDR2004 temperature-difference controller, on the other hand, I left installed in its original location and turned off its power supply for the winter break. As a result, no automatic control commands for the solar heating system were triggered anymore.
However, the TDR2004 does not feature a display type that is fundamentally more frost-resistant: It, too, uses a liquid crystal display, in this case a two-line LCD. Therefore, the simpler display does not offer any definite advantage in terms of frost resistance compared to the BAYROL display.
In my setup, the controller was therefore installed in the off position. This should be distinguished from operation at sub-zero temperatures: For the TDR2004, the manufacturer also specifies a permissible operating range of 0 to 40 °C. This specification does not explicitly authorize storage in freezing conditions.


Turn off the solar control system, three-way valve, and lighting
After completing the final flushing and draining procedures, I turned off the electrical components of my pool system. These included the solar control system, the three-way valve actuator, the lighting control system, the transformers, and the pump timer.
I cut off the power supply so that no automatic switching operations could take place during the winter shutdown. This prevented the pump from starting up via a timer program and the three-way valve from being adjusted by the solar control system.
I had the frequency converter and the temperature differential controller installed in the utility room, but left them turned off. The removed units, on the other hand, were stored in the basement, where they were kept dry and frost-free.
The solar heating system was also drained. Although turning off the control system prevents automatic operation, it does not remove any residual water from the absorbers and connecting pipes. I had described the design and drainage options for my system in detail in the post on solar pool heating with a finned-tube system.
Store pool chemicals in a cool, frost-free place, and keep them separate from other items
I also stored the partially used chemical canisters in the basement for the winter. This required a cool, frost-free, and well-ventilated storage area. The containers were kept upright in their labeled original containers and protected from sunlight and unauthorized access. The storage instructions on each label were followed strictly.
Liquid chlorine and acidic pH-Minus must be stored separately. If the two substances come into contact, toxic chlorine gas can be produced. For this reason, they should not be stored together in a single spill tray: in the event of a leak, the spilled liquids could mix inside it. Separate, chemical-resistant spill trays prevent such a shared collection point from forming.
The original caps remained on the canisters. Especially with liquid chlorine, a designated vent cap can be important to allow any gases that form to escape. For this reason, I did not replace it with just any completely airtight screw-on cap.
Note the shelf life: Liquid chlorine loses its effectiveness over time
Liquid chlorine based on sodium hypochlorite cannot be stored indefinitely. The active ingredient degrades over time, causing the active chlorine content to decrease. Heat significantly accelerates this degradation. Storing it in a cool, dark place therefore helps limit the loss of active ingredient. A warm boiler room is unsuitable for this purpose.
A remaining amount stored over the winter therefore does not automatically retain its original concentration in the spring. For further use, I therefore took into account the filling date or expiration date and the storage conditions. There is no standard shelf life for all liquid chlorine products; the information on the container is what matters.
For my planning, this meant that by the end of the season, I wanted to avoid stockpiling unnecessarily large amounts of chlorine as much as possible. That way, I had to store less and could plan to use as much fresh product as possible for the spring.


Protecting Pool Pipes from Frost: Preventing Residual Water and Re-Filling
When it came to the plumbing, I focused on two main tasks: removing as much of the existing water as possible and preventing water from getting back into the pipes later on.
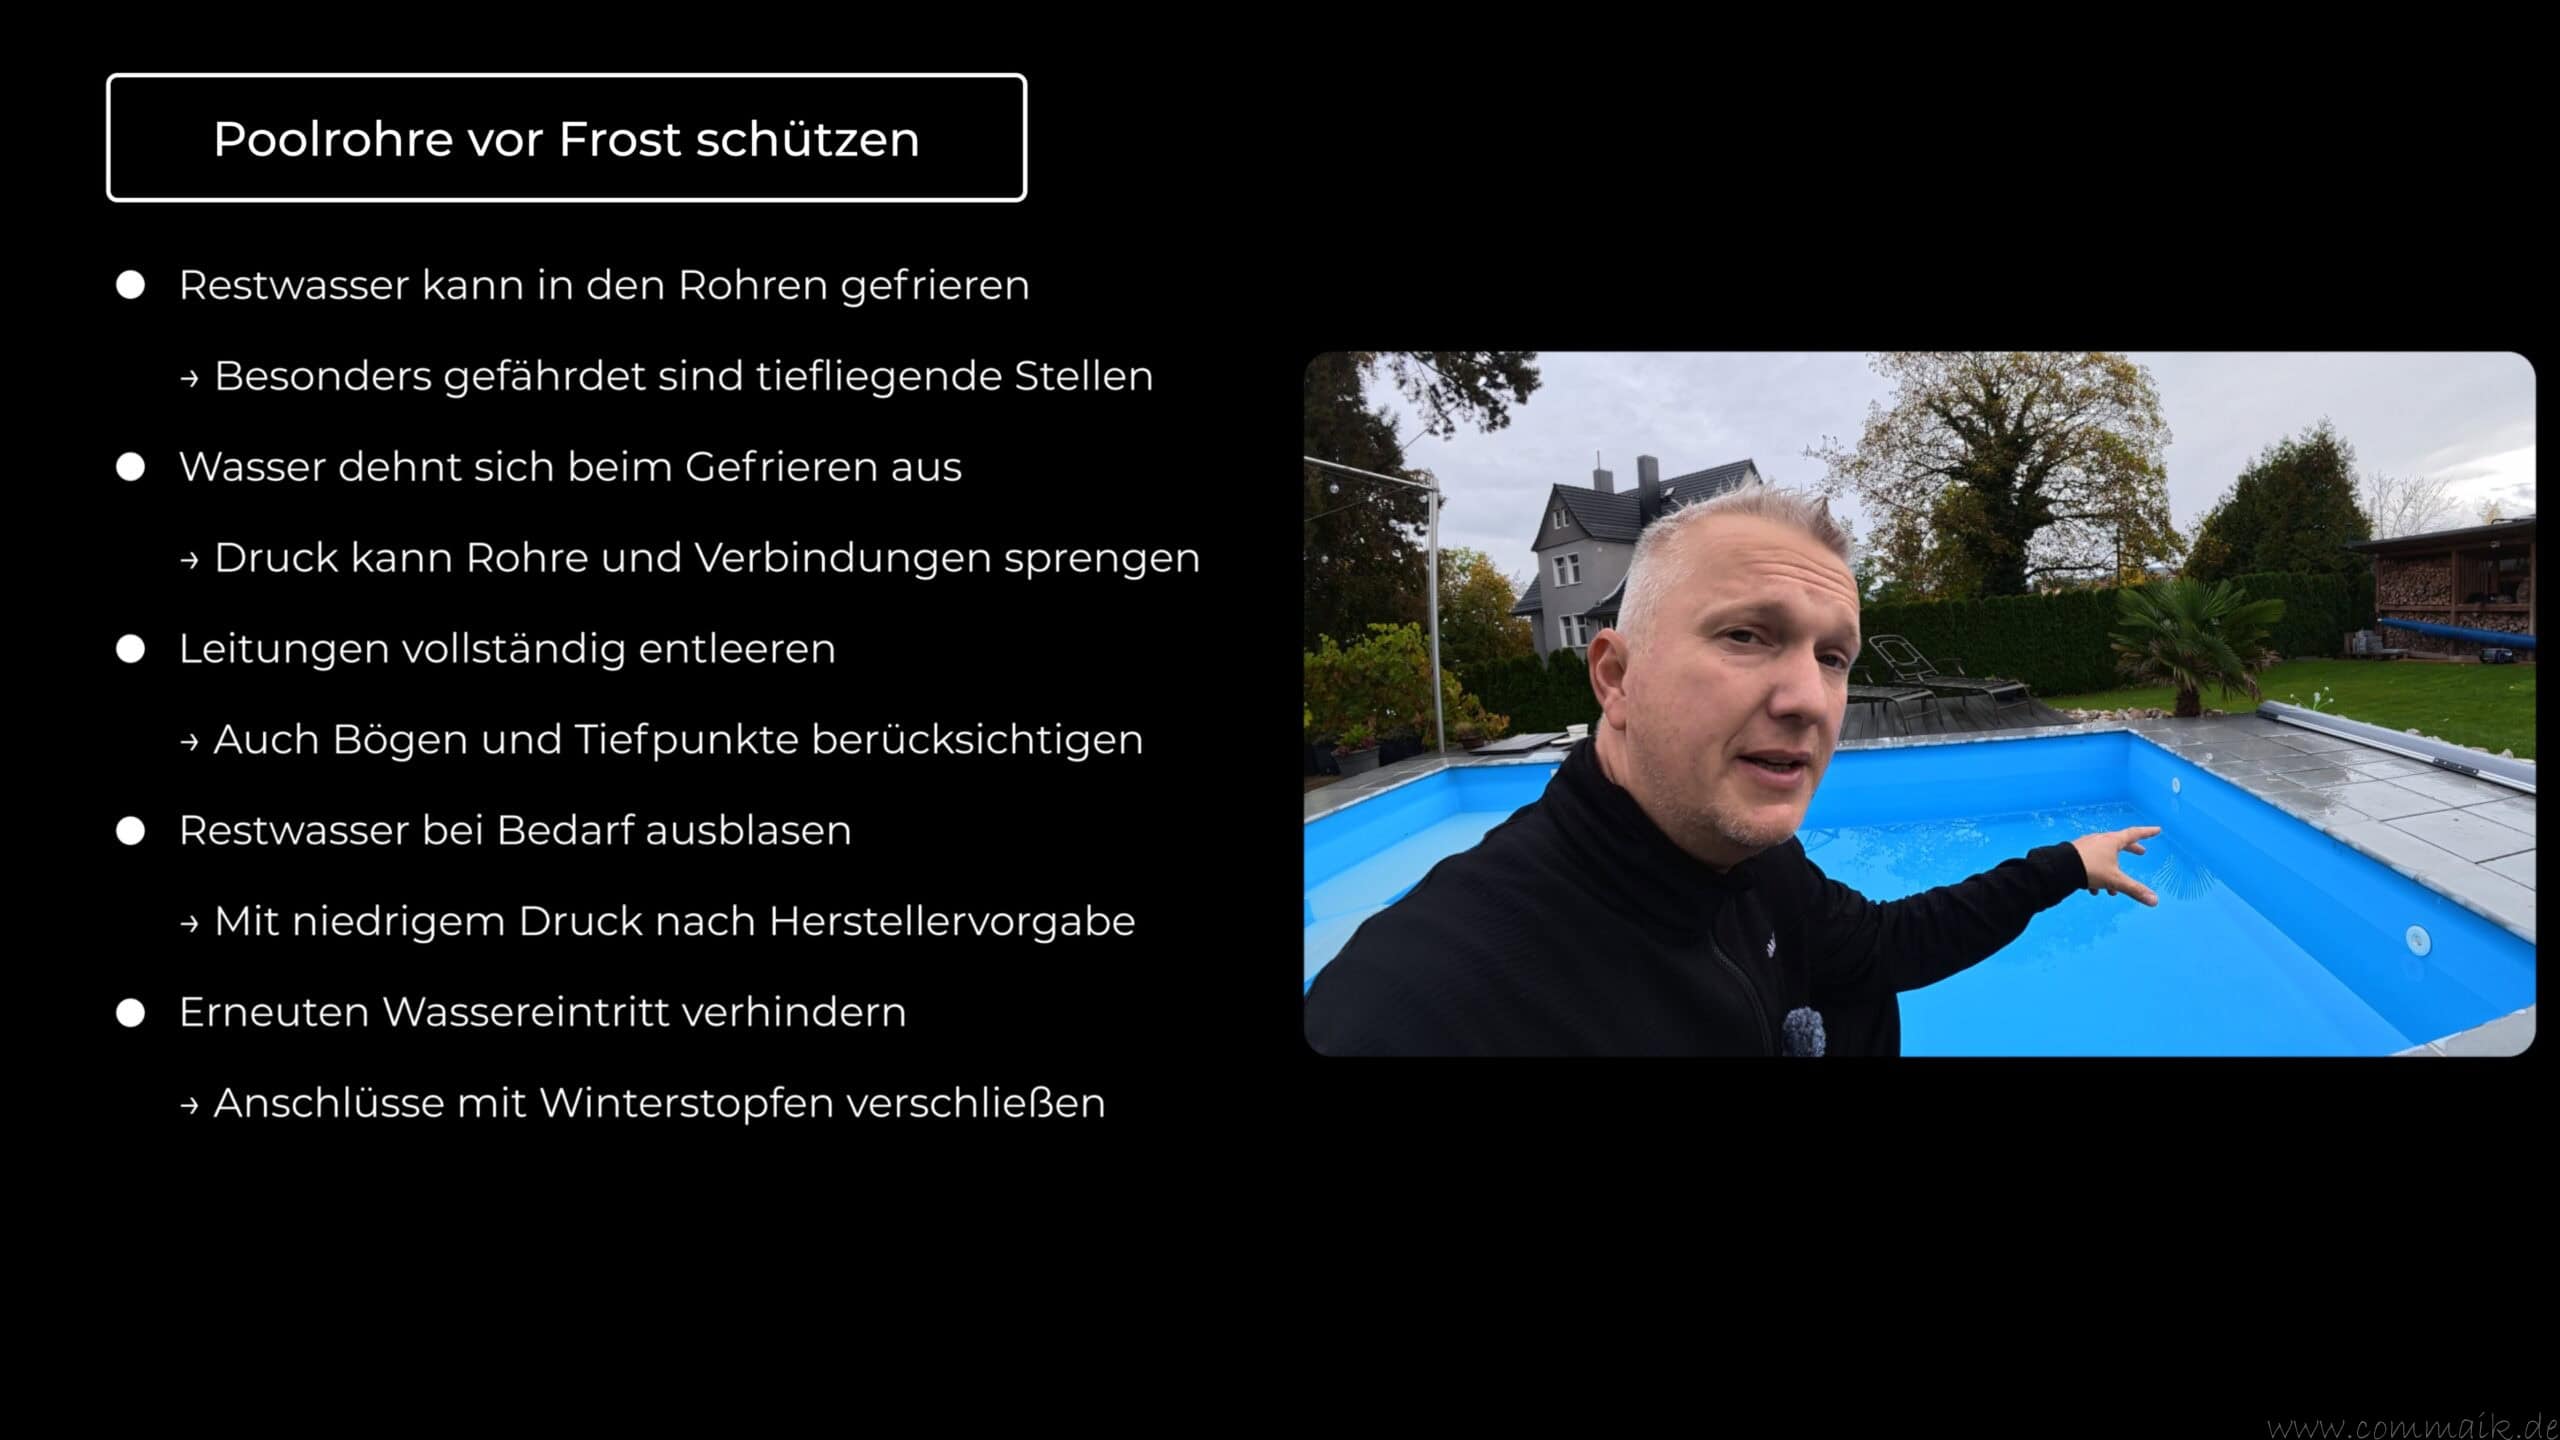
Water expands when it freezes. In closed or improperly filled components, this can create pressure that may damage pipes, fittings, or housings. Therefore, part of winterizing involves draining the circulation system as completely as possible.
After lowering the unit, I sealed my inlet nozzles with matching blind caps. On the technical side, I left the designated drain lines open.
It is not enough to simply drain water at an easily accessible location. Low points, bends, and closed-off sections must also be taken into account. An open screw connection does not necessarily mean that the entire line is empty.
Drain the skimmer and protect open connections
On my skimmer, the connection to the decommissioned piping was sealed, while the designated overflow remained open. This allowed the water that had accumulated there to drain away.
I also took open pipe ends into account. I’d already had mice in the piping once before. That had been a very unpleasant surprise when the system was restarted.
For me, therefore, protection against animals was essential, without blocking necessary drainage or ventilation pathways. “Seal all openings tightly” would have been just as inappropriate as “leave everything completely open.” The function of each connection was crucial.

- Hochwertig verarbeitet
- Mit Sand beschwert
- Plus Verbindungshaken
- Optimale Konstruktion zur Wärmeaufnahme
- Größe: ca. 40 x 8 x 8 cm
Ice Compression Pad: How I Relieved Pressure on My Pelvis When Ice Formed
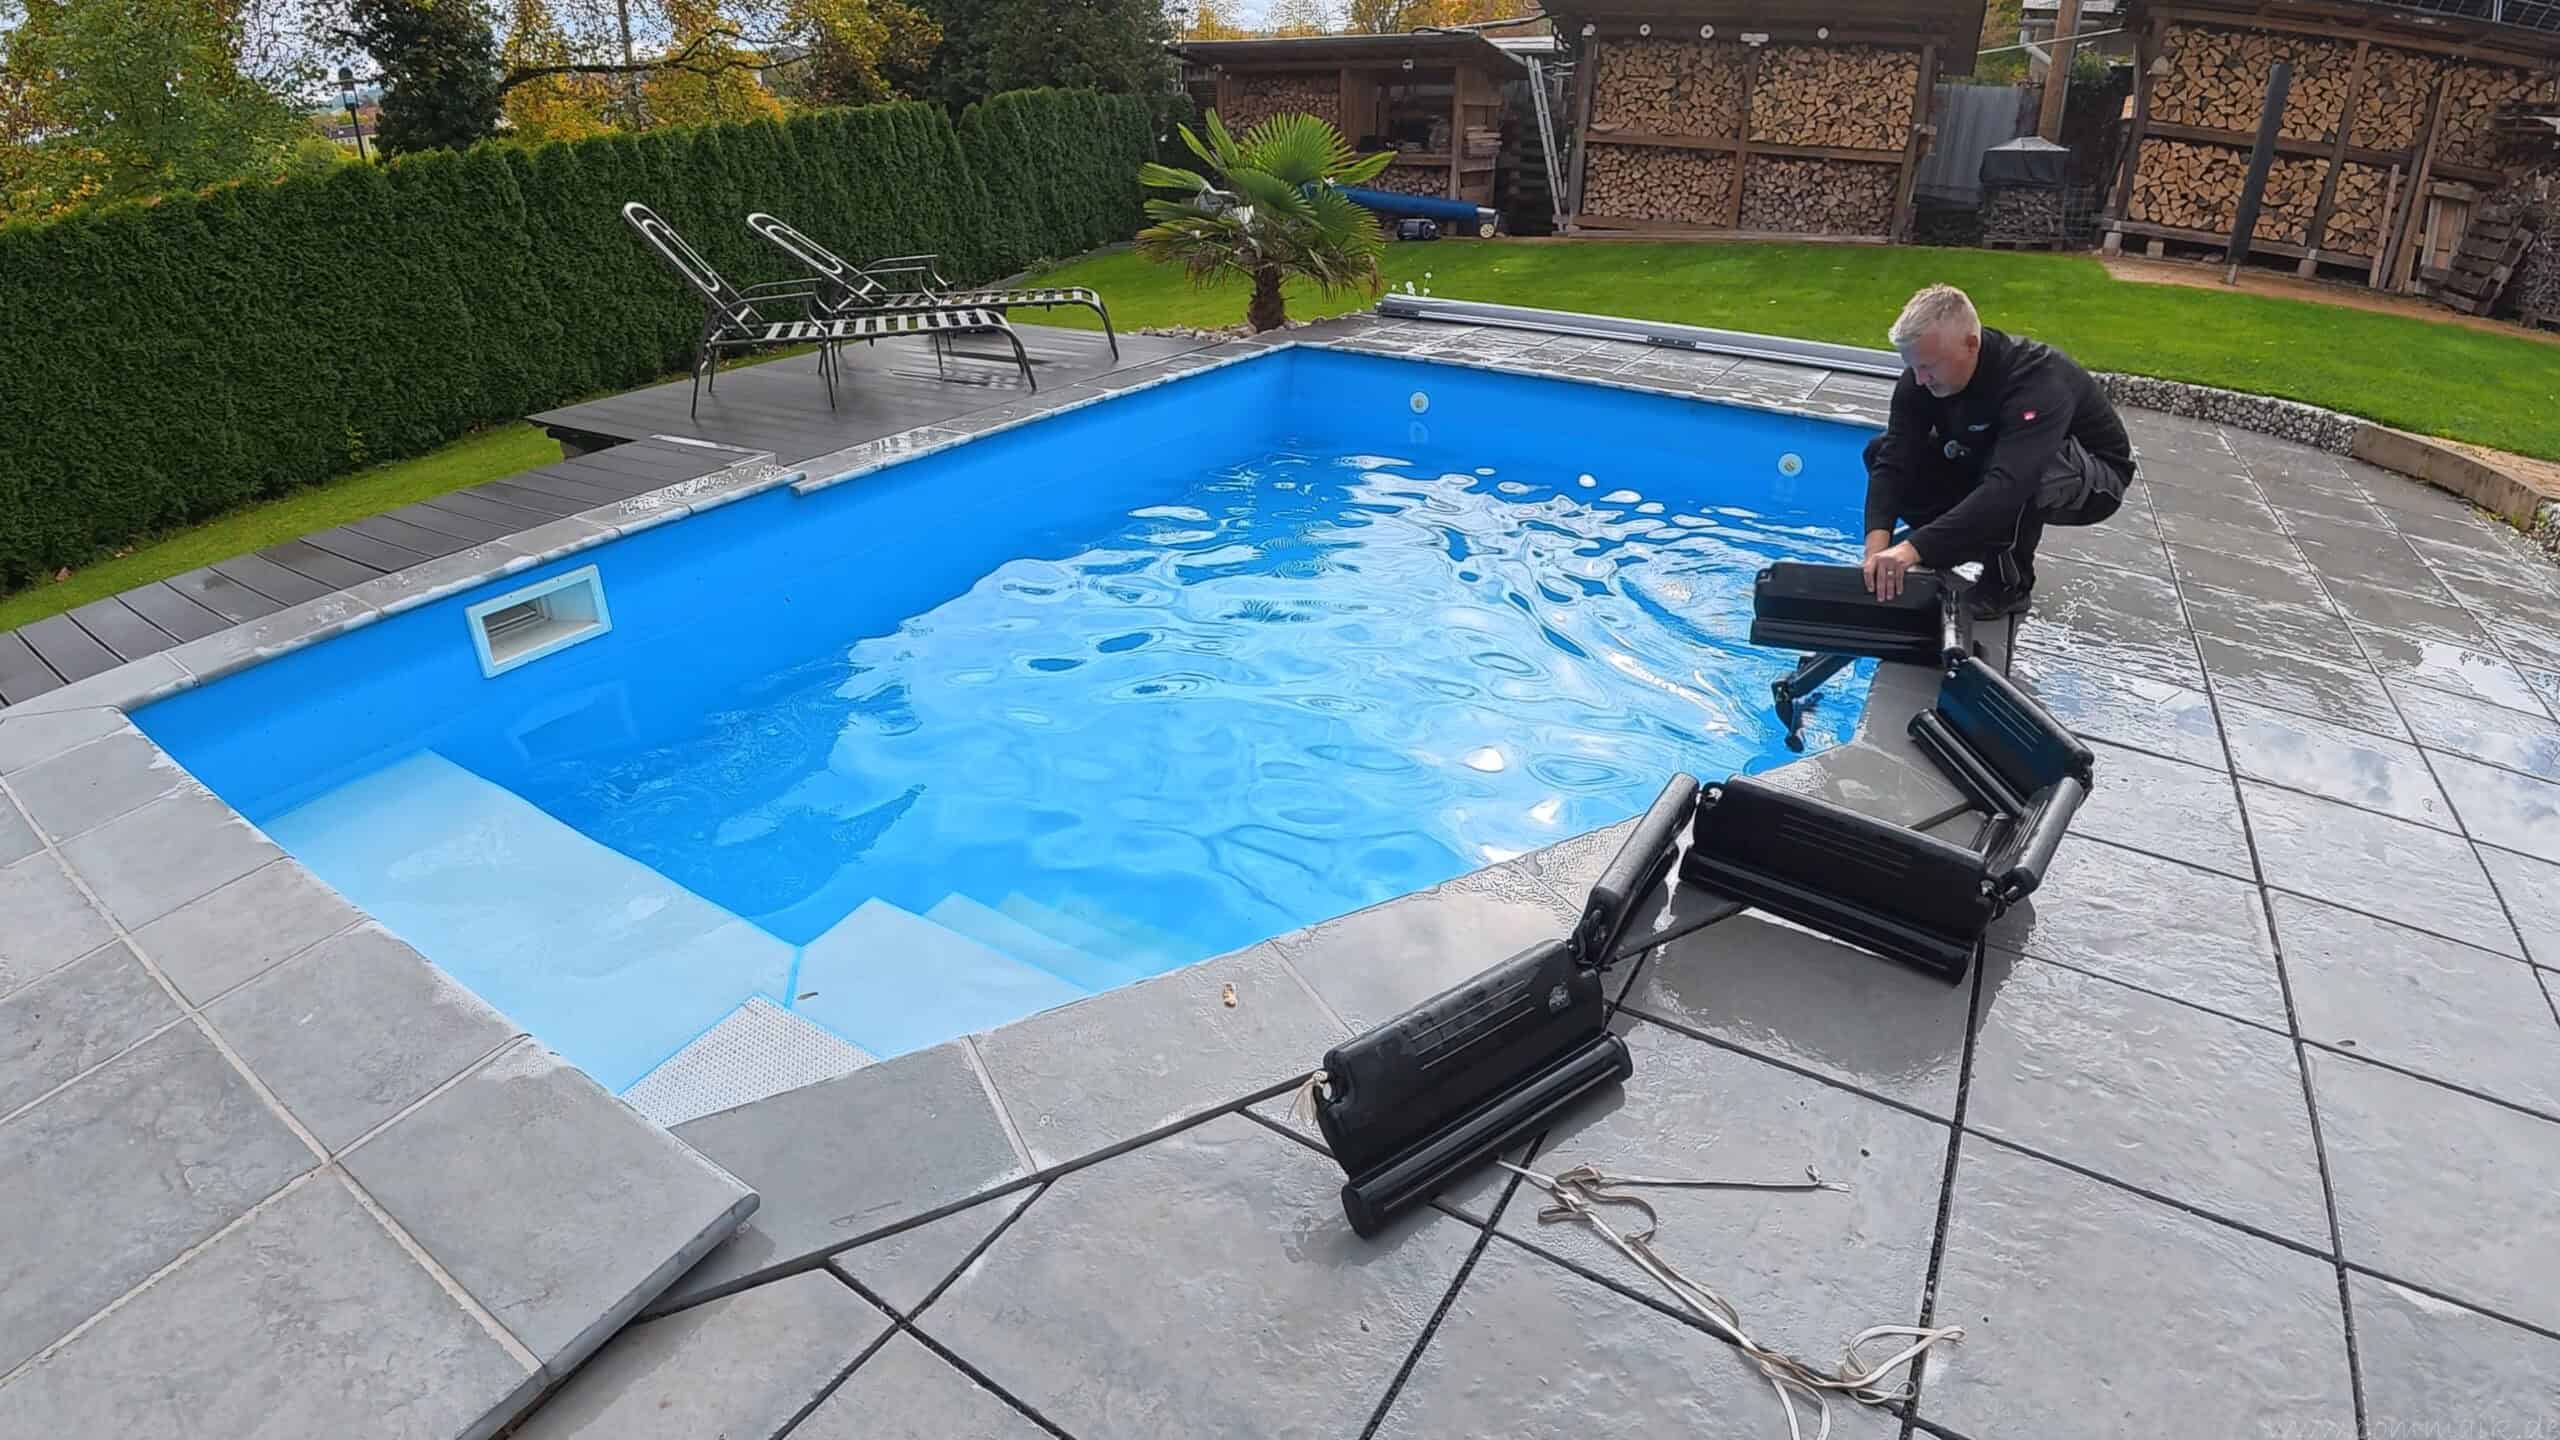
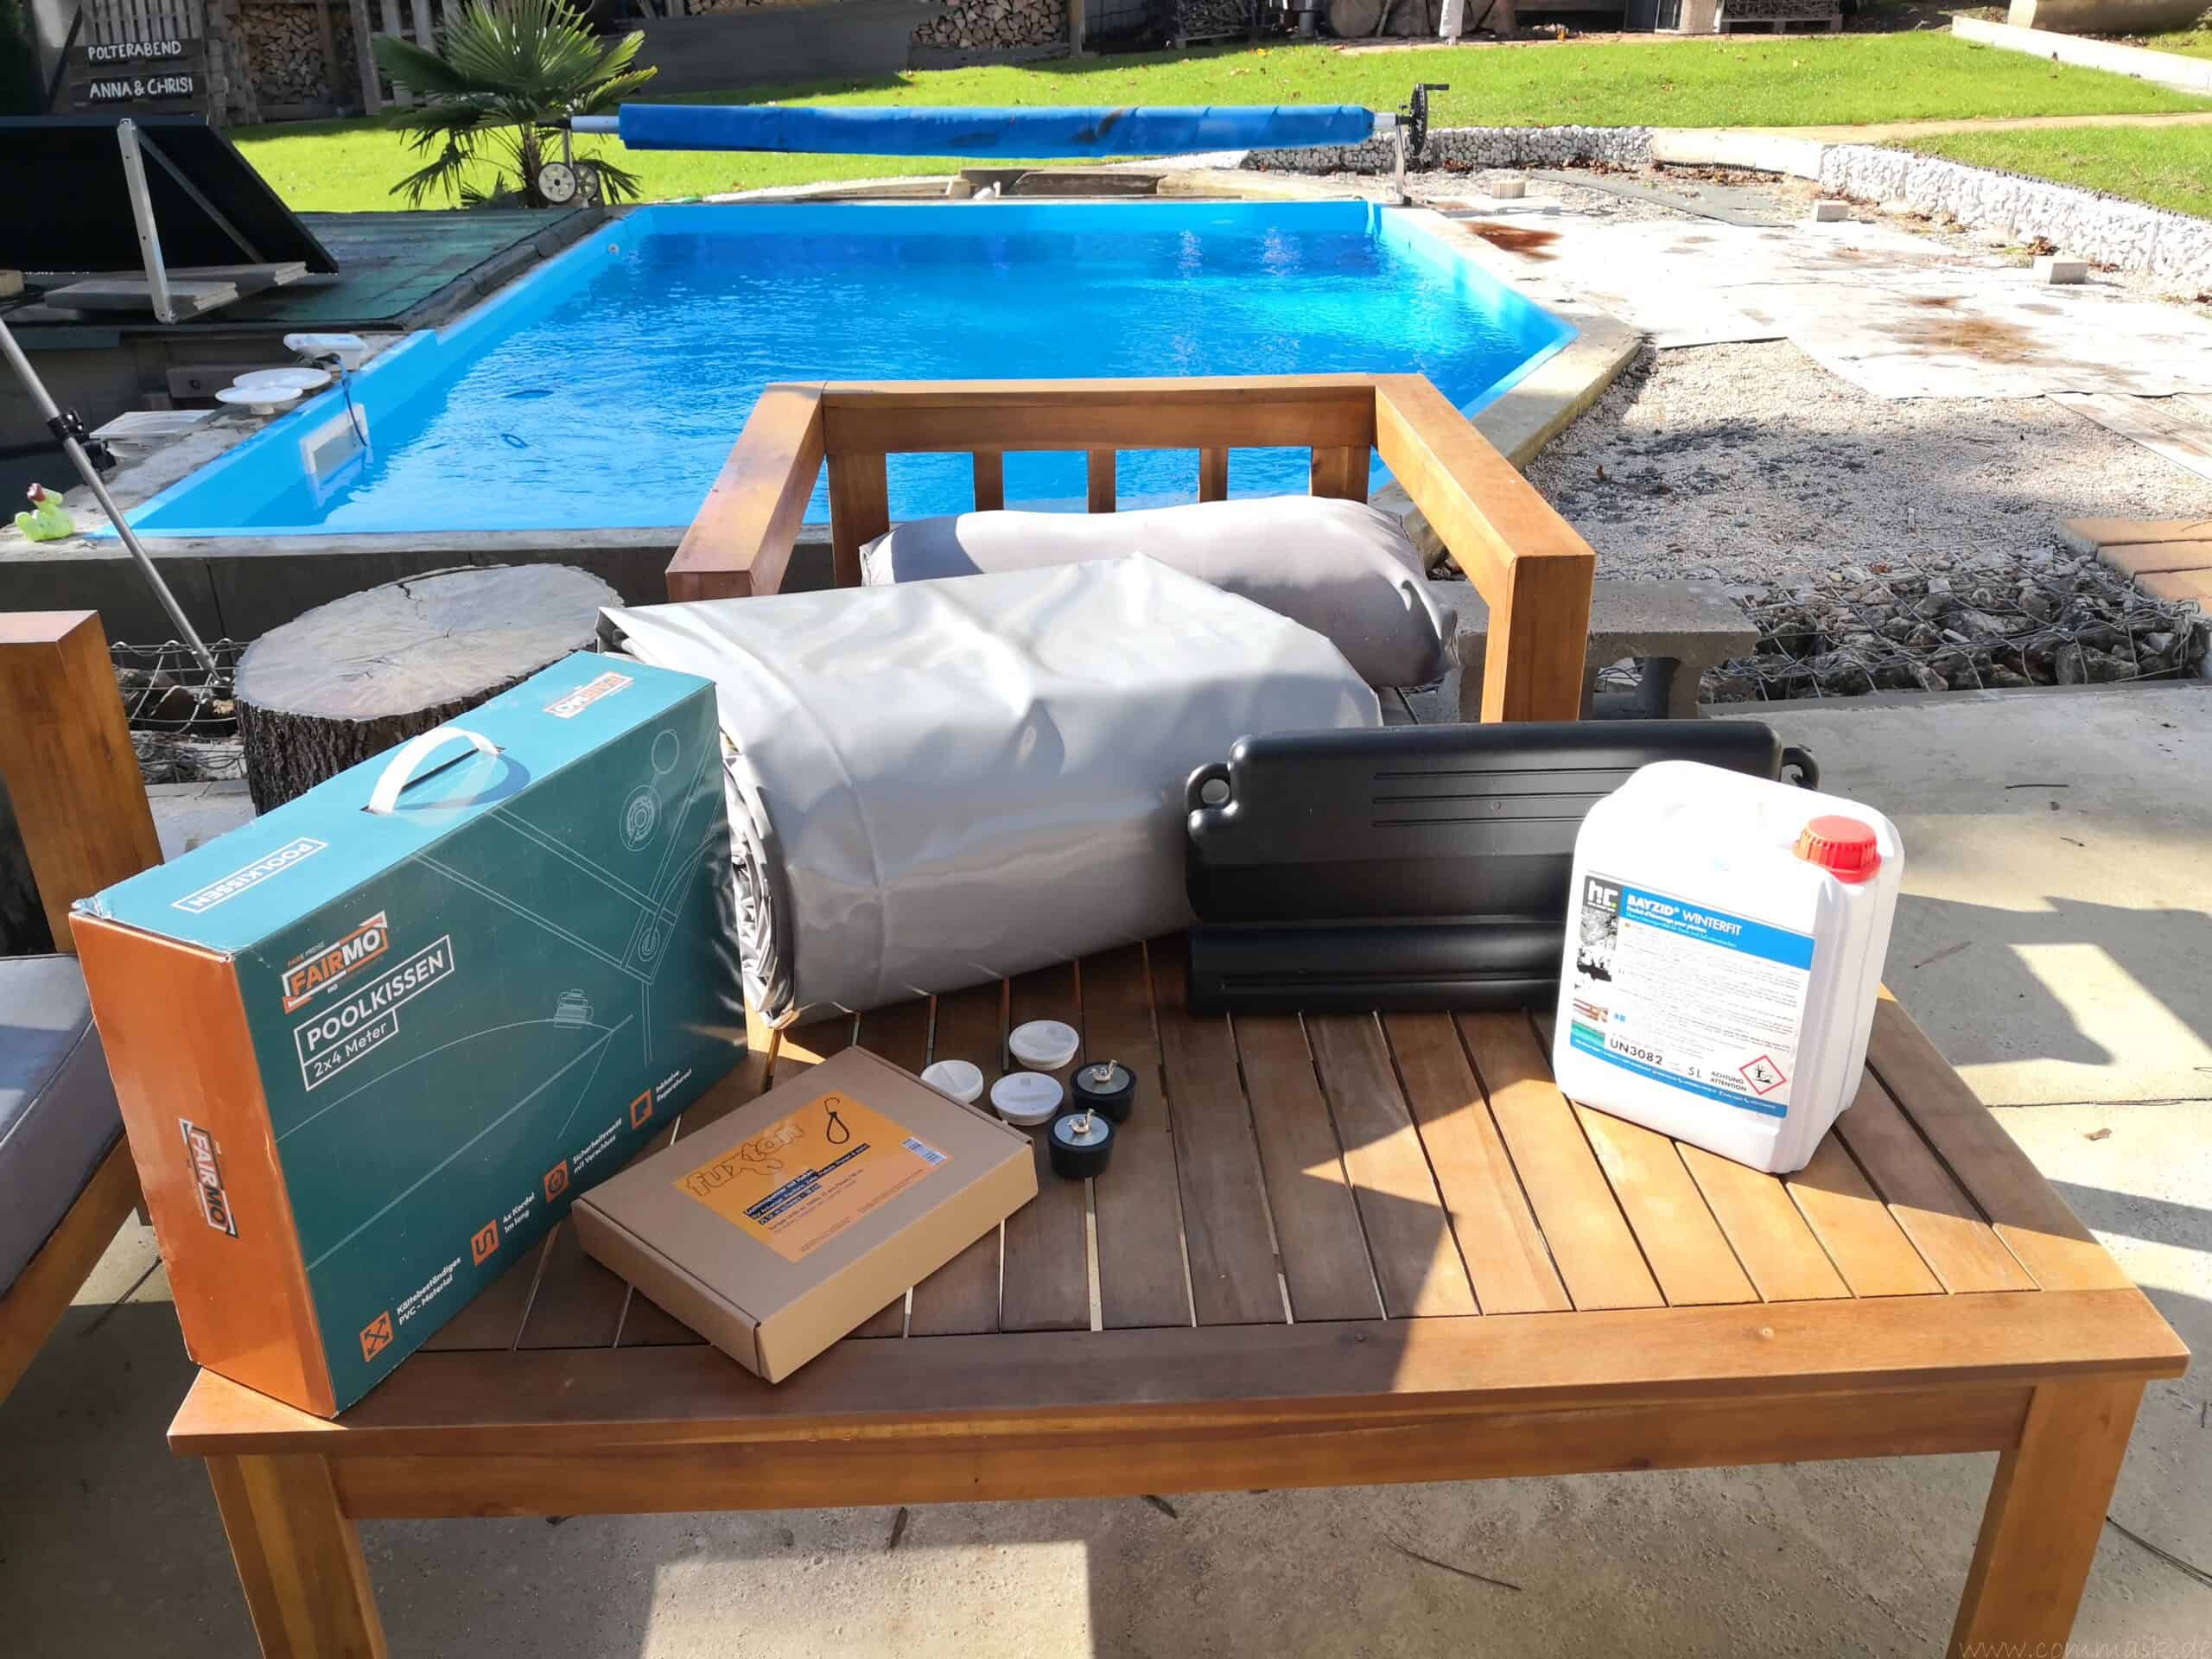
Before I put the winter cover on, I placed the ice-pressure pads in the water. The plastic elements are weighted at the bottom, which keeps them upright on the surface. Their upper, air-filled section is flexible and acts as a buffer against the ice pressure that builds up.
How Ice Pressure Pads Work
Water expands when it freezes. If a layer of ice forms, this can exert forces on the pool walls and the built-in components. The cushions provide an area within this ice surface that can give way under pressure.
When frozen, the elements are encased in ice. If lateral pressure is applied, their plastic bodies deform and the air-filled interior is compressed. As a result, they absorb part of the load that would otherwise act on the rigid basin surfaces.
The weight in the lower section ensures that the floats do not simply lie flat on the water. Their deformable section remains where the ice forms.
Join the padding and distribute it throughout the basin
I connected the individual elements using their hooks to form a continuous row and placed this on the water’s surface. The arrangement and the number of elements required depended on the shape of the tank and the specifications of the system used. Common arrangements include, for example, a diagonal layout or rows along one long side and one short side.
The ice-pressure pads do not keep the pool ice-free. Even with them in place, a solid layer of ice can still form. They serve as flexible buffers within this area and thus complement my other winter preparation measures.
I therefore continued to completely drain the pipes and sealed the inlet nozzles to prevent water from entering again. Maintaining the proper water level to protect my pool lighting also remained important. The cushions relieve pressure on the pool, but they do not provide frost protection for the entire system.
Covering the Pool: My New Winter Cover with Aluminum Struts
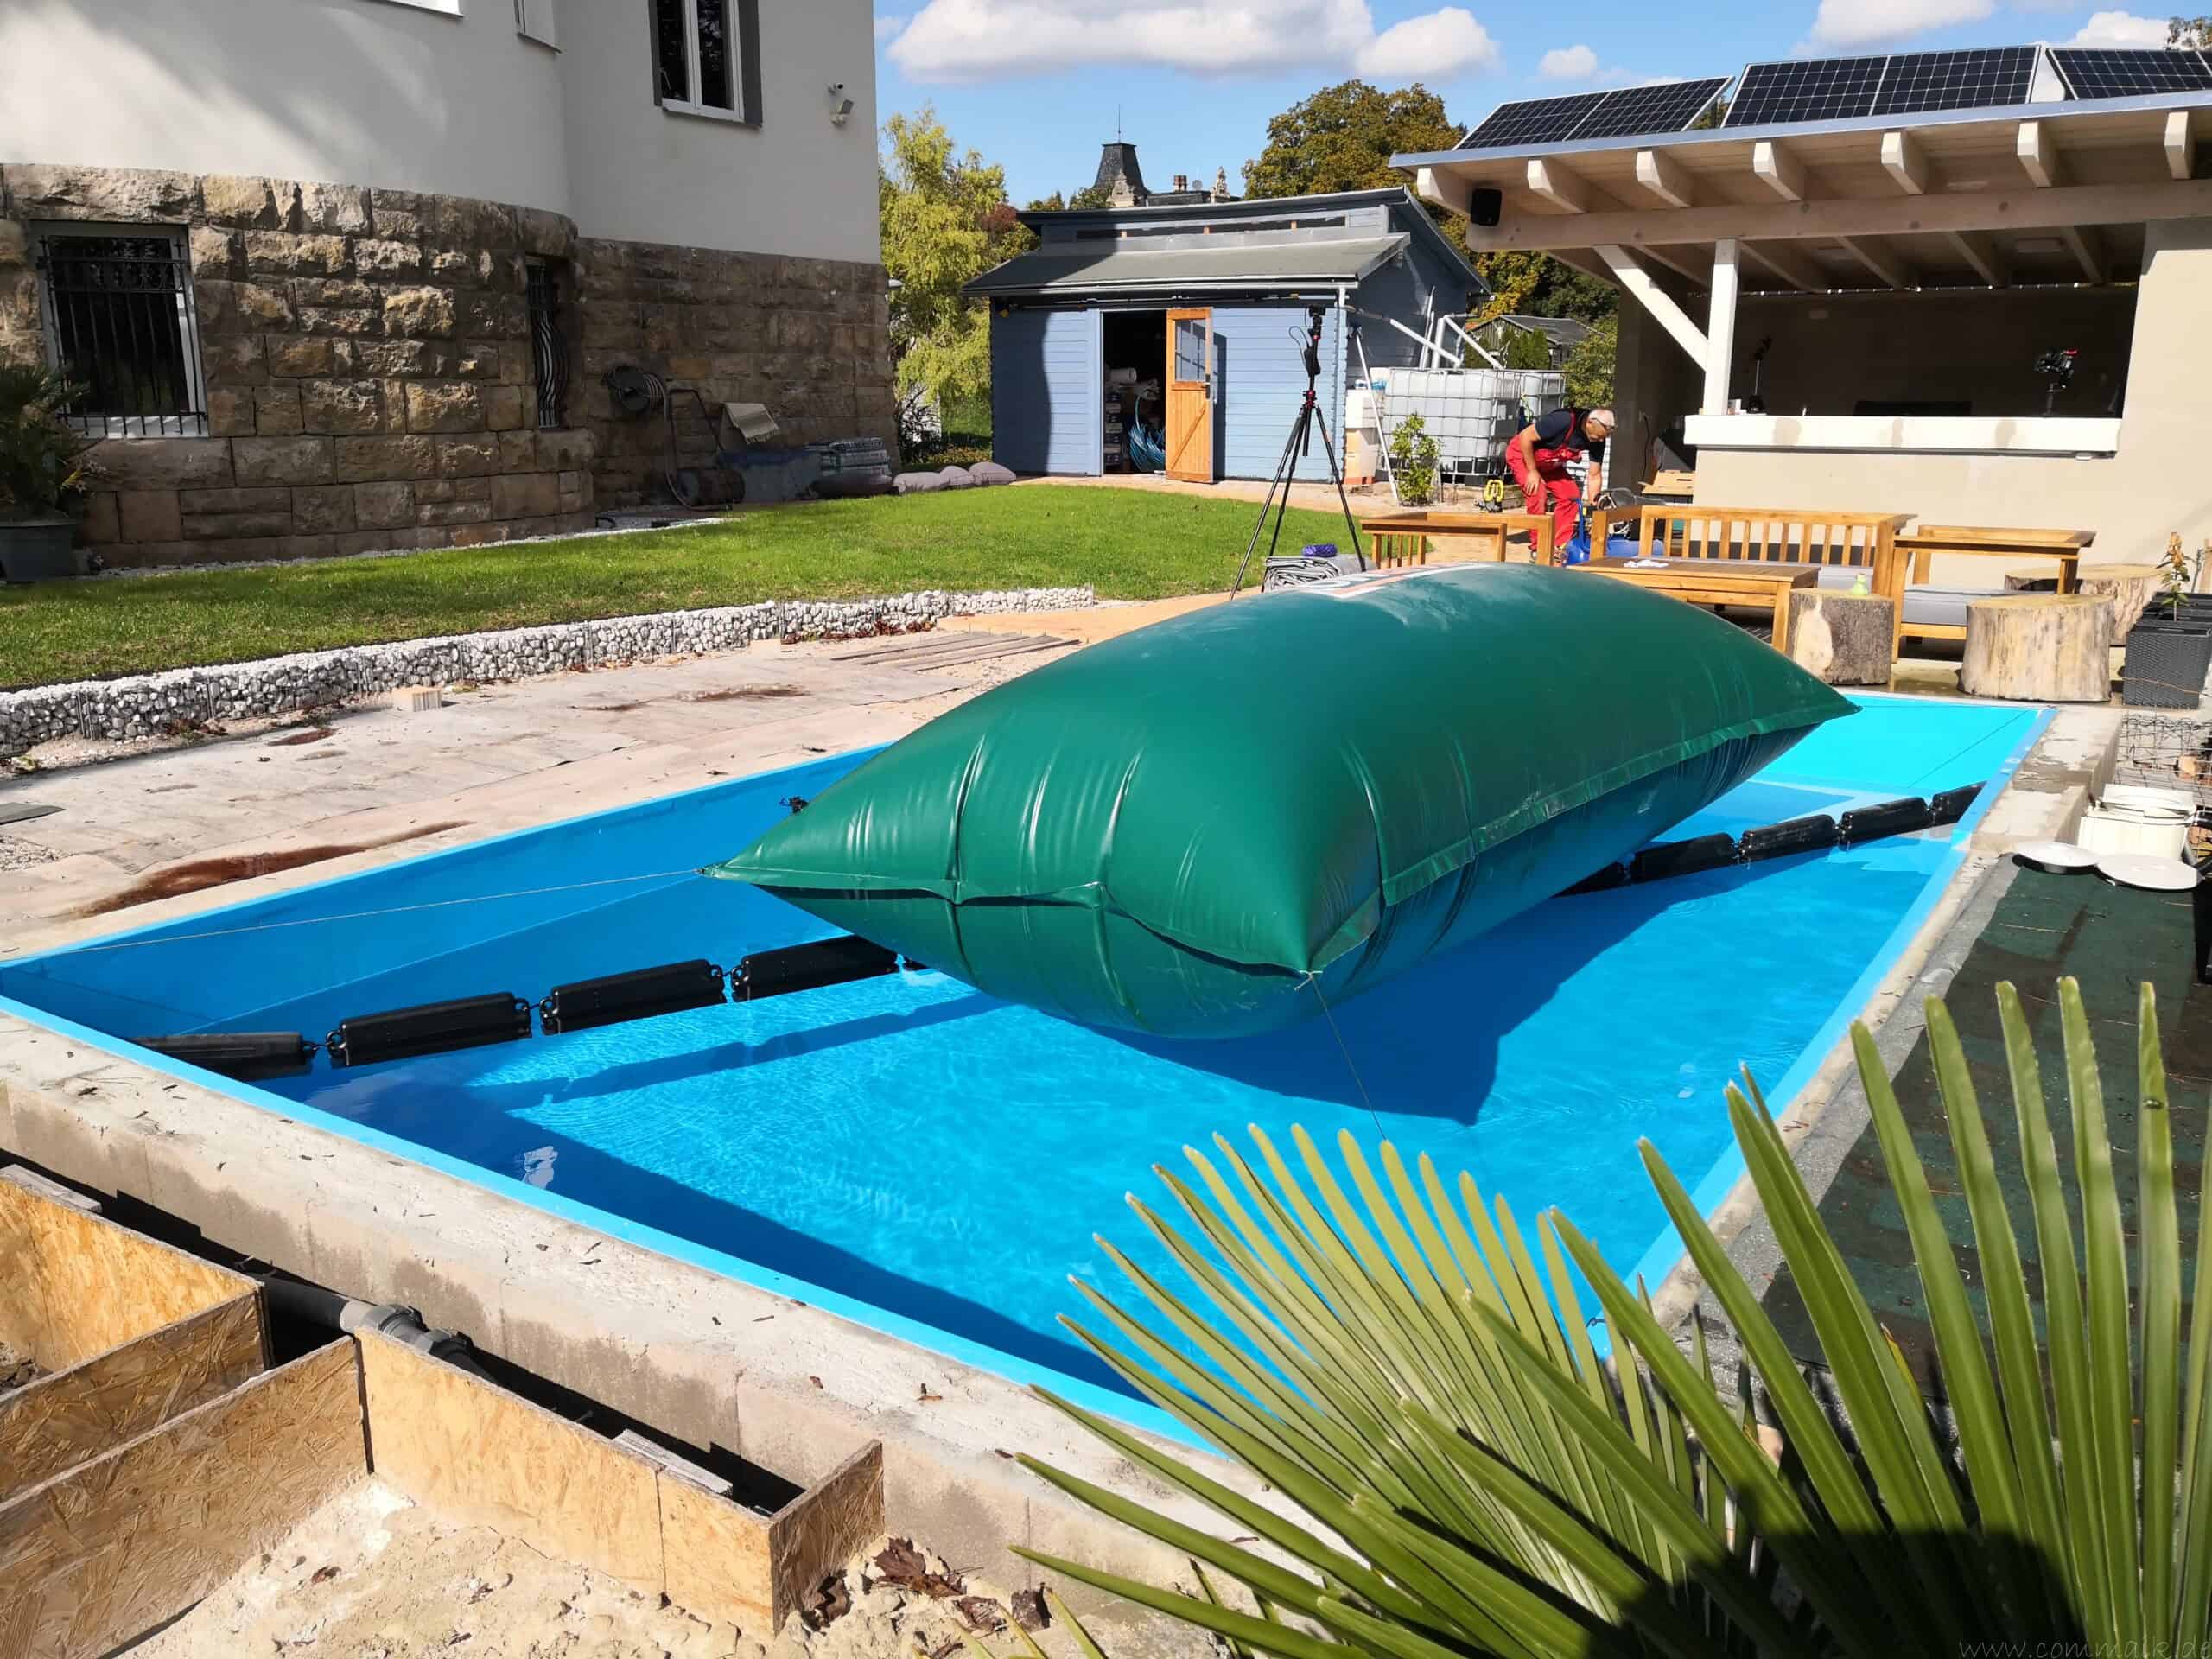
In recent years, I had covered my pool with a heavy truck tarp and inflatable pool cushions. The largest cushion measured about four by two meters. It lifted the tarp in the middle so that rain and meltwater could run off to the sides as much as possible.
For the most part, this setup worked. However, depressions kept forming at the edges where water would collect. As the weight increased, the tarp was pulled further downward. As a result, I had to remove the pooled water regularly. I had already described these experiences in my post on winterizing the pool, installing pool equipment, and adjusting water parameters.
From XXL pool cushions to covers with fixed straps
With additional cushions, I was able to provide better support for specific areas. However, this made the setup more time-consuming: The cushions had to be inflated, distributed, and held in place under the tarp. I had documented my previous solution using the large air cushion in the post “How to Properly Winterize Your Pool with XXXL Pool Cushions.”
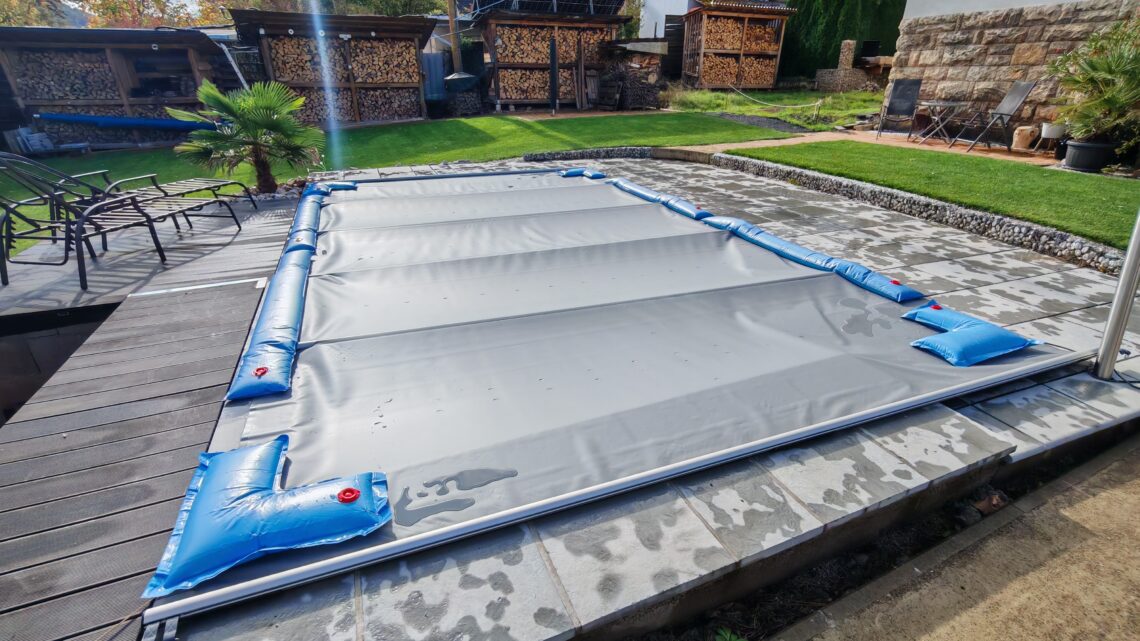
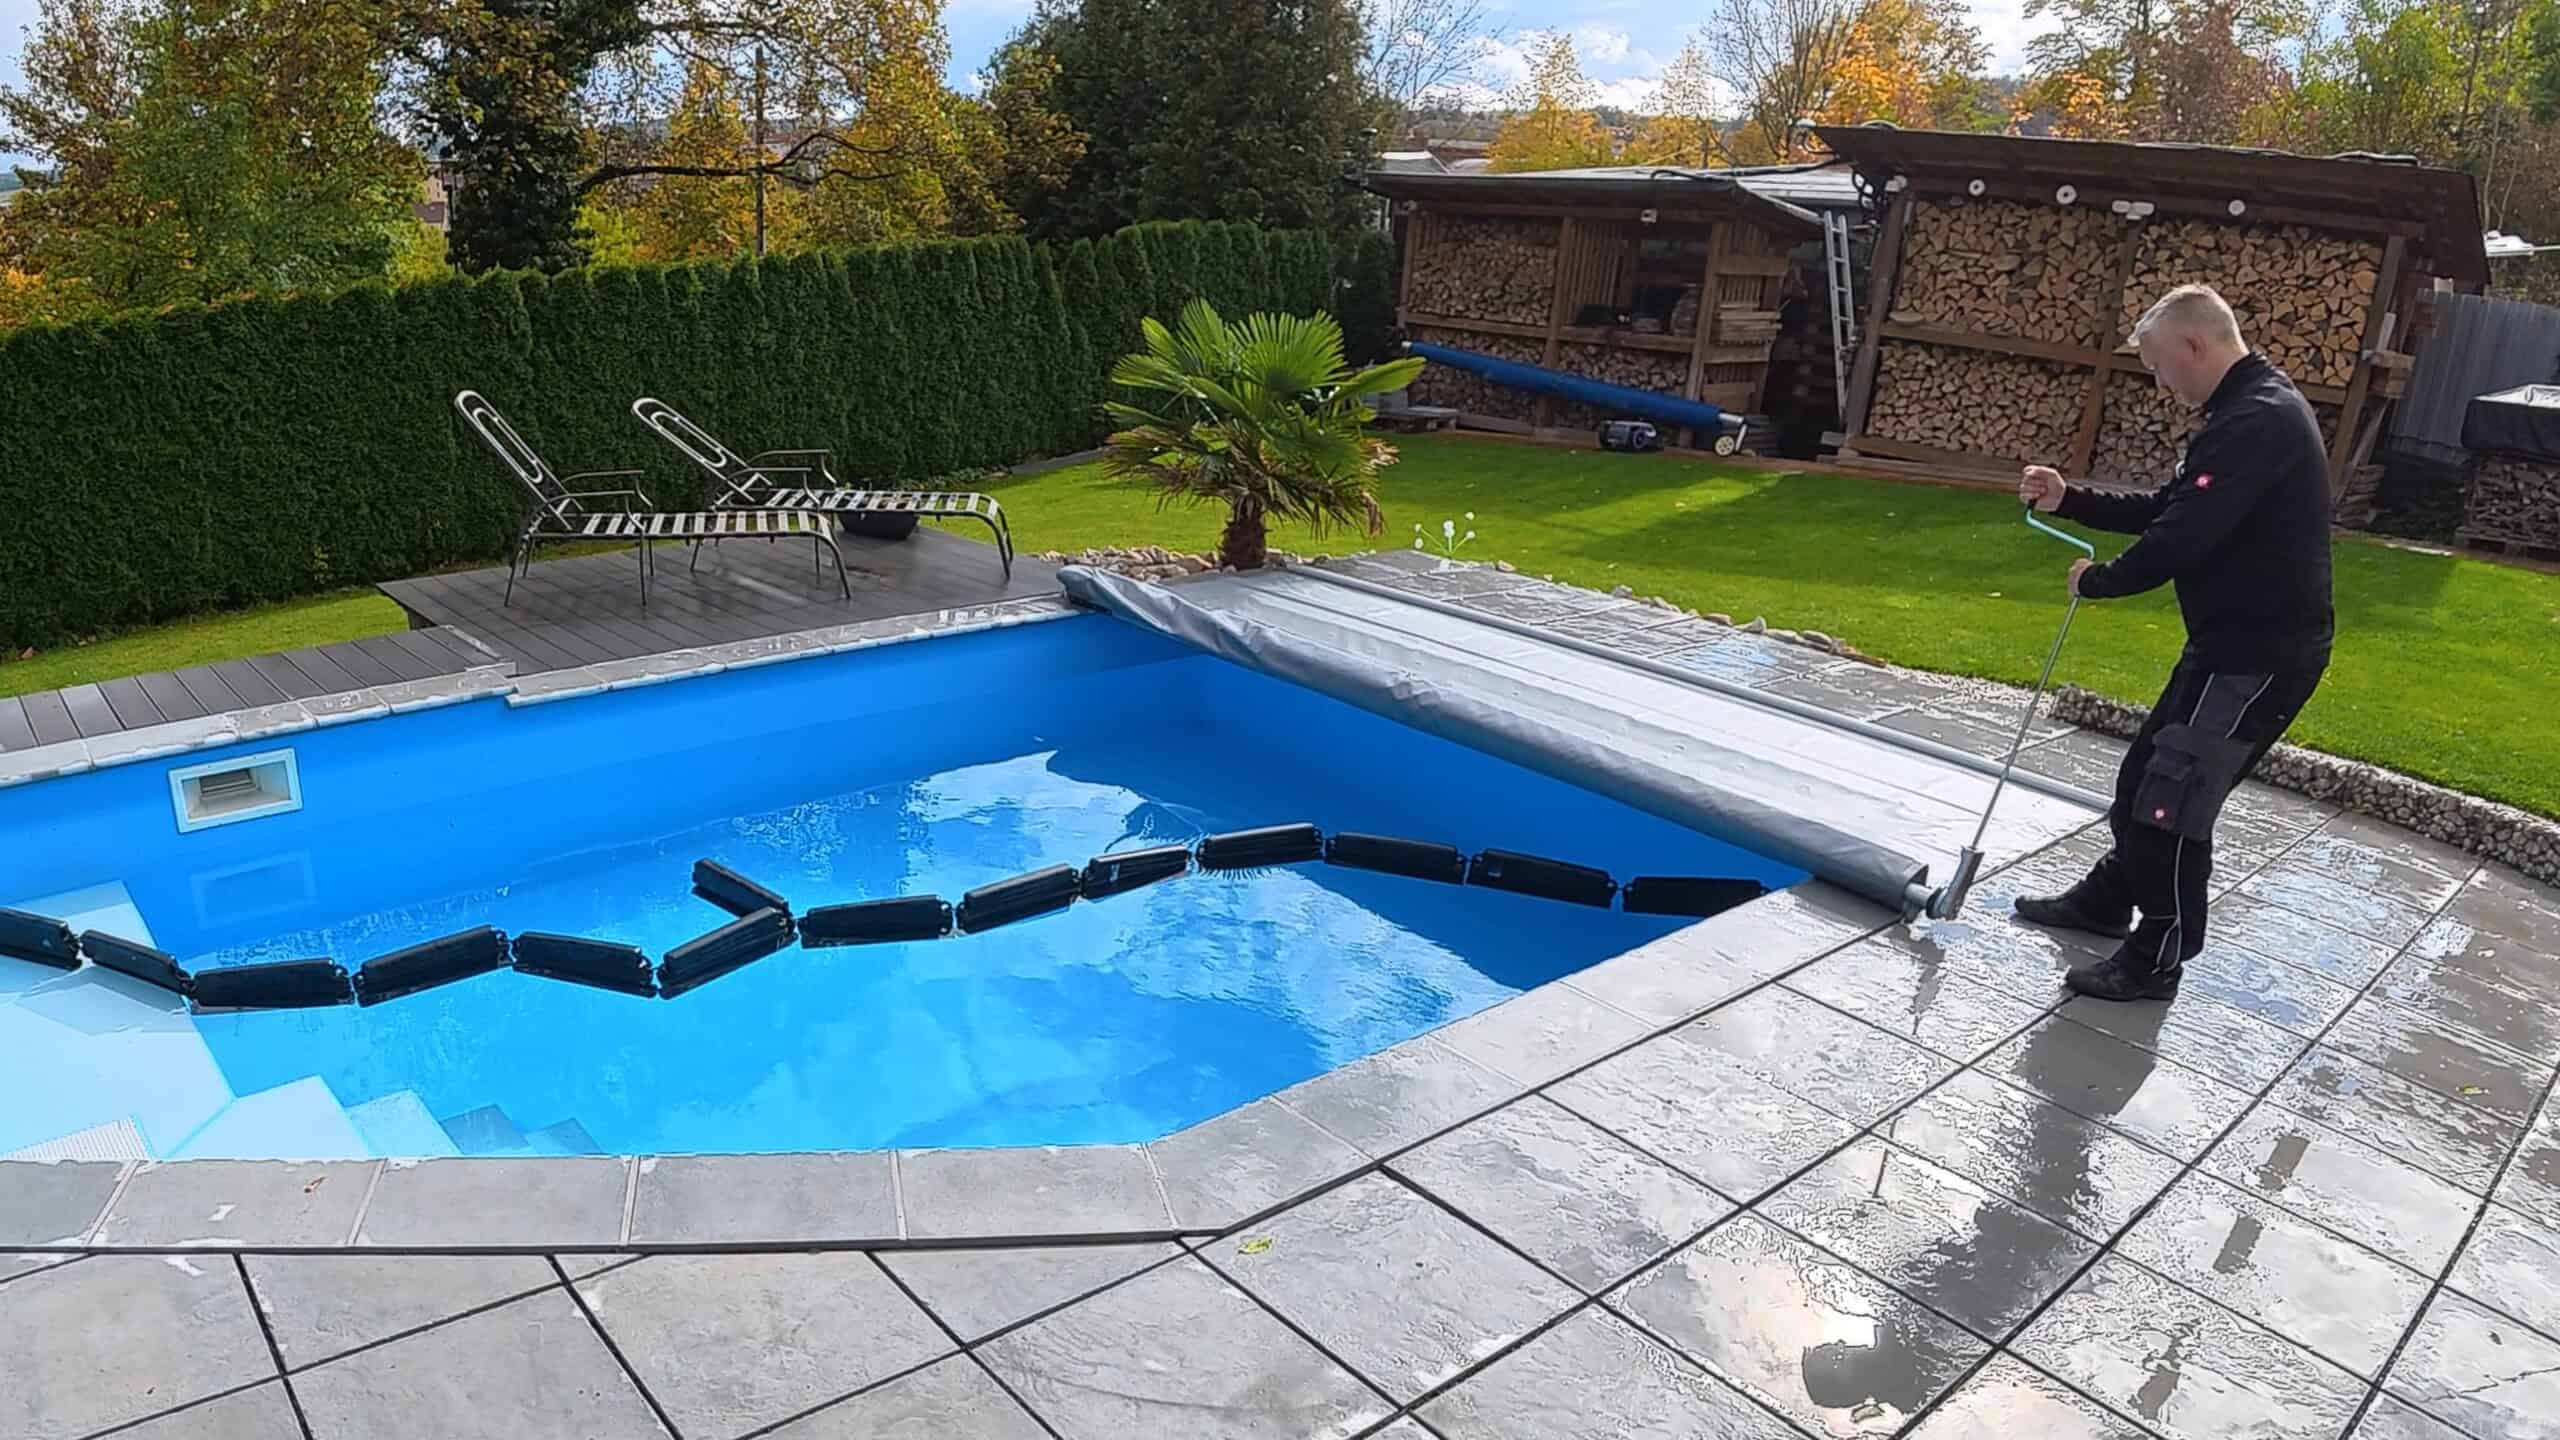
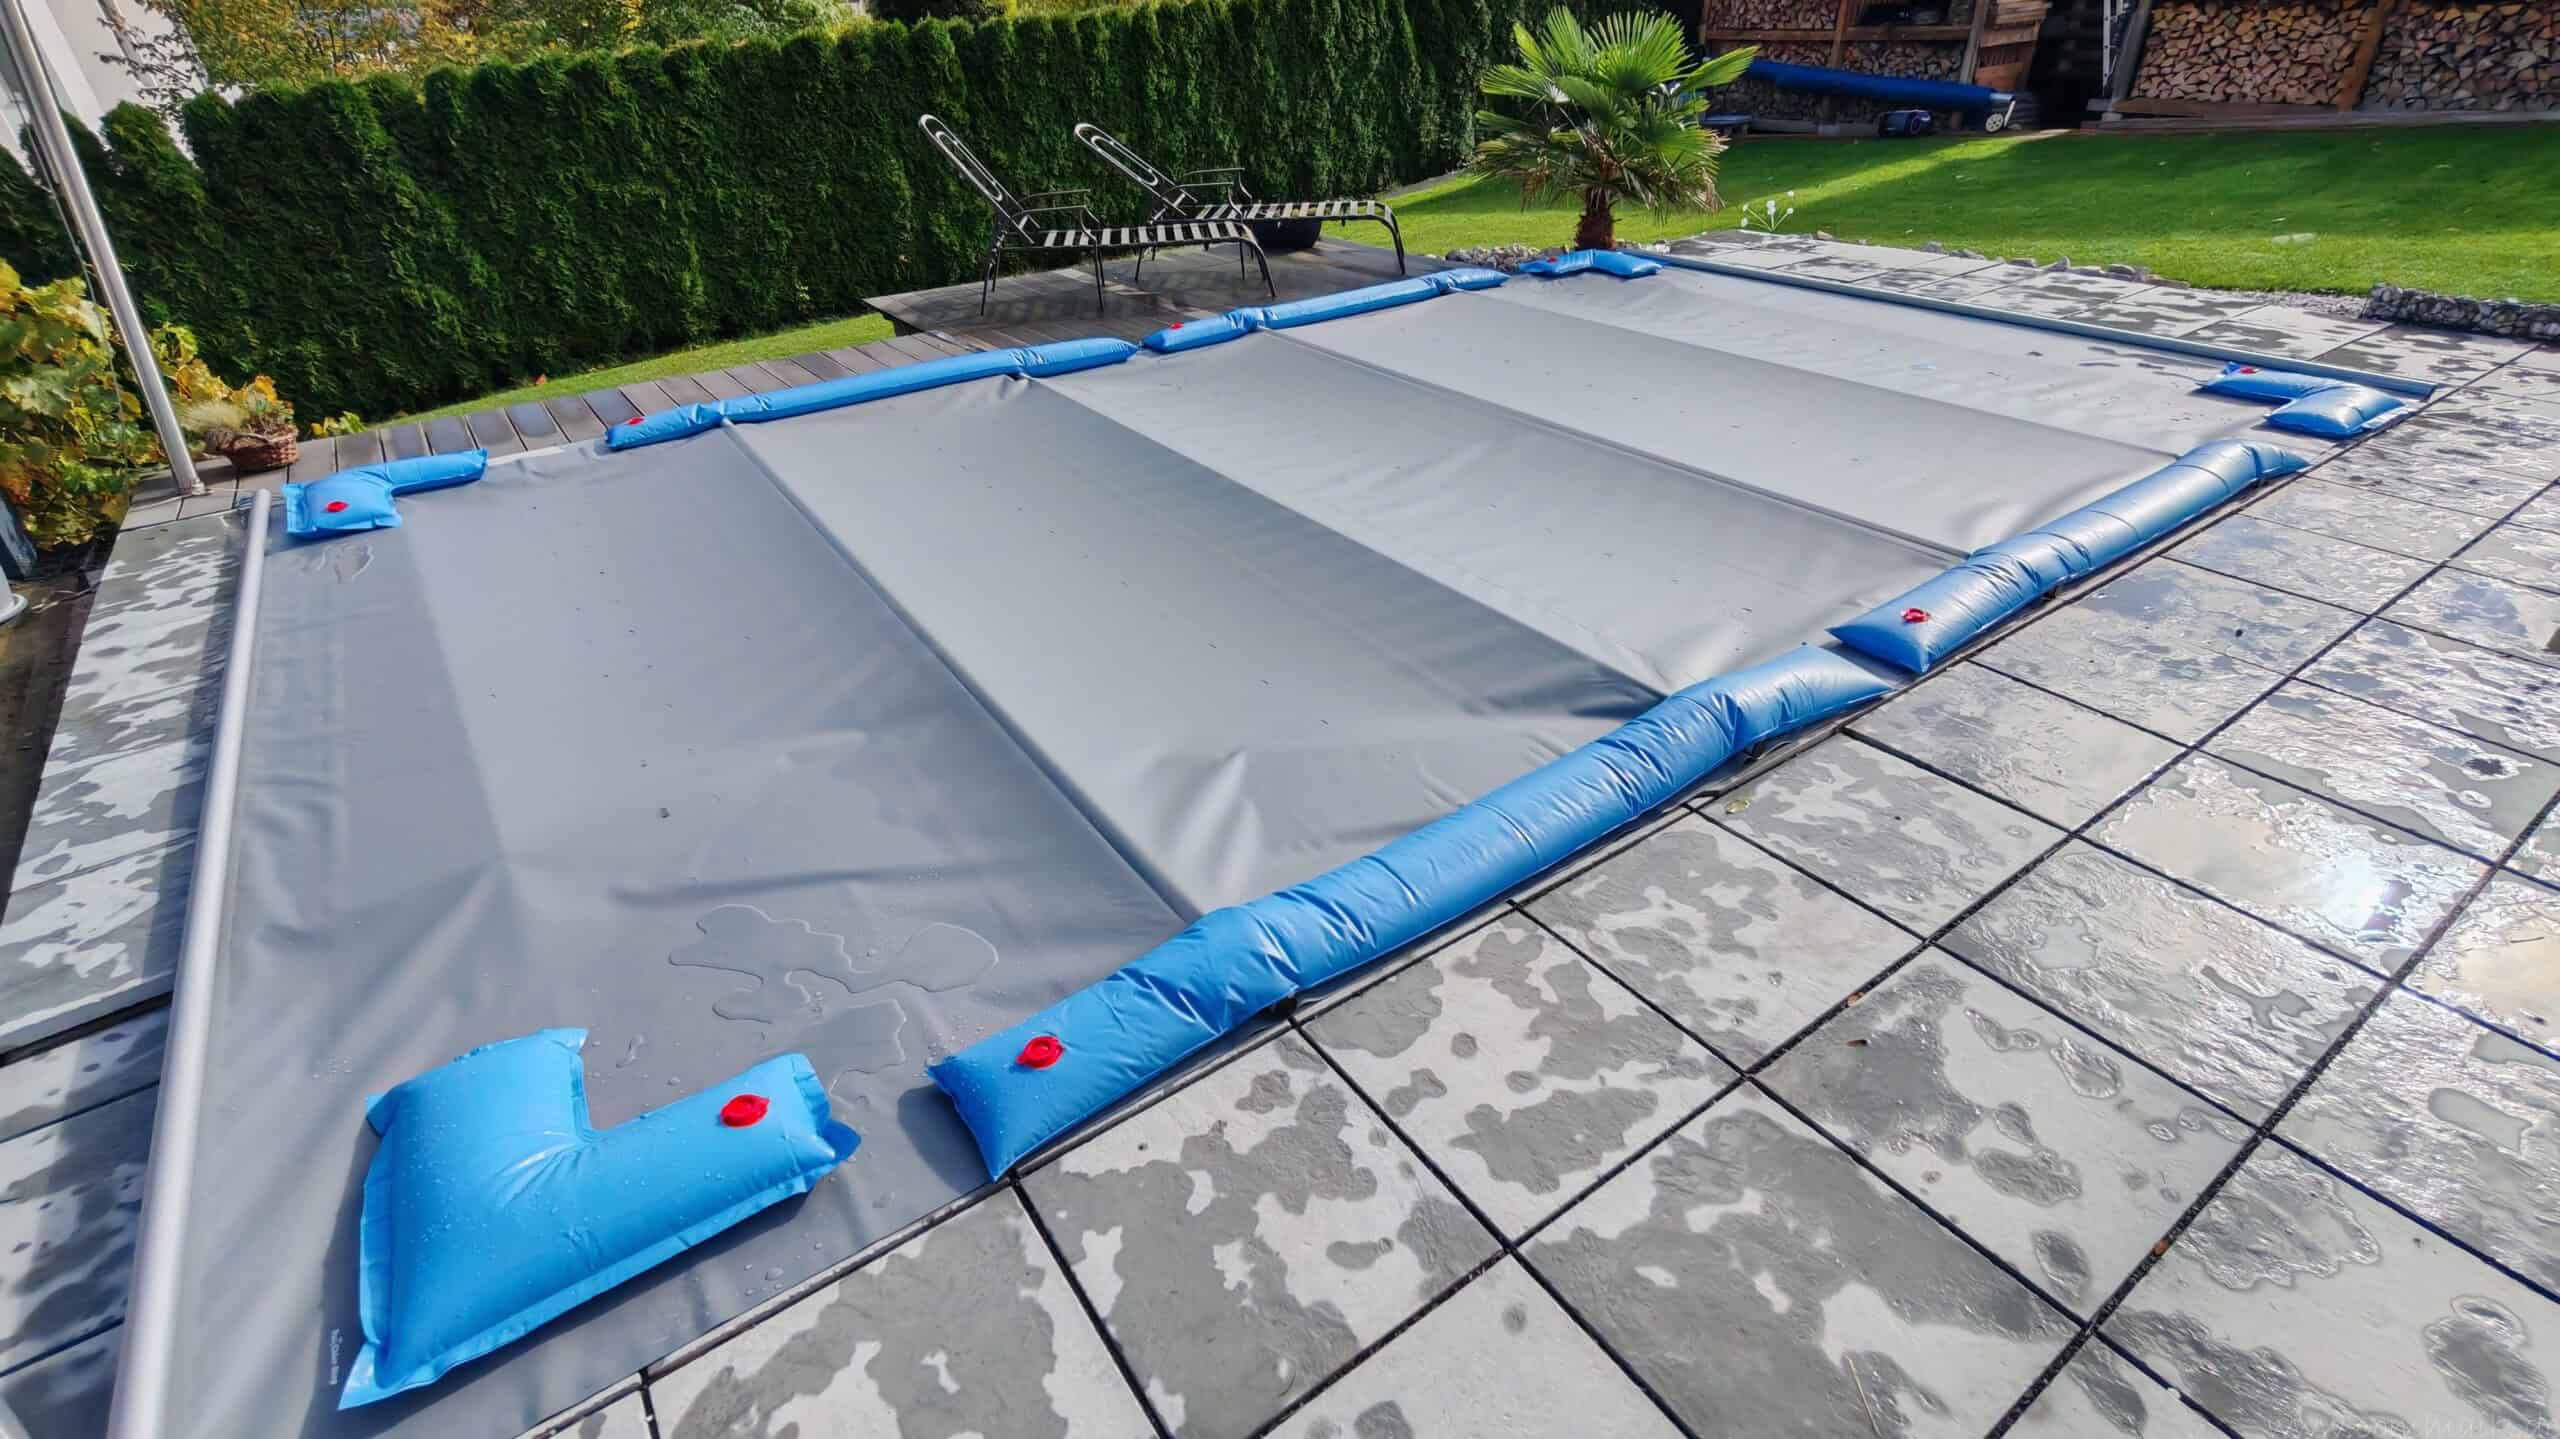
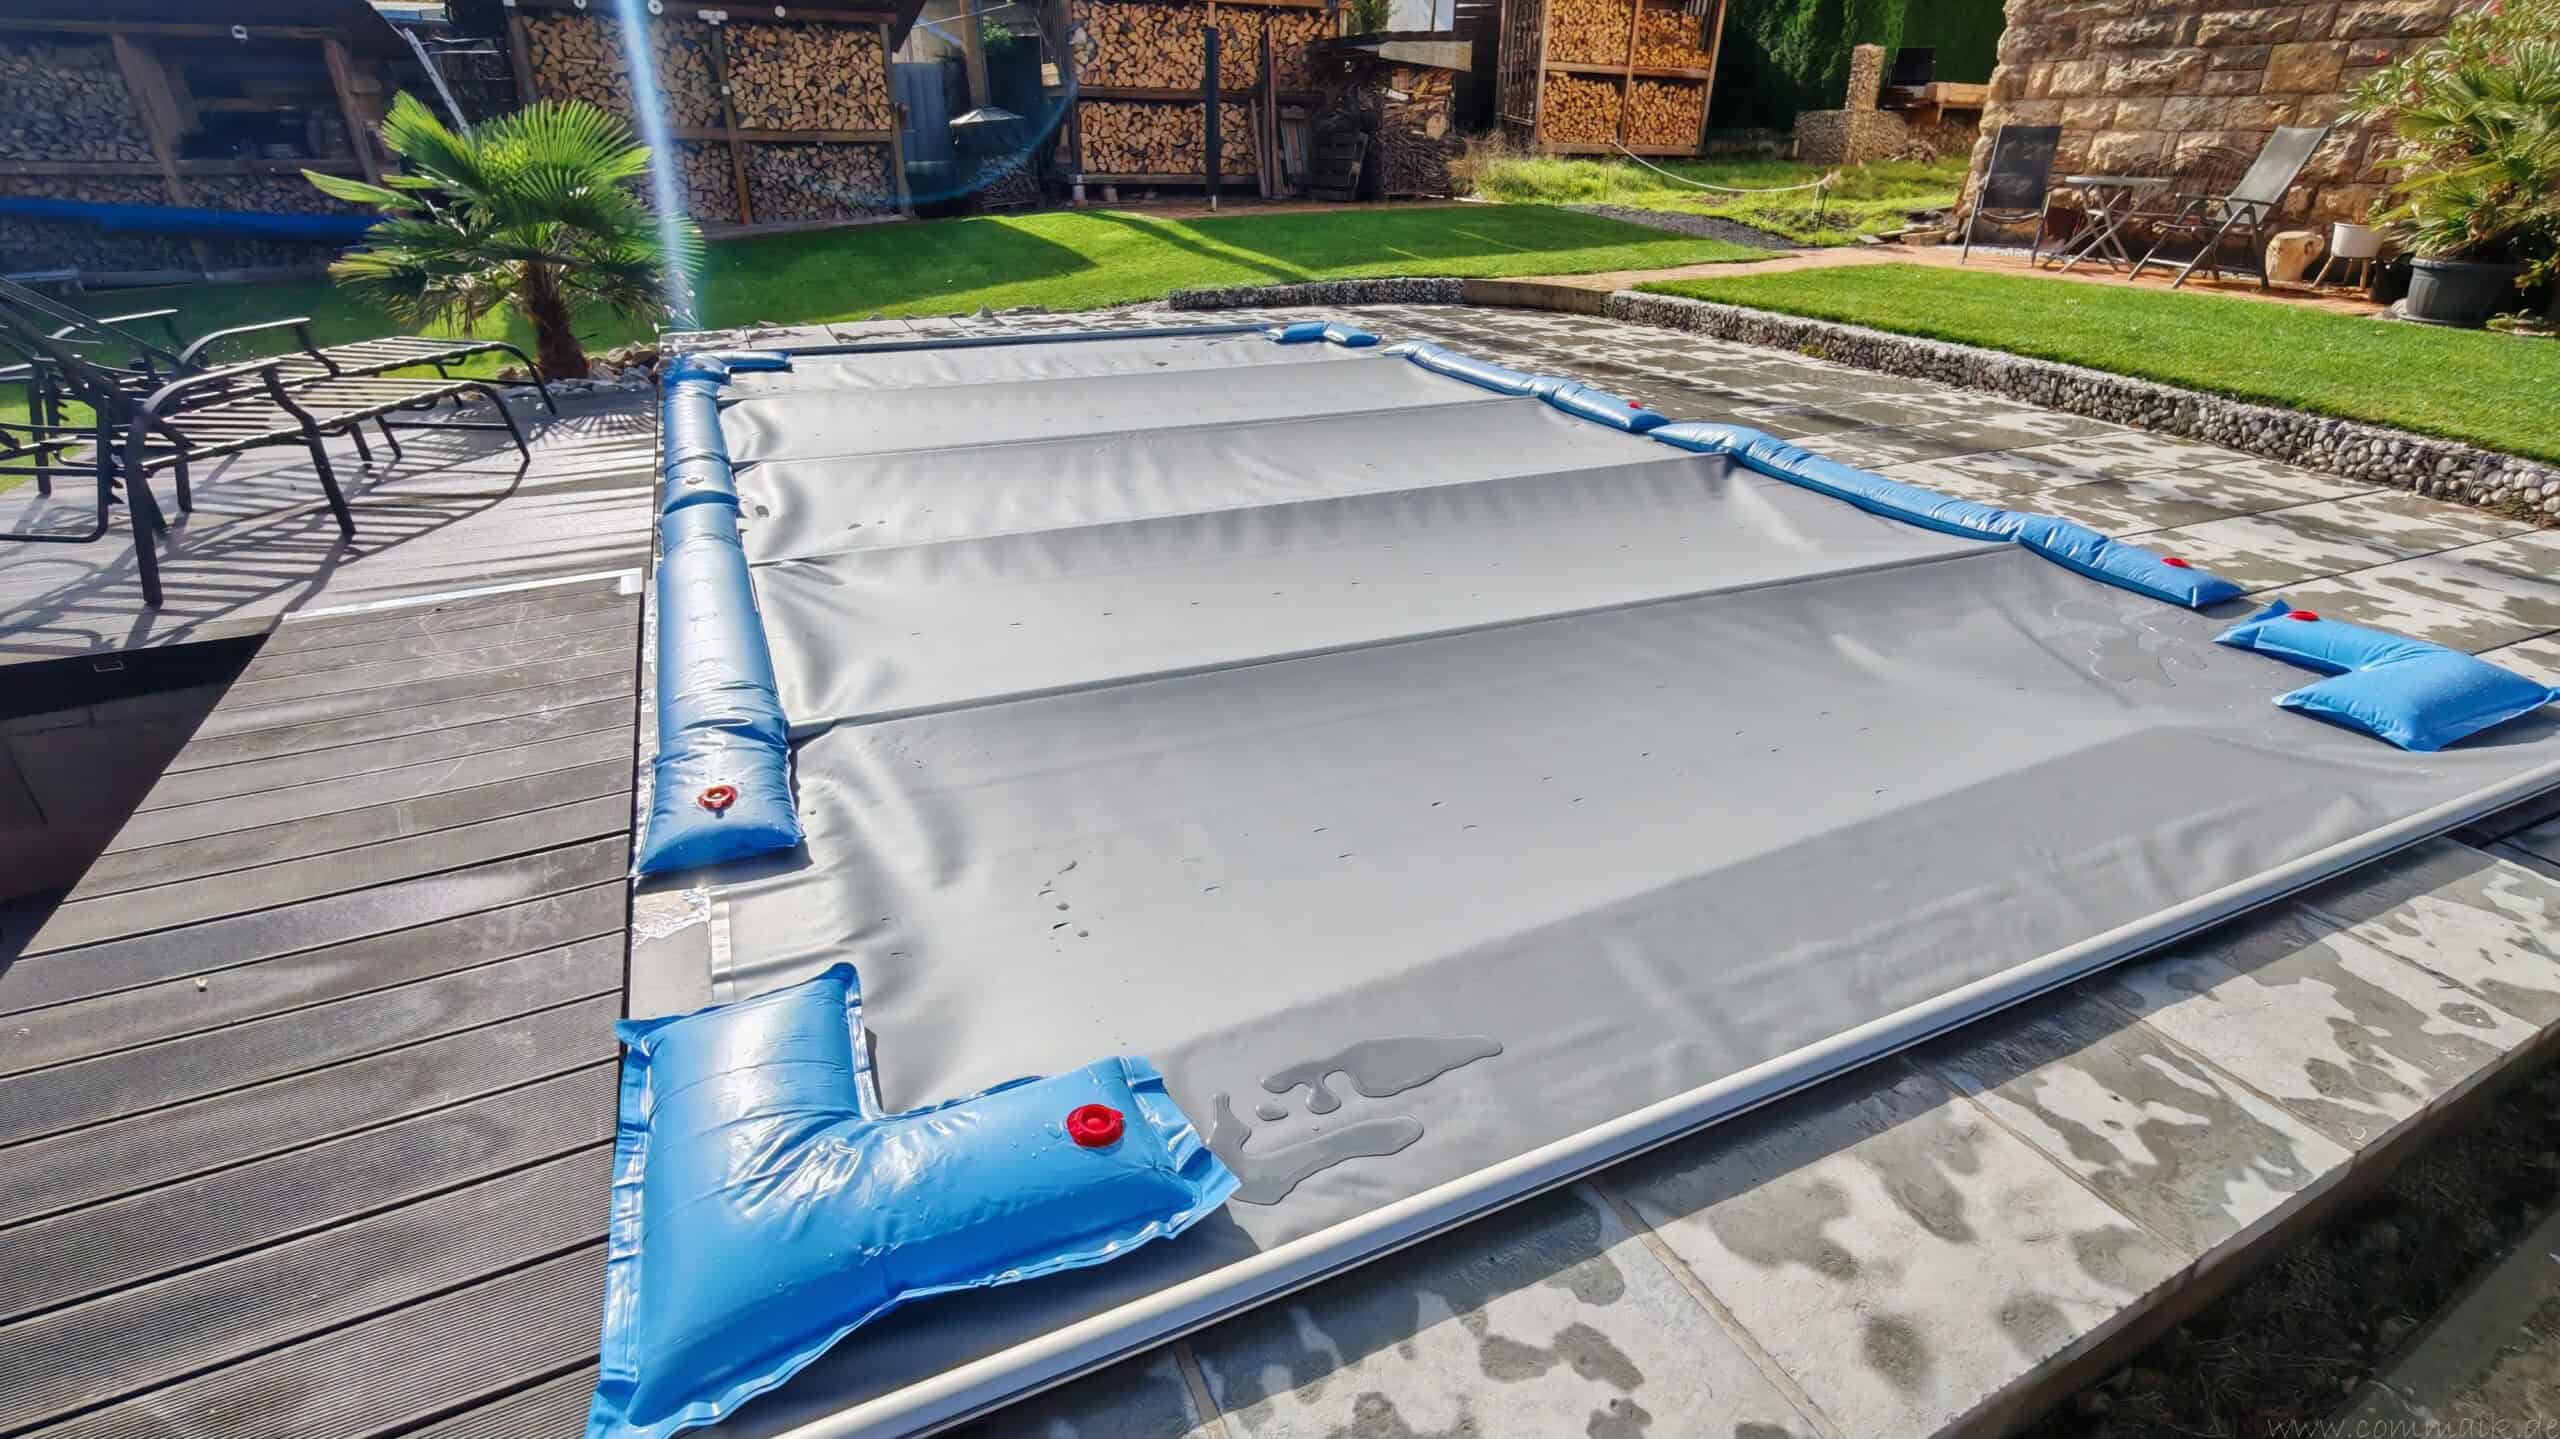
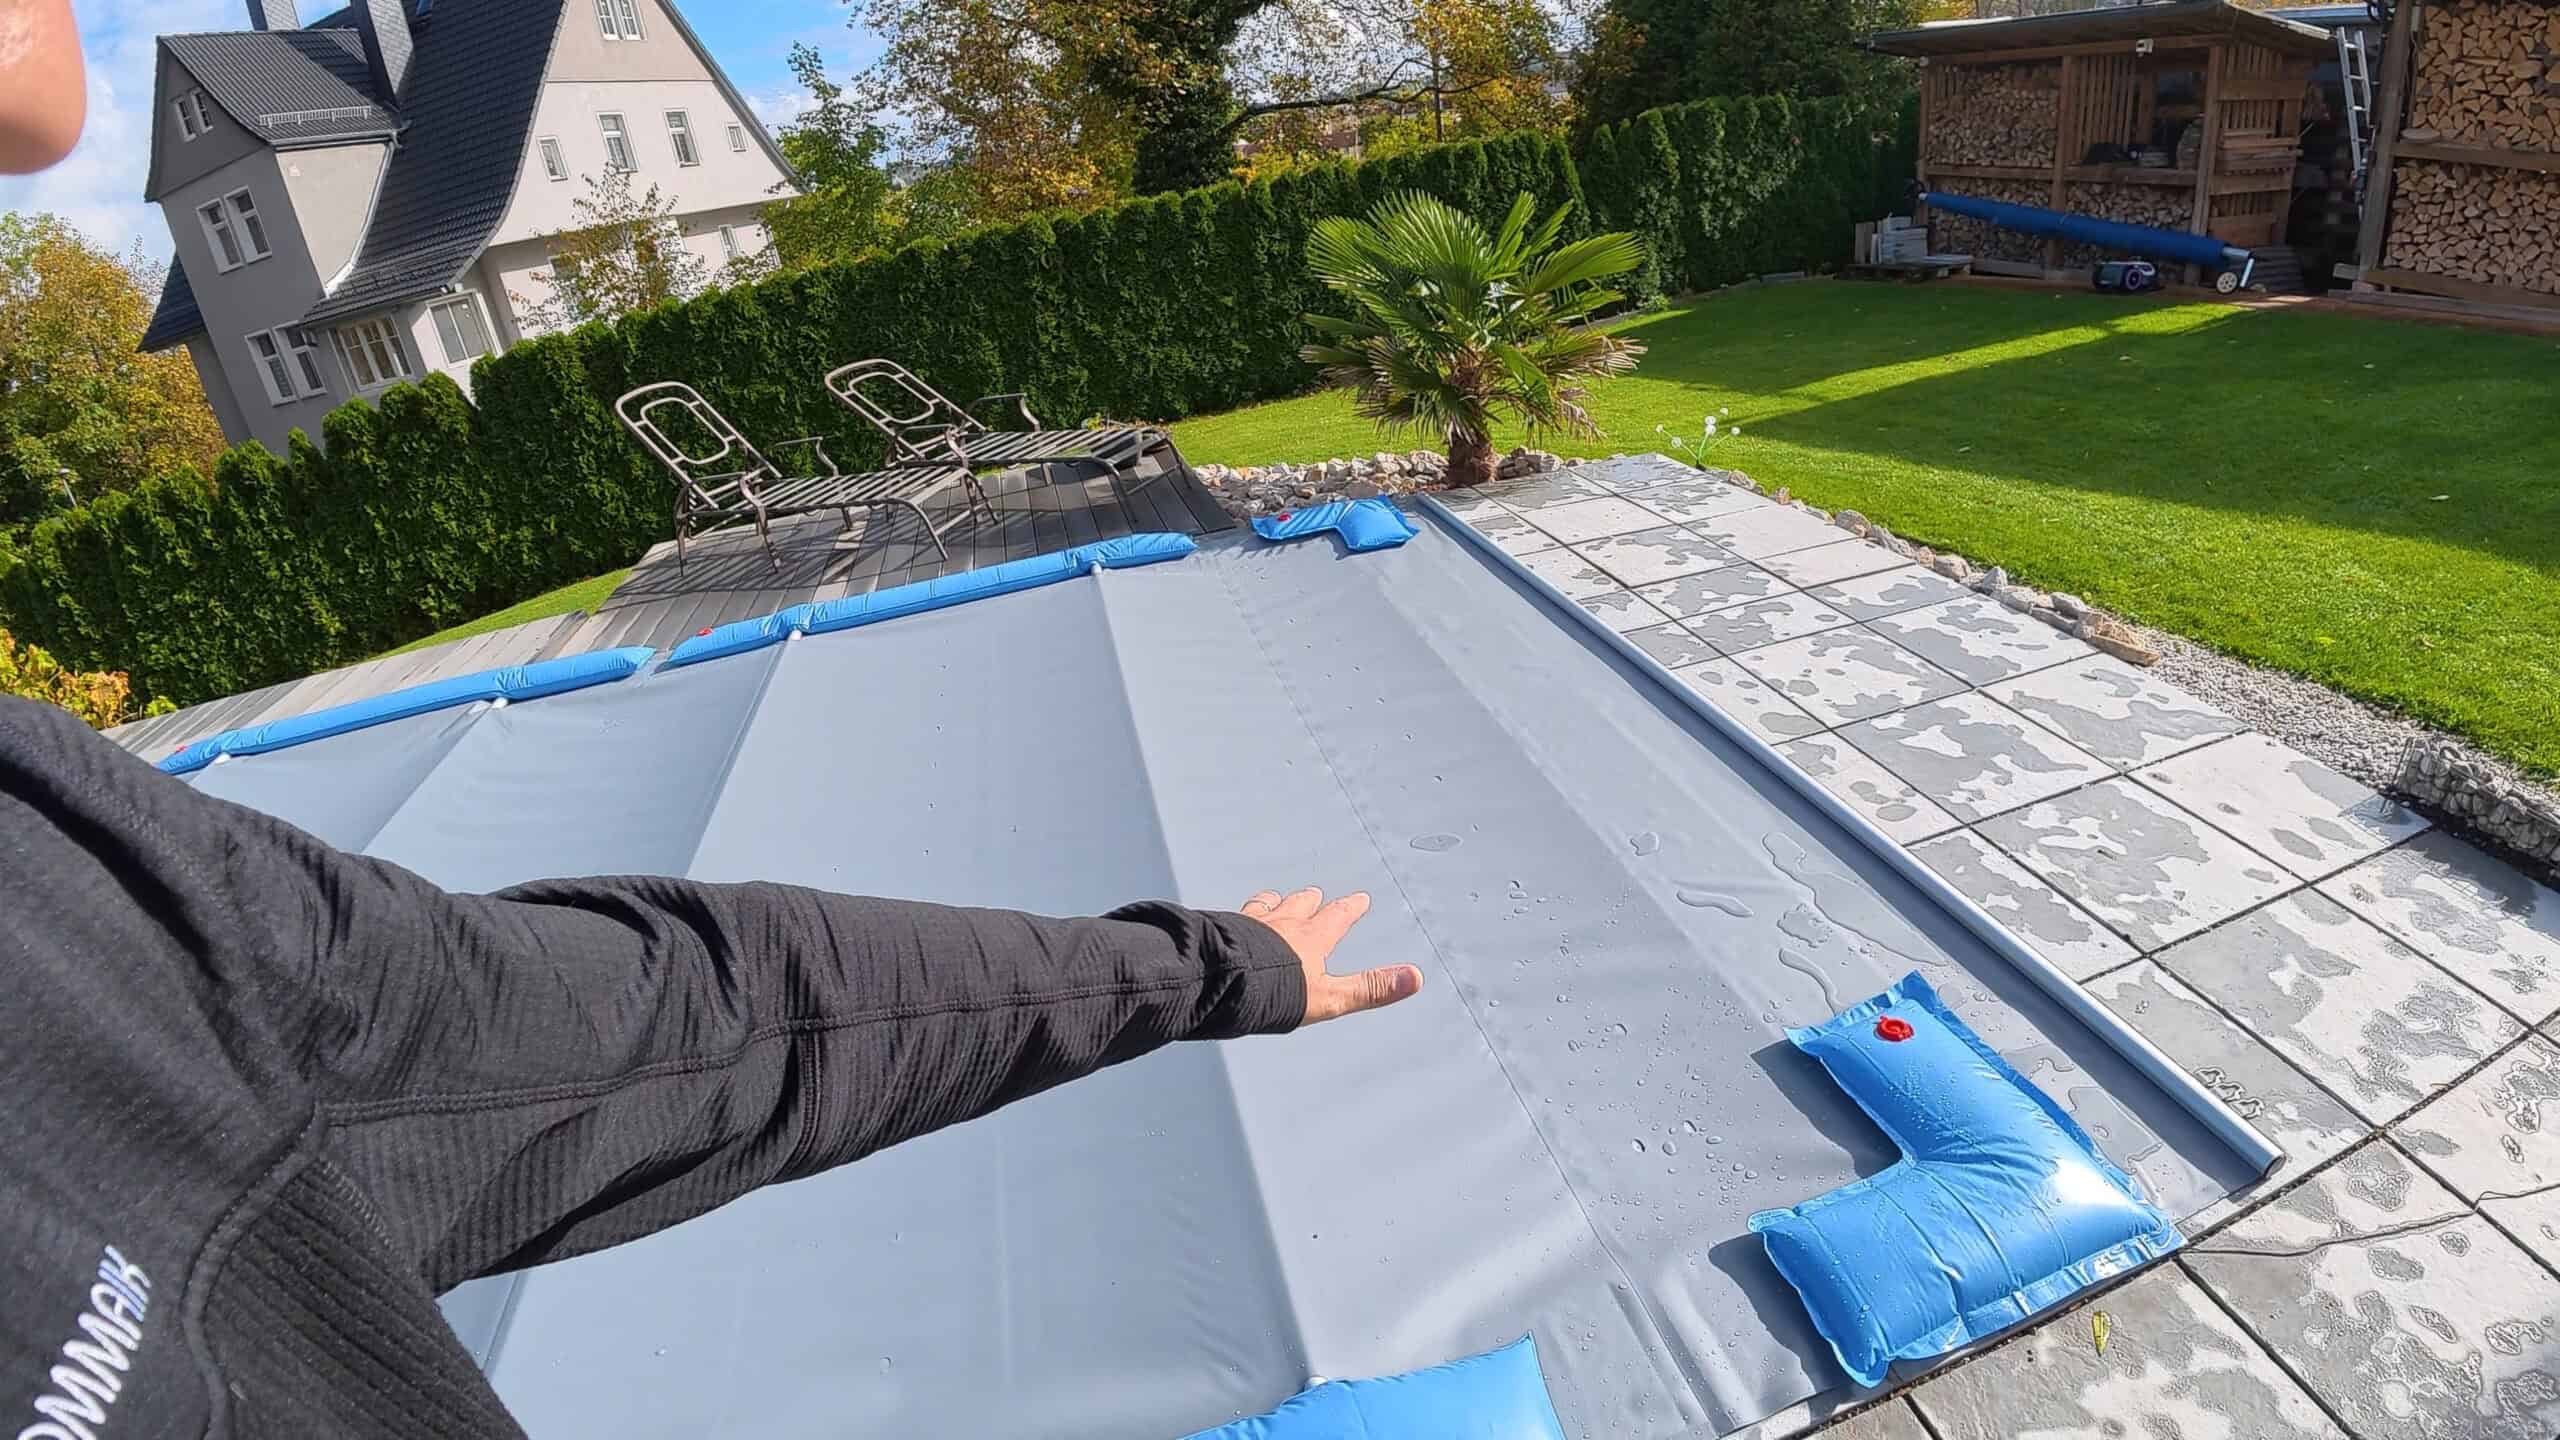
So this year, I decided to try out a winter cover with aluminum struts. The crossbeams spanning the pool supported the material at regular intervals. Instead of lifting the tarp with several air cushions, this sturdy structure now took over that task.
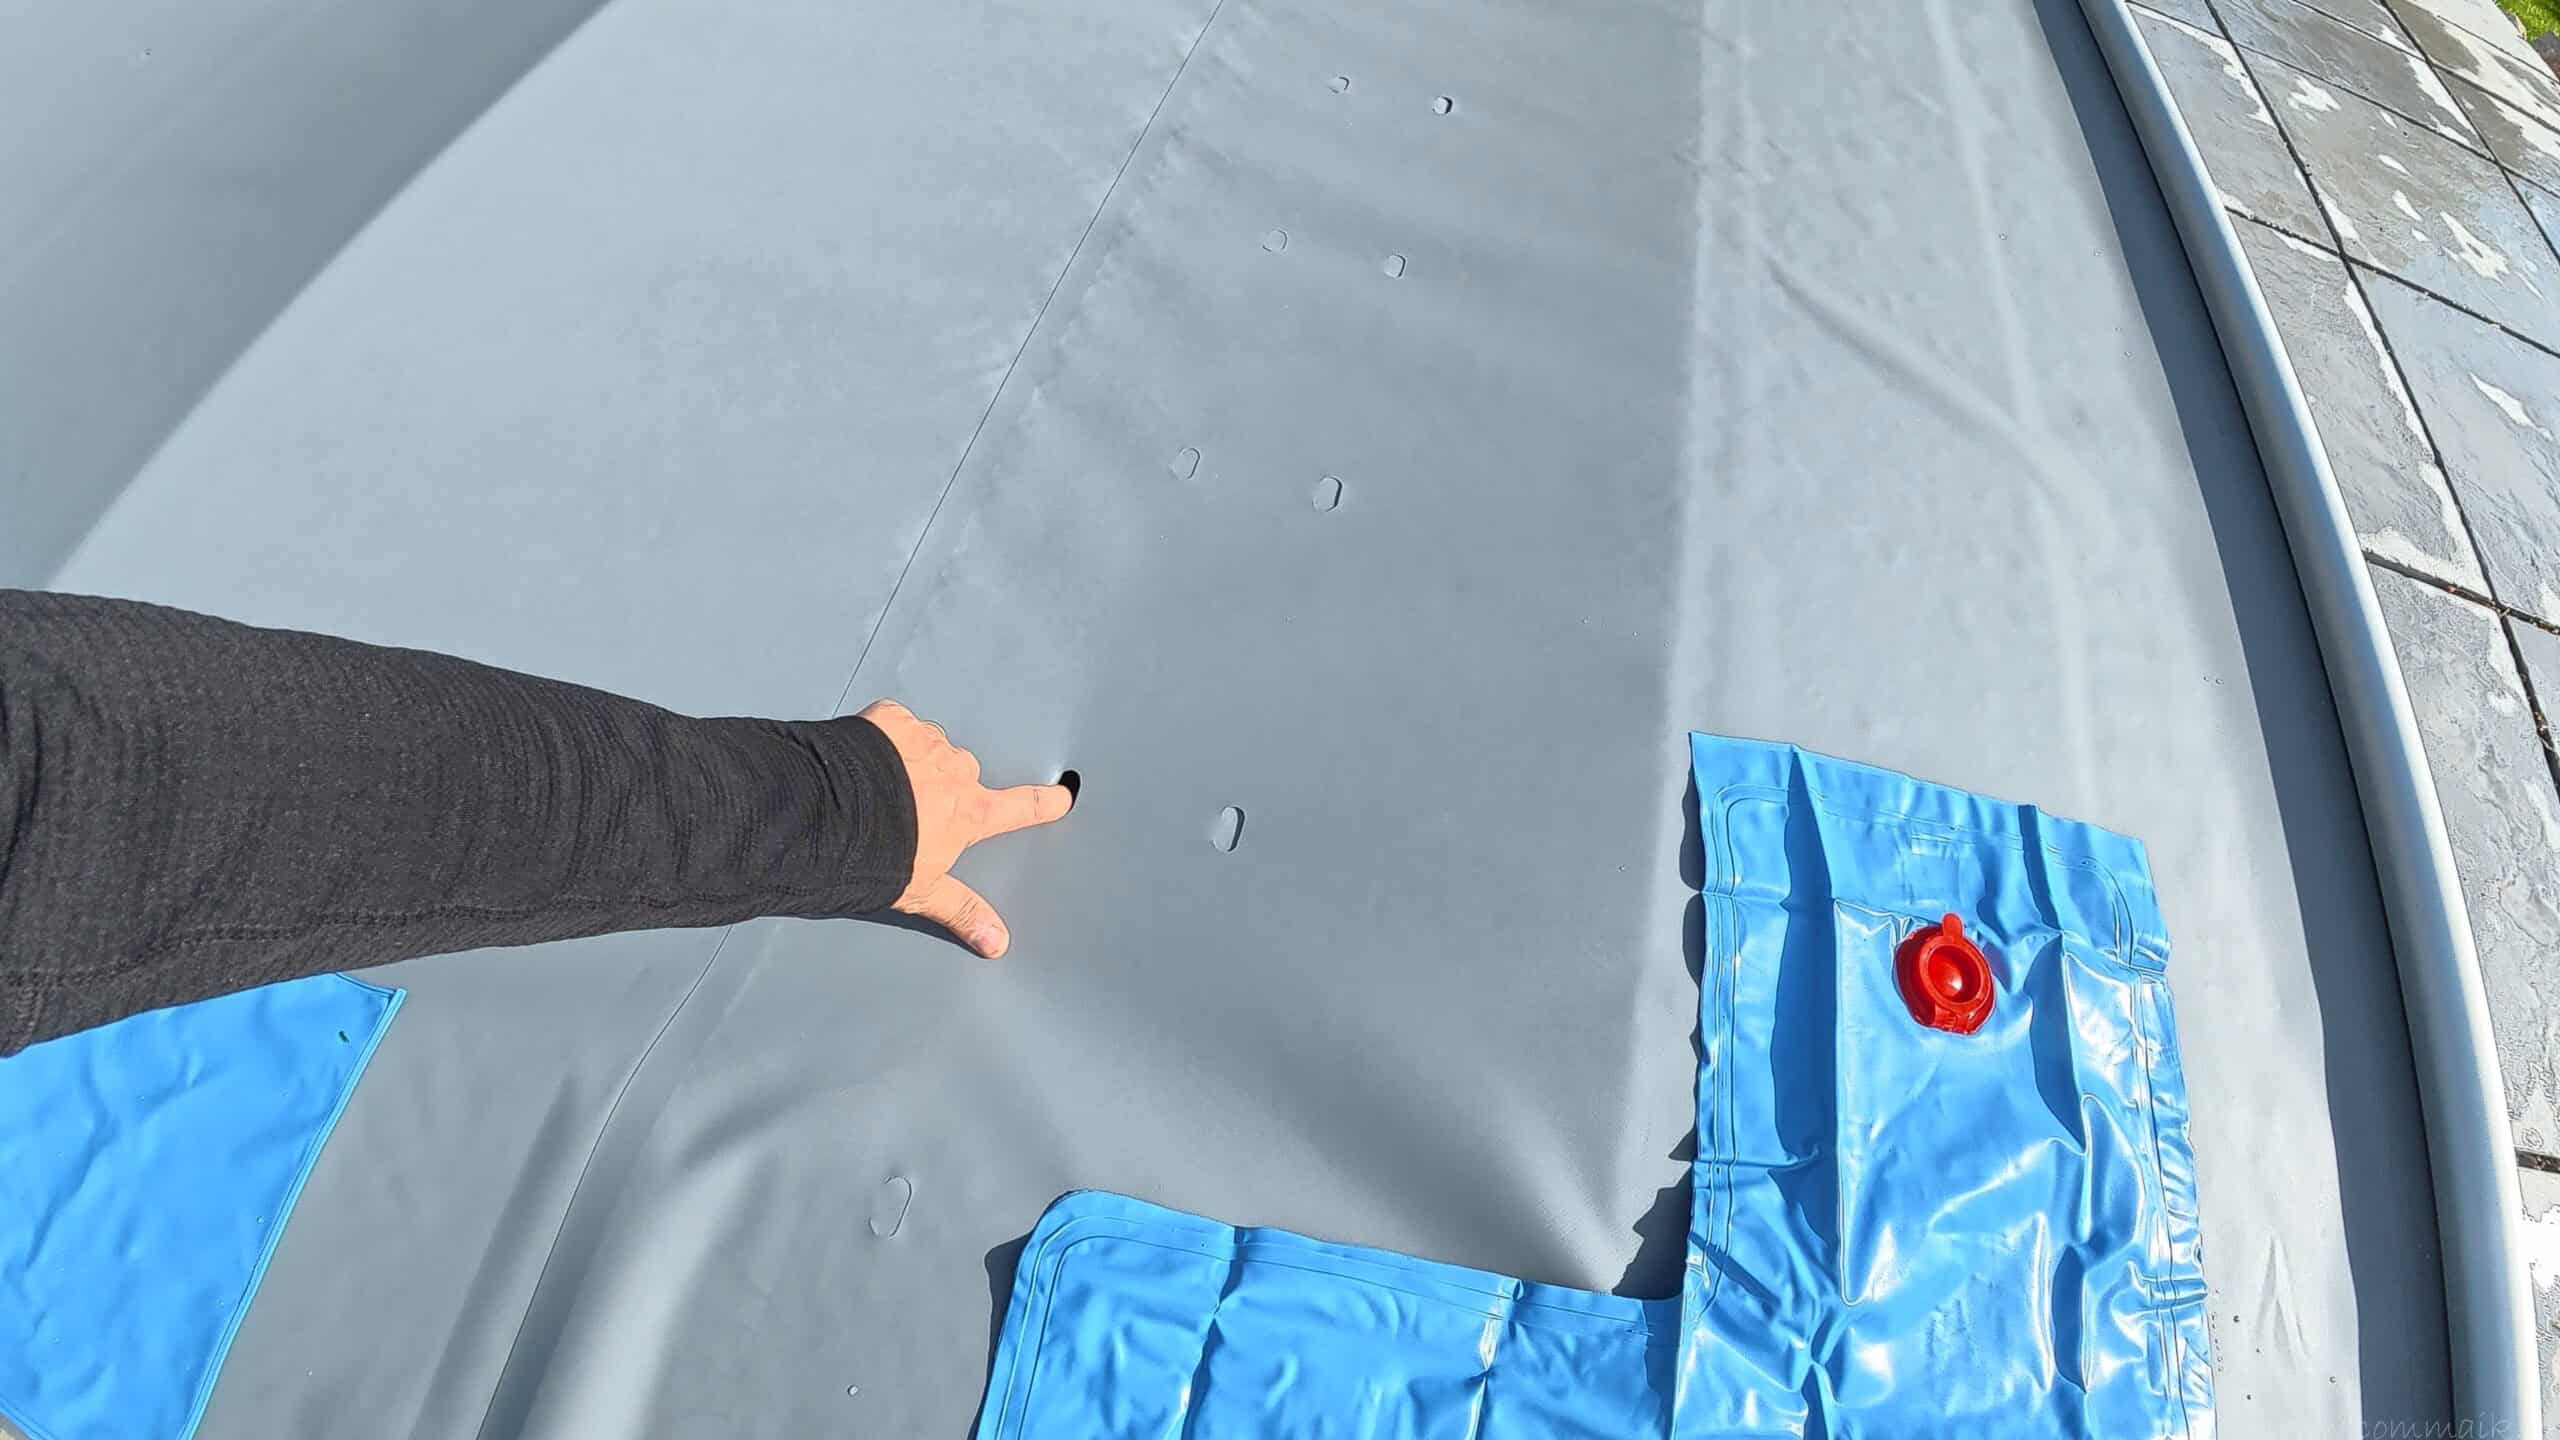
Designated drainage openings allow rainwater and meltwater to drain into the basin. My main goal in doing this was to avoid the deep pools of water that had caused me extra work with the previous solution.
Keep rain drains clear and check for snow load
For the drainage system to work properly, the openings must remain clear. Leaves and other debris must not clog them, otherwise water may accumulate on the surface again. So, during the winter break, I planned to check the cover and the water level in the basin after heavy rainfall. The rainwater draining out can cause the water level to rise again over the winter.
When it snows, the rainwater drainage system alone is not sufficient. The snow cover initially remains on the surface and puts a strain on the materials and aluminum struts. I therefore made it a point not to let large amounts of snow accumulate on the structure and followed the guidelines for winter supports and snow removal. For pole covers as well, keeping drainage openings clear and removing snow are part of winter maintenance.
Water bags used as weights along the edges
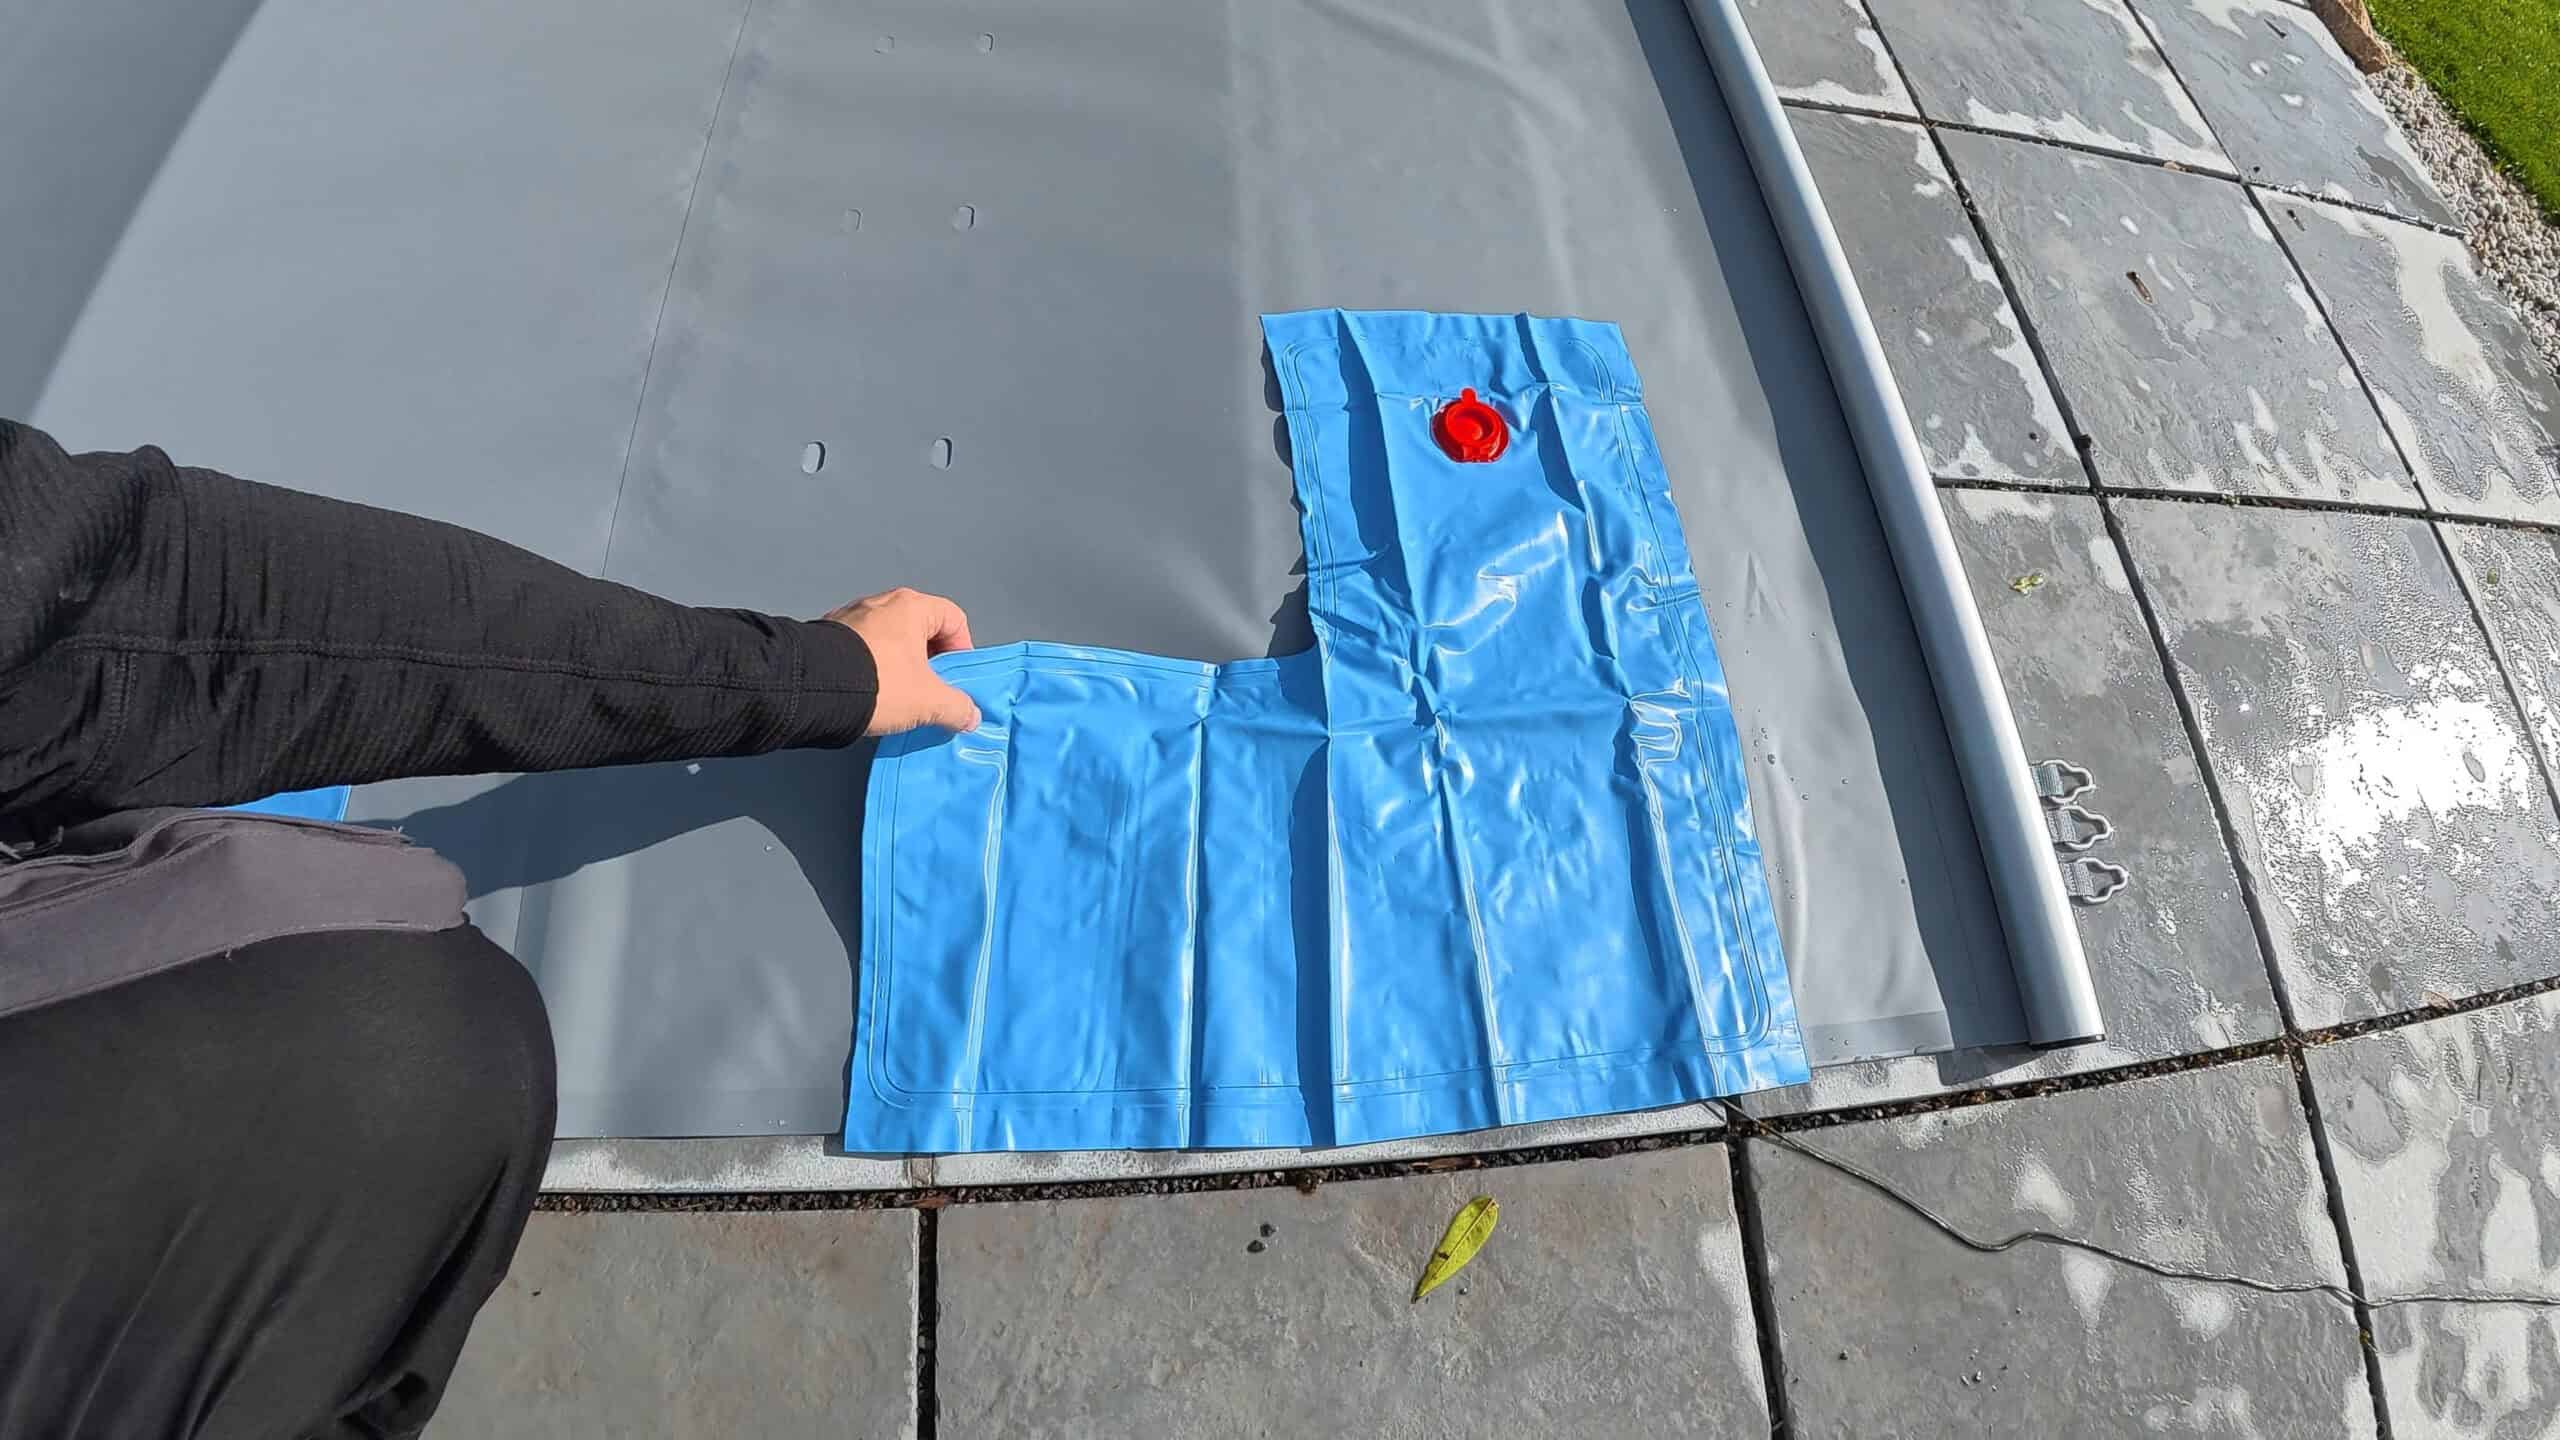
My patio slabs are installed as a floating floor. Therefore, to secure the cover, I would have had to anchor it through the slabs into a load-bearing subgrade. For my current setup, I instead laid out long water bags and matching corner pieces.
The water-filled bags weighed down the edges. The long pieces were placed along the sides, while the corner pieces covered the seams. My goal was to prevent the wind from lifting the edges and getting under the tarp.
This winter, I began testing the water bags for myself for the first time. I was particularly interested in how well they held up in the wind, their watertightness, and how they performed in freezing conditions. Whether they prove to be as effective as the weights I’ve used so far remains to be seen over the coming months.
The additional weight does not, however, serve as proof of certified safety for children or animals. My primary concern at first was how reliably the new combination of aluminum struts, drainage holes, and water bags would hold up through the winter.



Winterizing Products: Why I Didn’t Use Any This Time
In previous years, I had tried winterizing products but didn’t notice any significant difference in my pool. That’s why I decided not to add any this time. For me, thorough cleaning, properly adjusted water parameters, and a good winter cover had proven to be the best foundation.
What Winter Remedies Are Made Of and How They Work
Winterizing agents are usually liquid concentrates designed to limit algae growth and stubborn deposits during the winter months. Their composition varies depending on the product. Active ingredients include, for example, polymeric quaternary ammonium compounds, which are used to prevent algae growth. However, not every winter treatment contains the same active ingredients or the same combination.
The algae-inhibiting ingredients make it harder for algae to multiply. This is particularly useful during mild winter periods and as temperatures rise in the spring. They are designed to prevent large algae blooms from developing under the cover.
Another key benefit of the product is protection against lime and dirt buildup. Depending on the formula, it either inhibits the crystallization of lime or makes it harder for deposits to adhere firmly to the pool surfaces. This can make spring cleaning easier, as residues are easier to remove. However, this does not automatically remove existing deposits.
A winterizing agent does not prevent water from freezing. It does not work like antifreeze in a vehicle and does not protect filled pipes or pump housings from freezing. Draining, installing winter plugs, and other preparatory measures therefore remain necessary.
Advantages and Disadvantages of Winterizing Products
For me, the potential benefit lay primarily in easier cleaning at the start of the season. Less algae buildup and less stubborn limescale deposits can reduce the amount of work and effort required for cleaning. Protection against deposits can be particularly beneficial in areas with hard water.
This comes with additional costs and the use of more chemicals. The product must be dosed according to the volume of water; for some products, a follow-up dose may be necessary during a warm winter. In addition, environmental and disposal guidelines must be followed: Treated water must not simply be discharged into the garden or a body of water.
My experiences without using any additional winter products
With my pool, the difference between winters with and without the additive hadn’t been significant enough so far to convince me to use it regularly. That’s why I skipped this extra step.
Instead, I made sure to leave as little dirt as possible in the pool and to properly prepare the water before closing it down for the winter. For me, whether a winter treatment is worth it becomes clear above all when I reopen the pool in the spring: based on the water quality, the buildup of debris, and the actual amount of cleaning required.

- POOL SICHER ÜBERWINTERN: BAYROL Puripool Super ist ein flüssiges, schaumfreies Überwinterungskonzentrat. Es verhindert Algenwachstum, Kalkablagerungen und sonstige Schmutzablagerungen im Pool während der gesamten Winterperiode.
- FRÜHJAHRSREINIGUNG WESENTLICH ERLEICHTERT: Dank Puripool Super ist der Pool im Frühjahr in einem deutlich besseren Zustand. Die Inbetriebnahme nach dem Winter wird wesentlich erleichtert, weniger Aufwand und weniger Produkte nötig.
- AKTIVE UND PASSIVE ÜBERWINTERUNG: Puripool Super eignet sich für alle Überwinterungsarten, aktiv (Pool bleibt befüllt) oder passiv (Pool teilweise entleert). Kompatibel mit Chlor, Brom, Aktivsauerstoff und Salzwasserpool.
- OHNE SCHWERMETALLE, pH-NEUTRAL: Die Formel enthält keine Schwermetalle und verhindert dadurch Beschädigungen an Pooloberflächen und Einbauteilen. Schaumfrei und pH-neutral. Dosierung: 500 ml pro 10 m³ direkt ins Wasser.
- ✔ UNSER ZIEL: Ihnen das Beste bieten! Vertrauen Sie auf BAYROL - das ist der sicherste Weg in hygienisch reinem und kristallklarem Wasser zu schwimmen. Seit mehr als 65 Jahren sind wir für Sie da.
Video: Preparing My Pool for Winter
In the accompanying video, I showed the work done in the equipment shed, lowering the water level, preparing the BAYROL system, and setting up the new winter cover. You can also see my previous solution using pool cushions and the first time I used the water bags.
I have included the technical details regarding flow-through, probe positioning, ice-pressure cushions, and fastening in the article as appropriate.
I document other projects related to pool maintenance and technology in my pool playlist on YouTube and on my YouTube channel, COMMAIK.
Zuletzt aktualisiert am 3. November 2026 um 20:45 . Ich weise darauf hin, dass sich hier angezeigte Preise inzwischen geändert haben können. Alle Angaben ohne Gewähr. (*) Bei den verwendeten Produktlinks handelt es sich um Affiliate Links. Ich bin nicht der Verkäufer des Produktes. Als Amazon-Partner verdiene ich an qualifizierten Verkäufen. Dein Preis ändert sich jedoch nicht.


Products Used and Additional Accessories
- Pool Cover – Option 1*
- Pool Cover – Option 2*
- Long water bags for ballasting*
- Water bags for the corners*
- Ice-pressure pad*
- Winter caps for inlet nozzles*
- Skimmer net or filter fleece*
- Submersible pump for lowering the water level*
- Storage Solution for pH and Redox Probes*
Note: All links marked with an * are affiliate links. If you make a purchase through these links, I’ll receive a small commission at no additional cost to you. Thank you for your support!
My Conclusion: Technology Protected—A New Cover Put to the Test
After about half a day, my pool was ready for the winter break. The water level had been lowered, sensitive equipment had been removed, and the new structure was in place over the pool.
The additional effort required for the dosing system remained manageable. More attention was needed for the separate chemical lines, the storage of damp probes, and the complete draining of water-carrying components.
I haven’t made up my mind about the cover yet. The aluminum struts initially solved the problem of the fabric sagging freely. I won’t be able to assess how it handles rain runoff, snow loads, and water pockets over the long term until after winter.
Even with the equipment shut down, the pool therefore remained a checkpoint for the winter. For me, this still included checking the position of the ballast, ensuring the drain openings were clear, and monitoring for a possible rise in water level due to precipitation.
I’m particularly interested in long-term experiences with water bags, dosing systems left outdoors, and the use of winter chemicals. I’d appreciate any feedback on these topics in the comments.
Summary: Here’s How I Prepared My Pool for Winter
To winterize my pool, I first cleaned the floor, walls, and steps and adjusted the water parameters for winter storage. Then I flushed the dosing hoses and the filter. For backwashing, I increased the pump speed using the variable-frequency drive. I lowered the water level to about 5 to 10 centimeters below the inlet jets. Most of the water remained in the pool while I drained the pipes and sealed the jets.
For passive overwintering, I removed the BAYROL dosing system, the measurement probes, the pump, the multi-way valve, and the UV-C unit. I stored the equipment in the basement, protected from frost; the probes remained moist in their filled storage containers. I prepared the pool for ice formation using ice pressure pads. A new cover with aluminum struts and water bags replaced my previous tarp with pool cushions.
After about half a day, I had winterized the pool for the cold season. Based on my past experience, I decided not to use any additional winterizing products. We’ll see how well the new winter cover holds up after the first winter.
Frequently Asked Questions About Winterizing Your Pool
When should you winterize your pool?
I prepared my pool for the winter break before the first frost. I used a consistently low water temperature—below about 15 °C—as a guide. The weather forecast and the end of my swimming season were also key factors. The water treatment system continued to run until the pool was shut down.
Does the water have to be completely drained from the pool in the winter?
In the case of my in-ground pool, most of the water remained in the pool. The water counteracts the external pressure from the soil and groundwater. Therefore, completely draining the pool is not a standard procedure for winterizing. For above-ground pools that are not designed for winter use, however, complete disassembly may be necessary.
How much does the water level need to be lowered for overwintering?
I lowered the water level to about 5 to 10 centimeters below the inlet nozzles and then sealed them with winter plugs. My PAR56 floodlight remained well below the waterline. When determining the lowering height, you must take into account not only the nozzles but also other installed components and the requirements of the winter cover.
What water parameters are important before the winter break?
Before turning off the circulation, check the pH level and the disinfectant concentration as part of the preparation. A pH level between 7.0 and 7.4 serves as a guideline. The appropriate chlorine level depends on the maintenance system used. Any necessary adjustments should be made while the treatment cycle is still running so that the chemicals can circulate throughout the pool.
How do you winterize a pool pump and sand filter system?
At the end of the season, I backflushed the filter and increased the pump speed via the variable-frequency drive to do so. I then shut down the system, drained the water-carrying components, and removed the pump and the multi-way valve. Both were stored in the basement, protected from frost. No residual water susceptible to freezing must remain trapped in the filter tank, which remains outdoors.
How can you protect pool pipes from frost damage?
I drained the pipes and sealed the inlet nozzles to prevent water from entering again. On the technical side, the designated drainage paths remained open. Low points, bends, and closed sections are particularly important: Water can remain there even though it has already stopped flowing elsewhere.
Are ice-pressure pads useful for overwintering?
I use ice-pressure pads to provide additional relief for the pool. Their flexible bodies can absorb some of the pressure generated when ice forms. However, they do not keep the pool ice-free and are not a substitute for draining the pipes or protecting sensitive components.
Is it possible to overwinter a pool without using winterizing products?
I decided not to use it this time because I hadn’t noticed any significant difference in my pool so far. Winter treatment products can help limit algae growth and stubborn lime scale buildup. However, they are no substitute for cleaning or maintaining proper water parameters, nor do they prevent the water from freezing.
How do you winterize a dosing system and pH and redox probes?
I rinsed both dosing lines separately with clean water and then drained the hoses. I stored the dosing system and the probes in a frost-free location. The measuring tips remained moist in filled storage containers. For my BAYROL Automatic Cl-pH, the instructions recommend using a KCl solution, or alternatively, clean pool water.
What should you keep in mind when choosing a winter pool cover?
I used a cover with aluminum struts and water bags as additional ballast. During the winter break, key points to check include secure fit, unobstructed drainage openings, snow load, and water level. The type of fastening, lowering height, or winter supports required depends on the specific cover system.

- Ganzjähriger Poolschutz: Die Poolabdeckung schützt vor Schmutz & Verdunstung, reduziert Wärmeverlust und sorgt für mehr Sauberkeit im Sommer & Winter. Außerdem erhöht sie die Sicherheit für Kinder & Haustiere. Die Maße entsprechen dem Planenmaß, wir empfehlen ca. 50 cm mehr als Ihr Poolinnenmaß
- Extrem reißfest & wetterbeständig: Gefertigt aus hochwertiger PVC-Plane bleibt die Stangenabdeckung formstabil & farbecht – auch bei intensiver Sonneneinstrahlung, Schnee & starkem Regen
- Durchdachtes System: Einschublaschen (Hohlsaum) am Anfang & Ende mit drei Aussparungen ermöglichen die Aufnahme von Rohren & eine einfache Verspannung mit Spanngurten
- Sicher & stabil: In Querrichtung im Abstand von max. 105cm aufgeschweißte Laschen sorgen für hohe Stabilität & verhindern das Durchhängen – Für Rohre bis Ø 55mm (nicht im Lieferumfang enthalten)
- Ohne Zubehör: Spanngurte, Anker & Rohre sind nicht im Lieferumfang enthalten und können zusätzlich erworben werden. Mit Abflussöffnung versehen, welche das Abfließen des stauenden Wassers ermöglichen. Dadurch bilden sich keine Wassersäcke auf der Plane und das Wasser kann in den Pool abfließen.
Dieser Beitrag ist auch verfügbar auf:
 English
 Deutsch


Ähnliche Beiträge
High Chlorine Consumption in the Pool: Why 20 Liters of Chlorine Disappeared in Two Weeks
Building a new pool – dismantling BPC decking and pool technology