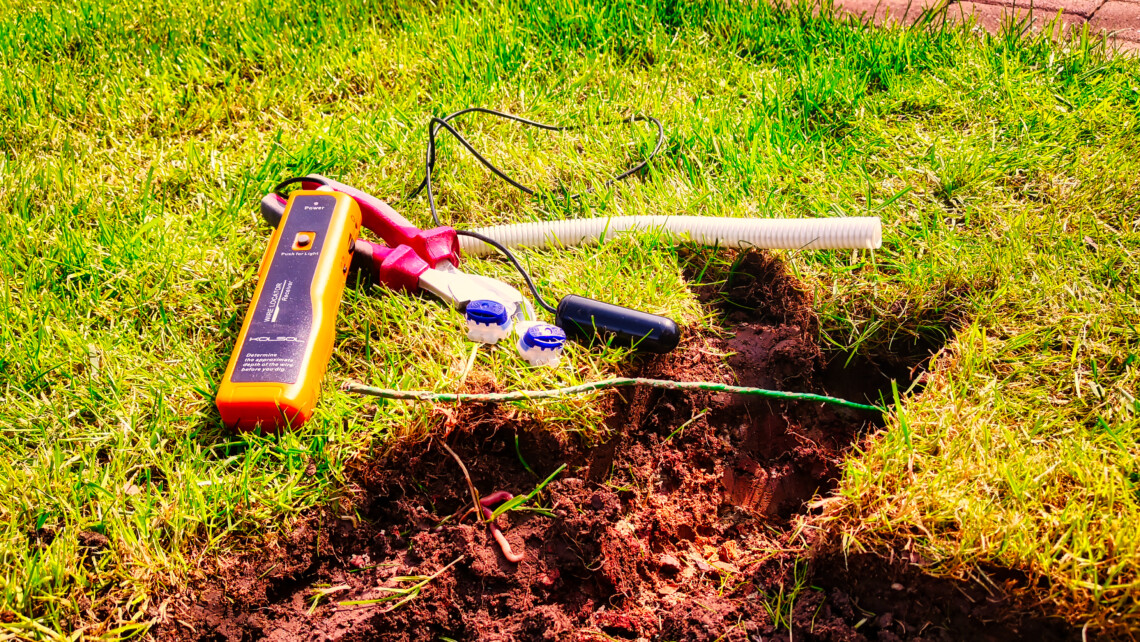
Robot lawn mower – Find and repair a broken control cable easily
If the robotic lawnmower no longer wants to drive, it is often due to a defective or broken control cable. But how do you find the broken spot on the boundary wire? And how can you repair the damage quickly and easily yourself?
I have made a video on precisely these questions and will now provide many more important tips and tricks with this entry.
Why does a robotic lawnmower need control cables and boundary wires?
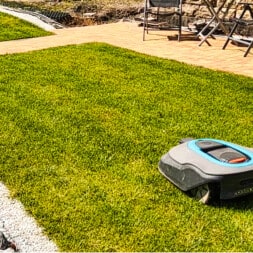
In order for the robotic lawnmower to know where it can and should mow, you need to assign it an area. This now works via GPS and geotracking – although most robotic lawn mowers are still controlled via traditional cables.
The cables create an electric field and the robot can distinguish whether it is inside or outside the zone. Another cable, the so-called control cable, steers the robot in the right direction.
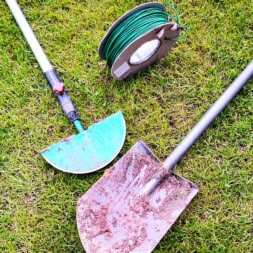
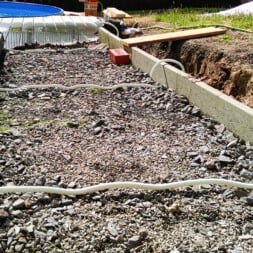
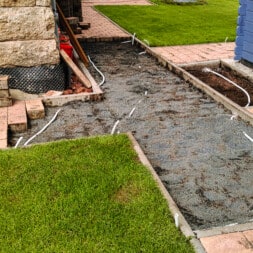
The cables will initially be laid above ground in order to gradually optimize the position. I later laid the cables about 10 to 15 centimeters deep into the ground. Now I can scarify my lawn without hesitation, but finding a broken cable is even more difficult.
How the boundary wire works
The central control unit is, of course, the charging station. The robot is coupled to it and the boundary wire and control cable are connected here.
As the name suggests, the boundary wire limits the area on which the robotic lawnmower is allowed to move. In addition to the lawn, the marked out area may of course also include the robot’s paths.
My boundary area consists of three zones, each separated by walkways. As the cables have been laid under the paving stones of the footpaths to the next zone, the robot can of course continue on the stones to the next zone.
The boundary wire is first connected to the left-hand contact point on the charging station using special cable clamps. It is then laid out to the left along the lawn and secured to the ground with pegs.
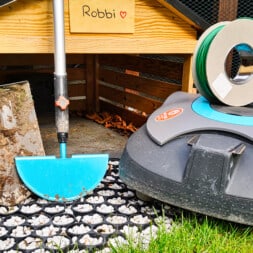
The robot transfers the cable by a maximum of 10 centimeters. The space to obstacles must be planned accordingly. In my article Automation in the garden – installation and use of the Gardena Sileno+ robotic lawnmower, for example, I describe how to choose the right edging strip.
If trees, bushes or other obstacles are to be excluded from the area, the cable must be routed there from the edge.
The obstacle is then circled with the cable before the cable is laid parallel and in the immediate vicinity of the previously laid cable back to the edge. If the cables are too close together, the robotic lawnmower will easily run over them.
Once the side boundary wire has been laid around the entire area back to the charging station in this way, it is now connected to the right-hand contact point.
Now the electric field is generated within the enclosed zone, inside the circle.
-
3M 314 Scotchlok Feuchtigkeitsgeschützter Verbinder, maximal 0,5 mm² bis 1,5 mm², Blau (50-er Pack)*Price: € 21.90instead of: € 22.90
-
Price: € 71.96
-
Price: € 46.89instead of: € 49.99
How the control cable works
The control cable is not required by all robotic lawnmowers. Some manufacturers dispense with the control cable and use the side boundary wire for pathfinding instead. However, my Gardena Sileno+ relies on the control cable.
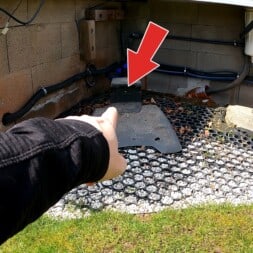
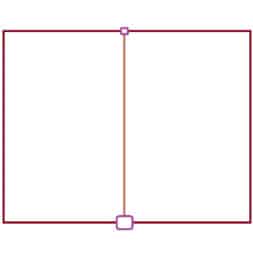
The control cable is attached to the center of the charging station and laid underneath it on the lawn to the most remote point of the entire zone. There it is connected to the side boundary wire via a T-connector.
If the robot passes over the control cable, it recognizes the direction in which the charging station is located based on the electrical impulses in the cable. This allows it to find its way home safely and recharge itself when power is needed.
However, the control cable can also be used to assign different starting points, i.e. mowing zones. For this purpose, the running meters of the cable from the charging station to the desired starting position are programmed into the robot. With my robot, this is a maximum of three starting points.
If the robot is programmed accordingly, it moves over the control cable after the start until the distance is reached. Only then does it start mowing.
In order to protect the lawn, I can also program the size of the channel above the control cable on my Gardena Sileno+ robot lawn mower. This significantly reduces ruts.
So if one of the two cables is defective, the robotic lawnmower will no longer work!

- LONA Intelligence: Durch die LONA Intelligence kommt eine AI zu tragen die intelligentes Mapping, Zonen Management, Area Protect und Location Tracking ermöglicht
- Intelligentes Mapping und Location Tracking: Sorgt für eine präzise Kartografie des Gartens und erzeugt einen genauen Grundriss des Mähbereichs mit Standorterfassung des Mähroboters in Echtzeit
- Für einen grünen Rasen: Das Zonen Management definiert für verschiedene Bereiche die Mähintensität und Frequenz während mittels Area-Protect Sperrzonen definiert werden können
- Direkte Kontrolle: Mittels smart App (Online-Registrierung erforderlich) können alle Funktionen des innovativen Mähroboters individuell eingestellt werden
- Lieferumfang: 1x Mähroboter SILENO life 1500 m², 1x smart Gateway, 1x Ladestation, 200 m Begrenzungskabel, 4x Verbinder, 5x Anschlussklemmen, 300 Haken
Why is the cable from the robotic lawnmower defective?
There can be many reasons for a defective cable. In addition to mechanical force, loose contacts at the connection points or simply material fatigue are of course also possible causes.
In my experience, the most common reason for a robot lawn mower cable breaking is mechanical impact. Whether lawn trimmer, lawn mower, scarifier or aerator. All devices can damage or destroy the cables on the lawn.
If the robot lawn mower breaks down immediately after one of these garden tools has been used, you should look for the damage in the area where you were previously working.
Furthermore, it is not uncommon for cables to be cut with a spade or shovel. Whether it’s a planting hole for a new shrub or a trench for watering the lawn – the cable is quickly cut with the spade without you noticing.
Unless the robotic lawnmower was accidentally in use and has now stopped abruptly, the cable break can usually be reliably recognized by the status LED on the charging station. If it continues to drive but cannot find its way back to the charging station, the control cable is usually defective.
Unfortunately, it’s not always that easy…
Is the control cable or the boundary wire broken?
Using my Gardena Sileno+ robot lawn mower as an example, I would now like to describe my next steps in the search for the broken cable.
The charging station has a status LED: green=good – blue=bad!
However, it is important to know that the LED only indicates the status of the side boundary wire. Unfortunately, the station does not recognize whether the control cable is working.
There is a simple trick to recognize whether the side boundary wire or the control wire is defective. With this trick I can also find out whether the boundary wire on the left or right side of the charging station is defective and whether there is more than one broken wire.
To make it easier to understand my approach, I will briefly explain the structure of the cables again:
The side boundary wire is connected to the left and right contact points of the charging station. It forms a large circle.
The boundary wire runs through the center of this circle and is connected to the circle at the outermost end. But not at the charging station. The control cable has its own connection point here.
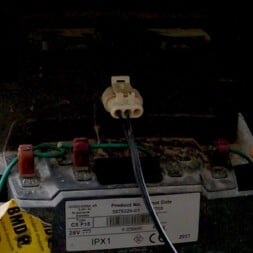
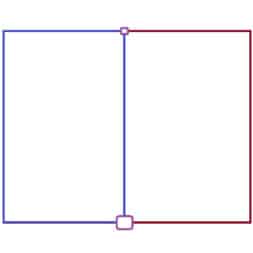
If the LED now flashes blue, the side boundary wire is defective in any case. To determine the position more precisely, I disconnect the cable at the right contact point of the charging station and connect the control cable to this right contact point instead.
As a result, I have now turned the large circle into a small circle. This is the circle to the left of the charging station. This consists of the left half of the boundary wire and the center control wire.
If the display is still flashing blue, the wire break is in the left boundary wire between the charging station and the point where the center control wire was connected to the boundary wire.
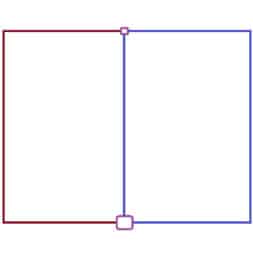
If the display flashes green, the fault is probably on the other side. The control cable is then plugged into the left contact point on the charging station and the right boundary wire is plugged into the right contact point.
Incidentally, the middle contact point for the control cable does not need to be connected with this procedure. As I wrote above, the charging station does not read these values.
If the blue LED flashes for both variants, this means
- Several cable breaks
- a faulty contact on the connection between the control and boundary wire
- The control cable is defective
This may not be nice, but this problem can also be solved.

- 10 Stück T-Abzweigverbinder rot 0,5 -1,5qmm
Video: Find and repair a broken control cable easily
Since my robot lawn mower didn’t want to drive, I had to repair a few broken cables last year and published my approach in a video.
You can also find the video and many more in my playlist: Lawn robots.
If you want to see more of me and my projects, have a look at my YouTube channel.

- UNIVERSELL EINSETZBAR - Unsere qualitativ hochwertig verarbeiteten Begrenzungskabel sind kompatibel mit allen gängigen Hersteller wie Gardena, Husqvarna, Bosch Indego, Worx Landroid u.v.m.
- EINFACHE HANDHABUNG - Durch die praktische Abrollhilfe können Sie den Draht einfach und problemlos im Garten verlegen. Markieren Sie die zu mähende Fläche zur Orientierung und legen Sie los.
- ERSTKLASSIGE QUALITÄT - Das Mähroboter Begrenzungskabel setzt sich aus 24 Einzeladern zusammen, die aus einem hochwertigen verzinnten, kupferplattierten Aluminium bestehen - langlebig & robust.
- IDEALES MÄHROBOTER ZUBEHÖR - Das 2,7mm dicke Kabel eignet sich sowohl für eine Neuinstallation als auch zur Ergänzung - es ist witterungsbeständig & resistent gegen Feuchtigkeit und Frost.
- UNSER VERSPRECHEN - Wir vertrauen zu 100% in die Qualität unserer Produkte und wollen stets zufriedene Kunden haben- sollten Sie mit dem Kauf nicht zufrieden sein, finden wir garantiert eine Lösung.
Finding a cable break in the garden
With the methods used so far, the location of the cable break can already be narrowed down quite well. But depending on the size of the garden, the defective area may still be barely recognizable. Especially not if the cable has been laid in the ground.
Modern technology is now needed to find the cable break. If you have a small FM transmitter, i.e. a small portable radio, you can use it to find the fault. I have opted for a cable finder.
The technology behind it is relatively simple. The device induces a voltage in the cable to be checked and the position of the cable can then be precisely localized via a sensor using a signal tone. As soon as the cable is interrupted, there is no signal tone and I know where the cable break is located.
As this method involves earthing via the soil, the moister the soil, the better the device works.
The device I used was supplied with all the necessary accessories, including the two required 9V block batteries. The application now works as follows:
- Insert batteries in the transmitter and receiver
- The charging station remains switched off, so the power cable is removed from the socket
- The boundary wire/control cable can remain connected to the contacts on the charging station
- The red cable of the transmitter is connected to the cable to be tested on the charging station
- The black cable is connected to the ground via an electrical conductor (e.g. a screwdriver)
- The transmitter and receiver are now switched on
- If I now hold the sensor at the end of the cable from the receiver over the position of the cable to be tested, a loud signal tone should be heard
- To find the cable break, I now walk along the cable, guided by the signal from the receiver, until the signal stops
- In my experience, it helps to move the sensor in small concentric circles to better determine the position of the cable
- The cable is then (carefully) searched for at the suspected cable break

- Time and Money SaverHelpful-Locating & tracking buried and hidden wires.No more calls,no more cost, find and fix it by yourself.
- How to UseEasily Locate Pet Fence Wires, Metal Wires, Metal Pipes, Electrical Wires, ect ( only for single-strand wire, or double-strand wire in parallel, not for multistrand wire!!!)
- Where You Can LocateLocate-Determining Which Receptacles are on specific circuits,track-Pinpointing Drill Sites before drilling.
- Range of ParametersWire tracer range-Up to 2-3 feet deep and 1000 feet in length.
Simply repair a broken cable from the robot lawn mower yourself
The broken cable from the robot lawn mower must of course also be repaired. This is also very easy with the right tools and accessories.
First, the damaged area of the cable is cut off cleanly. If the cable has been damaged by the grass trimmer or lawn mower, it is sufficient to cut the severed ends cleanly with the side cutter. The plastic wrap should completely enclose the cable again!
In my case, the cable was completely rotten over a length of a good five to ten centimeters. Here I cut the cable cleanly two centimeters to the left and right of the damaged area.
If the cable is long enough to connect it directly to each other again, this is of course much nicer. But as a rule, this will not be the case. The gap must be bridged with an intermediate piece.
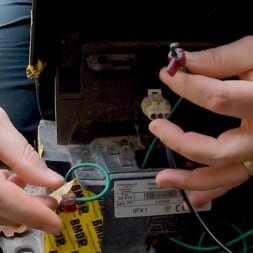
To do this, I take a piece of spare cable and cut it to the right length. The new cable is then connected to the old cable using waterproof cable connectors. Alternatively, you can of course also do this with heat-shrink tubing.
The status LED of the charging station should now light up green again. If it does not, the cable has another cable break and the search continues.
Tips and tricks
I have already installed some special features when laying the cables. This way I can simplify my search for cable breaks even further.
Since my boundary wire is several hundred meters long, the search remains very time-consuming despite all the technology. This applies in particular if there are several defective areas.
I have therefore not laid the boundary wire in the ground everywhere. I attached the cable above the turf at the corner points and also provided a good 50 centimeters of cable as a reserve. This reserve is rolled up and securely fastened to the ground with ground hooks.
When searching for the defective point, I can now connect a replacement cable to one of the outer contact points of the charging station. I then connect the other end to a terminal that I have installed in the coiled spare cable.
In this way, I build a new, much smaller, temporary zone. If the display now lights up green, I know that the cable damage must be behind the cable reserve. If the LED continues to flash blue, the damage is between the charging station and the new contact point.

- Dieses Produkt ist für den Verkauf an industrielle und professionelle Kunden für den Einsatz an der Arbeitsstätte konzipiert, hergestellt, gekennzeichnet und verpackt. Es ist nicht für den Verkauf an oder den Gebrauch durch Verbraucher bestimmt.
- Verbinder, blau
- Einfacher Schneid-/klemmkontakt
- Dauerhafte Verbindungen
Video: Repairing a broken lawn robot cable
A second video of mine shows how I quickly and easily repair the boundary wire of my robotic lawnmower myself. All I need is a pair of side cutters, a pair of pliers, some spare cable and two cable connectors.
You can also find the video and many more in my playlist: Lawn robots.
If you want to see more of me and my projects, have a look at my YouTube channel.
Lawn robots – ants love the cables
Incidentally, most of the cable breaks on my boundary wire or the control cable are not caused by mechanical impact. I have not damaged the cable with the lawn trimmer, the scarifier or the large lawn mower.
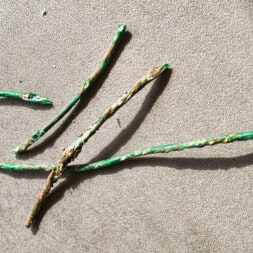
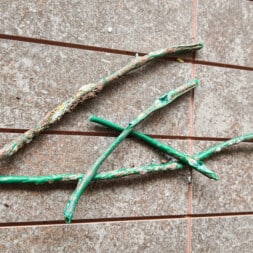
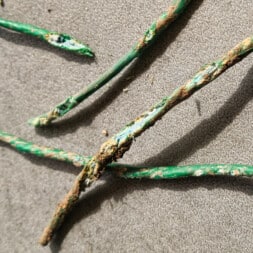
No, more and more often the cable is oxidized, i.e. rusted, at the damaged points. During the repair, the cable literally crumbles in my hands. But why is that?
Well, my guess is that ants are to blame for the problem. Especially when the soil is quite damp after long periods of rain, huge numbers of ant nests suddenly sprout from the ground.
The nests are always located in the immediate vicinity of the boundary wire or control cable. When I switch off the power from the charging station, the nests disappear again relatively quickly.
It seems as if the small insects are attracted by the electric fields that are created around the cables. One year it was so extreme that I didn’t even need a cable tracker. I was able to trace the course of the cables through the ants’ nests alone.
Basically, I have no problem with the animals. I am much happier that they actively support me in my gardening work. Unfortunately, they are rather counterproductive on my lawn.
The ants eat the green plastic coating of the cables and thus damage the waterproof sheath around the cables. As a result, they become damp and start to rust. At some point, there will be nothing left of the cable but white dust.
I first noticed the cause when the charging station indicated a cable break even though I hadn’t done any work in the garden. The damaged area was also in a place that was absolutely protected against mechanical stress. Only the ants’ nest directly at the cable break was a first indication.
Unfortunately, I have not yet found an effective and sustainable solution to get rid of the ants. But maybe you have a tip for me?
Just write me a comment.
-
Price: € 46.89instead of: € 49.99
-
Price: € 71.96
-
3M 314 Scotchlok Feuchtigkeitsgeschützter Verbinder, maximal 0,5 mm² bis 1,5 mm², Blau (50-er Pack)*Price: € 21.90instead of: € 22.90
Summary and conclusion
When my robot lawn mower suddenly stopped working, it quickly became clear that there must be a cable break.
The challenge was to locate and repair the damaged area on the boundary or control cable.
Robot lawn mowers need these cables to recognize the area to be mowed and to orient themselves within it. They define the robot’s work area and guide it back to the charging station.
Troubleshooting began with checking the electrical field created by the cables. A defect in the cable interrupts this field and prevents the robot from functioning.
Using technical aids such as a cable detector, I was able to precisely locate the cable break.
The cause of such damage is often mechanical force, for example from gardening tools or accidental cutting during digging. But in my case it was ants that had eaten the cable sheathing and damaged the cables.
Once I had found the defective area, I went about repairing it. I cut out the damaged piece of cable and inserted a new piece of cable using waterproof cable connectors.
This repair method restored the functionality of the boundary and control wire and the robotic lawnmower was able to continue its work.
Interestingly, ants seem to be attracted to the electrical fields of the cables, which has led to repeated damage in my garden.
This was a realization that led me to look for a solution to the ant problem to prevent future cable damage.
FAQ on repairing and maintaining robotic lawnmower cables
1 Why does a robotic lawnmower need boundary and control wires?
The boundary wire and control wire define the working area of the robotic lawnmower and help it to orient itself. The boundary cable forms a virtual fence that limits the working area, while the control cable shows the robot the way to the charging station.
2. how do I recognize that a cable is broken?
An indication of a cable break is when the robot suddenly stops moving or cannot find its way to the charging station. With many charging stations, a status LED indicates the status of the boundary wire: Green usually means that everything is OK, while blue or red indicates a problem.
3. how can I find out whether the boundary wire or the control cable is defective?
- The charging station status LED usually only monitors the boundary wire.
- To check whether the control cable is defective, you can connect it to one of the charging station’s boundary wire connections as a test.
- If the LED then lights up blue, the problem is with the control cable. If the LED remains green, the boundary wire is damaged.
4. how do I find the exact location of the cable break?
You can use a cable finder that feeds a signal into the cable by induction. The cable is tracked with a receiver, and the cable break is located at the point where the signal breaks off. Alternatively, a portable FM radio can also help to locate the cable break.
5. what are the most common causes of cable breaks?
- Mechanical impact: Cables can be damaged by garden tools such as lawn trimmers, scarifiers or spades.
- Material fatigue: Breaks can occur, especially with older cables.
- Animal damage: Ants or rodents can damage the cable sheathing and cause the cable to corrode.
6. how can a defective cable be repaired?
- Cut off the damaged area cleanly.
- Reconnect the two ends with waterproof cable connectors. An additional piece of cable can be inserted in the event of major damage.
- Then check whether the charging station displays a green signal again.
7. can I lay cables in the garden to prevent future damage?
Yes, cables can be laid slightly deeper (10-15 cm) in the ground to protect them better from mechanical damage. It is also helpful to leave spare cables in strategic locations above the ground to facilitate future repairs.
8. what problems do ants cause on the cables and how can I avoid them?
Ants can nibble on the cable sheathing, exposing the cable to moisture and causing it to corrode. Unfortunately, there is no permanent solution to the problem, but removing the ants’ nests can help to reduce recurring damage.
9. what is the difference between a boundary wire and a control wire?
The boundary wire defines the robot’s working area and forms a closed loop around the lawn. The control cable is a separate line that guides the robot to the charging station and defines different starting points for the mowing process.
10. can the boundary or control cable be extended?
Yes, the cable can be extended with additional cable sections and waterproof connectors. The same cross-section should be used to avoid interference.

- Time and Money SaverHelpful-Locating & tracking buried and hidden wires.No more calls,no more cost, find and fix it by yourself.
- How to UseEasily Locate Pet Fence Wires, Metal Wires, Metal Pipes, Electrical Wires, ect ( only for single-strand wire, or double-strand wire in parallel, not for multistrand wire!!!)
- Where You Can LocateLocate-Determining Which Receptacles are on specific circuits,track-Pinpointing Drill Sites before drilling.
- Range of ParametersWire tracer range-Up to 2-3 feet deep and 1000 feet in length.
Dieser Beitrag ist auch verfügbar auf:
English
Deutsch


