Building a raised bed on a slope with gabions and automatic irrigation
The raised bed between my two gabion walls is to be redesigned. In future, the plants will be watered automatically. I install an automatic irrigation system for this purpose. This time the whole thing is to be realized with a drip hose.
Solenoid valves from Hunter ensure automatic control of irrigation via my irrigation computer. The water supply for the automatic irrigation system is via a 25 mm PE pipe.
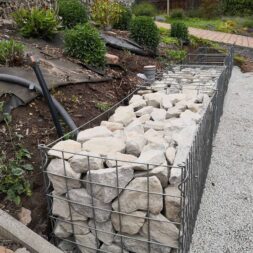
Gabions border the raised bed on the slope
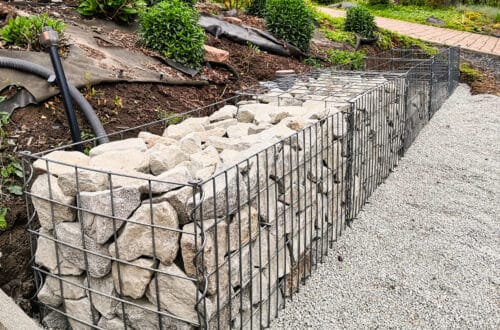
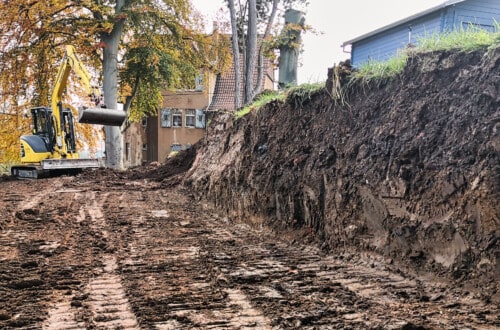
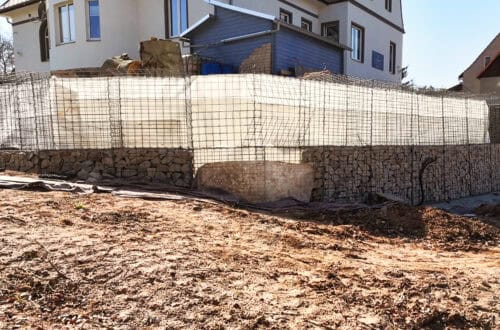
A few weeks ago, I already intercepted the slope with a gabion wall. I removed parts of the earth slope, built a sturdy foundation and then built a 50 cm high and 50 cm deep gabion wall.
This prevents soil from slipping further and the slope of the raised bed is also flattened slightly.
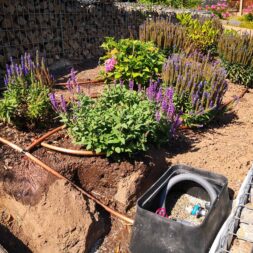
Some perennials have already been planted in the raised bed. These will remain there and be supplemented with other decorative but extremely low-maintenance succulents.
As the soil is covered by a weed protection fleece, a honeycomb fleece, an approx. 5 cm thick layer of gravel and finally another decorative layer of granite stone, the irrigation is to be supported by an underground drip hose system.

- Gabionenkorb * Breite 1000 mm * Höhe 500 mm * Tiefe 500 mm
- Frontgittergröße 1000 x 500 mm * Maschenweite 50 x 100 mm * Drahtstärke 4,5 mm
- Maschenweite der restlichen Gitter 50 x 100 mm * Drahtstärke 4,5 mm
- Verbindungsart * Spiralverbindung
- Ausführung Galfan (95% Zink, 5% Alu)
Automatic watering in raised beds
Before designing the raised bed, the irrigation had to be installed and later I would no longer be able to get under the layers of stones, gravel and the various fleece sheets.
Having already had good initial experiences with my automatic bead hose irrigation system on my 50-meter-long hedge, I wanted to use a drip hose here on the raised bed. I opted for a model from Rain Bird.
The drip hose has a small opening every 30 cm through which the water can drip into the ground. A special copper coating in the holes ensures that no roots can grow in. At the same time, water is released very evenly over the entire length.
The drip hose from Rain Bird was connected to a solenoid valve from Hunter. I already use these solenoid valves in my valve boxes for lawn irrigation.
I can connect this valve to my irrigation computer via a two-wire cable and thus fully automate the irrigation.

- Ventilkasten Ventilschacht mit Deckel rechteckig STANDARD 12"
- Der rechteckige Ventilkasten ist komplett aus hochwertigem
- stabilem Polypropylen Kunststoff gefertigt. Der grüne Deckel kann mit einer Sechskantschraube bei Bedarf festgeschraubt werden. Die Ventilboxen sind ideal für die Abdeckung der Ventilverteilungen der Bewässerungsanlage. An beliebigen Stellen kann per Säge oder Bohrer ein Zugang geschaffen werden.
- Maße: Länge 414/504 mm - Breite 288 / 376 mm - Höhe 302 mm
The valve box – the heart of the irrigation system
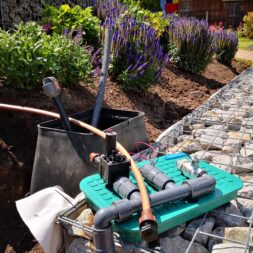
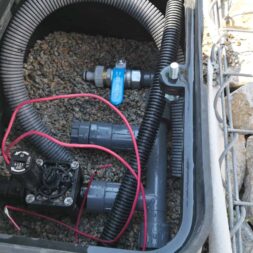
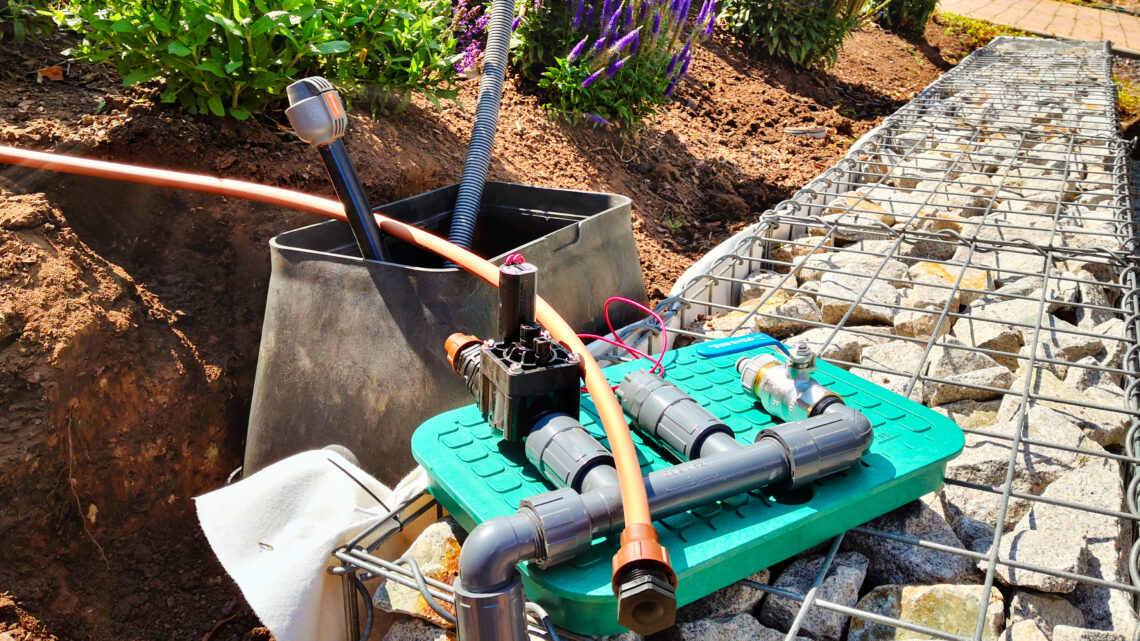
The drip hose and solenoid valve were connected via a Rain Bird distributor. I have also installed a 1-inch tap on these. This gives me the option of connecting a garden hose with the Gardena quick-release coupling at any time.
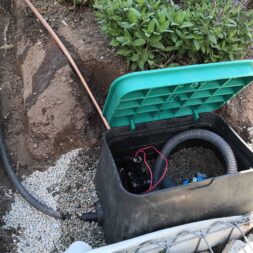
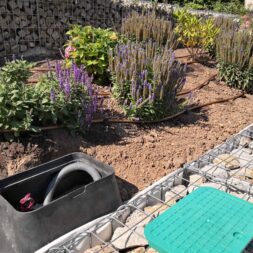
The distributor should of course be installed protected from the environment and unauthorized access. As so often, I installed a valve box directly into the slope. The box is very robust, completely open at the bottom and can be closed from above.
I fed the water pipe into the valve box from below. It is a 25 mm PE pipe. I usually used the Gardena quick coupling system for the connectors. These fittings are easy to use and safe.
I also inserted the empty conduit for the control cable into the valve box from below. The Rain Bird distributor lies in a stable gravel bed in the box. All connections are freely accessible. In addition to the tap, I can also open the solenoid valve manually at any time.
I pulled the cable for the 24V AC voltage of the solenoid valve through the empty conduit to my control computer. At the moment, my Hunter X-Core 801i is still doing the watering. I’ll probably have to make another big upgrade here later.
Video – Creating automatic irrigation in raised beds
I made 2 videos about this project, the construction of the raised bed between the two gabions and the installation of a fully automatic irrigation system. Click here for part 2 of the project: Securing raised beds on a slope with gabions and honeycomb fleece
In the video I show the assembly of the valve box with the components from Hunter, Rain Bird and Gardena in detail. The installation and connection of the valve box in the slope is also described in the video.
You can find the entire playlist of my videos here: Automatic garden irrigation. If you want to see more of me and my projects, feel free to check out my YouTube channel.
Zuletzt aktualisiert am 17. December 2025 um 02:46 . Ich weise darauf hin, dass sich hier angezeigte Preise inzwischen geändert haben können. Alle Angaben ohne Gewähr. (*) Bei den verwendeten Produktlinks handelt es sich um Affiliate Links. Ich bin nicht der Verkäufer des Produktes. Als Amazon-Partner verdiene ich an qualifizierten Verkäufen. Dein Preis ändert sich jedoch nicht.
Automatic irrigation in the test
After installing the valve box, the irrigation system is tested. I provisionally connected the inlet via a garden hose as I could not yet pull the PE pipe to the next distribution box. The Rain Bird drip tube has already been connected to the Hunter solenoid valve.
The solenoid valve can be opened manually with a quarter turn to the left and the irrigation circuit can be tested. As the entire irrigation system would later disappear below the surface, this test was extremely important.
I therefore left the water pressure on the pipe for a good hour to see if my construction was tight.
Initially, the water came to me from the inlet which was connected to the manifold from below in the valve box. I had not closed one of the Gardena quick couplings. Once I had rectified the fault, I was able to give the all-clear after a good hour.
Everything was tight.
The next weekend I was able to devote myself to the drip tube and the honeycomb fleece.
Dieser Beitrag ist auch verfügbar auf:
English
Deutsch


