• Privacy
  • Imprint
  • Contact Form
  • COMMAIK
    • Contact Form
    • Imprint
    • Privacy
  • The Villa
    • The top floor
    • The upper floor
    • The first floor
    • The cellar
    • The garden
  • Stories from the construction
    • irrigation
    • Photovoltaics
    • Pool and terrace
    • SmartHome
    • The planning
    • The demolition
    • The installation
    • Machinery
    • Restoration and working techniques
    • This and that
  • Videos
    • Build & Renovate
    • Irrigation
    • Carport
    • Gabions
    • Garden
    • Garden kitchen
    • Pool
    • Smart Home
    • Drying
    • Tutorials
  • TESTED & RATED
    • Heating solutions & energy
    • Outdoor & Garten
    • Pool & garden kitchen
    • Security & Smart Home
    • Tools & DIY
  • Privacy
  • Imprint
  • Contact Form
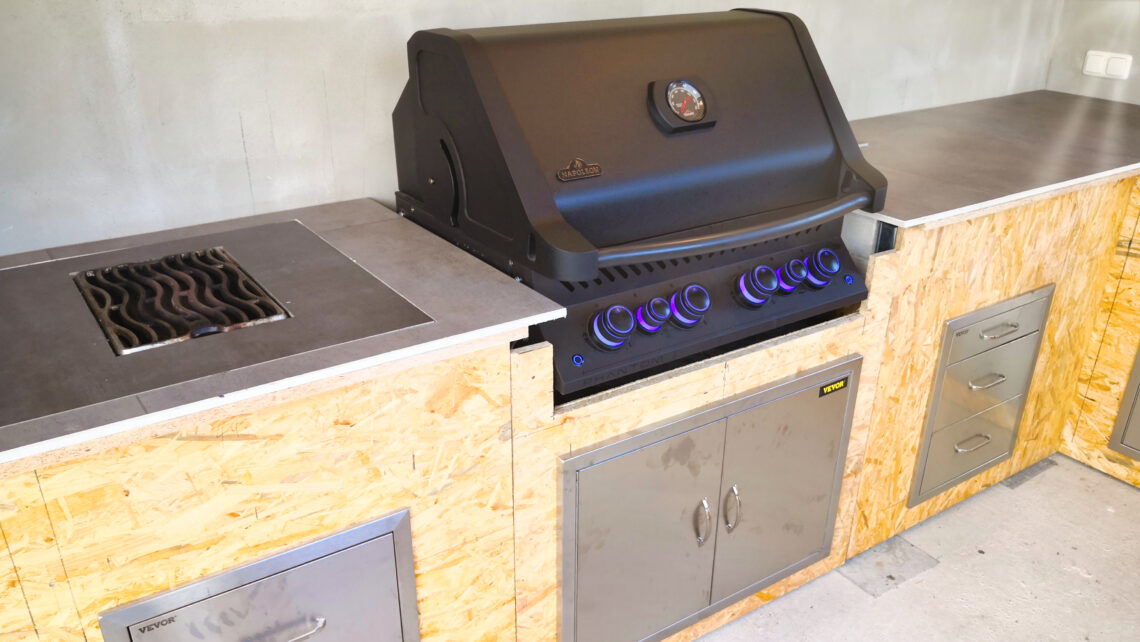
  • Permanently installing the sizzle zone of the Napoleon gas barbecue in the outdoor garden kitchen

    Gartenkueche bauen Napoleon Gasgrill einbauen commaik.de 030 YT1 - Permanently installing the sizzle zone of the Napoleon gas barbecue in the outdoor garden kitchen

    The Napoleon PHANTOM P500 is a powerful gas barbecue – and with the built-in sizzle zone it becomes the centerpiece of my outdoor kitchen. In this post, I’ll show you how I removed the sizzle zone, integrated it into the worktop and permanently installed the grill body in the kitchen unit. From the gas connection to the power supply to the porcelain stoneware tiles, I document the complete conversion step by step – including all solutions for heat, grease, ignition and dismantling.
    Weiterlesen

    Ähnliche Beiträge

    Reolink Kameras ins Netzwerk einbinden PoE WLAN Schritt fuer Schritt erklaert www.commaik.de - Integrate Reolink camera into the network - WLAN & PoE step-by-step guide

    Integrate Reolink camera into the network – WLAN & PoE step-by-step guide

    26. April 2025
    Bewaesserung mit RainBird XFD Tropfschlauch bauen 022 a - DIY ornamental bed with automatic Rain Bird drip tube irrigation

    DIY ornamental bed with automatic Rain Bird drip tube irrigation

    2. February 2024
    Rasenbewaesserung bauen hunter mp rotator Rohre unter geweg verlegen www.commaik.de 008 a - Laying the water pipe in the garden: tips for connecting the water supply to the garden irrigation system

    Laying the water pipe in the garden: tips for connecting the water supply to the garden irrigation system

    10. March 2025

Autor & Blogger

In this construction diary, we share our experience in the renovation and modernization of our Art Nouveau villa and hope to give a few suggestions and tips to some of you.

commaik.de © 2025
  • Contact Form
  • Privacy
  • Imprint
  • Change privacy settings
  • Cookie policy
  • English
  • Deutsch (German)