Install 8kW diesel parking heater safely in the workshop & garage
In this article, I show you how I heat my workshop efficiently, permanently and reliably with an 8 kW diesel parking heater from KROAK. I planned and implemented the complete installation of the diesel parking heater step by step – from safe exhaust gas routing to fuel supply and hot air distribution. It’s not just about technology, but also about safety, consumption, control via app and the question of whether heating oil can be an alternative to diesel. If you are looking for a workshop heater that also works at low temperatures, you will find all the details here.
What you can expect in this blog post:
- Why a diesel parking heater is the ideal solution for cold workshops
- Advantages of an 8 kW KROAK diesel heater in stationary use
- Detailed planning: flue gas routing, fresh air, tank and power connection
- Practical test: How well can the workshop be heated – consumption & temperature
- Safety instructions for operation in enclosed spaces
- Technical implementation: ventilation ducts, butterfly valves & control via app
- Tips for using heating oil instead of diesel – legal & economical
- All installed components & my personal conclusion on the workshop heating system
Why an 8kW diesel heater makes sense in the workshop
I have tested various heating solutions in my workshop over the years. Without heating, the temperatures in winter were usually constant at around 10 °C – too cold to work comfortably in the long term. Initially, I used a 3.6 kW industrial fan heater. With the electric fan heater, the room could easily be heated up to 30 °C, but the power consumption was enormous, which made this solution uneconomical in the long term.
A 600 W infrared panel was later used as an alternative. This could hardly raise the room temperature noticeably, but provided a pleasant feeling of warmth through direct IR radiation. The principle of infrared heating is based on heating solid bodies and surfaces in the radiation range rather than the air – similar to the sun’s rays. The air remains cool, but the body still feels warm. This was ideal for selective work, but not sufficient as a permanent solution for larger rooms.
As I also regularly work in the workshop in winter, I needed a durable and efficient heating solution. The aim was to create a workshop heating system that not only runs reliably, but can also heat several rooms efficiently regardless of electricity consumption. A diesel parking heater meets precisely these requirements: compact, robust and with impressive efficiency – even in enclosed spaces such as workshops, cellars, garages or hobby rooms.
I documented my first experiences with a diesel heating system in the house in my blog post on the KROAK TB2(to the post). The compact solution in suitcase format was ideal for mobile use, but could not remain in the workshop permanently, as I now also use it for other purposes, such as camping or garden shed heating. Permanent installation was therefore impossible.
I also analyzed the performance of these inexpensive but functional heaters from China in my test of the Vevor 8 kW diesel parking heater(see article). I used the mobile version there in a self-built mobile transport box, e.g. to heat my animal house. The results were convincing: low consumption, good control options via remote control or app, and surprisingly quiet operation – especially on a low heating level.
I was also able to show how flexibly diesel parking heaters can be used when installing them in a garden shed(see article). This gave rise to the idea of permanently heating my workshop with a diesel heater – with a stationary solution.
Another advantage is that such heaters can be used for a wide range of applications. In the blog article “5 diesel parking heaters in comparison”(to the article), I show which devices are suitable for garages, campers, workshops or even boats. From compact models to powerful all-in-one systems – there is a suitable solution for almost every environment.
The decision was ultimately made in favor of a stationary diesel heater because it is self-sufficient, cost-effective to operate and powerful enough to heat my entire work area. It is also independent of 230 V power – operated with a 12 V transformer, I can flexibly adjust the power supply.

- 【Schnelle Aufheizung & Energiesparend】Hcalory Diesel Luftheizung verfügt über einen verstärkten Alu-Wärmetauscher, der die Verbrennungseffizienz um 18% steigert und den Kraftstoffverbrauch signifikant reduziert. Spüren Sie die Wärme in nur 3,5 Minuten – der Luftauslass erreicht in 5,5 Minuten volle 100°C. 8 kW (einstellbar) für vielseitige Einsätze bei einem Verbrauch von nur 0,12-0,45 L/h, 10L Großtank für wohlige Wärme die ganze Nacht.
- 【Zwei Plateau-Modi - Intelligente Anpassung】Standheizung Eingebaute Plateau-Modi für 2500 m und 5000 m Höhe mit manueller Umschaltung. Automatische Anpassung des Luft-Kraftstoff-Verhältnisses für stabilen und effizienten Betrieb auch in großen Höhen.
- 【Drei Steuerungsmöglichkeiten】Unterstützt LCD-Display, Fernbedienung (30 m) und Bluetooth-App (10 m). Die App bietet Zeitschaltungen, Stufenregelung (1-10), Auto-Start/Stop und Temperatur-einstellung.
- 【Sicherheitsschutz】Neues verbessertes Mainboard mit Schutz vor Kurzschluss, Verpolung, Überspannung und Überhitzung (≥270°C). Sicher einsetzbar in Autos, Wohnmobilen, Booten und Innenräumen - für einen warmen Winter.
- 【Einfache DIY-Installation】Speziell für Heimwerker: Keine komplexe Verkabelung nötig. Direkter 12V/24V DC-Anschluss ermöglicht einfachen Einbau in Fahrzeugen, Werkstätten oder mobilen Räumen.
Requirements and challenges when installing the diesel parking heater in the workshop
Planning the installation of a diesel parking heater in an enclosed space such as a workshop entails a number of basic requirements and challenges. Issues such as safe exhaust gas routing, oxygen consumption during combustion and possible odor nuisance from the diesel tank are particularly critical.
A key risk is the formation of exhaust gases, in particular carbon monoxide (CO), which is odorless, colorless and highly toxic even in low concentrations. If the exhaust gas is not completely discharged outside in a controlled manner, it can accumulate in the room in a very short time. In a closed volume like my workshop with a floor area of around 25 m² and a room height of 2.30 m, this results in a room volume of around 57.5 m³. Added to this is the connected basement with around 26.4 m³ (4 × 3 × 2.2 m), so that the total air volume is around 84 m³.
Depending on the heating level, an 8 kW heater consumes approx. 0.1 to 0.5 liters of diesel per hour. The by-product of combustion is not only heat, but also a relevant amount of CO and CO₂. Without flue gas routing to the outside, a dangerous CO concentration can be reached after just a few minutes of operation – especially in the event of incomplete combustion or leaks in the flue gas system.
The oxygen displacement caused by the combustion process should also not be underestimated in closed rooms. For every liter of diesel burned, around 13 m³ of air is needed from which the oxygen is extracted. This means that with a maximum consumption of 0.5 liters of diesel per hour, around 6.5 m³ of air volume can be completely consumed within one hour. With a total air space of around 84 m³, critical oxygen levels would be reached after a few hours, especially with an insufficient supply of fresh air.
Another important point is the potential odor nuisance caused by diesel – especially if the tank is installed indoors. Even the smallest leaks or imperfectly sealed connections on tank taps, hoses or the diesel pump can lead to a persistent diesel odor that settles in the workshop and is perceived as a nuisance.
These considerations made it necessary at an early stage not only to ensure safe exhaust gas routing, but also to plan suitable measures for monitoring air quality. A simple smoke detector is by no means sufficient. Rather, it was clear that a multi-gas detector with CO, CO₂ and smoke sensors was required to reliably detect both acute dangers from carbon monoxide and gradual oxygen depletion or smoke development.
These points formed the basis for the technical planning of the installation and significantly determined the selection of components and the subsequent implementation.
CO and CO₂ hazard with diesel parking heaters in closed rooms
Operating a diesel parking heater in an enclosed space such as a workshop or basement entails serious risks – primarily due to carbon monoxide (CO), carbon dioxide (CO₂) and oxygen consumption during combustion:
Carbon monoxide (CO)
- Just 50 ppm CO can trigger initial symptoms such as headaches or dizziness.
- In the event of a typical leak in the flue gas system (e.g. due to loose connections, corrosion or poor seals), a critical CO concentration can be reached within 10-30 minutes.
- From 400 ppm CO there is a danger to life after 2-3 hours – an undetected leak is therefore extremely dangerous.
Carbon dioxide (CO₂)
- One liter of diesel produces around 2.6 kg of CO₂ – this corresponds to approx. 1.4 m³ of CO₂ gas volume.
- With a consumption of 0.5 l/h, around 0.7 m³ of CO₂ is produced per hour.
- In a room with a volume of 84 m³ (e.g. 25 m² workshop + connected basement), the CO₂ value rises to over 8000 ppm after just 60 minutes – this is well above the limit value of 1000 ppm recommended by occupational health authorities.
Oxygen consumption
- Diesel combustion requires large quantities of fresh air: approx. 13 m³ of air per liter of diesel.
- Without an active supply of fresh air, oxygen deficiency can occur in a closed room within a few hours – with symptoms such as tiredness, shortness of breath and concentration problems.
- It becomes particularly critical in tightly sealed cellars or garages, where there is hardly any natural air exchange.
Planning advice
When installing a diesel heater indoors, safe exhaust pipes, a reliable fresh air supply for combustion and suitable sensors for monitoring CO, CO₂ and oxygen content must therefore be planned from the outset. Without these measures, there is an acute risk of poisoning, suffocation or explosion.

- BITTE BEACHTEN SIE, DASS DAS XP0A-SR NICHT MIT SBS50 BASISSTATIONEN KOMPATIBEL IST. Nur die deutsche Sprache wird unterstützt. Eine App-Unterstützung ist nicht verfügbar. Wenn Sie App-Funktionen benötigen, wählen Sie bitte das XP0A-MR11 (mit Basisstation) oder das XP0A-iR (WLAN-Verbindung).
- Alarm per Sprachausgabe: Zusätzlich zu der Alarmsirene erklingt eine Sprachausgabe, um Bewohner unmittelbar auf die vorhandene Gefahr hinzuweisen. So gibt der eingebaute Lautsprecher je nach Art der erkannten Gefahr spezifische Warnmeldungen aus, wie etwa: „Warnung! Rauch entdeckt. Evakuieren Sie.“ oder „Warnung! Kohlenmonoxid erkannt. Begeben Sie sich an die frische Luft.“ (Nur Deutsch)
- Einfacher bedeutet sicherer: Praktische Sprachwarnungen informieren Sie schnell und einfach über wichtige Ereignisse wie Notfälle, Batteriestatus, Fehler und Lebensdauer. Auf dem LCD-Display werden Kohlenmonoxid-Messwerte, Batteriestatus und andere Informationen in Echtzeit angezeigt. So können Sie die Situation rasch einschätzen, ohne das Handbuch herauskramen zu müssen – und schnell handeln, um Ihre Familie zu schützen
- Barrierefrei: Dank der Sprachwarnungen ist dieser Melder auch für Kinder geeignet. Zudem können Kinder dank des LCD-Displays und der LED-Statusleuchte problemlos informiert werden
- 2-in-1-Schutz: Umfassender Schutz durch einen einzigen Rauchmelder: der photoelektrische und der elektrochemische CO-Sensor funktionieren unabhängig voneinander und warnen Sie unverzüglich im Falle von gefährlichen Rauch- oder CO-Werten. So ist Ihre Familie mit minimalem Aufwand vor zwei tödlichen Bedrohungen geschützt
Planning and components for the parking heater
Careful planning was the first step before the actual installation began. The aim was to install a stationary diesel parking heater in my workshop that works reliably, safely and efficiently. Control via remote control and app, as well as safe exhaust gas and warm air routing for the air heater, should be possible. Below are the components that I have planned for the project:
KROAK diesel parking heater 8 kW (12 V)
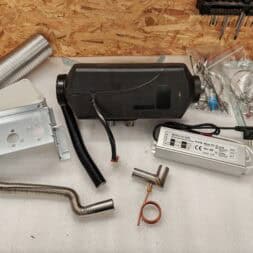
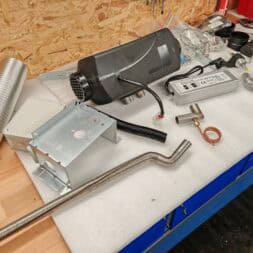
A KROAK diesel parking heater with 8 kW output was to be used(for the product). The heater was supplied in a set that already contains important basic components: Remote control, fresh air pipe, exhaust, silencer, tank extractor, fuel line and basic installation material. Their compact design, sturdy metal housing and integrated Bluetooth app control make them particularly interesting for stationary use.
Fuel supply with larger tank
For longer running times without constant refilling, a larger diesel tank should be installed. The tank should be equipped with a tank extractor to ensure a safe fuel supply. The pipes should be connected with pressure-tight hoses and suitable clamps to prevent leaks and odors.
Exhaust hose, exhaust extension, condensate drain & accessories
As the exhaust gas would have to be routed from the basement to the outside, I planned to use a 3 m exhaust extension, an exhaust bracket, a condensate drain with spiral and exhaust assembly paste. The aim was to create a tight, durable and condensation-proof flue gas pipe.
Fresh air pipe for the combustion air
The fresh air required for combustion should be drawn in via a metal pipe included in the set. This would supply air from outside and prevent oxygen from being extracted from the room air – a crucial point when used in enclosed spaces such as a basement.
Hot air distribution with 70 mm ventilation ducts
To distribute the heated air, I planned to use 70 mm ventilation pipes, T-pieces with integrated adjustable throttle valves and suitable air outlets. This would allow the heating output to be divided between the basement and the workshop and the air flow to be regulated as required.
Prefabricated metal bracket & OSB mounting plate
A prefabricated metal bracket should be used for stable and maintenance-friendly wall mounting. This would provide all the necessary feed-throughs for exhaust gas, fresh air, fuel and screw connections. It was to be attached to an OSB board, which would also serve as a mounting surface for the rest of the technology.
Transformer (220 V to 12 V direct current)
As the KROAK heater is operated with 12 V direct current, a 300 W transformer should be used. This would be powerful enough to supply the high starting current of the glow plug. It was also planned to secure the system with a corresponding safety unit.
Electrical installation box & extension for the remote control
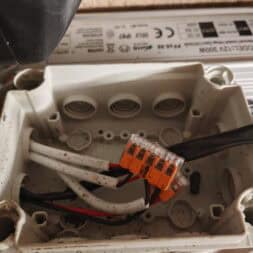
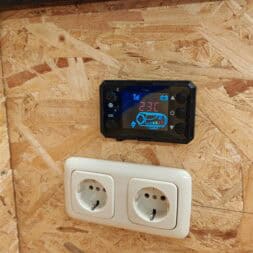
An installation box should be installed to ensure a clean and safe electrical connection. The remote control should be installed in the upper workshop area using a separately ordered 3 m cable extension. This means that the control system can be accessed at any time, even without an app.
This compilation formed the basis for the subsequent implementation. The planning took into account not only the functional requirements, but also aspects such as safety, ease of maintenance and user-friendliness of the entire system.

- Weit verbreitet: Die Basishalterung für die Luft--Standheizung ist ein Ersatz für Eberspacher Airtronic D2 D4 D4S T5, Ersatz für Webasto Air Top 2000 5000 Dieselheizung. Wenn Sie sich bezüglich des Artikels nicht sicher sind, kontaktieren Sie uns bitte vor dem Kauf, um unnötige Rücksendungen zu vermeiden, danke!
- Material: Der Basishalter besteht aus hochfestem Edelstahlmaterial, das die Eigenschaften einer starken Haltbarkeit, Oxidationsbeständigkeit und Korrosionsbeständigkeit aufweist. Im Gebrauch ist das Material nicht anfällig für Rost-, Korrosions- und Ausbleichungsprobleme, sodass es lange Zeit ohne häufigen Austausch verwendet werden kann.
- Einfache Installation: Die Basis-Montagehalterung für die Luft--Standheizung zeichnet sich durch eine einfache Struktur und einfache Installation aus. Es sind keine großen Werkzeuge und Fachkenntnisse erforderlich. Sie ist praktisch für eine schnelle Installation und Verwendung, was den Benutzern bei der tatsächlichen Verwendung viel Zeit und Mühe ersparen kann. und kann einige unnötige Probleme reduzieren.
- Hinweis: Der Einbau des Luft--Standheizungssockels ist ein wichtiger Schritt, um sicherzustellen, dass die Heizung stabil am Fahrzeug sitzt und eine optimale Erwärmung erreicht werden kann.
- Verformungssicher: Nicht leicht zu brechen, zu verformen, wodurch die Standheizung wirksam vor äußeren Schäden geschützt wird und eine sichere und zuverlässige Verwendung gewährleistet wird. Die Halterung besteht aus hochfesten Materialien mit guter Stabilität, um sicherzustellen, dass die Standheizung während des Gebrauchs nicht wackelt und sich verschiebt.
Mounting & installation of the KROAK diesel parking heater
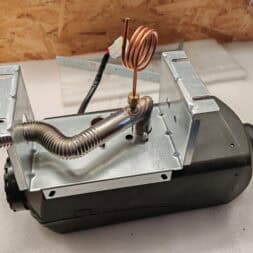
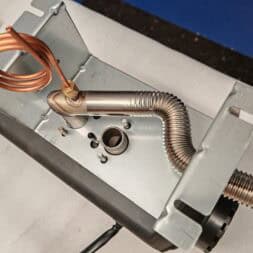
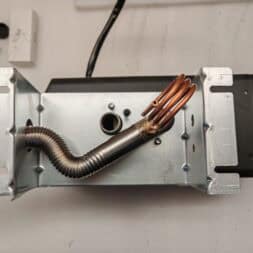
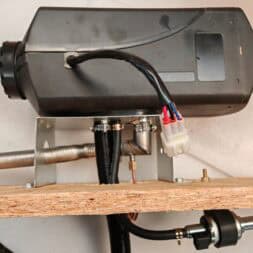
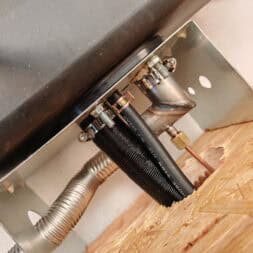
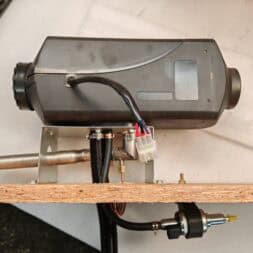
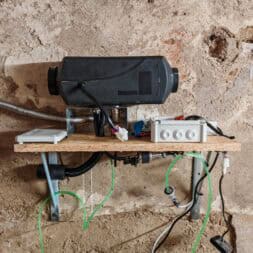
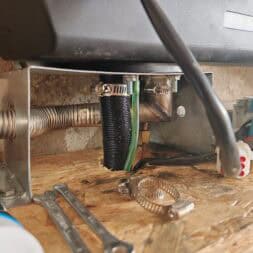
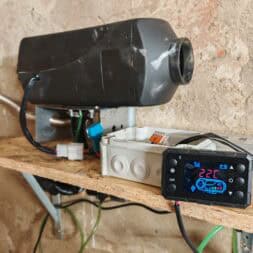
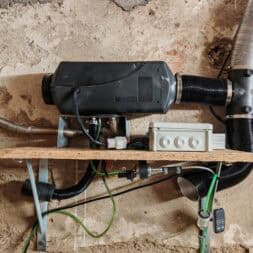
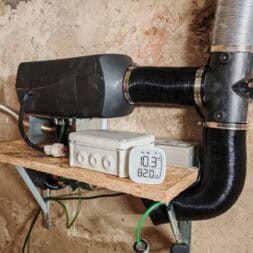
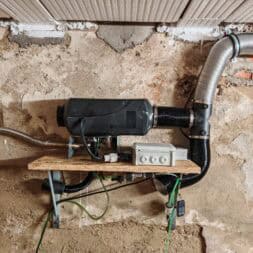
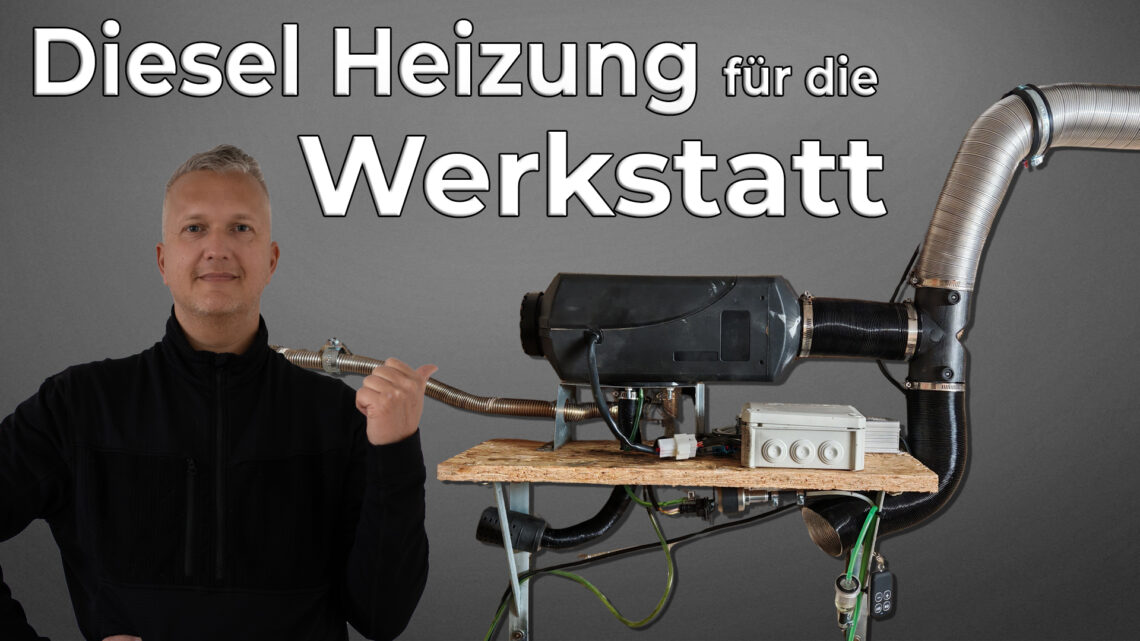
As this is a fixed installation, I planned and implemented a robust and maintenance-friendly bracket. The base is a stable OSB board to which I have attached a prefabricated metal bracket. The KROAK diesel parking heater with 8 kW output was installed in this metal bracket.
The OSB board itself was prepared to fit perfectly: I drilled cut-outs for the exhaust pipe, the fresh air hose and the cable ducts. This meant that all connections could be routed cleanly and space-savingly through the panel without causing collisions with the wall or other components later on.
I used solid heavy-duty brackets to attach it to the wall of the basement. These ensure a permanent and stable connection between the OSB board and the cellar wall. The entire construction is therefore firmly bolted down, mounted with low vibration and accessible at all times – ideal if maintenance work is required at a later date.
The heater itself sits securely in the bracket, is not in the way and is positioned so that all connections remain accessible from both sides. This creates the basis for reliable operation and clean installation of all cables.
Drain flue gas and condensate safely
A central point in the installation of the diesel parking heater was the safe and condensate-free exhaust gas routing. The flue gas system had to be carefully planned and implemented to ensure that the flue gases were discharged cleanly and to avoid condensate damage.
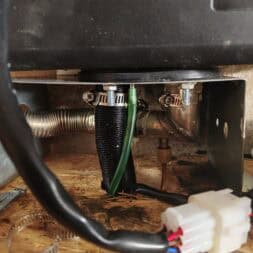
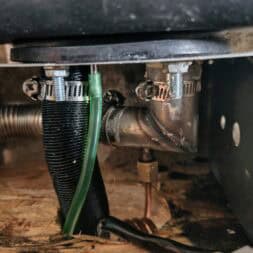
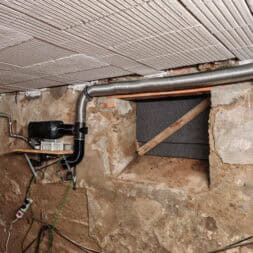
First of all, I fitted the condensate drain directly to the flue gas outlet of the heating system from below. This is located at the lowest point of the entire system and thus forms the first station of the flue gas routing. I connected a 60 cm long exhaust pipe directly to it, which I bent and adjusted so that it fits comfortably through the openings in the metal bracket.
I made sure that there was sufficient distance to the fuel line and the electrical cables to avoid the effects of heat and to ensure that all components functioned safely.
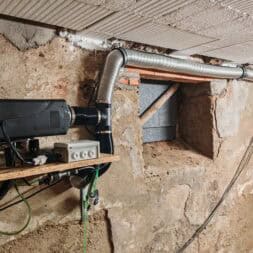
The 60 cm pipe is connected to a 3 m long exhaust pipe that leads to the outside via the false ceiling. The exhaust pipes were connected using 90° elbows. These can be flexibly bent open and adapted to the installation process.
All joints – i.e. between the heater, condensate drain, pipes and angles – were sealed with exhaust assembly paste to permanently prevent leaks and unpleasant odors.
The entire flue gas pipe was laid with a slight, constant gradient towards the condensate drain. This means that any condensation water that forms during operation can be collected at the lowest point and run off drop by drop via the integrated condensate spiral. This installation prevents water from accumulating in the pipe, causing corrosion or creating pressure points in the system.
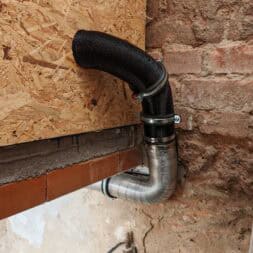
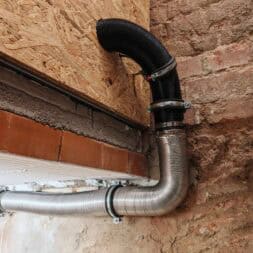
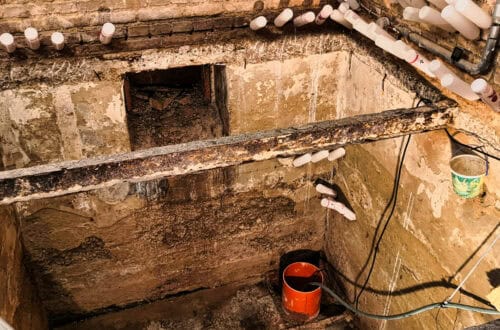
In the basement, the 60 cm section and the first meter of the 3 m pipe run open along the wall. The remaining meters of pipe run upwards through the suspended ceiling, behind which they lie neatly in a cavity behind the OSB wall cladding. There, the pipe is fed through a hole in the outer wall. A silencer was installed outside, supplemented by an angle piece that safely diverts the exhaust gas away from the wall to the outside.
A positive side effect: the flue gas pipe gives off noticeable heat to the room in the basement, which I also use for passive heating. To protect the OSB board and adjacent wood paneling, I covered the pipe on the inside with a heat-resistant protective hose. This prevents heat from building up or components from overheating.
Outside, I made sure that the installation was dry, well protected and mechanically stable. This is important, as moisture, vibrations or wind loads could otherwise lead to corrosion, leaks or mechanical damage in the long term. This means that the entire flue gas system remains safe and low-maintenance even in continuous operation.


Fuel supply and tank solution
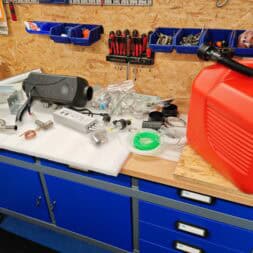
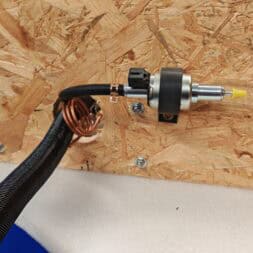
I used a larger external 20-liter tank for the fuel supply, which is connected to the diesel pump using a tank extractor. The diesel is fed to the pump via a fuel hose and from there to the heater. The course of the hose has been chosen to avoid air bubbles in the system – a principle that has already proven itself in my previous projects.
I built the tank in the same way as my mobile heating box, which I described in an earlier project. The details can be found in my blog post:
🔗 Upgrading the diesel parking heater – installing a tank extension for the mobile heating box
The tank used is not 100% airtight – and this is a deliberate choice. A completely sealed tank would create a vacuum when fuel is removed, which could impair delivery by the pump in the long term or even bring it to a standstill. A small ventilation system allows the pressure to equalize so that the diesel can flow in evenly.
However, this ventilation also has a disadvantage: under certain conditions, a slight odor can develop – especially if the tank is located in a closed room such as my basement and the surrounding area is poorly ventilated. Although odor development is limited if the connections are clean, it should definitely be taken into account during planning.
In my case, the slight odor was acceptable because I opted for the lowest possible emission solutions when selecting the hose, the connections and the routing of the tank venting point. An optional activated charcoal filter would be one way of additionally counteracting this.
Depending on the heating level, the diesel consumption of the KROAK heater is around 0.2 to 0.5 liters per hour, which, with the larger tank, enables a long running time without refilling – ideal for permanent stationary operation in the workshop.

- Autotankabsaugung Kraftstoff Standrohr Set: Es beinhaltet 1 x Tankstandrohr (53 cm), 1 x Kraftstoffleitung (4 m), 1 x Ölfilter, 5 x Gummischläuche, 10 x Schlauchclips.
- Materialien: Der Kraftstofffilter-Satz besteht aus hochwertigem Kunststoff und Metallmaterialien, Es verfügt über eine schnelle Filtrationsgeschwindigkeit, Korrosionsbeständigkeit, ist nicht leicht zu beschädigen und hat eine lange Lebensdauer.
- Eigenschaften: Das Kraftstoffschlauch-Kit filtert Verunreinigungen, Schmutz und Partikel aus dem Kraftstoff, verhindert eine Verstopfung des Vergasers und lässt nur sauberen Kraftstoff einströmen, wodurch der Kraftstoffverbrauch und der mechanische Verschleiß reduziert werden und der Motor reibungslos läuft.
- Einfach zu installieren: Installieren Sie Kraftstoff schnell und sicher, Kein Bedarf, den Kraftstofftank zu entfernen oder die Kraftstoffleitung des Fahrzeugs zu unterbrechen. Direkt am vorhandenen Fahrzeugtank oder Tanksender installiert, einfache Installation und Verwendung.
- Anwendungen: Auto-Kraftstoff-Standrohr für Eberspacher/Webasto-Heizung. Kraftstoffleitungssatz für alle Dieselheizungen bis 5kw.
Electrics, transformer & control
The KROAK diesel parking heater is powered by a 220V-12V transformer, which provides the necessary voltage for operation and starting. The heater works with 12 V direct current and has different requirements in the individual phases of operation.
The current requirement is particularly high in the starting phase: up to 8-10 amps are required for a short time when the glow plug is preheating – this corresponds to a power consumption of approx. 100-120 W. The transformer must be able to cope with this load peak without the voltage collapsing or the heating system forcing a restart.
During operation – i.e. after ignition – the power consumption drops significantly. Depending on the heating level, it is typically between 0.8 and 3.0 amps, which corresponds to a continuous output of around 10 to 36 watts. The power requirement is then distributed between the fan, the electronics and the diesel pump. After starting, the glow plug is usually deactivated or only pulse-controlled.
That’s why I chose a transformer with a rated output of 300 W. This offers sufficient reserves for the start-up phase and remains far below its load limit during normal operation – which extends the service life and ensures a stable voltage curve. The 12V outputs are additionally protected by a flat fuse that triggers in the event of a short circuit or overload.
Alternatively, a regulated 12V power supply unit could also be used. The difference to the classic transformer lies in the type of voltage regulation: switching power supplies deliver a constantly stabilized output voltage with a smaller size and higher efficiency. It is important that the power supply unit is designed for at least 10 A peak current and has protection functions against overload and short circuit. A high-quality power supply unit definitely offers advantages for permanently installed solutions, especially where space is limited.
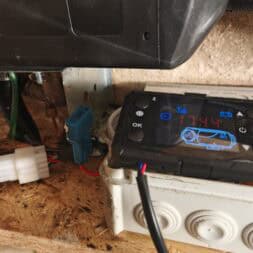
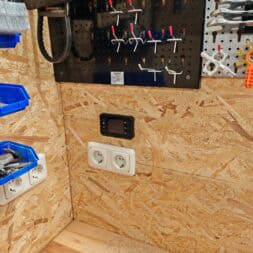
I laid the remote control for the heating via a 10 m long control cable from the basement to the main area of my workshop. Despite its length, it works perfectly and without signal loss. The heating is thus controlled directly and conveniently from the central workstation.
The diesel heater with LCD display can also be operated using a smartphone app via Bluetooth. This allows me not only to control the temperature, but also to switch it on and off and select the heating levels – particularly handy if I want to warm up the workshop before I even enter it.
What is currently still missing is a central on/off switch that deactivates the entire heating system including the power supply. I could easily retrofit this if required – for example as a rocker switch with LED directly on the OSB panel or as a wall switch next to the remote control. This allows the entire system to be safely disconnected from the mains in a single step.

- Transformator 230V auf 12V LED: AC-Eingang 170-260 Volt. 50 / 60Hz, Konstant Spannung ausgang: 12V DC, Ausgangs strom: 25 Ampere. Maximale Belastung: 300 Watt. Abmessungen: 365 x 58 x 25mm; Nicht dimmbar.
- LED Trafo 12V Robust: Das Vollkörper-Aluminiumgehäuse in Verbindung mit Silikonverbundstoff hilft innen gefüllt, das Gerät 100 % wasserdicht und kühl zu halten. Keine Funkstörungen, keine Mindestlast, kein Flackern und kein Rauschen
- LED Netzteil Schutzfunktionen: Automatischer Schutz bei Kurzschluss, Überlastung, Überspannung, Überstrom, hoher Temperatur. Schutztyp: Hiccup-Modus, automatische Wiederherstellung nach Behebung des Fehlerzustand
- Transformator 230V 12V Wasserdicht: IP67 bewertet Regenfest und staubdicht. Für CCTV-Kameras und DC12V LED-Beleuchtung wie einfarbige LED-Streifen, Unterschrankleuchten, LED-Module, Puckleuchten, Poolbeleuchtung, Landschaftsbeleuchtung, Decksbeleuchtung, Geschäftsschilder und G4/MR16/MR11 LED-Lampen
- Hochwertig und Unterstützt: Kann an einem trockenen oder nassen Ort installiert werden, der für Innen- und Außen anwendungen geeignet ist. Bei Problemen mit dem LED Netzteil 12V 300W können Sie sich gerne an uns wenden, um Unterstützung zu erhalten.
Laying ventilation ducts & controlling hot air
To distribute the hot air, I installed a T-piece with integrated throttle valves, which directs the air flow both into the basement and into the actual workshop. The two outlets of the T-piece are each connected with flexible 70 mm ventilation pipes that can be extended to a length of up to 5 meters. To bridge even greater distances, I have also installed a pipe connector, which can be used to extend the ventilation system further if required.
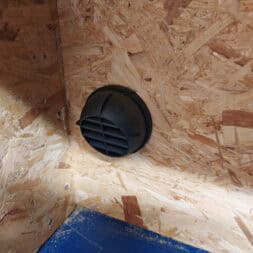
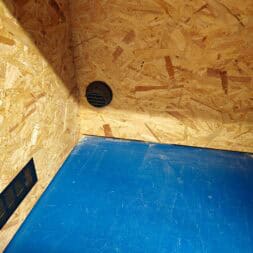
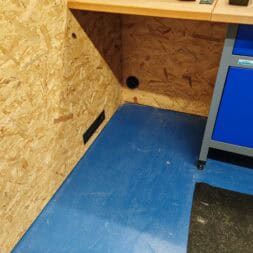
I laid the ventilation pipe that transports the warm air into the workshop along the ceiling of the basement. Directly at the staircase exit, a breakthrough was made through the wall, which is clad with OSB panels on both sides. The pipe runs through this opening and ends in an air vent, which is located in the workshop about 10 cm above the floor.
This placement has several advantages:
- Efficient heat distribution: As warm air rises, it can be optimally distributed throughout the room from below. The floor-level air outlet ensures that the entire room is heated evenly without the heat remaining unused under the ceiling.
- Reduced draught: Placement close to the floor prevents hot air from being blown directly into the face or onto sensitive work areas – an important aspect when working with paper, wood dust or fine materials.
- Less dust turbulence: Air outlets at head height or on the ceiling could generate stronger air currents that stir up dust. The deep outlet ensures a gentle air flow close to the floor, which works unobtrusively and effectively.
The throttle valves in the T-piece allow me to precisely adjust the distribution of the air flow. Depending on requirements, more heat can be directed into the cellar or workshop – ideal if only one area is to be heated.
One deliberate point in the planning was that I didn’t insulate the ventilation pipes. As a result, they passively emit heat to the environment over their entire length, which provides additional temperature control, especially in the basement. Instead of selective heat at a single air outlet, this creates uniform, surface heating, which is particularly useful for cool masonry.


Video: Installing the diesel parking heater permanently in the workshop – explained step by step
I have documented the complete installation of the KROAK 8kW diesel parking heater including mounting the bracket, piping for exhaust, fresh air and fuel, connecting the transformer and laying the hot air pipes in a detailed and practical video. The video is part of my playlist Product Tests, Experiences & Conclusion on my YouTube channel and shows the entire process from planning to the successful test run.
Another overview of my videos on building the animal house with outdoor aviary can be found in the Garden blog category.
If you want to see more of me and my projects, feel free to check out my YouTube channel.
Zuletzt aktualisiert am 26. January 2026 um 15:32 . Ich weise darauf hin, dass sich hier angezeigte Preise inzwischen geändert haben können. Alle Angaben ohne Gewähr. (*) Bei den verwendeten Produktlinks handelt es sich um Affiliate Links. Ich bin nicht der Verkäufer des Produktes. Als Amazon-Partner verdiene ich an qualifizierten Verkäufen. Dein Preis ändert sich jedoch nicht.
Test run: Workshop heating with diesel
After the successful installation, I put the KROAK 8 kW diesel parking heater into operation in a first test run. The initial temperature in the workshop was around 10 °C. A pleasant room temperature of almost 18 °C was reached after just under two hours of heating on level 2.
The air distribution via the ventilation system worked excellently: the warm air entered the room evenly, without any disturbing draughts or excessive noise.
The heating itself ran quietly and reliably. The typical clicking of the diesel pump was barely audible at the lower heating levels, only becoming more noticeable at higher levels – but without being annoying. The generated air flow is targeted and ensures rapid heating where it is needed. Overall, the room climate feels pleasantly dry and well tempered – ideal for working in winter.
Fuel consumption & heating costs
In the aforementioned test operation at level 2, fuel consumption was around 0.25 liters of diesel per hour. This means that approx. 0.5 liters of diesel were consumed for a heating period of 2 hours. This also provides good indications for regular operation during the heating season.
I mainly use the workshop at the weekend – on Fridays, Saturdays and Sundays for a total of around 15 hours a week. With an average consumption of 0.25 l/h (depending on the heating level), this results in
- 15 h × 0.25 l = 3.75 liters of diesel per week
- For 5 winter months (November to March):
~20 weeks × 3.75 l = approx. 75 liters of diesel per heating season
With a diesel price of around €1.60 per liter (as of spring 2025), this results in seasonal heating costs of approx:
- 75 l × 1.60 € = 120 € per heating season
Tank filling & durability
The new tank has a volume of 20 liters. With a weekly consumption of around 4 liters, one tank of fuel lasts for around 5 weeks. This means that the tank only needs to be refilled around 4 times during the entire heating season – a major advantage in terms of convenience and maintenance.
Diesel can be kept for several months if stored in a cool, dry place, but should ideally be used within one heating period. For long-term stabilization, a diesel additive can be used to prevent ageing, resinification and bacterial growth in the tank.
Alternative: Efficient heating with heating oil instead of diesel
Alternatively, the parking heater can also be operated with EL (extra light) heating oil – many diesel parking heaters are technically suitable for this. Heating oil and diesel are very similar in their chemical composition: both consist of long-chain hydrocarbons and have comparable calorific values (approx. 10 kWh/L). However, heating oil usually contains no additives for cold resistance or lubrication and often smells more intense.
The important thing is:
The KROAK diesel heater is not explicitly approved for heating oil, but works with it in practice. For private stationary use (e.g. in the workshop or garage), the use of heating oil as a fuel is generally permitted as long as no public funding or vehicle registration is affected. Heating oil would be illegal for mobile use (e.g. in a vehicle) due to the lack of taxation.
Heating costs with heating oil
The price advantage of heating oil is currently around € 0.30-0.40 per liter compared to diesel. Assuming an average heating oil price of €1.20 per liter, the difference is as follows:
- Heating oil: 75 l × 1.20 € = 90 € per heating season
- Diesel: 75 l × 1.60 € = 120 € per heating season
- Savings: approx. 30 € per season
So if you use your heating regularly, you can make significant savings by using heating oil. However, it should be noted that not every manufacturer provides a guarantee or warranty for heating oil operation. In addition, care should be taken to ensure that heating oil burns cleanly – regular maintenance and, if necessary, the addition of an additive to reduce soot are recommended.

- Kanister mit Auslaufrohr 10 L.
- Lufteinlass für gleichmäßiges Ausgießen.
- Mit Füllstandsanzeige.
- Geeignet für den Transport von Gefahrgutklassen 3, 6.1, 8 und 9.
- Erfüllt Normen ADR, RID, IMDG, IATA/OACI.
- Hydraulikdruck 200 kpa.
- Farben: Kanister, rot oder orange, mit schwarzem Einfüllstutzen und Verschluss.
- Material: Hergestellt aus Polyethylen.
- Maße. 265 x 200 x 307 mm.
- *Lufteinlass im Inneren des Kanisters*
Summary: Installing the diesel parking heater permanently in the workshop
In this article, I will show you how I permanently installed a KROAK diesel parking heater with 8 kW output in my workshop. The aim was to create an efficient workshop heating system that would also ensure pleasant temperatures in winter – independently of expensive electric heating systems. The temperature was previously around 10 °C, now I reach almost 18 °C in a short time at heating level 2. I go into detail about the selection of components, safe exhaust gas routing, condensate drainage, fuel supply and hot air distribution.
The diesel heater is installed safely and space-savingly in the basement and heats both the workshop and the adjoining cellar. I used a 300 W transformer for the power connection, which supplies the heater with 12 V direct current. The system is controlled via a remote control and smartphone app.
The average fuel consumption is 0.25 l/h, which means that the heating costs for approx. 15 hours of use per week amount to around €120 per winter. With a 20-liter tank, it only needs to be refilled every 4-5 weeks. I also explain the legal and practical differences between using diesel and heating oil in a diesel parking heater – including potential savings of around €30 per season.
Whether in the garage, in the hobby room or as a stationary solution in the utility room: an 8 kW diesel parking heater is a powerful, self-sufficient and cost-effective heating solution for a wide range of environments – if the planning is right. My practical contribution shows what is important.

- Leichte Schlauchleitung H 03 VV-F 3 x 0,75 mm², 3-adrig, schwarz
- 5 m
- Kopp
- 152305846
FAQ – Installing a diesel parking heater in the workshop
1 Why is a diesel parking heater useful for workshops?
It offers high heating output with low operating costs, is independent of the mains supply (with 12 V operation), heats up quickly and is ideal for poorly insulated rooms such as workshops, cellars or garages.
2. what is the output of the diesel heater used?
The installed KROAK diesel parking heater has a heating output of 8 kW and is easily sufficient to reliably heat the workshop and basement (total room volume approx. 84 m³) to over 18 °C.
3. how is the exhaust gas routing implemented?
The exhaust gas is safely routed to the outside through a tightly screwed pipe system with condensate drain, silencer and heat-resistant jacket – all connections are sealed with exhaust paste.
4. is operation indoors safe?
Yes, if CO and CO₂ hazards are protected by suitable measures such as flue gas routing, fresh air supply and CO/multi-gas detectors. Without these precautions, there is a danger to life.
5 How is the warm air distributed?
The warm air is fed into the basement and workshop via a T-piece with butterfly valves using a 70 mm pipe system. An air outlet near the base ensures even, efficient heating.
6. how high is the diesel consumption?
Between 0.2 and 0.5 l/h depending on the heating level. In the test run, around 0.25 l/h were consumed, which at 15 operating hours per week results in heating costs of around €120 per season (at €1.60/l diesel).
7. can heating oil also be used?
Technically yes – many parking heaters also run on EL heating oil. This saves around €30 per season, but is only permitted for stationary (not mobile) use and may affect warranty issues.
8. how is the power supplied?
Via a 300 W 220V-12V transformer that reliably covers the starting currents for the glow plug and operation. Control is via remote control and app via Bluetooth.
9. how often does the tank need to be refilled?
A 20 l tank lasts for about 4-5 weeks with regular use. The tank is easily accessible and can be refilled flexibly.
10. can the heating system be dismantled or does it require maintenance?
The system is low-maintenance, all components are easily accessible and can be dismantled again if necessary. Annual maintenance (e.g. cleaning the combustion chamber) is recommended.
Dieser Beitrag ist auch verfügbar auf:
English
Deutsch

