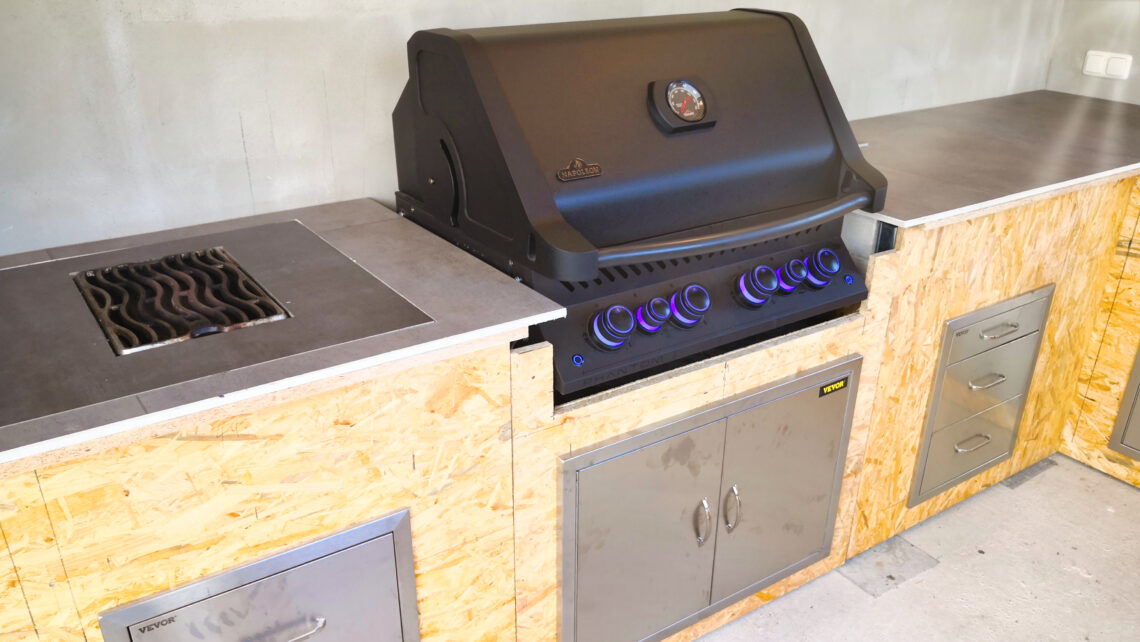
Permanently installing the sizzle zone of the Napoleon gas barbecue in the outdoor garden kitchen
The Napoleon PHANTOM P500 is a powerful gas barbecue – and with the built-in sizzle zone it becomes the centerpiece of my outdoor kitchen. In this post, I’ll show you how I removed the sizzle zone, integrated it into the worktop and permanently installed the grill body in the kitchen unit. From the gas connection to the power supply to the porcelain stoneware tiles, I document the complete conversion step by step – including all solutions for heat, grease, ignition and dismantling.
What you can expect in this blog post – at a glance
- Removing the sizzle zone from the Napoleon PHANTOM P500 gas barbecue
- Planning and preparing the installation location in the outdoor kitchen
- Replacing the vinyl tile with a heat-resistant porcelain stoneware tile
- Cutting the tile to size with a diamond blade and fitting the opening
- Use of CNC-milled rails for stable fastening
- Conversion of the gas connection with special adapter and original replacement hose
- Connection of the electronic ignition via a heat-resistant silicone cable
- Detailed installation of the grill body in a custom-made niche
- Facing with OSB panel and BBQ stainless steel door including furniture connectors
- Access to the grease tray, removability and long-term durability
- Tips on material selection, heat protection and worktop structure
- Links to matching blog posts and my YouTube video about the project
Why I removed the sizzle zone from the Napoleon gas barbecue
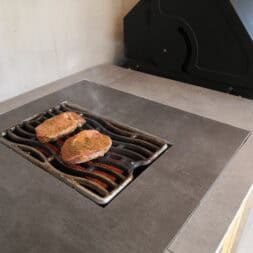
The Napoleon PHANTOM P500 should no longer be used as a free-standing gas barbecue, but should be fully integrated into the outdoor kitchen. The Sizzle Zone™ plays a central role here: it reaches temperatures of up to 800 degrees and is therefore ideal for searing steaks and creating a perfect crust and intense roasted flavors. This function should be retained – permanently installed in the worktop and positioned directly next to the main grill.
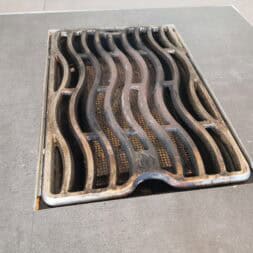
The sizzle zone on the Napoleon gas barbecue is designed as a powerful side burner. At its heart is a ceramic burner that is heated by a large number of small gas openings. The resulting infrared radiation ensures that food is heated extremely quickly and evenly. A cast-iron grill grate on top also stores the heat and transfers it optimally to meat and other grilled food.
The sizzle zone offers decisive advantages, especially when searing steaks: The enormous heat immediately produces strong roasting aromas, which significantly improve the quality of the food. At the same time, the inside of the steak remains juicy and tender.
The fixed integration of the sizzle zone into the worktop makes the outdoor kitchen more functional and compact. It enables steaks and other grilled food to be seared quickly at high temperatures of 800 degrees and then finished on the main grill without wasting time or detours. Pots, pans or a wok can also be used on the sizzle zone, which significantly increases versatility.
With the conversion, the sizzle zone has been optimally integrated into the overall kitchen concept and remains an indispensable part of the grill station.
Preparation for the conversion of the sizzle zone
Before the sizzle zone could be removed and integrated, important preparations had to be made at the installation site. The existing worktop was originally designed for use as a classic outdoor kitchen surface. Its structure consists – from bottom to top – of an 18 mm thick OSB board, a 10 mm thick Fermacell moisture-proof board and a vinyl click tile as the final surface. A detailed description of the construction can be found in my separate blog entry:
Build your own garden kitchen – worktop and jamb.
Various risks and requirements had to be taken into account when installing the sizzle zone. During operation, temperatures of up to 800 degrees, heavy smoke development and run-off of fat and barbecue juices directly under the burner occur. The vinyl tile was unable to withstand these loads in the long term. High temperatures, grease and moisture would have damaged the material, discolored the surface or even rendered it unusable.
Even the underlying Fermacell board, although suitable for damp rooms and pressure-resistant, is not designed for direct heat loads of this intensity. Although the OSB board provides a load-bearing base, it is sensitive to the effects of moisture. Unprotected installation of the sizzle zone would therefore have created structural weak points.
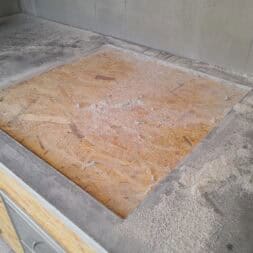
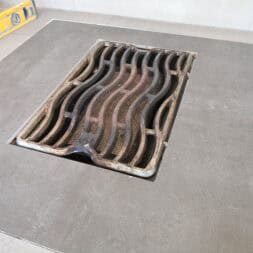
In order to meet the requirements for heat resistance and cleaning safety, it was decided to remove the vinyl tile in a 60×60 cm area and replace it with a porcelain stoneware tile. The new structure at this point therefore consisted – from bottom to top – only of the OSB board as a support and the bonded porcelain stoneware tile.
A precisely fitting opening for the sizzle zone should then be cut in the middle of this tile. The challenge was to remove the vinyl surface and the Fermacell board with as little damage as possible while at the same time correctly compensating for the height differences. The aim was to ensure that the new porcelain stoneware tile would later be flush with the surrounding vinyl tiles and blend in neatly.
The plan was to carefully cut out the vinyl tiles in the relevant area and remove the underlying Fermacell board to the required depth. The porcelain stoneware tile should then be glued directly to the OSB board using a suitable tile adhesive. This made it possible to adjust the installation height precisely.
In addition, the subsequent attachment of the support rails for the sizzle zone also had to be taken into account during these preparations. The rails should reliably support the grill tray without impairing the structure of the new surface. Precise planning of the cut-outs, heights and mounting points was therefore necessary.

- Napoleon S83038 Pagesbrennerrost aus gegossenem Stahl für Sizzle Zone, groß
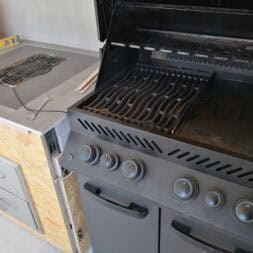
Remove the sizzle zone and install it in the worktop
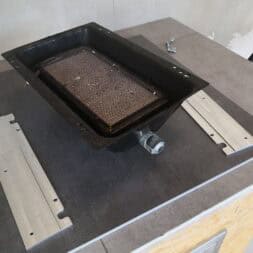
First, the side burner was removed from the Napoleon gas barbecue. Removal was relatively straightforward: Four screws had to be loosened, as well as the electronic ignition cable and the gas hose. The sizzle zone was embedded in the side table and could be easily removed after loosening these connections.
It is important to note at this point that this is not a classic piezo igniter, but an electronic igniter that receives its power supply from the grill’s internal control unit. This power supply is provided by three D batteries as standard. However, as batteries have to be replaced regularly, my Napoleon PHANTOM P500 has already been converted to a permanent mains power supply.
Details of this conversion are described in my separate blog article: Converting a Napoleon PHANTOM gas barbecue to an external power supply.
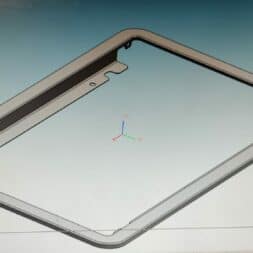
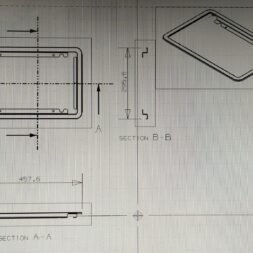
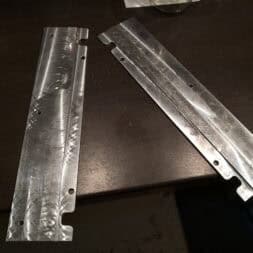
Once the sizzle zone had been removed, preparations were made for its subsequent attachment to the worktop. Special support rails were used for this, which – as already mentioned in the previous section – were designed using a CAD program. Many thanks at this point to Alex for the planning and to Christoph for the subsequent production. The rails were precisely milled by a CNC machine and were therefore absolutely accurate and stable enough to reliably bear the subsequent load and the expected heat development of the sizzle zone.
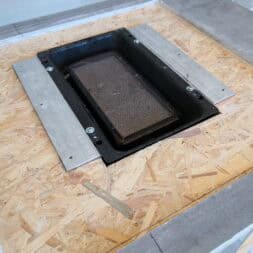
To determine the exact installation location of the rails, the grease tray was first firmly bolted together with the rails. This method allowed the positioning to be adjusted with millimeter precision and matched to the worktop opening. Only after the rails were correctly aligned and permanently screwed to the OSB board was the fixing of the tray released.
Specially prepared securing bolts were then used to fix the grill tray to the rails. The grease tray and rails each have precisely positioned holes, one above the other. The bolts are inserted through these holes and ensure that the grease tray rests on the rails in a floating but non-slip manner. A fixed screw connection is therefore not necessary. The sizzle zone can therefore be easily removed at any time – for cleaning or maintenance work, for example – without having to dismantle the entire structure.
Once the rails were securely fastened and all dimensions checked, the grease tray was removed again. This cleared the way for the installation of the gas and electricity supply and the gluing in of the new porcelain stoneware tiles.
I have uploaded a schematic structure as a PDF for download under the following link: Side burner layout diagram

- Verpackungsabmessungen (L x B x H): 295.0 mm x 395.0 mm x 215.0 mm
- Verpackungsgewicht: 7.26 Kg
- Herkunftsland:- Deutschland
- Hohe Qualität
Converting the gas connection: not easy, but feasible
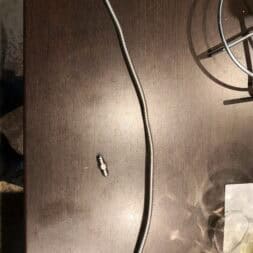
Connecting the gas hose posed a particular challenge during the conversion. The original gas hose of the Napoleon PHANTOM P500 had to be extended, as the new installation location of the sizzle zone is significantly further away from the main grill. It quickly became clear:
The connections of these hoses do not correspond to the metric standard used in Europe. Instead, American or Canadian threads are used here – specifically the 7/16″-20 UNF thread format. This dimension can be found on many Napoleon components and is not readily available in Europe.
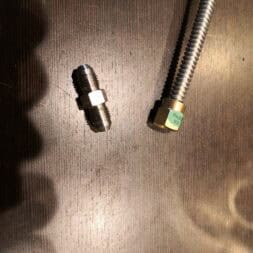
A special connector was used to make the connection:
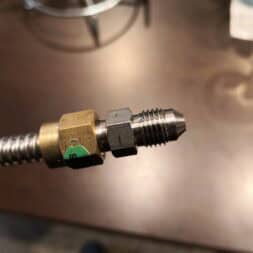
Connector for gas hose: Double nipple 7/16 “-20 UNF x 7/16”-20 UNF – stainless steel, 350 bar
This adapter was used to securely connect two hoses with identical threads. The stainless steel design ensures maximum tightness and durability – even with long-term outdoor use.
The matching original spare part was used as the extension hose:
Replacement hose Napoleon PHANTOM P500: Item number N720-0055
This hose is not only suitable for conversions such as extending the gas line, but can also be used directly as a replacement if the original gas hose of the Napoleon barbecue is damaged or defective. Thanks to the original dimensions and the matching connections, a safe and precise repair is possible without any problems.
As both components are tapered threads, the connections are self-sealing due to their shape. No additional sealing compound or Teflon tape was required. Nevertheless, the utmost care must be taken during installation.
There are potentially serious risks involved in handling gas pipes – especially if they are installed incorrectly. Gas leaks, inadequately secured connections or incorrect components can lead to dangerous situations. For this reason, all transitions were thoroughly checked with a leak detection spray after connection.
The connection is wetted with the spray – if there are leaks, bubbles immediately form, indicating a leak. The connection was only classified as ready for operation after passing the leak test.
It is also important to always consult a qualified specialist when in doubt about gas installations – especially if you are not fully familiar with thread standards or safety regulations. In my case, I was able to draw on the necessary specialist knowledge and accessories and implement the conversion safely.


Connecting the power supply and igniting the sizzle zone
Once the gas pipe had been successfully extended and installed, the next step was to connect the power supply for the electronic ignition of the sizzle zone. The Napoleon PHANTOM P500 does not use a classic mechanical piezo ignition system to ignite the sizzle zone and the back burner, but an electronic ignition system. This system generates an electric spark via an ignition module, which ignites the escaping gas.
The grill’s electronics are powered by three D batteries as standard. To reduce maintenance costs and ensure a permanent, stable supply, my grill had already been converted to a 220V mains power supply. The details of this conversion are described in my blog post: Converting a Napoleon PHANTOM gas barbecue to an external power supply.
Several technical aspects had to be taken into account when installing the new ignition cable. As the ignition section is exposed to high voltages and is located directly in the area of the hot sizzle zone, a considerable heat load is generated there.
Normal installation cables would not have been suitable for this application, as the insulation could be damaged by the heat. A silicone cable was therefore deliberately used to ensure a durable and secure connection.
Silicone cables are specially designed for high temperatures. They retain their flexibility even in extreme heat, withstand thermal stress and prevent the insulation from disintegrating at continuous temperatures of well over 100 °C. Especially in the sizzle zone, where temperatures of up to 800 degrees can be reached directly at the burner, this property is crucial for safe operation.
However, silicone cables also have some disadvantages. They are mechanically more sensitive than conventional PVC or rubber cables, especially to abrasion or sharp edges. They are also more expensive to purchase, which often makes their widespread use economically unattractive.
Silicone cables are therefore generally only used where there are high temperatures, extreme flexibility or special insulation requirements – such as in grills, ovens or industrial applications.
The new cable has been routed so that it is as short, protected and voltage-free as possible between the control unit and the igniter of the sizzle zone. All connections have been carefully insulated and additionally protected against mechanical damage.
Initial information on the technical features and assembly of my Napoleon PHANTOM P500 can also be found in the unboxing and burn-in report that I created after the purchase: Napoleon PHANTOM P500 – Unboxing, assembly and burn-in.
Once the power installation was complete, the ignition system was thoroughly tested. The electronic spark igniter worked reliably so that the sizzle zone could be ignited safely and quickly – both for the first test run and for later use in everyday outdoor cooking.
Cutting and gluing in the porcelain stoneware tile
Once the rails for the sizzle zone had been prepared and the gas and electricity connections installed, the next step followed: cutting and fitting the porcelain stoneware tiles.
Porcelain stoneware tiles are characterized by their particularly dense structure and high load-bearing capacity. They are extremely resistant to mechanical stress, chemical influences, temperature fluctuations and moisture. These properties make them ideal for outdoor use as well as for heavily used surfaces such as an outdoor kitchen.
However, these positive properties also pose challenges when it comes to processing: porcelain stoneware is very hard, which makes it difficult to cut and requires special tools.
First, the opening required for the sizzle zone was precisely measured. It was important to precisely consider the dimensions of the grill tray and the position of the support rails. The cut-out shape was then transferred to the tile.
Particular attention was paid to placing the opening in the center of the tile. A central arrangement reduces the risk of stress cracks, both during cutting and later due to the thermal load during operation of the sizzle zone.
A special diamond blade, mounted on an angle grinder, was used to cut out the opening. Diamond cutting discs are essential for processing porcelain stoneware, as they can cut precisely and with minimal material loss. To minimize the risk of breakage during the cut, work was carried out slowly and in several stages.
Once the opening had been cut out, the tile was carefully aligned on the prepared worktop. I used a frost-resistant tile adhesive that is specially designed for outdoor use. Such adhesives are not only resistant to moisture and frost, but can also withstand moderate temperature loads.
Although very high temperatures are generated directly at the burner when using the sizzle zone, the heat is only transferred to the tile adhesive layer to a limited extent, as the burner is installed slightly raised and the heat primarily radiates upwards. Even today, several years after the conversion, the bonding shows no signs of damage – clear evidence of the suitability of the chosen material and the careful execution.
The joint between the new porcelain stoneware tile and the surrounding original vinyl tile was grouted with a special, heat-resistant silicone. A silicone in a matching shade was chosen to create a harmonious overall look. The heat-resistant silicone has the advantage of remaining elastic and not cracking even when the sizzle zone is used intensively.
The sizzle zone was only installed once the tile adhesive had fully cured. This ensured that the tile and the adhesive were not subjected to any unnecessary mechanical stress and that the entire construction remained permanently stable and resilient.

- EIGENSCHAFTEN: Die Diamant Trennscheibe besitzt ein Universal Block-Segment, das für sämtliche Baustoffe insbesondere Beton, Betonprodukte, leicht armierter Beton, Stein, Naturstein geeignet ist.
- TECHNISCHE DATEN: Die Diamanttrennscheibe mit dem Durchmesser ø 125mm und einer Aufnahmebohrung 22,23mm eignet sich perfekt zum Trennen der angegebenen Materialien.
- ANWENDUNGSBEREICH: Beton, Betonprodukte, Stein, Ziegel, Mauerwerk, Naturstein, Granit, Pflaster- und Knochen- Stein universal. Passend für Winkelschleifer Schlitzfräsen und Trennschleifer mit passendem Durchmesser und 22,23mm (M14) Aufnahme.
- MARKENQUALITÄT: Die deutsche Marke PRODIAMANT steht seit über 10 Jahren für Qualität, Zuverlässigkeit und Kundenservice. An uns können Sie die höchsten Ansprüche stellen, gerne beraten wir Sie zu Produkt und Anwendung. Preis-Leistung ist unser Maßstab, unsere Qualität ist auch unsere Garantie. Für dieses Versprechen stehen wir ein
- SICHERHEIT: Premium-Werkzeug mit hervorragendem Preis-Leistungsverhältnis, geprüft nach EN13236, hohe Standzeit durch qualitativ hochwertige und temperaturbeständige Diamanten. Die langjährige Erfahrung unserer Mitarbeiter erlaubt es uns hervorragend abgestimmtes Werkzeug für verschiedene Anwendungsbereiche anzubieten
- PERSÖNLICHE SCHUTZAUSRÜSTUNG: Verwenden Sie beim Arbeiten mit Diamantwerkzeugen immer die passende Schutzausrüstung. Tragen Sie Schutzbrille, Sicherheitsschuhe, Handschuhe, Atemmaske mit Staubfilter, Gehörschutz lesen und beachten Sie die Sicherheitshinweise
Video: Installing a fixed sizzle zone – Napoleon PHANTOM P500 in the outdoor kitchen
In my video, I show you step by step how I removed the sizzle zone from my Napoleon PHANTOM P500 and permanently integrated it into the worktop of my outdoor kitchen. From removing the side shelf and preparing the gas connection to cutting the porcelain stoneware tile, everything is documented in detail.
I have also published the other videos about my “garden kitchen project” in individual films in my playlist for building my garden kitchen on my YouTube channel. Another overview of my videos on building my outdoor kitchen can be found in the blog category Garden kitchen.
If you’d like to see more of me and my projects, take a look at my YouTube channel.
Zuletzt aktualisiert am 16. February 2026 um 20:30 . Ich weise darauf hin, dass sich hier angezeigte Preise inzwischen geändert haben können. Alle Angaben ohne Gewähr. (*) Bei den verwendeten Produktlinks handelt es sich um Affiliate Links. Ich bin nicht der Verkäufer des Produktes. Als Amazon-Partner verdiene ich an qualifizierten Verkäufen. Dein Preis ändert sich jedoch nicht.
Installation of the grill body and cladding with stainless steel elements
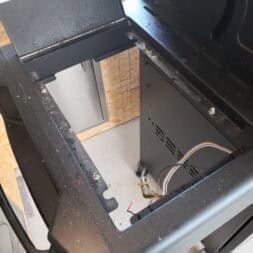
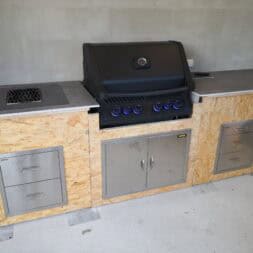
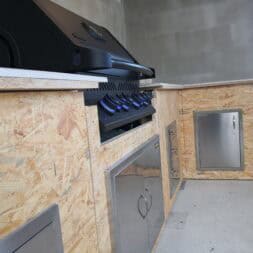
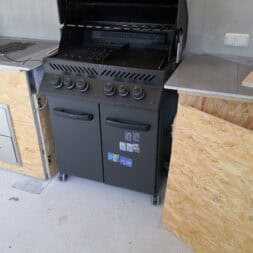
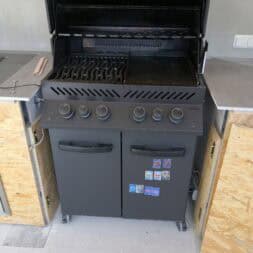
Once the integration of the sizzle zone was complete, the grill body of the Napoleon PHANTOM P500 was installed in the prepared niche of the outdoor kitchen. For perfect integration, the barbecue trolley first had to be adapted.
First, both side parts of the grill were dismantled. The left-hand side shelf, on which the sizzle zone was originally mounted, could be removed relatively easily by loosening the screws. The right-hand side shelf has also been removed. The screw connections have been carefully stored so that the grill can be returned to its original condition at any time if required. The two lower original doors of the barbecue trolley were also removed, as they were no longer needed in the later installation situation.
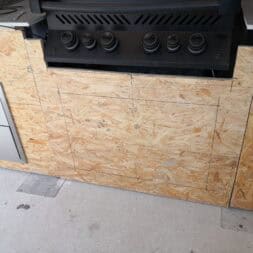
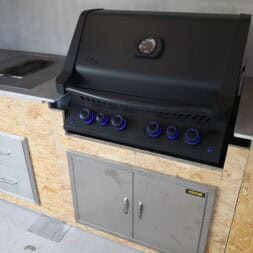
I made a precisely cut OSB panel to cover the opening below the burner area. This OSB facing covers the area between the grill chamber and the base of the niche. A precisely fitting opening was sawn into the plate, into which a high-quality stainless steel BBQ door was inserted. This door provides easy access to the inside of the barbecue and makes it easier to replace the gas cylinder and carry out maintenance work.
I used a sophisticated system of furniture connectors (click fasteners) to attach the OSB board. Sturdy OSB support panels were mounted on the side walls of the niche, to which half of the furniture connectors are attached. The opposite side of the connectors was attached to the back of the front panel. When inserting the facing, the connectors engage securely and fix the panel firmly and flush. The panel can be removed at any time by lifting it slightly – a solution that has already proven itself many times in everyday use.
The grill itself was placed in the niche in such a way that there was enough space between the back wall and the grill for air to circulate. Clearances have also been maintained at the sides and above so that the lid can be opened easily and heat does not build up. Experience shows that this design has not caused any damage, even after several years of intensive use – neither to the cladding nor to the grill itself.
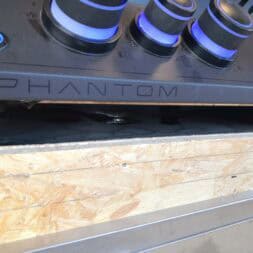
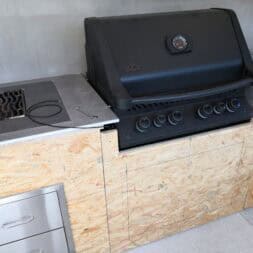
Today, only the burner area with the control knobs and the large grease tray of the Napoleon grill are still visible. Below, another OSB panel closes off the area, which is fitted with a large-format stainless steel double door. The installation of this and other stainless steel furniture in my outdoor kitchen is described in detail in a separate blog article:
🔗 Build your own outdoor garden kitchen – Installing stainless steel BBQ furniture.
In this article, I will discuss the selection of robust stainless steel furniture for outdoor use, show you how to install various BBQ doors and drawers and give you tips on the long-term stabilization and sealing of these components.
The removal of the side panels, the precise installation of the cladding and the targeted use of high-quality stainless steel components have resulted in a visually harmonious, functional and easy-to-maintain unit that integrates the barbecue perfectly into the outdoor kitchen.
Conclusion: The built-in sizzle zone is the highlight of my outdoor kitchen
During the conversion, it was important to me not only to improve the functionality and appearance, but also to consider the maintenance of the grill. The grease tray of the Napoleon barbecue should remain easily accessible. Thanks to the design with the guide pins, I can easily lift the entire sizzle zone out of the opening if necessary. This makes it easy to empty and clean the grease tray without the need for time-consuming disassembly. I am currently planning an even more convenient solution for accessing the grease tray – ideas and improvements are already in the works.
Another practical detail concerns the positioning of the cast stainless steel grill on the sizzle zone. I can either lay the grid flat and flush with the worktop or raise it by around 3 cm using the integrated spacer feet. This flexibility has clear advantages: When laid flat, the grid is flush with the surface, which is particularly practical when using pans or pots. The raised position, on the other hand, enables better air circulation and is ideal for exposing steaks to even more direct heat and achieving perfect roasting flavors.
The conversion was time-consuming, but the result speaks for itself. The permanently installed sizzle zone works perfectly, the look of the outdoor kitchen is harmonious, and the barbecue can still be completely dismantled – without any permanent damage. The temperatures in the sizzle zone easily reach 800 degrees, giving the food a fantastic crust and intense flavor. Steaks can be seared just the way I like them.
The Napoleon gas barbecue is no longer mobile, but forms the centerpiece of my outdoor kitchen. The sizzle zone is particularly practical when things need to be done quickly or when extra pans, pots or a wok need to be used. Even large quantities of food can be prepared efficiently and conveniently.

- PRAKTISCH – Das WEICON Lecksuch-Spray dient dem schnellen Auffinden von Undichtigkeiten, Rissen, porösen Stellen und Leckagen an Druckleitungen & Gasleitungen.
- SCHONEND – Das Lecksuchspray ist kurzzeitig verträglich mit Metallen, Kunststoff & Gummi. Es hinterlässt nach dem Spülen mit Wasser keine korrosiven oder schädlichen Rückstände.
- ZUVERLÄSSIG – Das Gasleckspray detektiert selbst kleinste Lecks zuverlässig und verbessert so die Sicherheit & Effizienz von Anlagen.
- VIELSEITIG – Der Leckfinder ist perfekt für Wartung & Inspektion in Industrie, Handwerk und Haushalt, geeignet für Heizungen, Grill, Armaturen, Verschraubungen, Klimaanlagen, Druckluftsysteme u. v. m.
- ANWENDUNG – Lecksucher satt auf die zu prüfende Stelle sprühen. An undichten Stellen entstehen Blasen.
Summary: Permanently installing the sizzle zone of the Napoleon PHANTOM P500 in an outdoor kitchen
In this article, I will show you in detail how I integrated my Napoleon PHANTOM P500 gas barbecue into my outdoor kitchen – with a special focus on the installation of the sizzle zone. This powerful zone, equipped with a ceramic burner, reaches temperatures of up to 800 degrees and is ideal for searing steaks and other types of meat. To make the function permanent in my grill station, I removed the sizzle zone and fitted it directly into the worktop.
This required a conversion of the existing worktop. The originally installed vinyl tile was removed in a defined area and replaced with a heat-resistant porcelain stoneware tile. The sizzle zone was embedded in a precisely fitting opening, which is held securely in the construction with the help of CNC-milled rails. A special adapter with a 7/16″-20 UNF thread was required for the gas connection – including an original replacement hose from Napoleon. The electronic ignition was connected to the 220 V mains via a heat-resistant silicone cable.
The installation of the barbecue body was also carefully planned: The side shelves and doors of the gas barbecue were removed and an OSB facing with a BBQ stainless steel door was added. This means that the grease tray can be accessed at any time and the sizzle zone can simply be lifted out for cleaning. In addition, furniture connectors ensure flexible but stable fastening of the cladding. A large stainless steel double door was installed underneath – details on installing my stainless steel BBQ furniture can be found here: Build your own outdoor garden kitchen – Installing stainless steel BBQ furniture
This elaborate but well thought-out conversion turned my Napoleon gas barbecue from a mobile appliance into a permanent fixture in the garden kitchen. The sizzle zone is now not only a visual highlight, but also offers me maximum functionality when grilling – whether with steak, wok or pan.

- Präzisionsöffnung: Gesamtmaße: 838 x 558 x 46 mm / 33 x 22 x 2 Zoll, Einbaumaße: 30 x 19 Zoll / 753 x 473 mm, es wird empfohlen, auf dieser Basis zusätzlich 0,08 Zoll / 2 mm für eine bessere Funktion zu reservieren. Die Tür ist speziell für Außenküchen und Grillinseln konzipiert und verleiht Ihrem Kochbereich eine elegante Note. Dank der präzisen Abmessungen ist sie leicht zu verarbeiten, zu installieren oder zu demontieren.
- Hochwertige Materialien: Diese Zugangstür ist aus robustem, hochwertigem Edelstahl gefertigt, rostfrei und wasserdicht. Sie können sie gut reinigen, ohne Spuren zu hinterlassen. Die integrierte, verdickte Rahmenstruktur ist langlebig, mit einem vollständig nahtlosen Design ohne scharfe Ecken. Die einzigartige, U-förmige Plattenstruktur sorgt für bessere Festigkeit und Haltbarkeit.
- Abnehmbare Plattenstruktur: Durch die Verwendung einer L-förmigen Einsatzstruktur zur schnellen Demontage kann das Scharnier entfernt werden, was den Austausch erleichtert.
- Benutzerfreundliches Design: Feine, ergonomische Griffe aus Zinklegierung, vergrößerte Größe für einfaches Öffnen. Die Kanten des Türrahmens sind gebogen und verdickt, um eine sicherere Verwendung zu gewährleisten und so ein benutzerfreundlicheres Erlebnis zu bieten, sodass Sie das Kochen in Ihrer Außenküche ohne Sorgen genießen können.
- Einfach zu installieren: Auf der Außenverpackung ist eine perforierte CAD-Installationszeichnung im Maßstab 1:1 abgedruckt. Sie können die Schablone gemäß den Anweisungen dort platzieren, wo die Grilltür installiert werden soll, und sie gemäß der Strichzeichnung perforieren. Mithilfe der eingebetteten Installation kann sie in wenigen Minuten problemlos an jeder Wand installiert werden.
FAQ – Integrating the sizzle zone into the outdoor kitchen
1. why was the sizzle zone removed from the Napoleon PHANTOM P500?
The sizzle zone has been permanently integrated into the worktop to make it functional, space-saving and permanently usable in the outdoor kitchen – ideal for searing and cooking at high heat.
2. which materials were used for the heat-resistant installation?
Instead of the original vinyl tile, a porcelain stoneware tile was used, which was glued to the OSB core board – it is extremely heat-resistant, easy to clean and permanently stable.
3. how was the sizzle zone attached to the worktop?
With CNC-milled rails mounted under the porcelain stoneware tile and screwed with millimeter precision. The grease tray is floating and can be removed for cleaning.
4. did the gas connection have to be extended?
Yes. An original replacement hose from Napoleon was used, which was connected to the existing connection via a 7/16″-20 UNF double nipple. All connections were tested using leak detection spray.
5. how was the electronic ignition connected?
The ignition was connected to an existing 220V mains supply via a heat-resistant silicone cable – instead of the factory-fitted battery supply.
6. can the sizzle zone be dismantled again?
Yes. The entire construction can be dismantled: the grill tray rests on guide bolts and can be removed at any time, the rails and connections can be dismantled.
7. was the worktop damaged by the conversion?
No. The adjustment was carried out in such a way that no structural damage occurs. The porcelain stoneware tile was fitted precisely without affecting the base tile.
8. how was the grill body installed in the outdoor kitchen?
The grill was inserted into a custom-made niche, the side panels and doors were removed and replaced with an OSB facing with a stainless steel BBQ door.
9. how was the facing below the grill attached?
With furniture connectors – these snap into place and allow the OSB panel with integrated stainless steel door to be fixed securely but can be removed at any time.
10. will the high heat of the sizzle zone be a problem for surrounding components?
No. Raised installation, the right choice of tiles, spacers under the grill grate and correct air circulation ensure that the construction remains permanently safe.
Dieser Beitrag ist auch verfügbar auf:
English
Deutsch
