Laying the water pipe in the garden: tips for connecting the water supply to the garden irrigation system
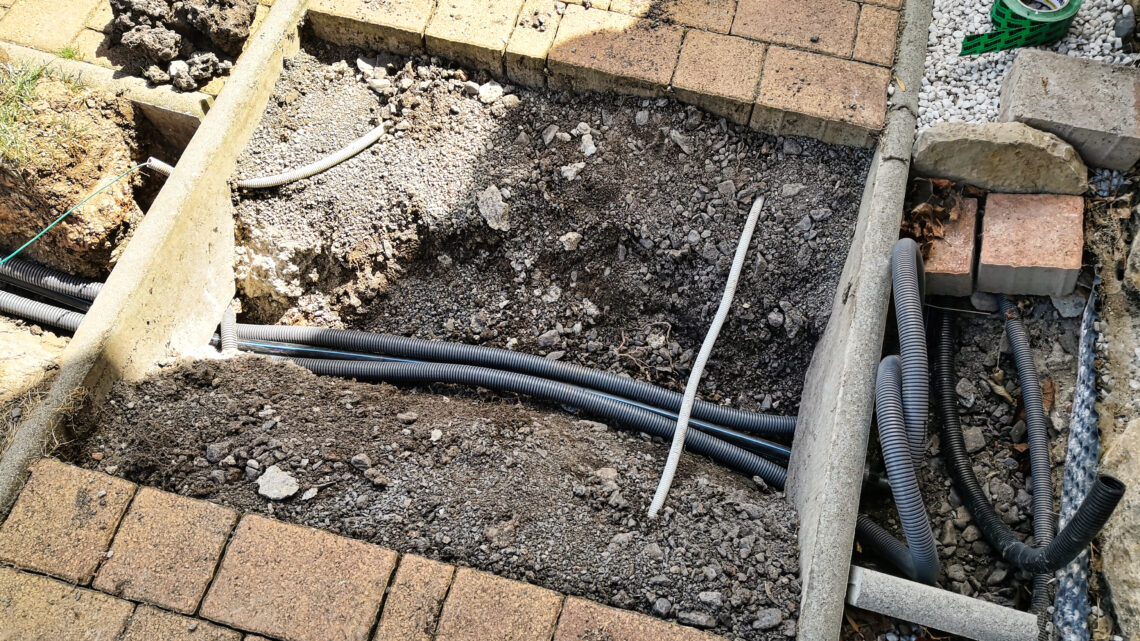
Laying a water pipe in the garden is a crucial step for efficient garden irrigation and reliable lawn watering. In this project, the pipeline had to be routed under an existing cobblestone path. The paving stones were removed, a trench dug and the pipes laid together with empty conduits for control and power cables. In addition to the right choice of material, frost resistance also plays an important role. The entire process – from planning and leak testing to restoring the sidewalk – is described in detail in this article.
At a glance: What you can expect in this blog post
- Planning and preparation: choosing the right water pipe in the garden, differences between pipes for garden irrigation and drinking water pipes
- Choice of materials: PE pipes for lawn irrigation, suitable fittings and empty conduits for control and power cables
- Laying under the sidewalk: removing the paving stones, breaking through the kerbs with a pneumatic chisel, excavating the trench
- Leak test: check with water pressure and water meter, protection against leaks
- Frost protection: comparison between frost-proof installation and draining by gravity or compressed air
- Restoration of the sidewalk: sanding the pipes, backfilling the trench, laying new paving stones and compacting with a vibratory plate
- Conclusion: Efficient and modular garden irrigation, protection against frost and future expansion options (e.g. garden pump)
Requirements for laying water pipes in the garden
Laying water pipes in the garden requires careful planning to ensure a reliable and long-lasting water supply. Various factors such as material selection, installation depth, frost resistance and drainage options are decisive.
Material selection: Which pipes and fittings are suitable?
Depending on the intended use, different pipe materials must be used. A basic distinction is made here between pipes for garden irrigation and pipes for drinking water supply, for example for a water connection in a garden kitchen.
Pipes for garden irrigation
PE pipes (polyethylene pipes) are usually used for garden irrigation as they are flexible, pressure-resistant and easy to lay. I opted for 25 mm PE pipes because they offer optimum water flow and can be easily connected with standard fittings and T-pieces.
Important properties of PE pipes for irrigation:
- Pressure resistance: Usually between 6 and 10 bar, sufficient for garden irrigation systems.
- Flexibility: Easier to lay around obstacles than rigid pipes.
- Corrosion resistance: No rusting or limescale deposits.
- UV resistance: Important when pipes are laid above ground.
Pipes for the drinking water supply
If a water connection is to be installed for a garden kitchen, a washbasin or a drinking water connection, special pipes approved for drinking water must be used. In these cases, the following pipe types are suitable:
- PE-HD pipes (high-density polyethylene): Approved for drinking water, more robust and pressure-resistant than standard PE pipes.
- Multi-layer composite pipes: Made of plastic and aluminum, particularly dimensionally stable.
- Stainless steel or copper pipes: Are used less frequently in gardens as they are more expensive and more difficult to lay.
Special fittings and screw connections that comply with hygiene and safety standards must also be used for drinking water installations. In addition, these pipes must be laid in a separate route to prevent contamination from garden irrigation pipes.

- Trinkwasser
- Betriebsdruck max. 12,5 bar bei 20 Grad Celsius
- schwarz mit blauen Streifen
Laying depth: How deep should water pipes be in the garden?
The laying depth is an important factor for the longevity and frost resistance of the pipes. The following depth recommendations apply:
- Garden irrigation: At least 30 cm deep to avoid mechanical damage (e.g. to the cold water pipes). e.g. through gardening).
- Drinking water pipes: At least 80 cm deep, as they must be protected from frost.
- Frost-proof installation: In regions with heavy frosts, water pipes must be laid below the local frost line (usually 80-120 cm).
Risks of laying too shallow
If water pipes are laid too shallow, various problems arise:
- Danger from frost: Freezing water expands and can damage pipes and fittings.
- Mechanical damage: Pipes can be damaged by gardening work, roots or animals.
- Excessive heating in summer: Flat pipes can become very hot in the sun, which leads to an undesirable increase in water temperature.
Frost protection for water pipes in winter
A central point in the planning is the frost resistance of the pipes. There are two methods here:
1. laying pipes frost-proof
The safest but most costly solution is to lay the water pipes below the local frost line (at least 80 cm, often up to 120 cm deep).
Advantages:
- No risk of frost damage.
- No regular emptying required.
- Water pipe can be used all year round.
Disadvantages:
- High laying effort, as deeper digging is required.
- Higher costs for materials and working time.
- Difficult repairs or subsequent modifications.
2. drain pipes before winter
If the pipes cannot be laid deep enough, they must be completely emptied before winter. There are two ways to do this:
Emptying by gradient
Here, the pipe system is laid underground with a slight gradient so that the water can drain away by itself.
Drain valves or drainage shafts are installed at the lowest points of the pipe.
Advantages:
- More cost-effective than a deep installation.
- Relatively low maintenance, as the water drains automatically.
Disadvantages:
- The gradient must be precisely planned, otherwise water will remain in the pipes.
- Does not work with complex pipe systems with several height differences.
- Water can collect in fittings and valves.
Emptying with compressed air
After the season, compressed air is forced into the pipes of the irrigation system to blow out the remaining water.
A compressed air connection is installed for this purpose, via which the system is emptied using a compressor.
Advantages:
- No complex slope planning necessary.
- Very effective, even in branched pipe systems.
- Ideal for lawn irrigation systems with several zones.
Disadvantages:
- Requires a compressor with sufficient power.
- Must be repeated every year.
- Incorrect air pressure can damage fittings and valves.
Conclusion: Which method is the best?
The choice between frost-proof installation or draining before winter depends on the conditions in the garden and personal requirements.
- If you need a cold water pipe that can be used all year round, you should choose a frost-proof installation at a depth of 80-120 cm.
- For pure irrigation systems that are not used in winter, draining by gravity or compressed air is usually the more economical solution.
In my project, I decided to use compressed air for draining, as the water pipes for watering the lawn could not be laid deep enough.
I have therefore installed a compressed air connection to blow out the entire garden irrigation system in the fall to protect it from frost damage.

- Doppelzylinder sorgt für die kraftvolle Ansaugleistung von 412 l/min
- Maximaler Arbeitsdruck von 10 bar
- Leistungsstarker 3,0 PS Motor
- Kesselvolumen von 50 L
- Druckminderer für die optimale Regelung des Arbeitsdruckes
- Anschluss an gewöhnlichen 230 V Stromzugang
- 2 Schnellanschlusskupplungen für einen schnellen Werkzeugwechsel
- Vibrationsgedämpfte Standfüße aus Gummi für rutschfestes Abstellen
- Fahrvorrichtung für einen einfachen Transport
Water connection in the garden: Preparing the installation
Before I started the actual work, I had to carefully plan the laying of the water pipes, empty conduits and cables. Precise planning was necessary to ensure that all components of the garden irrigation system, including the planned taps, would work together efficiently and could be easily expanded at a later date.
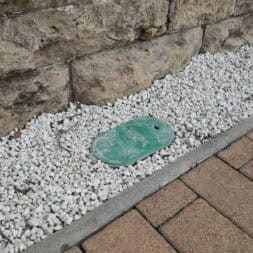
My lawn irrigation system is part of my modular garden irrigation system. This means that each irrigation zone – including the raised beds, the gabion slope, the lawn irrigation and the hedge irrigation – is controlled via its own valve box.
The valve boxes are connected to each other in a star shape so that I can remain flexible and make adjustments or extensions later.
The water supply for the garden comes from the house connection on the outside, which is located on one side of the walkway. The lawn with the new valve box for lawn irrigation, as well as the areas for slope and raised bed irrigation, are located on the other side of the walkway in the garden.
The sidewalk consists of paving stones with kerbs set in concrete, which makes laying the pipes beneath it particularly challenging.
To transport the water from the main line to the individual valve boxes, I decided to use 25 mm PE pipes. These pipes are robust, flexible and easy to install. However, pipes with a diameter of 32 millimeters are also recommended for increased water requirements.
I also planned empty conduits for the control cables to establish the connection between the irrigation computer and the Hunter solenoid valves.
The control cables ensure that each irrigation zone can be controlled independently.
I explain in detail how I planned the entire lawn irrigation system in my blog post:
🔗 Planning automatic garden irrigation – step-by-step instructions for efficient lawn irrigation
Details on the installation of the valve box, the Hunter solenoid valves and the Rain Bird water distribution system can be found here:
🔗 Installing lawn irrigation – valve box, Hunter solenoid valves and Rain Bird water distribution in detail

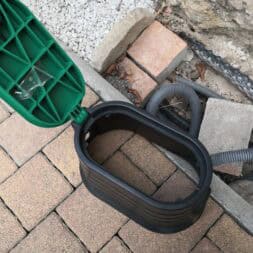
- Ventilkasten Ventilschacht mit Deckel rechteckig STANDARD 12"
- Der rechteckige Ventilkasten ist komplett aus hochwertigem
- stabilem Polypropylen Kunststoff gefertigt. Der grüne Deckel kann mit einer Sechskantschraube bei Bedarf festgeschraubt werden. Die Ventilboxen sind ideal für die Abdeckung der Ventilverteilungen der Bewässerungsanlage. An beliebigen Stellen kann per Säge oder Bohrer ein Zugang geschaffen werden.
- Maße: Länge 414/504 mm - Breite 288 / 376 mm - Höhe 302 mm
Open the sidewalk: Remove paving stones and expose the substructure
Opening a paving stone path is basically not complicated if it is done with the right technique and the right tools. It is important to proceed carefully and systematically so that the sidewalk can later be restored to its original condition.
Loosening and removing paving stones
To remove the paving stones, I first used two screwdrivers. I carefully pushed the blades into the joints between two stones and levered out the first stones piece by piece. I had to be careful not to damage the neighboring stones. As soon as the first stones were released, it was easier to continue.
After the first paving stones were removed, I used the paving stone lifter. With this tool, I was able to remove the remaining stones safely and evenly from the dressing. The advantage of this is that the stones do not tilt or break off.
In order to restore the sidewalk exactly as it was before, I temporarily stored the paving stones in the correct order. This meant that each stone could later be put back exactly in its original place.

- Zum Herausnehmen und Versetzen von Verbund- sowie Pflastersteinen
- An Werktagen vor 12 Uhr bestellt, innerhalb von 0 bis 1 Werktag versendet!
- stufenlos verstellbar
- Deutscher Hersteller
- Spannbereich von ca. 10 - 610 mm. Inkl. Federstahlklingen, Federstahlklingen auswechselbar
Excavating the substructure
Underneath the paving stones was a layer of laying chippings, which ensured the stability of the stones. I carefully removed this layer and stored it temporarily in buckets so that I could reuse it later.
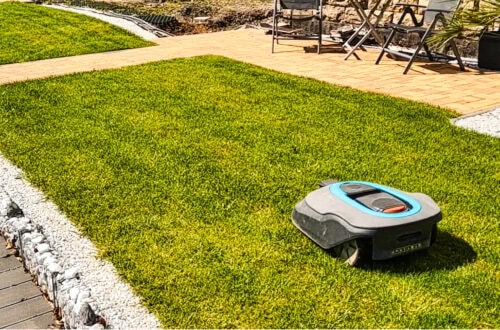
The boundary wire and control cable of my robot lawn mower were already running directly under the layer of grit. I was not allowed to damage or move these cables during excavation, otherwise they would lose their original function. To avoid this, I worked with a small shovel and slowly removed the gravel.
Once the chippings had been removed, I started digging the trench under the edge of the sidewalk. It was important to work precisely here in order to create enough space for the water pipe and the empty conduits without affecting the existing cables. The excavated gravel and the remaining substructure were also collected in buckets so that they could be reused later when the sidewalk was rebuilt.

- mit 4-teiligem Meißelsatz
- Abtriebsprofil: Außenvierkant
- Stecktülle für Schnellkupplung
- Arbeitsdruck: 6,3 bar
- Luftverbrauch: 113 l/min
- Schlagzahl: 4500 1/min
- Vibration: ahd = 9,4 m/s² / K = 1,5 m/s²
- Schalldruckpegel: 84 dB (A)
- Schalleistungspegel: 95 dB (A)
Laying the water pipe under the sidewalk
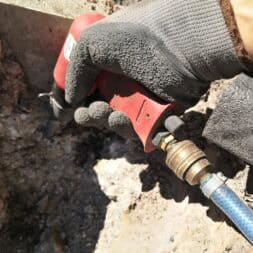
The shelves were set in concrete, which meant that I first had to partially remove it to run the pipes and cables through. I used a compressed air chisel for this, as it allows the concrete to be loosened precisely and in a controlled manner.
A hammer and chisel would not have been sufficient here, as the impact force and accuracy of the pneumatic chisel are significantly higher and enable faster work.
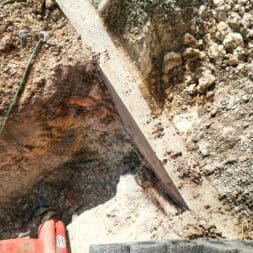
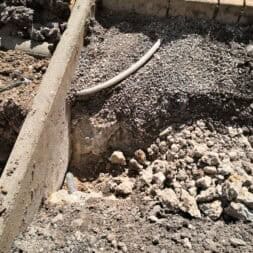
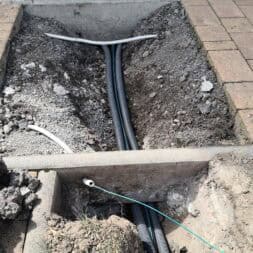
Once the concrete had been removed, I not only exposed the area directly under the shelf, but also the outside area so that the pipes and empty conduits could be pushed through more easily.
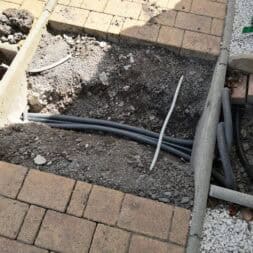
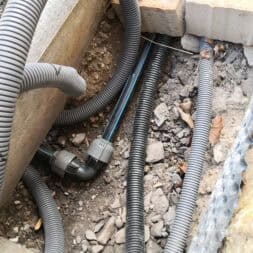
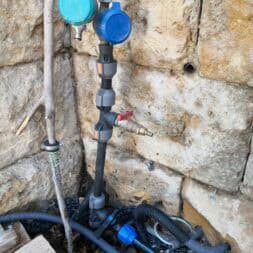
- On one side of the sidewalk, I was able to lay the PE water pipe with an angle directly along the house wall in the direction of my water connection.
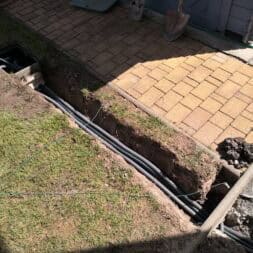
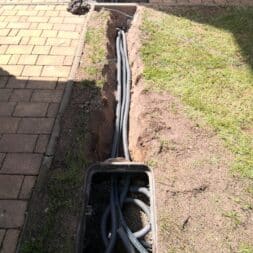
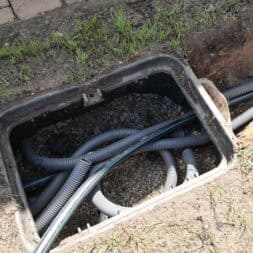
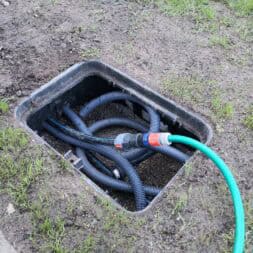
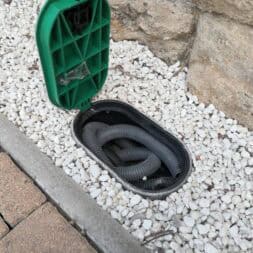
- On the other side, I had previously dug a trench in my lawn up to the valve box. This allowed me to route the pipes and empty conduits through the newly created opening under the sidewalk and have them end directly in the valve box.
I laid the pipes at a depth of approx. 30 cm to accommodate them securely. Since PE pipes are more rigid at cooler temperatures, I had laid them in the sun beforehand to make them a little more flexible. This has made insertion and installation much easier.
Additional empty conduits for control and power cables
In addition to the water pipes, I also laid empty conduits for control and power cables. I deliberately decided not to lay the cables directly in the ground, but to pull them through the empty conduits later. The reason for this is simple:
- Protection against moisture and mechanical stress: Direct contact with the ground can lead to damage and corrosion.
- Flexibility for future extensions: If I need additional control cables or network cables later on, I can simply pull them through the existing empty conduits.
- Easy repair: If a cable is damaged, it can be easily replaced through the empty conduit without having to reopen the entire sidewalk or trench.
Selection of suitable empty conduits
For this application, it was important to use the right empty conduits to safely lay the control cables, network cables and power cables. I opted for two M32 empty conduits as they offer enough space to accommodate several cables.
When selecting the empty conduits, I made sure that they:
- are approved for underground installation so that they can withstand the requirements in the ground.
- are made of sturdy plastic and are pressure-resistant enough to withstand mechanical stress – such as the weight of the soil or subsequent work.
- are large enough to allow several cables to be pulled in later without any problems.
- are UV-resistant if they are not completely buried in some places.
I did not use a threading aid when laying the empty conduits. Instead, I only used a pulling aid later – when actually pulling in the power and control cables. This has proven to be extremely practical, as it makes it easier to feed the cables through the empty conduits and prevents the cables from getting caught when they are pulled in.

- HOHE DRUCK- & SCHLAGFESTIGKEIT: Das Schutzrohr weist eine hohe Schlagfestigkeit von 2kg/10cm und eine hohe Druckbeständigkeit von 750N/5cm auf und bietet dadurch eine hervorragende Stabilität und Trittfestigkeit.
- UNIVERSELL EINSETZBAR: Das Wellrohr eignet sich für die Verlegung auf und unter Putz, in Beton, in Estrichen, in Hohlwänden und Zwischendecken sowie auf Holz als auch für die Verlegung im Erdreich und Außenbereich.
- HOHE TEMPERATURBESTÄNDIGKEIT: Unser Elektroinstallationsrohr verfügt über eine hohe Temperaturbeständigkeit (dauernd) von -25°C bis hin zu +120°C und kann dadurch in vielen Bereichen Einsatz finden.
- FLEXIBEL & HOHE BIEGEFESTIGKEIT: Neben hoher Druck- und Schlagfestigkeit sind unsere Leerrohre flexibel und leicht zu verarbeiten. Sie besitzen eine hohe Biegefestigkeit und sind durch diese Eigenschaften leicht zu handhaben.
- HOCHWERTIGES MATERIAL & BRANDSCHUTZKLASSE: Das Leerrohr besteht aus einem flammwidrigen Polyethylen mit hoher Dichte (PE-HD). PE-HD ist gegen nahezu alle Medien wie z.B. Alkohole, Fette, Mineralöle oder Kraftstoffe beständig. Das Kabelschutzrohr verfügt über die Brandschutzklasse V2 nach UL94 und bietet somit höchste Sicherheit.
- INTEGRIERTER ZUGDRAHT: Das Leerrohr ist mit einem integriertem Zugdraht ausgestattet, mit dem sich auch nach der bereits abgeschlossenen Installation Kabel leichter und unkompliziert einziehen lassen.
Leak test of outdoor water pipes
Before I could close the trench again, I had to make sure that the water pipe was tight. A thorough leak test is essential to prevent subsequent leaks or pressure losses.
I proceeded as follows:
- Filled the pipe with water and checked the water pressure.
- Check all joints and fittings carefully to ensure that no water is leaking.
- Leave the pipe under pressure for several hours to prevent gradual leaks.
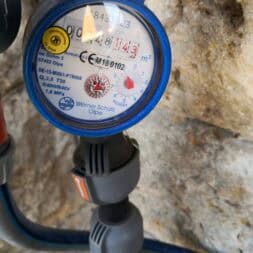
I also used the built-in water meter to measure the pressure loss. If there was a leak somewhere, the water meter would continue to turn slowly even though no water was being drawn. As the display remained stable, I could be sure that the entire line was absolutely tight.
Close the sidewalk and lay the paving stones again
Once I was sure that the pipes were tight, I was able to restore the sidewalk. It was important that the substructure was carefully rebuilt to prevent the paving stones from sinking later on.
Filling the trench
Before I could start with the actual reconstruction of the sidewalk, I first sanded the laid pipes. Sanding serves several purposes:
- Protection of the pipes against mechanical stress: The fine sand evenly coats the pipes and prevents sharp stones or other sharp-edged materials from causing pressure points or damage.
- Avoidance of stresses: The sand layer cushions movements in the ground so that the plastic pipes are not under tension.
- Better compaction of the substrate: the sand ensures an even transition to the gravel layer above.
Once the pipes were completely covered with a layer of sand approx. 10 cm thick, I filled the trench further in layers with gravel and a stabilizing concrete mix. I carefully compacted each layer to prevent subsequent subsidence.
I then refilled the laying split and brought it back to the original level with a screed. It was important to distribute the chippings evenly, as they form the direct base layer for the paving stones.
Laying and vibrating paving stones
Once the substructure had been restored, I put the paving stones back in exactly their original order. This ensured that the joint pattern remained uniform and that the stones fitted exactly into their previous positions.
I made sure that:
- Lay all stones flush to avoid unevenness.
- The joints must be precisely maintained so that the overall appearance of the walkway is harmonious again.
- None of the stones are tilted or too low to prevent tripping hazards.
Finally, I vibrated the entire surface with a vibrating plate to compact the paving stones and create an even surface. I moved the plate over the surface several times in different directions to achieve optimum compaction.
After vibrating, the joints were filled again with fine sand to further consolidate the stones. This ensures that the sidewalk remains stable in the long term and that the paving stones do not shift.

- ✅ OVALE FORM - der ovale Ventilkasten kann viele Geräte aufnehmen und erlaubt volle Bewegungsfreiheit.
- ✅ EINFACHER ZUGANG - die Konstruktion der Box gewährleistet einen einfachen Zugang zum Inneren, wodurch sie sehr bequem zu benutzen ist.
- ✅ HOHE HALTBARKEIT - die Box ist aus verstärktem Polypropylen gefertigt, das sehr widerstandsfähig ist.
- ✅ GESCHLOSSENER DECKEL - der Deckel schützt die im Inneren der Box befindlichen Elemente wirksam.
- ✅ FUNKTIONALITÄT - die Box hat eingebaute Löcher, so dass kein Werkzeug benötigt wird.
Video: Laying the water pipe under the sidewalk
In my video, I show how I laid the water pipe in the garden under an existing paving stone path. Step by step, I explain how I removed the paving stones, uncovered the substructure and ran the PE water pipes through the sidewalk together with empty conduits for control and power cables.
I discuss the choice of material, the correct laying depth and the challenges of laying under a kerb set in concrete. I also explain how I backfilled the trench properly, laid the new paving stones and compacted the sidewalk with a vibratory plate.
The video provides a detailed insight into the entire work process and shows what needs to be taken into account to ensure efficient and frost-proof garden irrigation.
You can find more videos on automatic garden irrigation in my garden irrigation playlist on YouTube. If you would like to find out more about my projects, you can also take a look at my YouTube channel COMMAIK.
Zuletzt aktualisiert am 28. January 2026 um 15:50 . Ich weise darauf hin, dass sich hier angezeigte Preise inzwischen geändert haben können. Alle Angaben ohne Gewähr. (*) Bei den verwendeten Produktlinks handelt es sich um Affiliate Links. Ich bin nicht der Verkäufer des Produktes. Als Amazon-Partner verdiene ich an qualifizierten Verkäufen. Dein Preis ändert sich jedoch nicht.
Summary: Laying the water pipe in the garden
Laying a water pipe in the garden requires careful planning to ensure reliable lawn and garden irrigation. Important factors are material selection, laying depth and frost protection measures.
Material and installation depth
PE pipes are suitable for garden irrigation as they are flexible and pressure-resistant. Drinking water pipes must be made of approved materials such as PE-HD or multilayer composite pipes. Pipes for irrigation are laid at least 30 cm deep, drinking water pipes at least 80 cm to avoid frost damage. Alternatively, the system can be drained before winter – either by gravity with drain valves or with compressed air.
Laying under the sidewalk
As the water pipe was laid under a cobblestone path, the stones had to be carefully removed and the concrete broken through with a pneumatic chisel. The trench ran from the house wall to the valve box so that pipes and empty conduits for control and power cables could be laid directly.
Leak test and closure
After the installation, the tightness was tested with water and the water meter. The pipes were sanded in for protection, the trench was filled with gravel and concrete mix and the paving stones were set back precisely. A vibratory plate provided the necessary compaction.
Conclusion
The modular garden irrigation system with valve boxes connected in a star shape enables flexible control of the lawn irrigation. The compressed air drain reliably protects the system from frost damage in winter.

- Einfache Richtungsänderung: Als Teil des Gardena Sprinklersystems, dient das Gardena L-Stück 25 mm zur Richtungsänderung des Verlegerohres
- Bequeme Installation: Die patentierte „Quick&Easy“ Verbindungstechnik ermöglicht eine schnelle Rohrmontage und Demontage durch Aufdrehen des Verbindungsstückes um 140°
- Kompatibel: L-Stück einsetzbar mit Gardena Verlegerohr (separat erhältlich), welches als Leitung des Sprinklersystems dient
- Teil des Gardena Sprinklersystems: Das Gardena Sprinklersystem bietet ein komplettes Sortiment an Versenkregnern und jegliches benötigte Zubehör
- Lieferumfang beinhaltet: 1x Gardena L-Stück 25 mm
FAQ on laying a water pipe in the garden
1. which pipes are suitable for garden irrigation?
PE pipes are ideal because they are flexible, pressure-resistant and corrosion-free. For drinking water pipes, PE-HD pipes or multilayer composite pipes should be used.
2. how deep do water pipes have to be laid in the garden?
For garden irrigation at least 30 cm, for drinking water pipes at least 80 cm, to ensure frost protection. Alternatively, it must be emptied before winter.
3. how do you protect water pipes from frost?
Either by frost-proof installation below the frost line or by draining by means of a slope or compressed air connection.
4. how do you lay a water pipe under a sidewalk?
Paving stones are removed, the kerbs are broken through with a pneumatic chisel and the water pipe is laid together with empty conduits for control cables. The sidewalk will then be professionally restored.
5 Why are empty conduits for control and power cables important?
Conduits protect cables from moisture and mechanical stress, enable later extensions and facilitate the replacement of damaged cables.
6 Which method is better: compressed air drainage or frost-proof installation?
For year-round water use, frost-proof installation is better. For seasonal irrigation, it is sufficient to drain the compressed air before winter.
7. how is the tightness of a water pipe tested?
The pipe is filled with water, checked for pressure and the water meter is monitored to detect any leaks.
8. how will the sidewalk be restored after the relocation?
The pipes are sanded in, the trench is filled with gravel and concrete mix, the paving stones are set back precisely and the surface is compacted with a vibrating plate.
9. can a water pipe be subsequently extended?
Yes, additional zones for irrigation or water sockets can easily be added with valve boxes connected in a star shape and prepared empty pipes.
10. how is a water pipe prepared for automatic lawn irrigation?
The pipes lead to valve boxes that are controlled by Hunter solenoid valves. Empty conduits for control lines connect the system to an irrigation controller such as Hunter X-Core or Hydrawise.

- PP-Fitting, Klemmverbinder, Kunststoff Kugelhahn für PE-Rohr.
- Schnittstellengröße: 25mm; Material: Mutter (PP), Spaltring (POM), T-Ring (PP), O-Ring (Gummi), Ventilkörper (PVC); Maximaler Betriebsdruck: 10 bar über 75°C, 16 bar unter 75°C
- Merkmale: Einfacher Anschluss und einfache Demontage. Präzisionsgewinde für festen Biss. Geringer Widerstand, hohe Durchflussleistung. Stabil und nicht leicht verformbar, korrosions- und UV-beständig.
- Kugelhahn für PE-Rohre, geeignet für den Einbau in alle Arten von Bewässerungsanlagen und Wasserleitungen.
- Kundenservice: Wir kümmern uns um das Gefühl jedes Kunden, wenn Sie irgendwelche Fragen über den Kugelhahn haben, kontaktieren Sie uns bitte per E-Mail, wir werden Ihnen helfen und das Problem sofort lösen.
Dieser Beitrag ist auch verfügbar auf:
English
Deutsch


