Installing a lawn sprinkler: Step-by-step instructions for watering your garden
Installing lawn sprinklers and setting up efficient lawn irrigation – that’s exactly what this article is about. I show how I planned my garden irrigation system, laid the PE pipes and equipped the system with automatic irrigation. I explain step by step how to excavate the trenches, connect the sprinklers with Hunter Swing-Joints and test for leaks. In the end, the irrigation runs reliably and saves time when watering.
At a glance: What you can expect in this blog post
- Installing lawn sprinklers: Choosing the right sprinklers and optimal placement for even watering.
- Planning garden irrigation: Drawing up a sketch with all pipes, sprinklers and the valve box.
- Digging trenches: Which methods are suitable for different soil types and how the V-cut technique works.
- Laying PE pipes: correct processing of the pipes, protection against soiling and fixing in the trenches.
- Set up automatic irrigation: Connection of the Hunter solenoid valves, leak test and first function test.
- Fine adjustment of the lawn sprinklers: throw distance, spray direction and pressure regulation for optimum performance.
- Hunter X-Core control computer: The last step towards automating lawn irrigation with programmed control.
Planning garden irrigation: preparation is everything
Careful planning was necessary before I started laying the irrigation system. The correct positioning of the sprinklers is crucial to ensure that the entire garden is watered evenly. I asked myself several questions:
- Which area should be irrigated?
- How many sprinklers do I need for even watering?
- How are the pipes routed in the garden so that the system works efficiently?
- Is the water pressure sufficient to reliably supply all sprinklers?
In my article on planning an automatic garden irrigation system, I have already described how I designed my irrigation system step by step. I chose Hunter MP-Rotator, as these pop-up sprinklers allow for even water distribution and are particularly water-efficient.
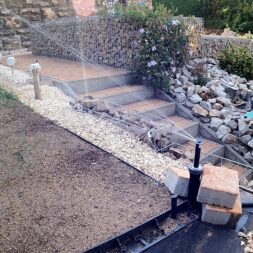
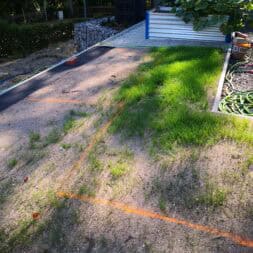
To determine the exact route of the water pipes in the garden, I drew up a detailed sketch. I have drawn in all the sprinklers, pipes and the valve box. This planning was particularly important because I had to run the main water pipe under the sidewalk to the valve box. I have described in detail how I went about this in my article Laying the water pipe in the garden.
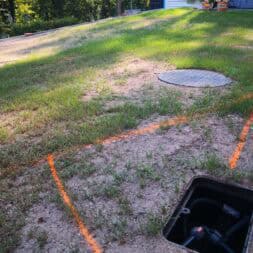
A central component of my system is the valve box, which controls the irrigation. Here I installed Hunter solenoid valves and a Rain Bird water distributor to efficiently control the different irrigation zones. You can find the exact installation of the valve box and the most important technical details in my article on installing the valve box.
Once these preparations were complete, I was able to start digging the trenches. I laid the PE water pipes underground to protect them from external influences. I then installed the sprinklers and aligned them so that the entire garden was watered evenly.
In the next section, I describe how I dug the trenches, laid the pipes and built the sprinklers for watering the garden myself.

- Einzigartig mit Rückflussverhinderung (CV)! – Hunter PROS-04 PRS40-CV Gehäuse verfügt über ein integriertes Rückflussverhinderungsventil, das Wasserrückfluss verhindert und Druckstabilität gewährleistet. Perfekt für unebenes Gelände, da Wasserverluste und Staunässe vermieden werden - besser als Modell PRS40 ohne Ventil!
- Optimale Druckregulierung (2,8 bar) – Entwickelt für maximale Effizienz mit Hunter MP Rotator Düsen. Der gleichmäßige Druck sorgt für eine exakte und wassersparende Bewässerung.
- MP Rotator – Präzise Mehrstrahl-Technologie – Erzeugt rotierende Wasserstrahlen, die langsam und gleichmäßig eindringen. Spart bis zu 30 % Wasser im Vergleich zu herkömmlichen Düsen! Perfekte Wahl für geplante Rasenbewässerung.
- Robustes PRO-Spray Gehäuse mit 10 cm Aufsteiger – Teil des exklusiven Verdone Sets, kombiniert bewährte Hunter-Technologie mit einer optimalen Zusammenstellung für maximale Leistung. Anschluss mit ½" Innengewinde, widerstandsfähig, wetterfest und ideal für private sowie gewerbliche Anwendungen.
- Düse nach Wahl für Ihre individuellen Bedürfnisse! Dieses Verdone Set enthält eine Hunter MP Rotator Düse Ihrer Wahl.
- GEWÄHLTE VARIANTE: MP-2000-210: MP Rotator-Düse, 10 mm/h Niederschlagsrate, 4 m bis 6,4 m Wurfweite, Sektor 210° bis 270°, Wasserverbrauch ca. 5,68 l/min bei 2,8 bar, grün. Perfekt für mittlere, unregelmäßige Rasenflächen.
Digging trenches: The first step towards irrigation
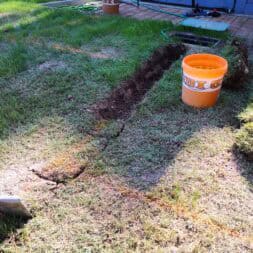
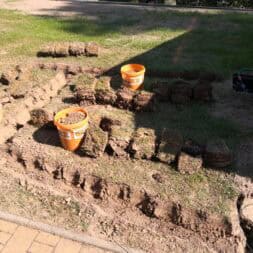
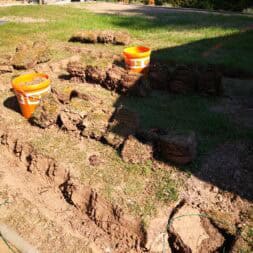
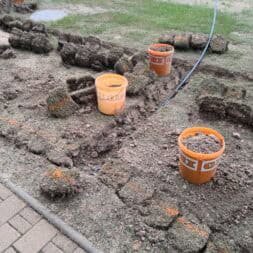
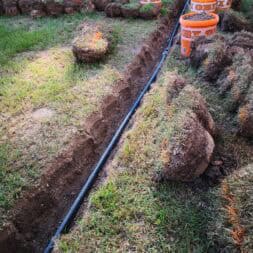
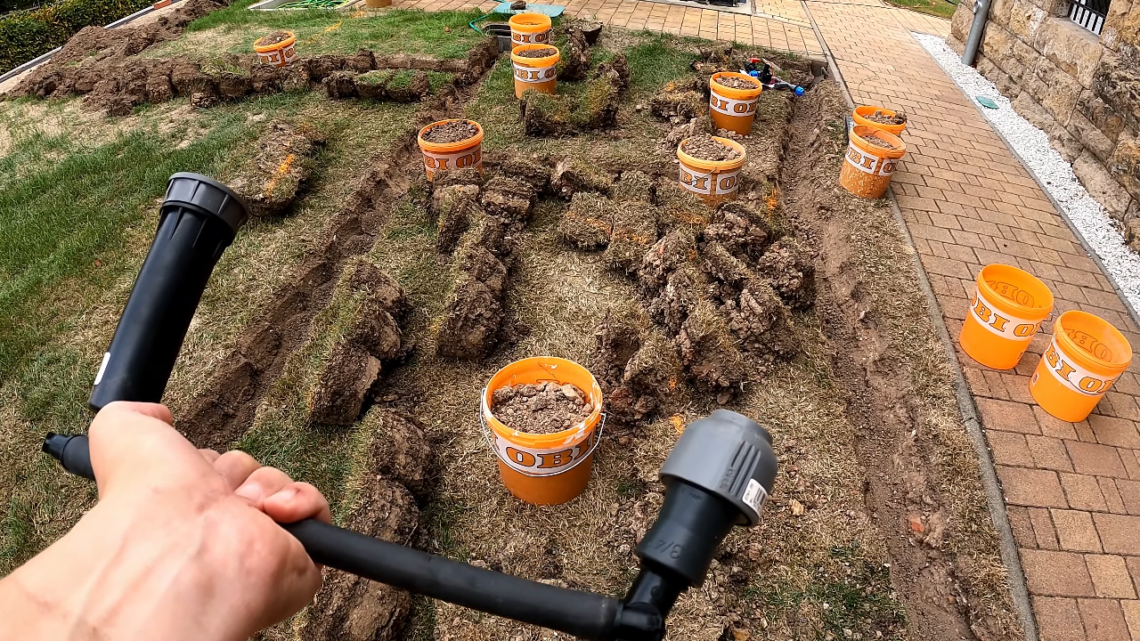
To lay the pipes underground, I first had to dig the trenches. The trenches should be around 25 cm deep so that the pipes in the garden are protected from frost and are not damaged by external influences. When digging, however, it quickly became apparent that the soil conditions presented a major challenge.
Challenge: The soil is clayey and full of slag
My soil consists mainly of clayey earth, which makes digging with a spade particularly difficult. About 25-30 cm below the surface is a drainage layer of slag, which was brought in during the construction of the house around 1900. Although I have added about 10 cm of sieved topsoil over time, the overall quality of the soil is not particularly good.
When digging with the spade, I often got stuck on stones and cinders, which made the work tedious. In some areas the soil was extremely hard and compact, so I had to use additional tools to help.
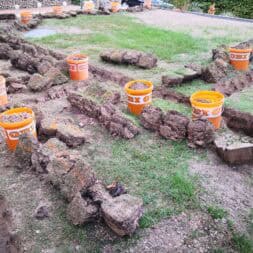
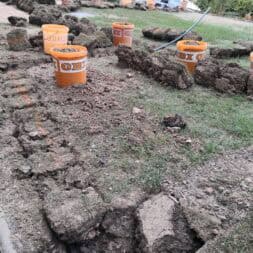
My method: V-cut with the spade for a clean restoration
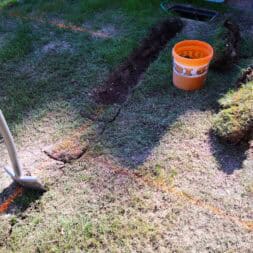
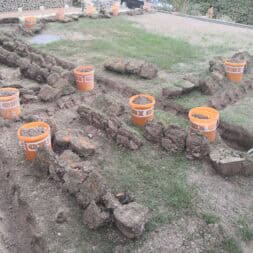
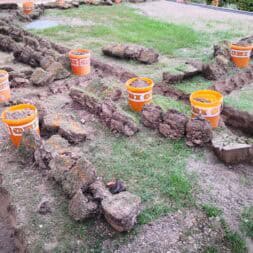
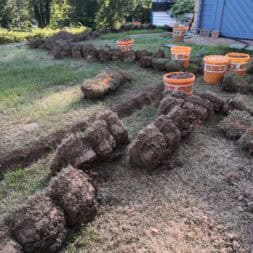
As I wanted to restore the lawn as undamaged as possible after laying the pipes, I decided to use the V-cut technique with the spade. I proceeded as follows:
- Position the spade on the left and dig downwards at an angle.
- Position the spade on the right and prick down again at an angle to form a V-shaped piece.
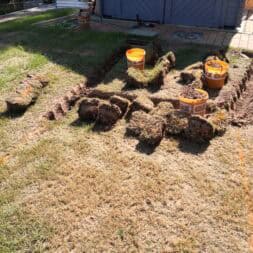
- Remove the piece of soil and place it to one side.
- Repeat the procedure until the entire trench has been excavated to the desired depth.
The advantage of this technique is that the turf can be precisely reinstalled at the end. This preserves the original structure of the lawn, and after a few weeks you can hardly tell that it has been dug.
Alternative methods for digging the trenches
There are various ways to dig trenches for irrigation, depending on the type of soil, area and personal effort. Here are some alternatives:
1. hand tiller or trencher
A trencher can be useful for larger areas or extremely hard soils. These machines work with rotating milling teeth that excavate the soil quickly and precisely.
Advantages:
- Saves a lot of time and muscle power.
- Enables precise, even trenches.
- Particularly efficient for long, straight stretches.
Disadvantages:
- High rental costs (approx. 80-150 € per day).
- Not suitable for stony ground – stones or slag can damage the machine.
- The soil is completely shredded so that the sward cannot simply be laid back.
In my case, a trencher was not an option as my ground was too hard due to the many stones and the old layer of slag. Such a machine would have done more harm than good here.
2. mini excavator with narrow bucket
Another option would be to use a mini excavator with a narrow bucket to dig the trenches more quickly.
Advantages:
- Ideal for larger gardens or longer irrigation systems.
- Makes working in heavy soils easier.
Disadvantages:
- High rental costs (approx. 100-200 € per day).
- Requires some practice to work precisely.
- Soil is heavily churned up, making the sward more difficult to restore later.
3. shovel and pickaxe for heavy soils
For smaller sections or particularly hard ground, a shovel in combination with a pickaxe can help.
Advantages:
- Inexpensive, as no machines are required.
- Precise control over the excavation.
Disadvantages:
- Very time-consuming and physically demanding.
- Not practical for large areas.
In my case, I opted for the manual method with the spade and V-cut technique, as it gives me the best control over the turf and the subsequent reconstruction of the lawn.
Conclusion: Choose the right method depending on the soil conditions
Digging the trenches is one of the most labor-intensive steps when installing an automatic garden irrigation system. Which method is best depends largely on the quality of the soil, the size of the area and the budget.
- Light, loose soils: Trencher or hand tiller.
- Large areas: Mini excavator or trencher.
- Difficult, stony soils: pickaxe, shovel or manual spading method.
As my soil was particularly challenging due to the layer of slag and the clay content, the manual method with a spade and V-cut was the best choice for me. Despite the time involved, I was able to achieve a clean, reusable turf and dig the trenches to the exact depth required.

- leistungsstarke Grabenfräse/Erdfräse mit 420 ccm Benzinmotor bis 600 mm Grabentiefe
- kraftvolle Grabekette mit gehärteten Zähnen, stufenlos einstellbare Kanaltiefe (Frästiefe) bis 600 mm
- robuste, stabile Bauweise aus Stahl mit langlebiger Pulverbeschichtung
- mobile, kompakte Maschine mit leichtlaufender Luftbereifung und ergonomisch einstellbarem Handgriff
- zum leichten Verlegen von Erdkabeln, Drainagen, Rohren uvm.
- inkl XL-Schwert, für max. Grabetiefe/Frästiefe von ca. 60 cm und Grabebreite von 10 cm
- eine Schnecke beseitigt ausgehobenes Erdreich für ein besonders sauberes Ergebnis
- die Kette ist mit auswechselbaren, Hartmetall bestückten Zähnen ausgestattet
- dank Easy-Startsystem hervorragendes Startverhalten, emissionsarmer 4-Takt Motor
Laying pipes and lawn sprinklers in the garden
Once the trenches had been dug, I was able to start laying the PE water pipes. To make it easier to work with the pipes, I first laid them in the sun. The heat softens the material, making the pipes easier to bend and less likely to spring back. This makes laying much easier, especially if the pipes come from a roll.
Laying pipes: Preparation and tools
As I laid the PE pipes directly from the roll into the trenches, it was important to cut them to the required length after laying them out. This allowed me to ensure that the pipe sections fitted exactly and that there were no unnecessary transitions.
I used a pipe cutter for PE pipes for cutting to length, as this enables a clean cut without crushing or damaging the material.
Fixing the cable in the trenches
When laying the pipes, I made sure that they were not kinked and that there was enough clearance to compensate for any movement or subsequent temperature fluctuations. To prevent the pipes from slipping during installation, I fixed them every few meters with the excavated V-pieces.
This fixation was important to ensure that the pipes remained in place and did not move out of the trench again when the sprinklers or connections were connected.
Protection against contamination: No soil in the pipes
Another crucial point was to ensure that no soil got into the pipes. Even the smallest amounts of dirt or stones could later clog the sprinklers or solenoid valves and impair the function of the irrigation system. That’s why I have either the pipe ends during the entire installation:
- provisionally sealed with adhesive tape,
- connected to a fitting immediately after cutting or
- the ends up to the final connection upwards out of the trench.
This simple step saves time-consuming cleaning and flushing of the system later on.
Connection of sprinklers with swing joint: more flexibility and protection
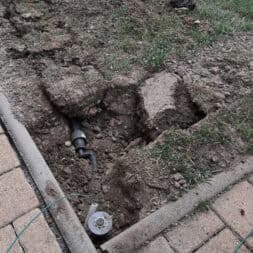
To connect the pop-up sprinklers, I did not make a direct fixed connection between the sprinkler housing and the PE pipe. Instead, I used the Hunter Swing-Joint.
This flexible connection consists of several rotatable elements and offers decisive advantages:
Increased flexibility: The height and position of the sprinkler can be precisely adjusted.
Protection against damage: If someone steps on the sprinkler or the ground sinks slightly, the connection can move slightly without damaging the pipe connection.
Easier maintenance: The sprinklers can be replaced or adjusted more easily if necessary.
Installing the swing joint was straightforward:
- Screw the swing joint to the sprinkler housing and place it in the correct position.
- Attach the adapter for the PE pipe to the swing joint.
- Connect the PE pipe to the adapter using a clamp connector.
- Align the sprinklers exactly at the desired height.
This method allowed the sprinklers to be set exactly at ground level so that they were not damaged when mowing the lawn.
Alternative connection options for lawn sprinklers
There are several methods for connecting pop-up sprinklers to the PE pipe:
- Direct connection with compression fitting
- Sprenger housing is connected directly to the PE pipe with a clamp connector.
- Disadvantage: No height adjustment, inflexible for later adjustments.
- Flexible hose connection
- A short, flexible hose connects the pipe to the sprinkler.
- Advantage: Offers a certain degree of mobility, but less than a swing joint.
- T-piece with threaded connection
- PE pipe is fitted with a T-piece that has a direct internal thread for the sprinkler.
- Suitable for: Rigid fixtures without height adjustment.
My decision to use the Hunter Swing-Joint was the best solution for my irrigation system due to its greater flexibility and easier maintenance.

- Trinkwasser
- Betriebsdruck max. 12,5 bar bei 20 Grad Celsius
- schwarz mit blauen Streifen
Installing the valve box and the control system
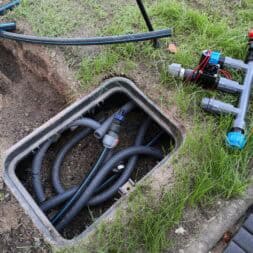
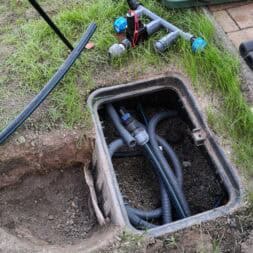
After the sprinklers were installed, I laid the water pipes to the valve box. The various irrigation circuits were connected with T-pieces so that each area of the garden can be optimally irrigated. Only after all the pipes were in place was I able to connect the main supply to the Hunter solenoid valve.
Connection to the solenoid valve in the distributor box
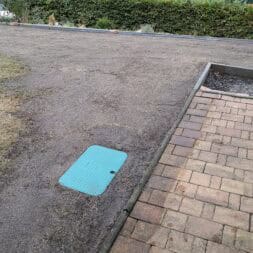
The valve box had to sit securely in the ground in order to function reliably in the long term. I placed them in an easily accessible place and made sure that the pipes were routed straight into the connections. Distortion or tilting of the pipes could lead to leaks or even damage to the joints later on.
Once the pipe was connected to the solenoid valve, the installation of the irrigation system was complete for the time being – but before the trenches could be closed again, I had to check the entire system for leaks.
First pressure test with garden hose
To ensure that there are no leaks, I connected a garden hose directly to the manifold in the valve box. This allowed me to fill the system with water and search for leaks. The test proceeded as follows:
- Slowly turn on the water so that the system fills with water in a controlled manner.
- Check all connections for leaks – especially at the T-pieces, the clamp connectors and the lawn sprinkler connections.
- Hold the water pressure for one hour to identify the smallest leaks.
- Watch the water meter – If the water meter moves despite the sprinklers being closed, this indicates a leak in the system.
This test was extremely important, as subsequent troubleshooting after the trenches had been sealed would have been much more time-consuming.
Alternative methods for leak testing
In addition to my method, there are other ways to test the system for leaks:
- Pressure test with a pump:
A manual or electric pressure pump can be used to test the system at a higher pressure than the normal water pressure. If there is a leak, the pressure drops within a short time. - Soapsuds test on joints:
By applying soapy water to the fittings, even the smallest leaks can be made visible as bubbles form there. - Dry run test with air pressure:
The system can also be pressurized with air before filling with water. This prevents water from spreading in the trenches if there is a leak.
Ensuring the flow of water in all areas
After the one-hour pressure test, I opened the sprinklers to check that enough water was reaching all areas. This also allowed me to determine whether there was soil or foreign matter in the pipes. If a sprinkler does not open or only discharges water irregularly, this is often an indication of a blockage caused by soil or stones that may have gotten into the pipes during installation.
Once I was sure that the system was tight and all the sprinklers were working reliably, I was able to take the next steps:
- Connecting the Water Computer
- Connect the solenoid valves to the control unit
- Program the watering times

- Auswahl zwischen: SJ-506: 1/2" AG x 15cm; SJ-512: 1/2" AG x 30cm; SJ-706: 3/4" AG x 15cm; SJ-712: 3/4" AG x 30cm; SJ-7506: 1/2" x 3/4" AG - 15cm; SJ-7512: 1/2" x 3/4" AG - 30cm
- Standardausführung mit beweglichen Winkelgelenken an beiden Enden
- Individuelle Installations Möglichkeiten
- Patentierte, bewegliche Winkelgelenke dichten in jeder Einbaulage zuverlässig ab
- Nenndruck bis 10 Bar
Video: Installing the sprinklers and laying the irrigation pipes
In my video, I show how I installed the sprinklers for my irrigation system and laid the PE water pipes. I explain step by step how to prepare the trenches with the V-cut, how to lay the water pipes and how to connect the pipes correctly to the Hunter PRS40-CV housings using the flexible swing joint connection.
I will go into the planning of the irrigation circuits, the installation of the T-pieces and Gardena clamp connectors as well as the first test of the system for leaks. You will find out how I connected the individual components, which tools were required and what needs to be taken into account to ensure that the system works efficiently and reliably.
More videos on automatic garden irrigation can be found in my garden irrigation playlist on YouTube.
to find. If you would like to find out more about my projects, you can also take a look at my YouTube channel COMMAIK.
-
Price: € 101.52
-
Price: € 99.95
-
Price: € 5.50
-
Price: € 11.43instead of: € 12.99
-
Price: € 4.10
-
Price: € 22.70instead of: € 24.99
First test: Does the garden irrigation work?
After installation, I tested the entire system to make sure all the sprinklers were working properly and the pipes were tight. The test went as follows:
- Open the tap: This activated all the sprinklers and the system filled with water.
- Direction of throw adjusted: The sprinklers had to be adjusted so that they did not water the sidewalk or flower beds, but only the lawns.
- Pressure checked: I made sure that there is enough water pressure in the pipes and that the irrigation works evenly.
The result was convincing: the automatic irrigation system went into operation without any problems.
Final steps: Backfilling trenches and aligning sprinklers
After the test was successful, I closed the trenches again with the V-pieces. To protect the pipes, I slightly loosened the bottom tip of the V-pieces before reinserting them. This allowed me to install the pieces of earth almost flush with the surrounding surface without creating any major unevenness.
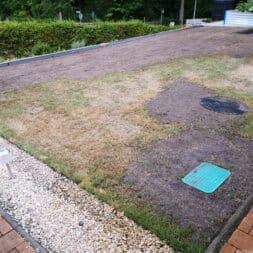
As the soil was very hard due to the weeks of drought, I then watered the inserted pieces of soil thoroughly to make them softer. This meant that they could then be leveled with the lawn roller so that the surface blended seamlessly back into the lawn after a short time.
Fine adjustment of the Hunter MP lawn sprinklers
The following day I precisely aligned the Hunter MP lawn sprinklers. Thanks to the pressure-regulated housings, this was relatively easy. Once a sprinkler has been set, it retains its throw range, direction and angle even if another sprinkler is readjusted or the water consumption in the system changes.
This was a big advantage, especially compared to my i2o gearbox sprinklers without pressure regulation. With these older sprinklers, any change – e.g. an adjustment to the water flow of an individual sprinkler – had a direct effect on all other sprinklers in the system.
This is because the available water pressure in non-pressure-regulated systems fluctuates as soon as a sprinkler is opened or closed. This can result in the range and throwing width of the other blasters changing when an additional blaster is added or deactivated.
This problem does not occur with the MP rotators, as they work constantly thanks to the integrated pressure regulation, regardless of how many sprinklers are active at the same time.
Last step: Connecting the Hunter X-Core irrigation computer
Now all that was missing was the connection of the Hunter X-Core irrigation computer, which takes over the automatic control of the irrigation. I will describe in detail how to connect and set up the control computer in another article. The complete programming of the Hunter X-Core is explained in detail here: Programming the Hunter X-Core control computer for garden irrigation
Until the final commissioning, I can also control the lawn irrigation manually by opening or closing the solenoid valve by hand. This means I can already use the system and ensure that all components are working perfectly.

- Intelligente Beregnung basierend auf lokalen Wetterbedingungen mit vorausschauender Anpassung
- Verwenden Sie die App als Fernsteuerung für erhöhte Effizienz
- SMS-Warnmeldungen
Common mistakes and how to avoid them when installing a lawn irrigation system
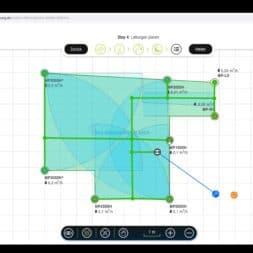
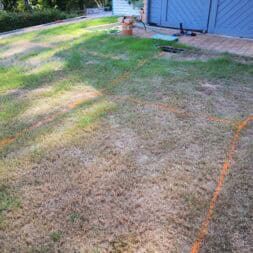
An automatic garden irrigation system must be well planned and correctly installed to ensure a consistent water supply. Errors in the placement of the sprinklers, the dimensioning of the pipes or maintenance can lead to uneven watering or technical problems. My lawn is L-shaped and bordered by concrete kerbs, sidewalks and decorative gravel areas, which is why the exact positioning of the sprinklers was particularly important. I did the planning with an online tool to avoid overlaps and dry spots(Planning automatic garden irrigation: step-by-step instructions for efficient lawn irrigation).
Typical mistakes and how I avoided them
1. uneven water distribution due to incorrect sprinkler position
A common mistake is incorrect placement of the pop-up sprinklers, which results in some areas receiving too much water and others too little.
My approach:
- I used MP rotators with different throwing distances to cover the entire area optimally.
- For narrow or hard-to-reach areas, I used the corner nozzles from the MP Rotator series, as they are specially designed for corners.
- The sprinklers were arranged so that the throwing beams overlap to avoid dry spots.
2. incorrect pipe dimensioning and insufficient water pressure
Many irrigation systems do not work properly because too many sprinklers are connected to a water source that is too weak or the pipe dimensions do not match the water flow.
My solution:
- My water connection can easily supply the 7 installed lawn sprinklers without any loss of pressure.
- The system was designed so that a single irrigation circuit is sufficient to irrigate the entire area.
- I laid 25 mm PE pipe throughout, as my main connection also only measures 25 mm.
- In principle, the following applies: For larger systems, the pipe dimensions should be adapted to the water flow in order to avoid pressure losses.
3. laying the pipes too deep or too shallow
The correct depth of the PE pipes is crucial to prevent damage caused by frost or gardening work.
My approach:
- As I blow out my pipes with compressed air in the fall, I didn’t have to lay them frost-free.
- The pipes are still deep enough to prevent damage from gardening or mowing.
- I have described my procedure for winterizing the system in detail in the following article: Winterizing and frost-proofing an underground lawn irrigation system
4. no protection against contamination in the pipes
Even small amounts of soil or sand can clog sprinklers or solenoid valves.
My measures:
- When laying, make sure that no soil gets into the open pipe ends.
- Open pipes should either be sealed immediately with fittings or provisionally covered with adhesive tape.
- Before first use, rinse the pipes with high water pressure to flush out foreign bodies.
5. faulty or insufficient drainage in winter
If water remains in the pipes, they can burst when it freezes.
My solution:
- I have a compressed air connection at my transfer point, which I use to systematically blow out the entire system in the fall.
- This removes all water from the pipes and sprinklers so that no damage is caused by frost.
- Alternative methods for emptying:
- Automatic drain valves: These are installed at the lowest points of the system and open in the event of a pressure loss to drain the water.
- Manual drain valves: Opening a drain valve allows the water to flow out of the pipes, but requires manual control.
Conclusion: Careful planning prevents problems
Thanks to detailed planning with an online tool, the correct placement of the sprinklers and efficient drainage, I was able to avoid typical mistakes and set up reliable automatic lawn irrigation.

- GERINGER KRAFTAUFWAND: Ideal verzahnte Schneidkurve
- BREITE ROHRAUFLAGE: Sorgt für einen präzisen rechtwinkligen Schnitt Schnitt
- AUSLÖSEHEBEL PER KNOPFDRUCK: So können Sie das Messer automatisch und kontrolliert öffnen
- TRANSPORTSICHERUNG: Nach der Anwendung können die Zangenschenkel in Transportstellung arretiert werden. Gummierter Griff: Für einen sicheren Halt ohne Abrutschen
- ROTHENBERGER Qualität: Handwerker schätzen unsere Werkzeuge für ihre Zuverlässigkeit, Langlebigkeit & die anspruchsvolle Technologie, die wir in der Entwicklung & Fertigung der Produkte einsetzen
Summary: Install lawn sprinklers and optimize garden irrigation
In this post, I explain how I planned my lawn irrigation, installed the sprinklers and put the automatic irrigation system into operation.
First I defined the sprinklers, pipes and the valve box in a sketch. I opted for Hunter MP rotators as they offer even water distribution. The main water line was routed under the sidewalk to the valve box where Hunter solenoid valves and a Rain Bird manifold were installed for control.
The next step was to dig the trenches to lay the PE water pipes underground. Due to my clayey soil with an old layer of slag, this was laborious. I used the V-cut technique to restore the turf cleanly later. Alternatively, a trencher or a mini excavator would have been possible, but the stony subsoil spoke against it.
I laid the PE pipes straight from the roll, allowed them to soften in the sun and cut them to size. The pipes were fixed every few meters with the excavated V-pieces to keep them in position. To avoid blockages, I made sure that no soil got into the pipes. For the sprinklers, I used the Hunter Swing-Joint to create a flexible and durable connection to the pipe system.
After installation, I tested the system for leaks by filling it with water. I then set up the sprinklers. Hunter MP pressure-regulated sprinklers retain their settings regardless of water consumption – an advantage over non-pressure-regulated geared sprinklers, where any change affects the entire system.
Finally, I connected the Hunter X-Core irrigation computer to automate the irrigation. Until the final programming, I can also control the system manually via the solenoid valve.

- Hunter Pros-04 PRS40 druckregulierter Versenkregner für MP-Rotator Düsen
- 25 mm hochwertiger Unidelta Klemmverbinder
- Optimierte Regnermontage mit 1 Meter flexiblem Blu Lock Schlauch
- Plug & Rain von DVS Beregnung für eine übersichtliche Zusammenstellung der Gartenbewässerung
- Hohe Qualität und Komponenten von weltweit führenden Bewässerungsherstellern
FAQ – Frequently asked questions about installing automatic lawn irrigation
1. how deep do the water pipes have to be laid in the garden?
As a rule, a depth of approx. 25 cm is sufficient. If the system is blown out with compressed air in the fall, the pipes do not have to be laid frost-free. It is important that they are deep enough so that they are not damaged when mowing the lawn or digging in the garden.
2 Which lawn sprinklers are suitable for narrow or angled areas?
Corner nozzles from the MP rotator series are particularly suitable for difficult areas such as corners or narrow L-pieces. They irrigate small areas in a targeted manner and avoid unnecessary water loss onto paths or flower beds.
3. how many sprinklers can I connect to one circuit?
This depends on the water pressure and the amount of water at the connection. In my case, I was able to operate 7 MP Rotator lawn sprinklers with a 25 mm pipe without any problems. For larger systems, the pipe dimensions must be adapted to the flow rate.
4 What advantages does a Hunter Swing-Joint offer during installation?
The swing joint allows flexible alignment of the sprinkler in height and inclination, protects against damage caused by ground subsidence or footfall and facilitates maintenance, as the sprinkler is not rigidly connected to the pipe.
5. do I have to empty my garden irrigation system in winter?
Yes, absolutely. Water residue in the pipes can cause damage in the event of frost. I use a compressed air connection to blow out the system completely. Alternatively, automatic or manual drainage valves are possible.
6 How do I plan the optimum position for the sprinklers?
I used an online tool for this, in which I mapped my lawn to scale and set the ranges of the sprinklers. The aim is to overlap the throwing areas so that no dry spots occur.
7. which pipe size should I use?
I used 25 mm PE pipe in my project, as my house connection also has this diameter. As a general rule, the more sprinklers and the longer the pipe, the larger the pipe diameter should be.
8. can I also control the irrigation system manually?
Yes, if the solenoid valves are not connected to a computer, they can also be opened and closed manually, e.g. for testing or for temporary operation without a control unit.
9. which controller do I use for automatic irrigation?
I use the Hunter X-Core irrigation computer, which can control several zones individually. I will explain the programming in detail in a separate article:
Program Hunter X-Core control computer
10. how can I tell if my system is leaking?
Before filling the trenches, I filled the system with water, held the pressure for 1 hour and monitored the water meter. Movement of the clock despite closed sprinklers indicates a leak. Alternatively, you can test with soapy water and compressed air.

- Für alle Markierungen auf Asphalt, Beton, Holz und Erde
- Inhalt (ml): 500
- Farbe: neonpink
Dieser Beitrag ist auch verfügbar auf:
English
Deutsch


