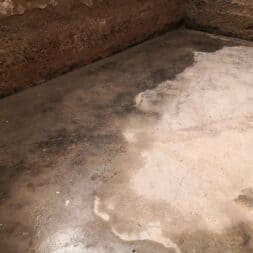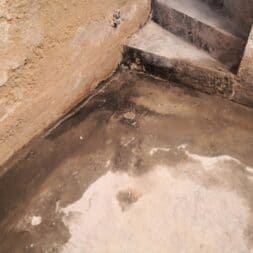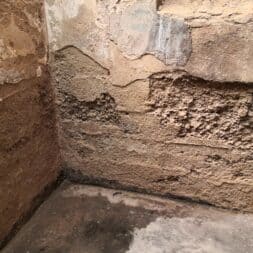
Draining and waterproofing basements: Effective measures against moisture and flooding
Draining my cellar was a lengthy and challenging project that I implemented using various methods to permanently combat damp and mold. From waterproofing with injection methods to installing a pump sump and retrofitting a horizontal barrier – I share my experiences, the challenges and how the measures have proven themselves even under extreme weather conditions.
Draining and waterproofing basements: In this blog post, I describe how homeowners can effectively combat moisture and mold to create a dry and healthy basement. Draining a damp cellar was an important step for me to preserve the building fabric and prevent mold growth.
In this article, I’ll shed some light on the measures I took to drain my cellar and how they proved their worth in extreme weather conditions.
At a glance
- Effective basement waterproofing using the injection method and a pump shaft.
- Challenges posed by heavy rain and water ingress.
- Long-term monitoring of moisture to prevent damage.
Moisture in the cellar: causes and first steps
Damp cellars are a common problem that can occur in both old and newer buildings. The risk is particularly high in older buildings, such as an old building, due to the construction method and the materials used.
Causes of damp basement walls
The reasons for damp basement walls are varied and often interconnected. Here are the most common causes:
- Cracks in the masonry or in the cellar wall
Over time, settlement movements of the building or heavy loads can cause fine to deep cracks in the masonry. These cracks allow water from the ground to easily penetrate into the cellar. Especially during heavy rainfall or flooding, water penetrates quickly and in large quantities through the damaged areas. - Rising damp and missing horizontal barrier
Many old buildings do not have an effective horizontal barrier to prevent moisture rising from the foundation into the masonry. This rising damp causes wet basement walls and, in the worst case, can affect the stability of the building, increasing the need for basement renovation. - Properties of the foundation in old buildings
In old buildings, the foundations are often made of inadequately sealed material such as quarry stone or unprotected concrete. These materials are porous and conduct moisture from the ground directly into the cellar walls. This not only leads to damp walls, but can also jeopardize the load-bearing capacity of the foundation. - Lack of or incorrect ventilation
Insufficient air circulation in the cellar is another problem that occurs particularly in old, solid buildings. In old buildings, thick walls store moisture for longer than modern construction methods. If ventilation is incorrect, for example when warm outside air meets cool basement walls, the moisture condenses on the walls. This promotes the formation of mold and increases the humidity in the cellar in the long term. Modern new buildings, on the other hand, are often equipped with vapour barriers, better insulating materials and special plaster, which minimizes the risk of condensation. - Insufficient drainage and risk of flooding
Without a functioning drainage system, water from the surrounding soil can easily penetrate the cellar in the event of heavy rainfall or rising groundwater levels. In many old buildings, such a drainage system is completely missing or has become inoperable over time. The consequences are wet walls, damage to the building fabric and an increased risk of mold growth.

- Zerstörungsfreie Feuchtemessung: Sphärischer induktiver Feuchtigkeitsmesser, zerstörungsfreie Messung der Holzfeuchte. Keine Notwendigkeit, die Sonde in das Messmaterial einzuführen. Messtiefe 5-40MM, Sondenlänge 58MM, Messbereich 0-100%.
- Schnelle und einfache Messung: Dreifarbige Anzeige: Drei farbige Analogstreifen erleichtern die Identifizierung der Messwerte. Eingebaute Taschenlampe: Zusätzliche Taschenlampe ermöglicht es Ihnen, schnell und einfach zu erkennen, die Oberflächenfeuchtigkeit der dunklen Arbeitsplatz.
- Breite Messung: 3 Haupttypen von Messbereich, Gips / zementartigen Substrat / Holz und anderen Materialien, Papier / Pappe / Fliesen / Gipskarton. Einsatzszenario: DIY Holz während der Konstruktion oder Dekoration.
- Haltefunktion: Mit der "Hold"-Taste kann der aktuelle Messwert aufgezeichnet werden. Außerdem wird der maximale und minimale Feuchtigkeitswert angezeigt.
- Einstellungsparameter: 3 Arten von Wassergehalt Ebene. Die Wand Hygrometer kommt mit einstellbaren Feuchtigkeit Alarmwerte nach Ihren Bedürfnissen.
First measures for draining the masonry in the basement
Draining a damp cellar requires a systematic approach. A mix of preventive, short-term and long-term solutions helps to combat moisture effectively and protect the building fabric.
Measures with little effort
There are first steps that can be implemented with little financial means and without a great deal of work. These measures help to quickly reduce moisture in the cellar:
- Localize and eliminate the water source: The first step in draining should always be to eliminate the source of water. For this purpose, the source, for example broken water pipes, defective rain gutters, accumulating surface water or pressing groundwater, should be localized. If possible, the causes should be eliminated immediately.
- Ventilate at the right time: Humid air from outside can make the situation worse, especially on warm days. I only open the basement windows in the early morning or late evening when the outside air is cooler and drier.
- Use a dehumidifier: An electric dehumidifier noticeably reduces the humidity. In very damp cellars, I also use a hygrometer to keep an eye on the moisture content. Smart dehumidifiers can also be combined with the PV system or a balcony power plant. This keeps electricity costs manageable.
- Move furniture away from the walls: To improve air circulation and prevent mold growth, furniture should be placed at least 5-10 cm away from the walls. This allows the air behind the cupboards to circulate better.
These measures can be implemented immediately and are ideal for achieving initial improvements without incurring major costs.
Medium-term measures with moderate expenditure
If the moisture is more severe or the initial measures are not sufficient, medium-term solutions are necessary, which require a little more planning and financial resources:
- Internal sealing: Sealing from the inside can be a good option, especially for old buildings. A special sealing layer, such as sealing slurry or restoration plaster, is applied directly to the walls. This method is relatively quick to implement and is suitable for rooms that are to remain in use. However, it should be borne in mind that the water will always find its way and may then emerge in other places.
- Replace or seal basement windows: Old or leaking windows in the basement allow moisture to penetrate – but also ensure better ventilation. New, well-sealing windows are an effective solution to prevent the ingress of warm, humid air. At the same time, the cellar is also better insulated, which reduces heating costs.
These measures bring tangible improvements and require a manageable financial investment.
Long-term solutions with high costs
In the event of serious moisture problems or damage to the building fabric, long-term measures are necessary. Although these are more expensive, they ensure permanent drainage. A specialist company or firm often has to be commissioned for this:
- Sealing from the outside: Exposing the exterior walls and applying a bitumen coating or sealing slurry prevents moisture from penetrating the cellar from the outside. This method also protects the foundation.
- Laying drainage: A drainage system drains water from the soil before it can exert pressure on the basement walls. The combination of drainage and external waterproofing is particularly effective. While the waterproofing prevents moisture from penetrating, the drainage ensures that the water does not reach the walls in the first place. The effort involved is high, as the floor around the cellar has to be cleared, but the result is extremely effective.
- Install a pump sump or soakaway: A pump sump is a useful addition in areas with high groundwater levels or heavy water ingress. A shaft is created below the cellar floor to collect any water that penetrates. A submersible pump transports the water to the outside before it can rise into the walls. This system is particularly helpful when drainage alone is not sufficient or the water pressure in the soil is too high.
Horizontal barrier and renovation of the foundation
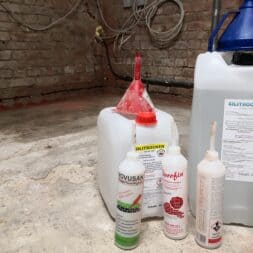
A missing or damaged horizontal barrier is often the reason for rising damp. I opted for the injection method for retrofitting a horizontal barrier, in which a waterproofing liquid is injected into the masonry to renovate the cellar. The procedure is very effective, but involves more effort. In addition to the injection liquid, I have also had good experiences with the use of injection sticks and injection cream.
Matching blog entries:
- Draining the cellar – 1 year later
- Draining the basement with a new horizontal barrier – conclusion after 9 months
- Drainage – retrofitting a horizontal barrier yourself
- Draining the cellar – pump sump | Build your own soakaway
- Drying out an old house yourself – planning and preparation

- TOBOLIN HORIZONTALSPERRE bietet einfache Anwendung und schnelle Durchführung mit dem wasserfreien Injektionssystem - absolut dicht. Ergiebigkeit: Reicht für 4,80 m Wandlänge bei einer Wandstärke von 30 cm.
- HOCHPROFESSIONELLES ABDICHTUNGSSYSTEM wirkt gegen aufsteigende Feuchte in Mauerwerken. Perfekt zur Selbstanwendung geeignet - Sie können eine nachträgliche Horizontalsperre selber machen mit TOBOLIN!
- KEINE SALZFRACHT: Das TOBOLIN Verkieselungsmittel sorgt dafür, dass keine wasserziehenden Salze in das Mauerwerk gelangen - die Wand bleibt dadurch "atmungsaktiv".
- TOP VERTEILUNGSVERMÖGEN: Daher ist ein Bohrlochabstand bis zu 20 cm möglich. Die Anwendung ist für innen und außen geeignet - ideal zur Bekämpfung von aufsteigender Feuchtigkeit.
- EINFACHES NACHFÜLLEN: Die Wiederbefüllung der Trichter-Flaschen ist mit dem Nachfüllkanister ganz einfach möglich. Im Set sind 24 x 500 mL Flaschen mit jeweiligem Injektionsaufsatz enthalten.
Video: Build your own horizontal barrier with Novusticks
I have documented the subsequent installation of a horizontal barrier with the NovuSticks in a short informative video.
You can also find the video and many more in my playlist: Basement Drying or in the blog category Basement Drying.
If you want to see more of me and my projects, have a look at my YouTube channel.
Zuletzt aktualisiert am 2. February 2026 um 17:18 . Ich weise darauf hin, dass sich hier angezeigte Preise inzwischen geändert haben können. Alle Angaben ohne Gewähr. (*) Bei den verwendeten Produktlinks handelt es sich um Affiliate Links. Ich bin nicht der Verkäufer des Produktes. Als Amazon-Partner verdiene ich an qualifizierten Verkäufen. Dein Preis ändert sich jedoch nicht.
Drying out basement walls with the injection method
What is the injection process?
The injection method is a proven method for waterproofing basements from the inside. A special injection fluid or compound is injected into the masonry to permanently seal and stabilize damp basement walls. This technique is particularly suitable for the subsequent sealing of walls that are already damaged by rising or penetrating damp.
Advantages of the process:
- Fast implementation without major construction work.
- Effective against both rising damp and water penetrating from the side.
- Long-lasting effect when used correctly.
Different injection methods
There are various methods and materials for the injection procedure. Each variant has its own areas of application, advantages and disadvantages. In my basement, I used different basement renovation methods depending on the wall area to achieve the best results.
Injection bottles
I used injection bottles in the main areas of the cellar. Special bottles containing the sealing liquid are connected directly to the prepared drill holes in the masonry. The liquid slowly flows into the capillaries of the wall until the masonry is completely saturated.
Advantages:
- Even distribution: The liquid flows under low pressure and is well distributed in the masonry.
- Easy to use: After attaching the bottles, the process runs largely independently.
- Controllability: You can see exactly how much liquid has flowed into each hole.
Disadvantages:
- Time-consuming: The process can take several days or even weeks until the masonry is completely saturated.
- Not suitable for walls that carry a lot of water: If the wall is too wet, the masonry absorbs the liquid less well.
Injection cream
I used injection cream in another area of the cellar that was difficult to access. The cream was inserted into the prepared drill holes using a pressure device. This method is particularly suitable for walls that are already heavily saturated with moisture, as the cream works regardless of the moisture saturation.
Advantages:
- High viscosity: The cream stays in place even when applied horizontally or overhead.
- Independent of wall moisture: Works well on damp and dry walls.
- Easy handling: Particularly suitable for smaller projects or difficult access points.
Disadvantages:
- Limited capillary effect: Compared to liquid materials, the cream does not penetrate as deeply into the masonry.
- Higher material consumption: The method is often more cost-intensive for larger projects.
Injection sticks
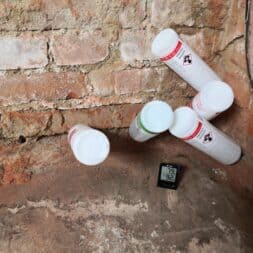
I used injection sticks in another area of the cellar where the moisture supply was particularly high. These were inserted into the drill holes and slowly release their active ingredients, gradually sealing the masonry.
Advantages:
- Slow and continuous sealing: Particularly effective for walls with high moisture ingress.
- Low maintenance: Once inserted, the sticks work automatically.
Disadvantages:
- Lengthy process: Complete waterproofing and thus draining the cellar often takes several weeks or months.
- Limited application: Not ideal for large areas or very thick walls.


New horizontal barrier, drainage and pump sump in the basement
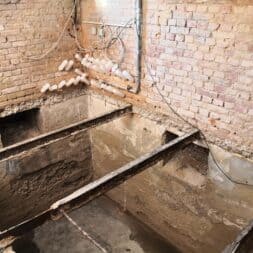
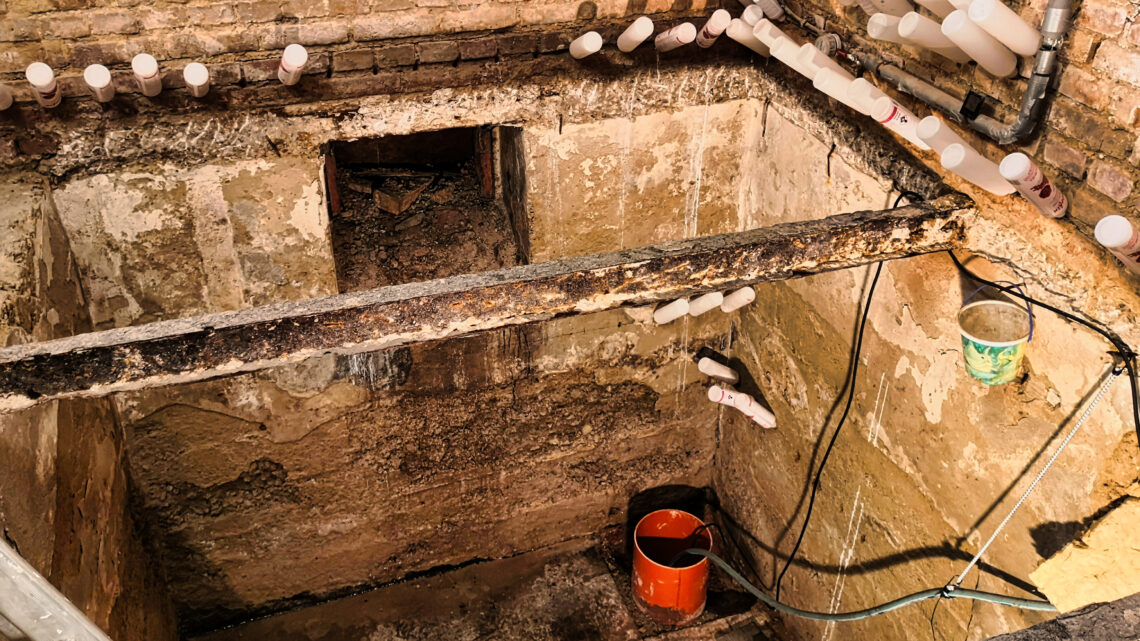
In the basement on the north-west side of the house, which is also the weather side, I have a special area – a cellar under the basement, which is up to 7 meters deep. Due to its location and depth, this area is particularly susceptible to moisture and water ingress.
I combined several measures to effectively drain this challenging area:
- Injection bottles in the main areas:
I treated the walls in the lower cellar area with the liquid injection solution, which was applied using the bottle method. This method is particularly suitable for evenly sealing heavily soaked masonry. The bottles were specifically connected to prepared boreholes, allowing the sealing liquid to slowly penetrate the masonry and saturate all capillaries. - Installation of a sump pump in the lower cellar:
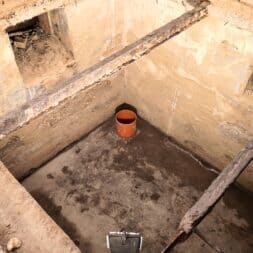
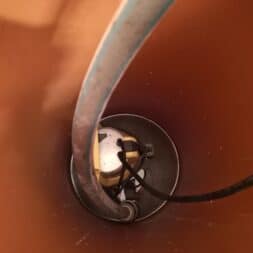
I installed a sump pump at the lowest point of the basement to drain off the water that collects below the foundation. For the pump sump, a large KG pipe was inserted into a hole about 100 cm deep in the cellar floor. The shaft was surrounded by a drainage layer of gravel so that water from the surrounding soil can easily flow into the pipe. An automatic submersible pump in the pump sump ensures that the collected water is reliably pumped out before it can reach the foundations or walls.

- 1m KG Steigrohr DN315 oder DN400
- VARIANTE 1 - DN315 Nennweite: DN315 Länge: 100 cm Material: PVC (Polyvinylchlorid)
- VARIANTE 2 - DN400 Nennweite: DN400 Länge: 100 cm Material: PVC (Polyvinylchlorid)
Video: Build your own sump pump in the cellar
I filmed the construction of my soakaway in the basement in detail and published it in an exciting and informative video on my YouTube channel.
The video is part of my project series“Draining the cellar“. You can find more videos on the subject of draining our old villa in the draining category
If you want to see more of me and my projects, feel free to check out my YouTube channel.
Zuletzt aktualisiert am 2. February 2026 um 17:07 . Ich weise darauf hin, dass sich hier angezeigte Preise inzwischen geändert haben können. Alle Angaben ohne Gewähr. (*) Bei den verwendeten Produktlinks handelt es sich um Affiliate Links. Ich bin nicht der Verkäufer des Produktes. Als Amazon-Partner verdiene ich an qualifizierten Verkäufen. Dein Preis ändert sich jedoch nicht.
Results after heavy rain and flooding
The drainage measures were put to the test by the recent extreme weather conditions. With more than 100 liters of rain per square meter and standing surface water, the question arose as to whether the basement waterproofing and the drainage system could withstand these loads.
Water ingress during heavy rainfall
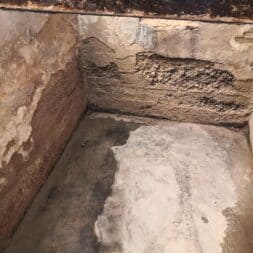
Due to the heavy rainfall, the surface water could not drain off quickly enough. It penetrated into the lower basement area, as the walls there are not made of solid bricks like in the rest of the building. Instead, these walls were originally built from a gravel-cement mixture, which is more porous and allows moisture to pass through more easily.
The penetrating water first collected in the basement before being directed to the sump pump via a drainage channel I built on the inside of the outer wall. This system prevented the water from spreading uncontrollably in the cellar.
Automatic water drainage with pump sump
In the pump sump, an electronic submersible pump ensured that the water was reliably pumped out. The system worked fully automatically and regulated the water level without me having to intervene. While many neighboring houses could only be helped by the fire department with high-performance pumps, I was able to cope with the flooding in the cellar on my own thanks to the built-in system.
Positive conclusion despite extreme stress
The combination of injection method, drainage system and pump sump has proven to be extremely robust:
- Dry masonry above the horizontal barrier: The waterproofing measures proved effective, as no moisture penetrated into the walls above the new horizontal barrier.
- Stable basement walls: Despite the water ingress, the treated walls in the basement remained stable and showed no new damage.
- Efficient water drainage: The drainage channel and submersible pump worked reliably and prevented major water damage.
The measures proved their worth even under these extreme weather conditions. By carefully planning and combining the systems, I was able to effectively keep the basement dry even during heavy rain and rising water levels.
Video: Draining the cellar on the test bench – flooding in the cellar
I filmed the construction of my soakaway in the basement in detail and published it in an exciting and informative video on my YouTube channel.
The video is part of my project series“Draining the cellar“. You can find more videos on the subject of draining our old villa in the draining category
If you want to see more of me and my projects, feel free to check out my YouTube channel.
Zuletzt aktualisiert am 2. February 2026 um 17:03 . Ich weise darauf hin, dass sich hier angezeigte Preise inzwischen geändert haben können. Alle Angaben ohne Gewähr. (*) Bei den verwendeten Produktlinks handelt es sich um Affiliate Links. Ich bin nicht der Verkäufer des Produktes. Als Amazon-Partner verdiene ich an qualifizierten Verkäufen. Dein Preis ändert sich jedoch nicht.
Summary: Cellar renovation
Draining a damp cellar is essential to protect the building fabric and prevent mold growth. In my project, I combined various methods to combat moisture in the long term.
The main causes of damp cellars, such as cracks in the masonry, rising damp due to a missing horizontal barrier or inadequate drainage, require targeted measures. Porous materials and poor air circulation pose additional challenges, especially in old buildings.
To successfully drain my cellar, I used the injection method, a pump sump and a drainage channel to remove moisture from the walls. The injection bottles effectively sealed the walls in the cellar, while the submersible pump in the pump sump automatically drained the penetrating water to dry out the cellar again. In addition, a new horizontal barrier was installed to prevent moisture from rising.
Even under extreme weather conditions, such as heavy rain and standing surface water, this combination has proven its worth in sealing the walls in the basement. While the fire department was needed in other houses, my cellar remained dry thanks to the measures taken.
Conclusion:
Effective drainage is possible with preventive, medium-term and long-term solutions. An analysis of the causes of moisture and customized measures, such as the combination of a horizontal barrier, injection method and drainage system, ensure a permanently dry basement.

- SCHUTZ VOR FEUCHTIGKEIT - Novusan schützt Ihren Keller vor aufsteigender Feuchtigkeit & Nässe. Fehlt Ihrem Haus die Mauersperrbahn, schaffen Sie mit der Injektion nachträglich eine Abdichtung.
- WAND TROCKENLEGEN - Neben der Feuchtigkeits-Abwehr eignet sich die Injektionsflüssigkeit, um bereits vollständig durchfeuchtete Wände dauerhaft auszutrocknen. (5 Flaschen = 1m trockene Wand)
- FÜR JEDE FEUCHTE WAND - Die Horizontal-Sperre eignet sich für Lagerfügen in allen mineralischen Wänden (auch in Hohlwänden) - z.B. für Ziegel, Gitterstein, Sandstein, Hohlkammerstein uvm.
- EINFACHES ANBRINGEN - Das Einsetzen der Mauerwerkssperre ist auch Laien möglich - ohne schweres Gerät & Ausschachten: Löcher bohren, Flaschen einstecken, warten & die Wand verschließen!
- NOVUSAN by BKM.MANNESMANN - Für ein trockenes Zuhause! In unserem Sortiment finden Sie verschiedenste Produkte, um Ihr Zuhause von Feuchtigkeit zu befreien & nachhaltig zu schützen.
FAQ: Drying and waterproofing cellars
1. what are the most common causes of damp cellars?
- Cracks in the masonry or foundation due to settlement movements.
- Rising damp in the absence of a horizontal barrier.
- Insufficient drainage or high groundwater levels.
- Incorrect ventilation, resulting in condensation on the walls.
2. which initial steps help with cellar drainage?
- Localize and eliminate the source of water (e.g. repair defective rain gutters).
- Only ventilate the cellar in the early morning hours or in the evening.
- Use electric dehumidifiers to lower the humidity.
- Move furniture away from the walls to improve air circulation.
3. what methods are available for effective basement waterproofing?
- Interior sealing: Sealing slurry or restoration plaster is applied directly to the walls.
- Horizontal barrier: subsequently installed to stop rising damp.
- Sealing from the outside: Bitumen or sealing layers protect the cellar walls.
4 What is the injection process and how does it work?
- A special sealing liquid or cream is applied to the masonry.
- It seals the capillaries in the stone and prevents moisture from rising.
- It is particularly suitable for old buildings and subsequent waterproofing.
5 What are the differences between injection methods?
- Injection bottles: Suitable for even distribution, but time-consuming.
- Injection cream: Ideal for very damp walls, but penetrates less deeply.
- Injection sticks: Slow release, effective with high moisture replenishment.
6 When is a pump sump useful?
- In the event of high groundwater levels or heavy water ingress in the cellar.
- The pump sump collects the water and a submersible pump drains it automatically.
- Particularly effective in combination with a drainage channel.
7 What role does drainage play in drainage?
- It directs water away from the building and relieves the basement walls.
- Particularly helpful in combination with sealing from the outside.
8. how much do the measures for cellar drainage cost?
- Interior sealing: 30-50 € per square meter.
- Injection method: 50-150 € per meter (depending on method and material).
- Pump sump: 500-1,500 € including submersible pump and installation.
- Drainage and external waterproofing: €10,000-20,000 (depending on scope and cellar size).
9. how long does it take to dry out a cellar?
- Short-term measures: Can be implemented within days (e.g. dehumidifier).
- Medium-term solutions: Waterproofing and horizontal barriers require 1-3 weeks.
- Long-term measures: External waterproofing and drainage require 4-6 weeks.
10 How do you check whether the measures were successful?
- A moisture meter can be used to measure wall and floor moisture.
- Drier wall surfaces and a lack of mold growth are further indicators.
- In modern systems, a green LED on the pump or monitoring unit indicates whether the water is being discharged correctly.

- Hält bis zu 3-mal länger als Standardbohrer
- Extrem belastbare Bohrerspitze mit Bosch Carbide Technology
- Passend für alle SDS plus Bohrhämmer
- Ideal zum Bohren von Löchern in Stahlbeton, z; B; zum Verankern von Inneninstallationen wie Klimaanlagen, Heizungsrohre, elektrische Leitungen und Lampen
- Lieferumfang: Bosch Expert SDS plus-7X Hammerbohrer, 14 x 550 x 600 mm
Dieser Beitrag ist auch verfügbar auf:
English
Deutsch


