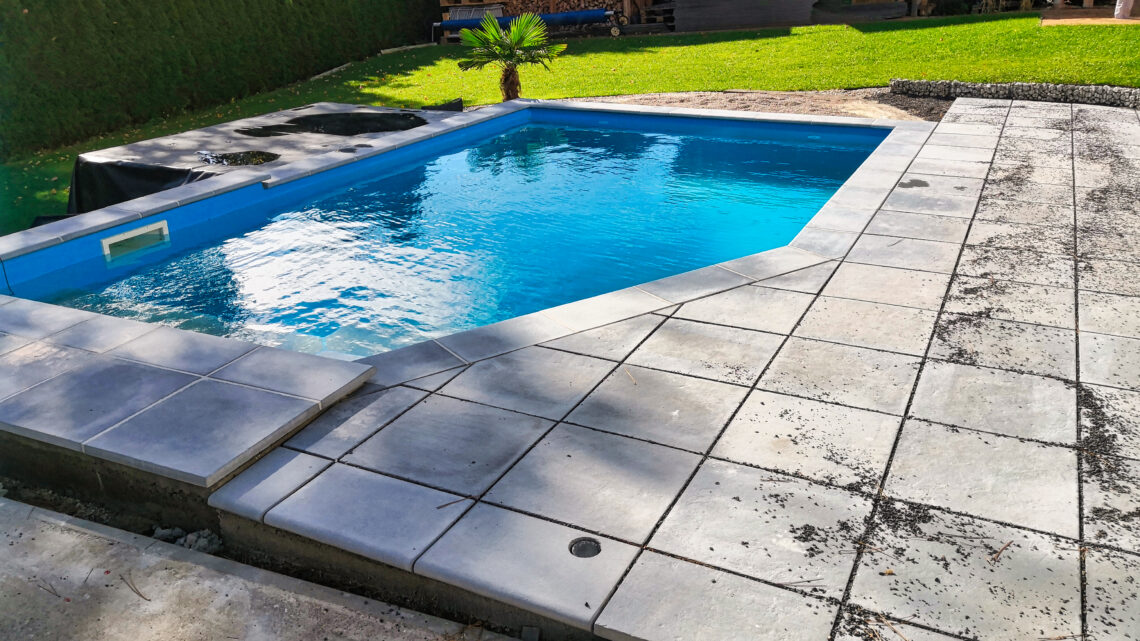
Laying pool edging stones and building your own pool terrace for the perfect pool surround
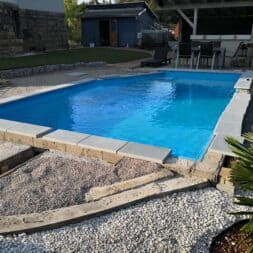
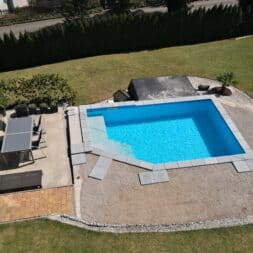
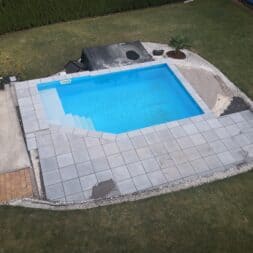
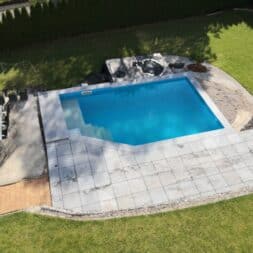
When building the pool, the correct laying of the pool edge stones and the construction of a beautiful and functional pool terrace played an important role. In this article, I describe how I selected the materials, prepared the substrate, cut and glued the stones. I also show how I laid the terrace loosely and built a platform as a transition to the garden terrace.
Building a pool has been one of my biggest DIY projects. In this article, I would like to tell you about my experiences with laying pool edging stones and building the pool terrace.
What you can expect in this article:
- Tips and tricks for building your own pool terrace.
- Laying pool edge stones: Selection of materials, preparation, cutting and gluing the stones.
- Building a pool terrace: Loose laying of granite slabs for optimum drainage and frost resistance.
- Prepare the substrate: Tips for creating a stable and functional base structure.
- Platform construction: temporary solution between swimming pool and garden terrace – planning, concreting and bonding.
- Practical experience: Challenges, solutions and tips from my DIY pool project.
Stone slabs as the best choice for the pool terrace
When planning my pool terrace, I researched the most common materials. Wood, WPC (wood plastic composite) and stone are used particularly frequently, but marble is also a popular choice for the design of a new pool.
Each of these materials has specific advantages and disadvantages which played a role in our decision-making process:
Comparison: wood, WPC and stone for pool surrounds
Wood
Wood offers a warm, natural look and feels pleasant underfoot. It is easy to machine, which makes installation easier. But it also has clear disadvantages: Wood requires regular maintenance and is susceptible to the weather. It quickly became slippery, especially in the wet. In addition, my old wooden decking showed signs of wear early on, which made cleaning and maintenance more difficult.
In terms of price, wood is often cheaper than other materials, which is why it is a popular choice, especially for DIY projects. But the high level of maintenance ultimately put me off.
WPC
WPC planks are a mixture of wood fibers and plastic. They are more weather-resistant and easier to maintain than pure wood and offer good slip resistance, which is particularly important if you are planning a new pool.
However, I had the feeling that WPC planks could not keep up with the look of natural stone. They also became uncomfortably hot in strong sunlight.
The price of WPC is higher than that of wood, and installation is easier, but also requires precision. After my research, WPC seemed like a solid option, but didn’t completely convince me.
Stone
Stone slabs, as I finally used them, convinced me with their robustness and durability. They are weather-resistant and offer a wide range of design options. The biggest challenge, however, was the heavy weight, which required precise preparation of the substrate.
The stone slabs were more expensive than wood and WPC, but the investment was worth it. The installation was more complex and perhaps a hurdle for DIY beginners, but I was able to achieve good results thanks to my experience and the right equipment.
Robust, durable, easy to maintain – advantages of a stone pool surround
I finally decided on stone slabs after having had bad experiences with other materials. My old pool deck made of BPC boards proved to be particularly problematic. In my article “Converting the pool – dismantling the pool terrace BPC planks substructure pool technology”, I describe how quickly the planks showed signs of wear and how susceptible they were to the effects of the weather.
The maintenance of the BPC planks also did not meet my expectations. After these experiences, I wanted something more durable and easier to maintain. Stone slabs met these requirements exactly and were an ideal choice for the edging of the new pool.
They look perfect with my pool and offer the stability I wanted for the terrace.
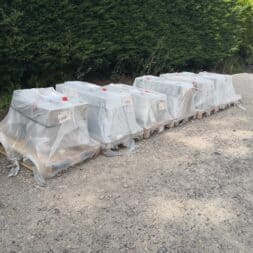
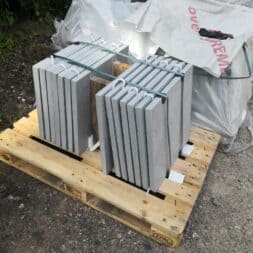
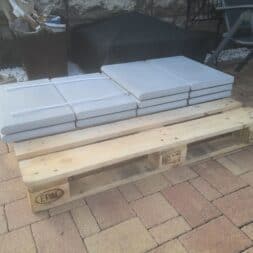
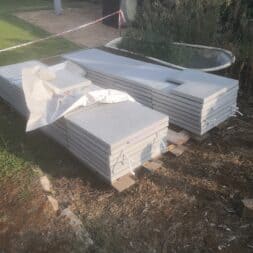
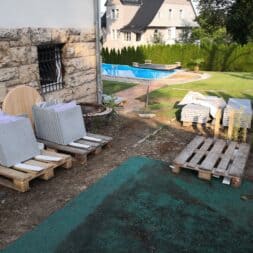
I ordered a total of seven pallets of material for the project, which I selected as a ready-made kit package from the Weserwaben company.
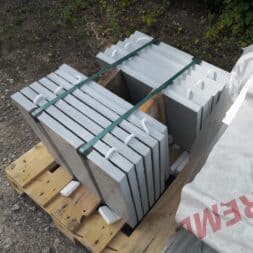
These packages are specially compiled for different pool sizes, which makes planning and ordering much easier. I opted for the Margo model because the pool edging stones and patio slabs matched the look of our pool, our house and the adjoining outdoor garden kitchen perfectly.
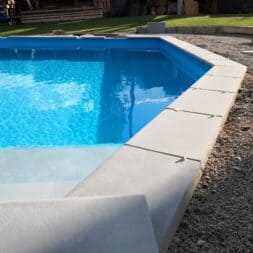
The pool edge stones had a size of 50×30 centimeters – ideal for a flush look with a projection of 5 cm. The terrace slabs are also 3 cm thick and measure 50×50 centimeters.
To make sure that the quantity of materials would be sufficient, I calculated the area of the terrace plus the amount of material needed. a blend of 10%. At around 25 m², the requirement was clear and I was able to order the right number of stones. The freight forwarder delivered the seven pallets directly to us within just 14 days.
The material weighed almost 3 tons in total – a real challenge to transport everything to the construction site. But the effort was worth it, because the quality of the stones created a perfect base for the pool surround and the terrace.

- 6-stufig verstell- und arretierbar: 30 - 35 - 40 - 45 - 48 - 50 cm, mit Sichtfenster zur präzisen Maßeinstellung.
- Hochwertiges Material: Aus verzinktem 2,0 mm starkem Stahlblech gefertigt, robust und langlebig.
- Hohe Tragkraft: Max. Belastbarkeit von 30 kg, ideal für verschiedene Anwendungen.
- Sicherer Halt: Verzinkte Metallteile mit Krallen sorgen für eine feste Fixierung auf unterschiedlichen Oberflächen.
- Ergonomisches Design: Der ergonomisch geformte Griff ermöglicht komfortables Arbeiten und steigert die Effizienz bei Fliesen- und Pflasterarbeiten.
Laying and bonding pool edging stones correctly
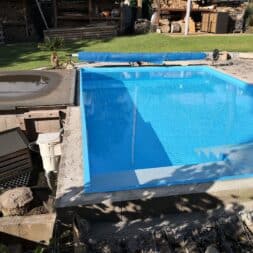
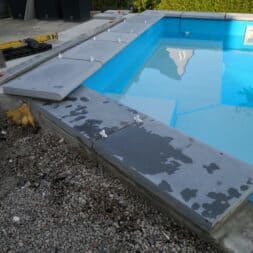
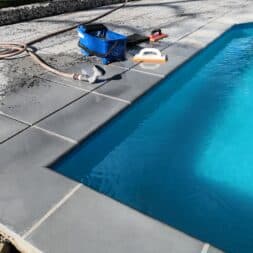
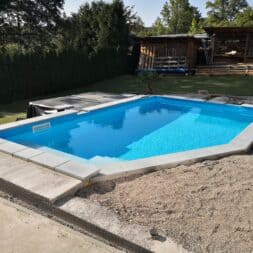
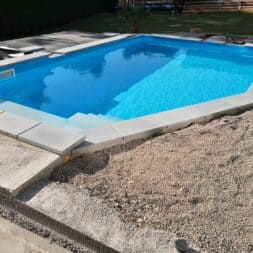
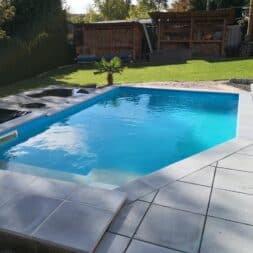
Thorough preparation was crucial for the laying and bonding of the pool edge stones. First, I thoroughly cleaned the surface of the pool edge, consisting of the concrete formwork blocks. This ensured that the adhesive would adhere optimally.
Laying the pool edge stones
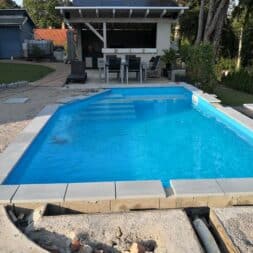
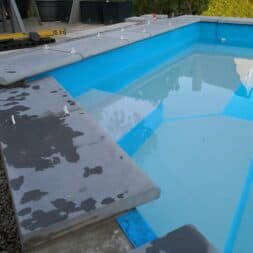
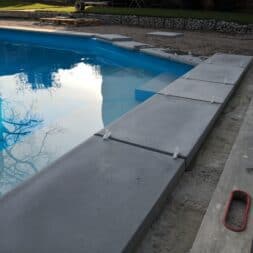
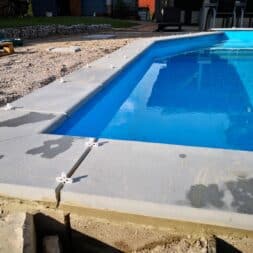
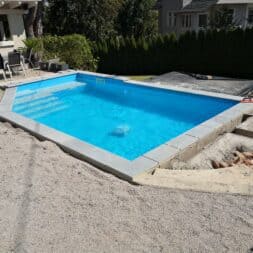
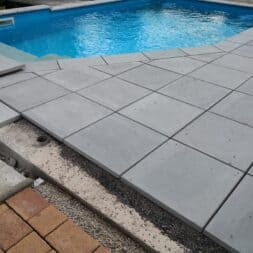
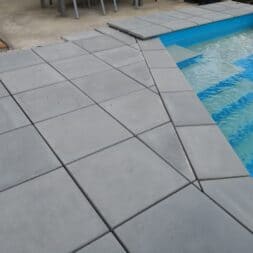
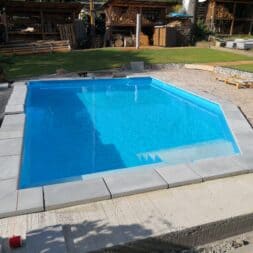
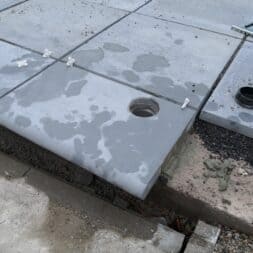
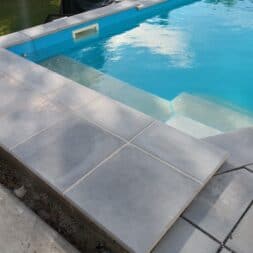
Before I started gluing, I first laid out the pool edge stones dry to get a feel for the dimensions and arrangement. The three right-angled corners of the pool were predetermined, but the 4. and 5th corner only resulted from the correct laying of the stones.
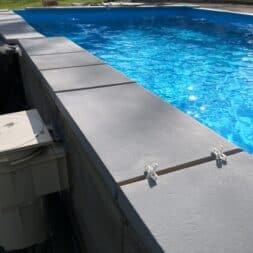
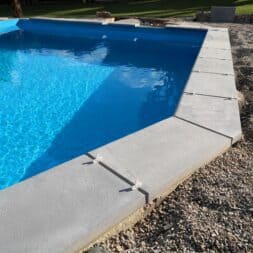
I laid the stones between the corners with 10-millimeter-wide joints. As the dimensions did not fit exactly in some places, I cut the pool edge stones individually. However, I always made these cuts just before gluing to ensure the exact dimensions. It was important to me to achieve a symmetrical arrangement of the stones along the entire length of the sides of the pool.
Cutting the stones to size with the angle grinder
I used my large angle grinder with a suitable diamond cutting disk for cutting. I then rounded off the visible edges of the stones with a fine grinding stone. In this way, I achieved a high-quality, uniform appearance.
Bonding the pool edge stones
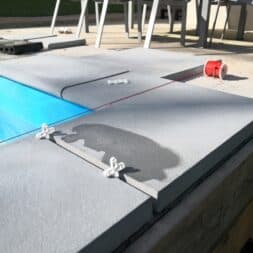
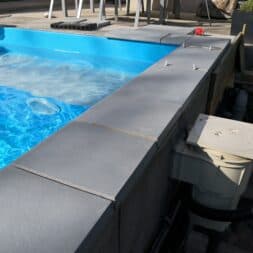
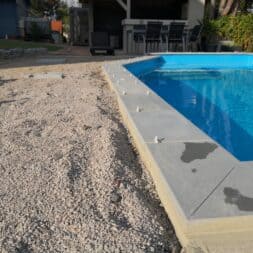
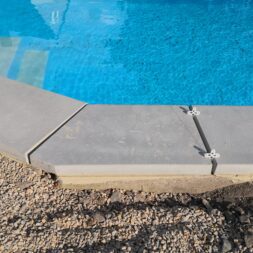
I used a frost-proof, flexible tile and stone adhesive for bonding. I mixed the adhesive according to the instructions and applied it to the pool edge with a notched trowel to a thickness of about 4 cm to create a stable base for the pool edge stones. I then pressed the pool edge stones into the mortar bed from the adhesive and aligned them with a slight slope to the outside.
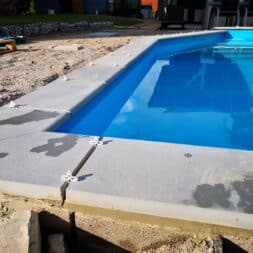
I used 10-millimeter joint crosses to secure the space between the stones. While I was working, I made sure that no glue fell into the pool. However, if any adhesive got onto the pool liner underneath, I wiped it off immediately so as not to leave any traces behind later.
The 4. and I only measured the 5th corner precisely when I had arrived at the corresponding positions. I cut the stones accordingly and then glued them precisely in alignment.
Cleaning and curing
Once all the stones had been laid and glued, I cleaned the pool edge stones thoroughly with plenty of water to remove any adhesive residue. I then allowed the adhesive to harden completely so that the pool edge panels could form a secure bond with the pool crown. A week later, I was able to start grouting the pool edge stones.
Silicone joint for sealing the pool edge
As soon as it gets warmer again in spring, I plan to seal the transition from the pool edge stones to the pool liner with a special silicone.
When I started work, the water temperature in the pool had already dropped below 15 °C. I didn’t want to get into the pool without a thermal suit to pull the silicone joint at the edge. Instead, I decided to postpone this task until spring, when the temperatures are more pleasant again and I can carry out the work more comfortably.
What to look out for when choosing the right silicone
For this task, it is important to use a chlorine-resistant and permanently elastic silicone that is especially suitable for use in swimming pools. The silicone must also be frost-resistant and UV-resistant, as the pool surround is constantly exposed to sunlight.
A neutral-curing silicone is particularly suitable as it does not react with the pool liner or the pool edge.
The silicone joint ensures that the transition between the pool edge stones and pool liner remains watertight. It prevents water from getting into the substructure or behind the liner, thus protecting the pool structure from damage caused by moisture.
At the same time, it compensates for movements between the materials that can occur due to temperature differences.


Grouting kerbstones correctly
Grouting the pool edge stones was an important step in visually and functionally completing the entire pool surround. It was not only a question of the correct technique, but also of choosing the right grout.
Choosing the right grout
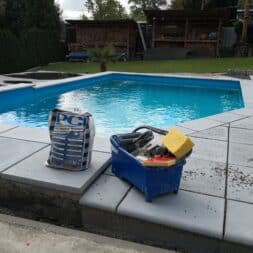
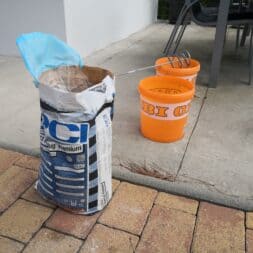
I opted for PCI Nanofug Premium flexible joint grout in the color light gray because it matched the gray pool edge stones perfectly. When choosing the grout, it was important to me that it:
- Flexible to compensate for small movements of the substrate and prevent cracks.
- Water-repellent and frost-proof to protect the pool area from the weather.
- UV-resistant, so that the joints retain their color even after prolonged exposure to sunlight.
Another advantage of the selected mortar was its fine grain, which resulted in a smooth and even joint pattern.
Mixing the joint sealant
I prepared the grout according to the manufacturer’s instructions, but only mixed small amounts at a time. The reason: The compound hardens quite quickly and I wanted to avoid a part becoming unusable before I could process it.
The right technique for grouting
For the grouting itself, I used a rubber spatula to press the compound firmly into the joints and fill them completely. To prevent the grout from getting into the pool, I taped the protrusions of the pool edge stones from below with adhesive tape. Unfortunately, this method did not work as effectively as expected.
So I changed my technique: I pressed the grout into the joints from the basin side with the hollow of my hand and smoothed it out with my fingers. In this way, I worked my way around the entire pool until all the joints were sealed.
Cleaning and prevention of cement residue
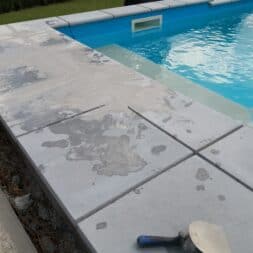
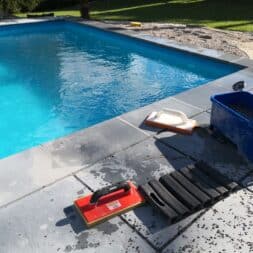
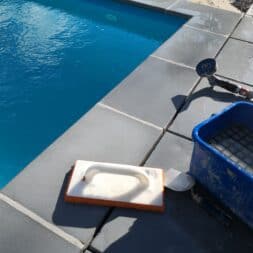
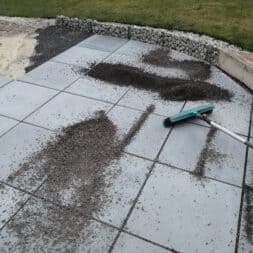
As soon as I got back to the first joint, the compound had already dried there. Now I started to clean the joints. I used a sponge board and lots of water to wipe the joints diagonally.
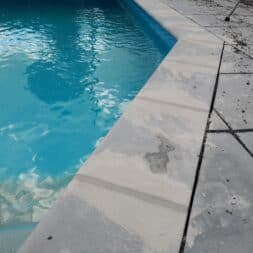
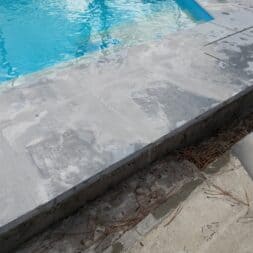
The use of a lot of water was necessary to avoid cement residue on the pool edge stones. Cement haze occurs when mortar residue dries and leaves a gray film on the surface. This film can impair the appearance and is difficult to remove later.
The Margo pool edge stones have been protected with a special impregnation from the factory. This meant that I could easily wash off the excess grout without a cement film forming. However, the terrace slabs had no impregnation. I therefore had to scrub the large stones thoroughly with a sponge and an old shoe brush.
By wiping the grout diagonally to the joint with the sponge board, I managed to keep the surface clean and clear. The first few attempts seemed a little uneven, but after three joints I got the hang of it.

- KOMPLETT SET: Das 5-teilige Fliesenwaschset besteht aus einem Kunststoff Eimer mit 12 Liter Volumen und Tragegriff, Doppelrollenaufsatz, Fliesenwaschbrett mit Hydro Schwamm Auflage und Reibebrett mit Zellkautschuk-Belag. Bestens ausgestattet, für das nächste Fliesenprojekt!
- EINFACHE HANDHABUNG: Das mitgelieferte Fliesenwaschbrett kann leicht über den Doppelrollenaufsatz abgestreift werden. Der Transport erfolgt einfach durch den flexiblen Griff. Maximaler Nutzen und höchstmöglicher Komfort!
- MADE IN GERMANY: Die sorgfältige Verarbeitung und die ausgewählten Materialien schaffen die nötige Stabilität.
- PRAKTISCH: Das Fliesenwaschset ist durch einen geringen Kraftaufwand zuverlässig und einfach einzusetzen. Das Waschset eignet sich zur schnellen und gründlichen Reinigung der frisch verlegten Fliesen. Ebenfalls wird das Schmutzwasser sicher im Eimer aufgefangen und kann durch die extra vorgefertigte Ecke ideal ausgegossen werden.
- FÜR HEIMWERKER: Das nächste Fliesenprojekt steht schon in den Startlöschern? Das Fliesenwaschset eignet sich besonders für Hobbyhandwerker & Heimwerker!
The pool terrace: Loose laying on chippings
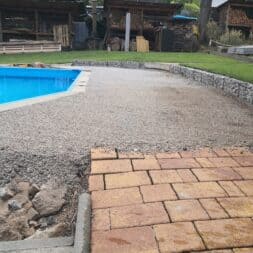
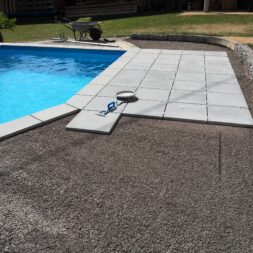
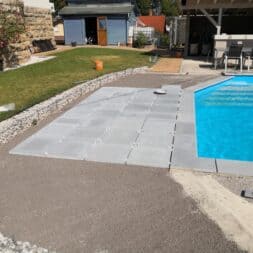
When designing the pool terrace, I decided to lay the terrace slabs loosely. Thorough preparation of the substrate was essential to ensure stability and durability.
The loose laying of the slabs had the advantage that the terrace can work with temperature fluctuations without cracking. It also remains flexible if adjustments or replacement work should become necessary in the future.
Preparation of the substrate
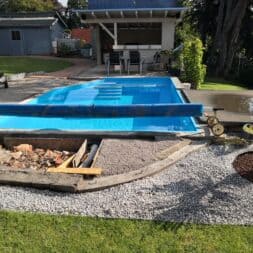
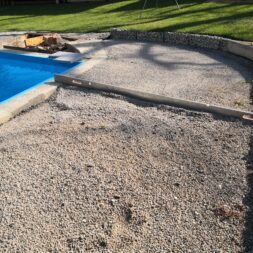
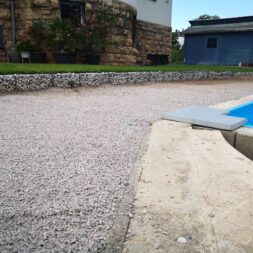
The substrate already consisted of a 30-centimeter-thick drainage layer of frost protection and gravel – the original base of my old BPC pool deck.
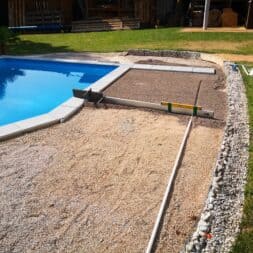
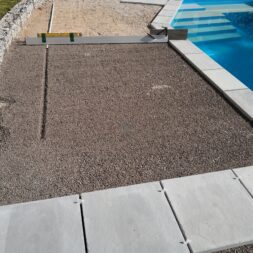
I filled this substrate with additional laying gravel and leveled the entire surface with a spirit level.
To ensure that rain and splash water can drain away easily, I created a slight slope from the pool to the outside. This has several advantages:
- Dirt reduction: Dirt and water do not collect on the pool edge and therefore get into the pool less.
- Optimum drainage: the slope effectively drains water and prevents puddles forming on the terrace.
Finally, I applied a layer of chippings about 2-3 centimeters thick. This was also stripped straight and aligned flush with the lower edge of the pool edge stones.
Laying the terrace tiles by the pool
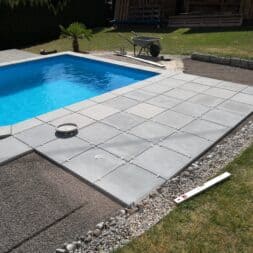
For the terrace, I used the 50 x 50 x 30 centimeter stone slabs from the Margo series by Weserwaben, which matched our pool perfectly. I had bought a slab lifter in the right size for laying the pool edge stones.
This made laying and aligning the terrace slabs much easier.
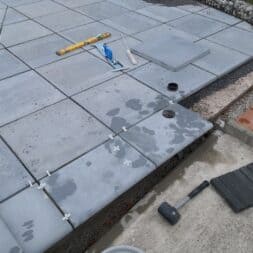
- Start at the pool surround: I started at one corner of the pool surround and placed the first slab exactly on the corner stone. The joint crosses ensured a uniform spacing of 10 millimeters.
- Row by row: I laid the second slab flush behind the first, again using the joint crosses to make the joints between the stones even. Row by row, I worked my way across the entire surface.
- Precision: Each slab was laid in alignment with the pool edge stones to create a harmonious overall appearance.
Cutting the offcuts
At the edge of the terrace, where the slabs bordered my gabions, leftover pieces had to be cut to size. I made these cuts with my angle grinder in order to adapt the granite slabs exactly to the conditions. In this way, I created a clean finish to the adjacent lawn.

- Anwendungen: Schwarzer Kopf = mittelweich: z.B. für Pflasterhandwerk, Fliesen verlegen, Trockenbau. Orangener Kopf = hart: z.B. für Montage- und Demontagearbeiten, Bauhandwerk, Werkstattarbeiten.
- Leichteres Arbeiten und optimale Schlagwirkung bei vermindertem Kraftaufwand.
- Made in Germany: Hohe Wiha Qualität aus Deutschland.
- Sowohl die Schlagköpfe als auch der Hickory Stiel sind einzeln als Ersatzteil erhältlich - somit schonen die Wiha Safety Hammer nicht nur Werkstück und Anwender, sondern auch die Umwelt.
- Lieferumfang: 1x Stiel aus Hickoryholz, 2x Sicherheitsschalen, 1x Schlagkopf schwarz / mittelweich (z.B. für den Trockenbau), 1x Schlagkopf orange transparent / hart (z.B. für Werkstattarbeiten)
Video: Gluing pool edge stones and building a pool terrace yourself
I recorded the preparation, the installation of the pool edge stones and the laying of the stone slabs for our new pool terrace in an exciting and informative video.
The video is part of my project series “Project Pool“. You can find more videos on dismantling our steel wall pool and building our new formwork pool in the garden in the Pool category.
If you want to see more of me and my projects, feel free to check out my YouTube channel.
-
Price: € 58.90
-
Price: € 28.16instead of: € 35.51
-
Price: € 14.39instead of: € 15.19
-
Price: € 15.99instead of: € 16.95
-
Price: € 21.90instead of: € 28.63
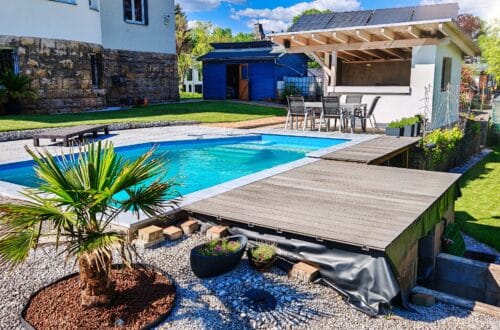
Building the platform between the pool and outdoor kitchen
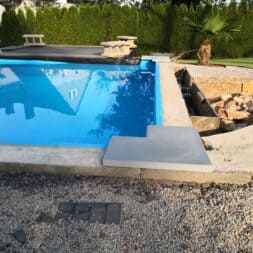
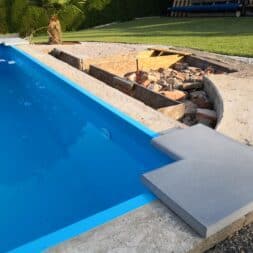
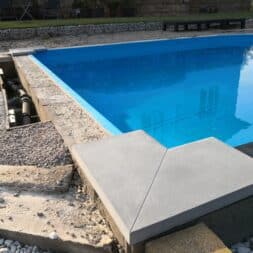
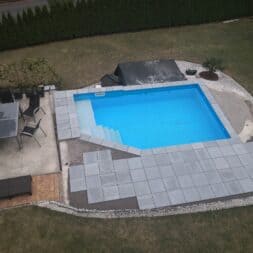
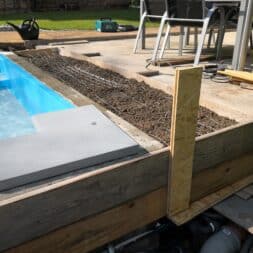
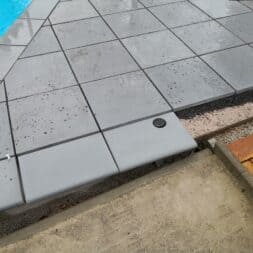
The different heights of the pool walls created a raised pool edge between the terrace of my garden kitchen and the pool. This pool wall was only 17.5 centimeters thick, so the pool edge stones would have protruded both into the pool and over the edge at the back.
To avoid this and create a harmonious connection between the pool and the garden kitchen terrace, I built a platform that acts as a transition.
Planning and calculation of the platform
The platform was around 1.25 meters wide and was intended to support the pool edge stones and two terrace slabs positioned one behind the other. It was important to me that the stones finish cleanly and have an overhang of:
- 50 mm into the pool,
- 20 mm above the outside of the platform.
I also took into account:
- 3 joints, each 10 millimeters wide between the stones,
- the exact width of the terrace slabs and pool edge stones.
With these dimensions, I planned the platform so that everything could be laid precisely.
Building the platform
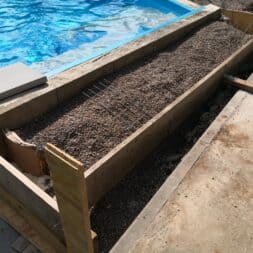
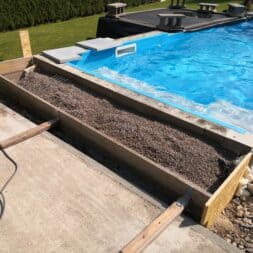
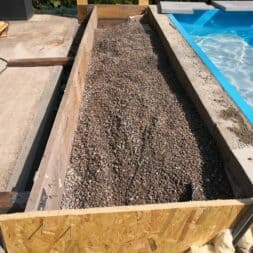
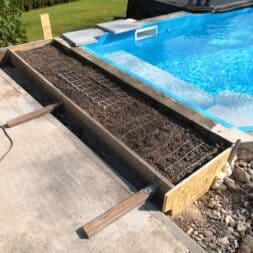
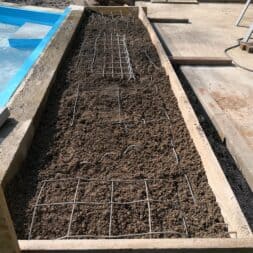
- Shuttering the area: Once the dimensions had been determined, I shuttered the area with wooden boards to create a stable mold for the concrete pour.
- Insert steel reinforcement: I inserted steel reinforcement in the area for stabilization. This ensures that the concrete does not crack later on and that the pedestal can easily bear the weight of the stones.
- Pour in the concrete: I then filled the area with concrete and allowed it to harden completely.
Laying the pool edge stones and terrace slabs
I started gluing the pool edge stones to the concrete platform. I used the same flexible tile and stone adhesive that I had used for the rest of the pool edge stones. The stones were firmly glued to the concrete substrate to prevent them from slipping.
Behind this, I laid two rows of terrace slabs, also with flexible adhesive. The panels were positioned so that they protruded slightly beyond the outside of the platform by 2 cm.
I maintained a uniform joint spacing of 10 millimetres between the slabs and stones to ensure a harmonious overall appearance.
The platform offered a practical and visually appealing solution to compensate for the height difference between the pool and the garden kitchen terrace. The stable construction and firmly bonded panels ensure that the transitions remain secure and stable in the long term.
At the same time, the clean overhang creates a clear and elegant edge that harmonizes perfectly with the rest of the pool terrace and emphasizes the pool edge stones.

- Entspricht CG2 WA nach DIN 13888:2009
- Sehr emissionsarm, GEV EMICODE EC1 Plus
- Für innen und außen
- Für Fugenbreiten von 1 - 10 mm
- Für alle Natursteine
Concreting in ground sleeves for the awning in the pool terrace
A special highlight that I would like to add later is a sun sail that will be stretched from the edge of the pool to the garden kitchen. An awning is a modern and practical way to provide shade while protecting the pool and patio area from UV radiation.
It is mounted on stable attachment points and can be held in position using steel cables or tensioning systems.
Important aspects when installing an awning
- Statics and stability: Awnings act like a large sail surface that exerts considerable forces on the attachment points in windy conditions. The fastenings must therefore be particularly stable.
- Inclination: A slight slope prevents rainwater from collecting on the sail.
- Choice of materials: UV-resistant and water-repellent fabrics increase the longevity of the awning.
Preparation for fitting the awning
In order to be able to tension the awning later, I planned two large, stable masts to which the steel cables would be attached when installing the platform and the pool terrace.
- Attachment to the garden kitchen: On the one hand, I can easily attach the steel cables to the wooden beams of the garden kitchen.
- Ground sleeves for the masts:
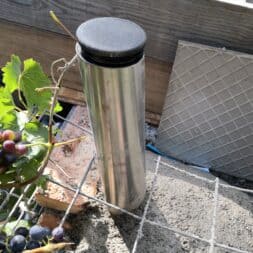
- On the south side, I concreted a 50-centimeter-long ground socket directly into the gabion basket. This was easier to position as it did not interfere with the terrace slabs.
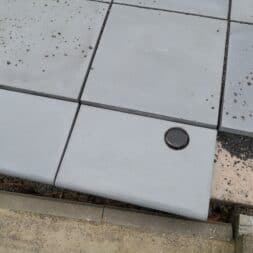
- On the north side, the ground sleeve had to be installed precisely flush with the terrace slab and parallel to the first sleeve. Special care was required here, as the sleeve had to be installed at a slight angle to support the weight of the awning.
The challenge of installing the ground sleeve on the north side
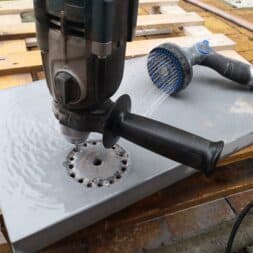
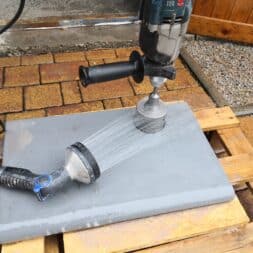
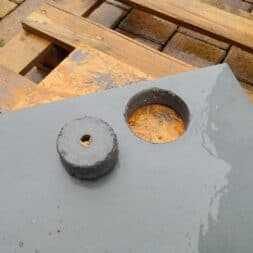
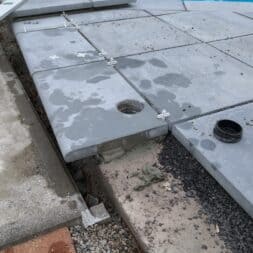
As the terrace slabs are made of very hard stone, it was not possible for me to drill a hole in the slab with a core drill. Instead, I drilled many smaller holes in a circle to create the opening for the base sleeve.
Despite permanent water cooling during the work, I used three Widia drill bits.
Once the opening was completed, I positioned the ground socket precisely and concreted it in place. In this way, I made sure that the sleeve was aligned with the garden kitchen and parallel to the south sleeve, so that the awning could be optimally tensioned later.

- ABGESCHRÄGTE OBERKANTE VON 10º: Zur perfekten Sonnensegelmast-, stangen-, pfosten-Ausrichtung Ihrer Segelanlage
- LANGLEBIGKEIT & SICHERHEIT: Gefertigt aus rostfreiem V2A-Edelstahl für den ganzjährigen Einsatz & in frostsicheren Tiefen
- EINFACHER AUFBAU: Die eingelassene Kerbe im Pfostenträger ermöglicht eine Hilfe zur optimalen Ausrichtung zur Winkelhalbierenden der Segel-Zugrichtung. Sie benötigen keine Schräge & Kerbe? - Einfach umgedreht einbetonieren!
- ABDECKKAPPE: Masten, Stangen & Pfosten können zum Winter hin einfach herausgezogen werden und die Bodenhülse lässt sich mit der mitgelieferten Kappe verschließen
- HILFE BEI PLANUNG & MONTAGE: Pina Design steht für über 40 Jahre Erfahrung. Zugang zu Schritt-für-Schritt Videoanleitungen zur Fundamenterstelung - inklusive.
Summary: Laying pool edge stones and building a pool terrace
In my DIY project “Building a pool”, I converted an old steel wall pool into a modern formwork pool and gained valuable experience in the process. One focus was on the laying of pool edge stones and the construction of the pool terrace.
Laying pool coping stones – step by step
The pool edge stones were carefully selected and bonded with flexible, frost-proof adhesive. I mastered special challenges, such as the precise cutting of the stones and the symmetrical arrangement along the edge of the pool, with an angle grinder and a lot of preparation. The stones were grouted with a high-quality grout in a light grey color to create a harmonious overall look for the pool surround.
Building a pool terrace – loose laying for maximum flexibility
For the pool terrace, I opted for loose laying on chippings. I laid the drainage layer of frost protection and gravel with a slight slope away from the pool to minimize the entry of dirt into the pool and ensure optimum water drainage. The 50 x 50 cm granite slabs were laid precisely in rows using joint crosses and cut to size at the edges.
Construction of the platform – transition between pool and garden terrace
An additional platform created an elegant transition between the raised pool edge and the garden terrace in front of the outdoor kitchen. The platform was cast from concrete with steel reinforcement and clad with pool edge stones and terrace slabs to combine stability and aesthetics.
Conclusion
The project combines practical functionality and an appealing look:
- The pool edge stones protect the pool from spilling over and ensure stability.
- The pool terrace offers optimum drainage and frost protection thanks to the loose laying.
- The platform creates a harmonious connection between the pool and the garden terrace.
This combination of well thought-out planning and high-quality materials makes the new pool area a long-lasting and low-maintenance highlight in the garden.

- GRIFF - Der Holzgriff ist glatt und mit Wachs veredelt, was ihn wasser- und schmutzabweisend macht. Er liegt sicher in der Hand, ohne Verletzungsgefahr und der Notwendigkeit, mit Arbeitshandschuhen zu arbeiten.
- ARBEITSFLACHE - REACH-Gummi ist dick und gleichmäßig geschnitten. Es hat die entsprechende Härte und Flexibilität, wodurch es leicht zu manövrieren ist, um den gewünschten Effekt zu erzielen. Es ist stabil in einem Holzstiel gelagert und zusätzlich mit Zimmermannsklammern mit diesem verbunden. Hinterlässt keine Spuren.
- FUNKTIONALITAT - Die Größe des Griffs (Breite 40 mm x Höhe 35 mm, variable Länge) trägt zum Arbeitskomfort bei. Es ist am oberen Rand abgerundet, wodurch es gut in der Hand liegt, nicht drückt und angenehm in der Hand liegt. Das Loch ermöglicht es Ihnen, das Werkzeug in der Werkstatt aufzuhängen und Ordnung zu halten.
- ABMESSUNGEN - Fugenspachtel 200 mm: Gummi: 45mm x 200mm, Fugenspachtel 250 mm: Gummi: 45 mm x 250 mm, Fugenspachtel 300 mm: Gummi: 45mm x 300mm,
- QUALITAT- Das Werkzeug wurde aus Rohstoffen höchster Qualität hergestellt, eine Technologie, die die Widerstandsfähigkeit gegen ungünstige Arbeitsbedingungen sichert. Beständig gegen Korrosion, chemische Umgebung, Abrieb und sogar geringfügige mechanische Beschädigungen.
FAQ: Laying pool edge stones and building a pool terrace
1 Why are flagstones a good choice for a pool terrace?
- Stone slabs are durable, easy to clean and weather-resistant.
- They provide a stable and non-slip surface, ideal for pool areas.
- Visually, they blend harmoniously into the surroundings and go well with modern garden designs, especially around the swimming pool.
2 Which materials are suitable for pool edge stones?
- Natural stone such as granite or sandstone: robust, durable and high quality.
- Concrete blocks: cheaper and available in many designs.
- Artificial stone: easy to clean and often UV-resistant, but less natural in appearance.
3. how is the substrate prepared for the pool terrace?
- A drainage layer of frost protection and laying gravel is laid.
- The substrate is leveled and designed with a slope away from the pool to drain water.
- A 2-3 cm thick layer of chippings forms the basis for the loosely laid terrace slabs.
4 What should I bear in mind when laying the pool edge stones?
- Lay out the stones dry before gluing to check the dimensions and arrangement.
- Use frost-proof, flexible tile and stone adhesive to optimally fill the joints between the stones.
- Lay the pool edge stones with a slight slope to the outside to allow water to drain away.
5 How are pool edge stones correctly grouted?
- Use flexible, water-repellent and UV-resistant joint sealant.
- Clean the joints diagonally to the stone edge with a sponge board to avoid cement residue.
- Mix small quantities of grout, as it hardens quickly.
6. why was the pool terrace laid loose?
- Loose laying allows the decking to withstand temperature fluctuations without cracking.
- A flexible design facilitates later adjustments or repairs.
- The chippings provide a stable yet permeable base that is ideal for the pool edge stones.
7. how was the platform between the pool and the garden terrace built?
- The platform was poured with concrete and steel reinforcement to ensure stability.
- Pool edge stones and terrace slabs were firmly bonded to create a clean transition.
- The design takes into account overhangs for a harmonious and safe design.
8. what challenges did you face when building the pool terrace?
- The heavy weight of the stone slabs required precise planning and preparation of the substrate.
- Cutting the stones for symmetrical transitions and clean edges was time-consuming.
- Avoiding cement haze on the pool edge stones required careful work when grouting.
9. how can the pool terrace be designed for easy maintenance?
- Loosely laid tiles can be easily removed and replaced if necessary.
- The use of natural stone or high-quality artificial stone minimizes the amount of maintenance required.
- Regular sweeping and cleaning with water is sufficient in most cases.
10. what costs can be expected for such a project?
- Pool edge stones: 20-50 € per meter, depending on the material.
- Patio slabs: € 30-80 per square meter, depending on quality and design.
- Substrate and laying work: 15-30 € per square meter for drainage, gravel and chippings.
- Platform construction: 200-500 € depending on size and effort.

- Elastisch
- Pilzhemmend ausgerüstet
- Enthält: 4,5-DICHLOR-2-OCTYL-2H-ISOTHIAZOL-3-ON. Kann allergische Reaktionen hervorrufen.
Dieser Beitrag ist auch verfügbar auf:
English
Deutsch


