Integrate Reolink camera into the network – WLAN & PoE step-by-step guide
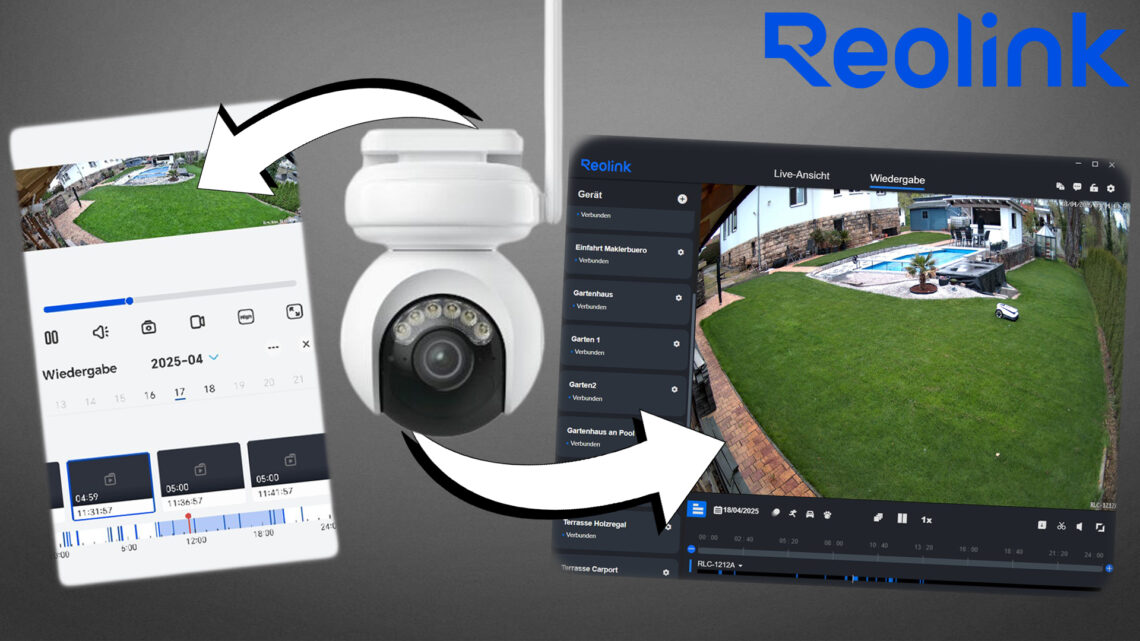
Reliably integrating Reolink IP cameras into the network, setting up PoE and WLAN models and managing them with the Reolink Client and the Reolink app – that’s exactly what this article is about. Step by step, I’ll show you how I integrated a wired Reolink Elite X Pro PoE camera and a Reolink Altas WLAN battery camera into my home network. I also provide troubleshooting tips and advice on how to optimize your WLAN connection. All processes are based on practical experience and are explained in such a way that they are easy and safe to set up.
What you can expect in this blog post
- Setting up a Reolink Elite X Pro PoE camera via the Reolink client on the PC
- Integration of a Reolink Altas WLAN battery camera via the Reolink app
- Technical differences and recommendations for PoE, WLAN and WLAN battery-powered cameras
- Overview of current Reolink premium models including special features and areas of application
- Step-by-step instructions for integrating Reolink cameras into the home network
- Troubleshooting tips for connection problems and network setup
- Notes on firmware updates, password assignment and optimal WLAN use
- Advantages of using Reolink Client and App to manage surveillance cameras
- Direct download links for Reolink Client and Reolink App
- Further links to other smart home and surveillance camera projects
Difference between PoE, WLAN and WLAN battery cameras
Before setting up a surveillance camera, it is important to understand the technical features of the different camera types. The choice of the right technology depends on the requirements for network infrastructure, energy supply, monitoring target and operational security.
PoE cameras (Power over Ethernet)
PoE cameras obtain both data transmission and power supply via a single Ethernet cable. Power is supplied via a PoE-compatible switch or a PoE injector in accordance with the IEEE 802.3af or IEEE 802.3at standard.
Technical specifications:
- Data transmission: up to 1 Gbit/s
- Power supply: 15.4 W (802.3af) or 25.5 W (802.3at)
- Cable length without power loss: up to 100 meters
- IPv4 and optional IPv6 compatibility
- Protection classes IP65 or higher for outdoor installation
Suitable Reolink models (PoE):
- Reolink RLC-1212A
Special features: 12MP ultra HD resolution for extremely detailed image reproduction, smart detection of people and vehicles, integrated ColorX night vision technology for colorful night shots without floodlight.
Area of application: High security zones, large properties, warehouses. - Reolink Duo 3 PoE
Special features: Dual-lens technology with seamless 180° panoramic image with no visible seams, 16MP total resolution, support for time-lapse recording and intelligent motion detection.
Area of application: Large-area surveillance of driveways, parking lots or gardens without blind spots.
WLAN cameras
WLAN IP cameras use a wireless connection via existing WLAN networks and enable particularly flexible installation. Power is still supplied via a separate power supply unit, so that only a power socket near the camera is required.
Technical specifications:
- WLAN standards: 2.4 GHz and 5 GHz dual-band, partial support of WiFi 6
- Encryption: WPA2-PSK / WPA3 for secure network connections
- Resolution: up to 16 MP with dual-lens systems
- Two-way audio and integrated siren for events
- Support for intelligent motion detection and person tracking
Suitable Reolink models (WLAN):
- Reolink TrackMix WiFi
Special features: Equipped with a dual lens system for simultaneous wide-angle and telephoto view. The smart auto-tracking function enables the automatic tracking of moving people and vehicles. The 4K resolution ensures particularly detailed image reproduction.
Area of application: Ideal for house entrances, garage entrances or property entrances where both an overview and a zoomed-in image are important. - Reolink Duo 3 WiFi
Special features: High-resolution 16 MP camera with two lenses for a seamless 180° panoramic view. Supports dual-band Wi-Fi 6 for more stable and faster connections. Integrated ColorX night vision provides realistic color images even in very low light.
Area of application: Suitable for large properties, front gardens or terraces where the largest possible surveillance field is to be covered without blind spots.
WLAN battery-powered cameras
WLAN battery cameras offer maximum flexibility as they are operated independently of a power source. They are ideal for locations without a permanent power supply.
Technical specifications:
- Battery capacities: 6000 mAh to over 10,400 mAh
- Support for dual-band Wi-Fi 6
- PIR sensor for energy-efficient motion detection
- Color night vision with low light sensitivity
- Protection class IP65 or higher
Suitable Reolink models (WLAN battery):
- Reolink Altas PT Ultra
Special features: 4K UltraHD resolution, motorized pan and tilt function for complete area coverage, ColorX night vision for colourful night shots, smart detection of people, cars and animals, longer battery life thanks to optimized energy management.
Area of application: Free-standing properties, construction site monitoring, stables without a fixed power connection. - Reolink Argus 4 Pro
Special features: 4K resolution, 180° field of view without image distortion, ColorX technology for clear color images at night, dual-band Wi-Fi 6 for stable wireless transmissions, local storage of recordings on SD card possible.
Area of application: Courtyard areas, entrance areas and garden areas without access to power networks.
My test of the Reolink Duo 3 offers a direct comparison between a PoE surveillance camera and a WLAN surveillance camera. In this article, I compare the PoE and WLAN versions, show the most important differences and test both variants in detail in practice.
The full article can be found here: Reolink Duo 3 WiFi & PoE review: Smart UHD surveillance camera with 180° field of view
The following table provides a compact overview of selected Reolink cameras. It shows the most important technical features, special functions and typical areas of application. The direct comparison makes it easy to see which camera is particularly suitable for which application.
| Camera model | Type | Resolution | Special features | Recommended area of application |
|---|---|---|---|---|
| Reolink RLC-1212A | PoE camera | 12 MP Ultra-HD | ColorX night vision, smart detection, high level of detail accuracy | High security zones, large properties |
| Reolink Duo 3 PoE | PoE camera | 16 MP (2x 8 MP) | 180° panorama, seamless image, intelligent motion detection | Parking lots, large plots without blind spots |
| Reolink TrackMix WiFi | WLAN camera | 4K Ultra-HD | Dual-lens technology, simultaneous wide-angle and zoom view, smart auto-tracking function | Driveways, garages, house entrances with motion tracking |
| Reolink Duo 3 WiFi | WLAN camera | 16 MP (2x 8 MP) | 180° panoramic view, dual-band Wi-Fi 6, ColorX night vision | Garden monitoring, wide areas with WLAN connection |
| Reolink Altas PT Ultra | WLAN battery-powered camera | 4K Ultra-HD | Motorized pan/tilt function, ColorX night vision, longer battery life | Detached properties, stables, construction sites |
| Reolink Argus 4 Pro | WLAN battery-powered camera | 4K Ultra-HD | 180° field of view, ColorX night vision, dual-band Wi-Fi 6, local storage possible | Courtyard areas, entrance areas without fixed power supply |
Depending on the requirements for resolution, network connection and installation environment, the various Reolink camera models offer targeted solutions for a wide range of surveillance scenarios. Especially when planning a new system or expanding existing installations, choosing the right type of camera is crucial for reliable and efficient monitoring.


Connecting the PoE IP camera to the network and setting it up
PoE IP cameras offer a reliable and stable way of integrating surveillance cameras directly into the home or company network. Power is supplied via the same cable that is used for data transmission, which significantly reduces the installation effort. This section describes how to set up a Reolink Elite X Pro PoE camera as an example.
Preparing the installation
Before starting the installation, make sure that all the necessary components are present. These include:
- A suitable Ethernet cable (Cat5e or higher)
- A PoE-capable switch or alternatively a PoE injector
- Access to the router or the network management system
- The current Reolink client on the PC
It should also be checked whether the PoE switch or injector is configured correctly so that both the power supply and the network connection can be established without any problems. A free LAN port on the router or switch should also be available.
Establish connection
The first step is to connect the Reolink Elite X Pro PoE camera to the PoE switch or PoE injector via an Ethernet cable.
The other end of the cable is connected to a free port on the router or directly to the network switch to ensure integration into the local network so that the camera can be connected.
Note: Ensure that the cable is correctly engaged and that the network infrastructure supports the PoE power supply. Otherwise, a PoE injector must be connected in between.
As soon as the camera is connected, power is automatically supplied via the network and the camera starts the initialization process. Some models also require manual activation via a switch on the camera.
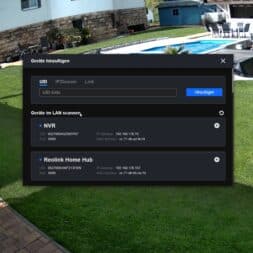
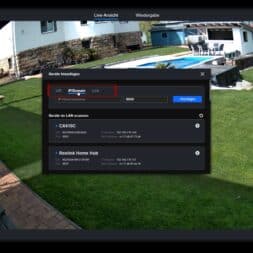
Recognize and add camera in Reolink Client
After a successful physical connection, the Reolink client is started on the PC.
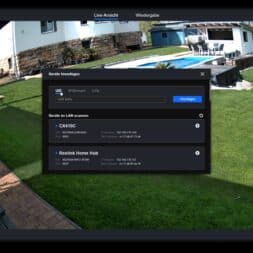
As a rule, the client automatically recognizes the newly added camera and lists it among the available devices.
If the camera is not displayed automatically, you can add it manually:
- By entering the IP address assigned to the device by the router.
- Alternatively, by entering the UID (Unique ID) that is assigned to the camera on delivery.
To determine the IP address, you can look under the connected devices in the router menu. The new camera is usually listed there under the designation “IPC” or with a manufacturer-specific name.
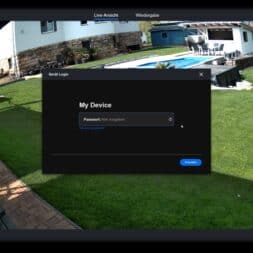
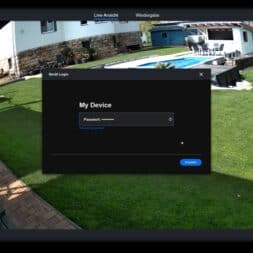
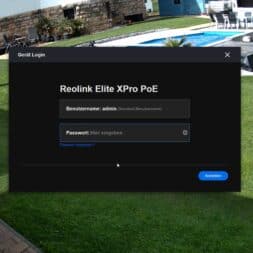
Password assignment and login
In the next step, the newly recognized camera is selected in the client.
To secure access, an individual password is assigned and entered in the corresponding field. This password protects the camera from unauthorized access and is later also required for remote access.
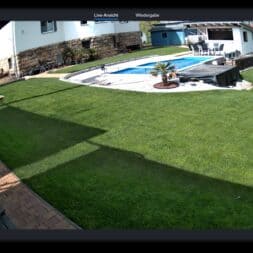
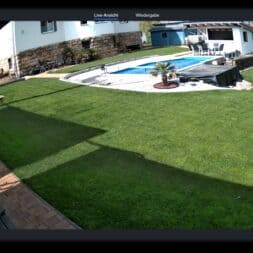
Once the password has been successfully entered and confirmed, the live image from the camera is available in the client. The camera functions can then be configured, for example:
- Setting the resolution and frame rate
- Activation of intelligent motion detection
- Configuration of e-mail notifications or FTP uploads
- Adjustment of night vision modes (IR/night vision color)
With these steps, the PoE IP camera is fully integrated into the network and ready for use.
Notes on setup and troubleshooting
- Reolink Client Software:
The latest version of the Reolink client can be downloaded directly from the official website:
Download Reolink Client
The client is available for both Windows and macOS.- Manual camera detection:
If the camera is not automatically recognized in the client, it is recommended to search for the IP address of the device in the router interface and add the camera manually via the IP address.- UID registration:
Alternatively, the camera can be connected via the UID (Unique ID), which is noted on the camera housing or in the operating instructions.- Update firmware:
After the initial installation, you should check whether a current firmware version is available for the camera. Firmware updates can improve performance and resolve possible connection problems.- Check network:
If the camera does not respond, make sure that the PoE switch or injector used is working properly and supports the necessary PoE standards (802.3af/at). Otherwise, the IP camera may not be connected correctly.- Firewall or router settings:
Some routers or firewalls block new devices by default. In this case, it may be necessary to release specific ports or activate automatic device detection.- Multiple operating systems:
In addition to the desktop version of the client, the Reolink app is also available for Android and iOS to carry out the camera setup alternatively or additionally via mobile devices.

- Dual-Ansicht auf einem Screen: Sehen Sie genau, was in Ihrem Zuhause passiert – mit Dual-Ansicht auf einem Bildschirm. Das 8-mm-Teleobjektiv fängt Details in Nahaufnahme ein, während das 2,8-mm-Weitwinkelobjektiv einen Panoramablick ermöglicht.
- Auto-Tracking und 6X Zoom: Das PT-Weitwinkelobjektiv verfolgt das Ziel, während das Teleobjektiv heranzoomt, um auf Details zu fokussieren. Die Nahaufnahme liefert automatisch 2MP- oder 4K-Ansichten. Sie können zwischen drei verschiedenen Tracking-Modi wählen, um Ihren Anforderungen zu entsprechen.
- Smarte Erkennung und Wiedergabe: Die Kamera kann Personen, Fahrzeuge und Haustiere erkennen und verfolgen. Sie können die gespeicherten Videos wiedergeben, sie nach Erkennungsmodi filtern und die Zeitleiste steuern, um das Wichtigste zu finden. Keine Abogebühr ist erforderlich. Home Assistant wird unterstützt.
- Sofortige Alarme: Sobald verdächtige Bewegungen erkannt werden, lösen sich Spotlights und Sirenen aus. Dann werden Push-/E-Mail-Benachrichtigungen an Ihr Gerät gesendet. Fühlen Sie sich jederzeit sicher.
- Einfache Installation mit PoE: Dank der PoE-Technologie kann diese Überwachungskamera 4K-HD-Bilder in unerreichter Stabilität übertragen. Sie können die Kamera schnell und einfach mit nur einem Netzwerkkabel installieren.
Next step: Integration into the Reolink app
After successfully setting up and registering the PoE IP camera in the Reolink client, it is recommended to additionally integrate the camera in the Reolink app on a mobile device.
This enables location-independent access to the live image, control of camera settings and receipt of notifications when motion is detected. Recordings can also be saved locally.
The next section describes in detail how to register the camera in the Reolink app.
Register PoE surveillance camera in the Reolink app
Once the PoE IP camera has been successfully integrated into the local network and the Reolink client, the next step is to log in to the Reolink app.
To do this, I have to connect the camera to the cell phone first. This enables mobile access to the live image and management of the camera settings directly via smartphone or tablet.
Preparation
The following requirements should be met before registering:
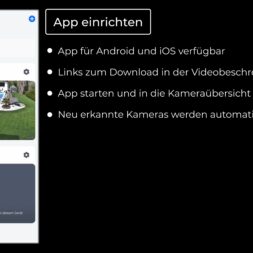
- The Reolink app is installed on the mobile device (available for Android and iOS via Google Play Store or App Store).
- The mobile end device is in the same local network (WLAN) as the camera.
- The camera is ready for operation and correctly integrated into the network.
Registering the camera in the app
- Launch of the Reolink app:
Open the app on your smartphone or tablet. - Add device:
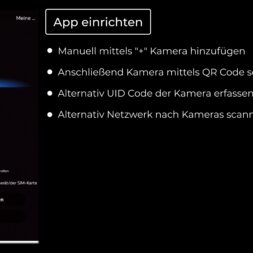
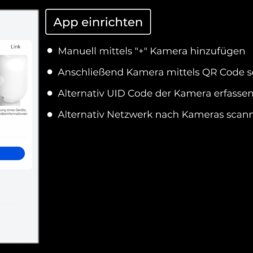
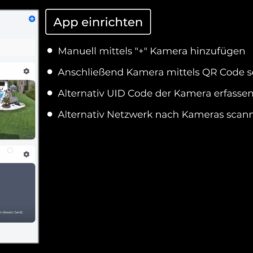
Select the “Add device” option on the start page of the app. - Scan QR code:
Scan the QR code located on the camera or on the label supplied. Alternatively, the UID can be entered manually. - Establish a connection:
After successful scanning or input, the camera is recognized and a connection is established. - Enter password:
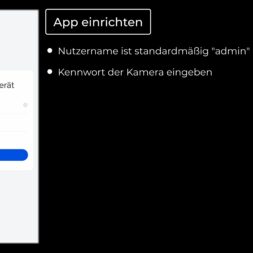
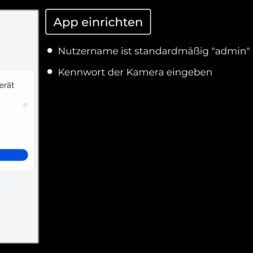
Enter the individual password previously assigned in the Reolink client for authentication. - Camera successfully integrated:
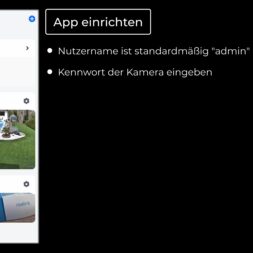
After confirming the password, the camera is added to the app and is available for live view and other configurations.
Functions after login
After successful registration, the following functions can be used:
- Retrieve live image in real time
- Receive push notifications when motion is detected
- Adjust camera settings (e.g. resolution, night vision, motion detection)
- Search recordings and play locally stored videos
- Perform firmware updates for the camera directly via the app
Notes on problems with logging in to the Reolink app
- QR code cannot be scanned:
The QR code should be well illuminated and positioned as straight as possible. Alternatively, the UID can be entered manually.- Camera is not found:
Make sure that the smartphone and the camera are in the same Wi-Fi network.
Check whether the router allows automatic detection of new devices.- Connection problems despite correct network:
In rare cases, a firewall or router setting may block the camera. Rebooting the router and camera can help here.- Password incorrect or forgotten:
If the set password is no longer known, the camera must be reset to the factory settings and set up again.- Check firmware:
Outdated firmware may affect compatibility with the app. We recommend checking and carrying out a firmware update via the app after logging in.
Download links for the Reolink app
The Reolink app is available free of charge for Android and iOS devices. The download should only be made from official sources:
- For Android (Google Play Store):
Download Reolink app for Android - For iOS (Apple App Store):
Download Reolink app for iOS
Note:
In addition to registering new cameras, the app also offers extensive options for remote monitoring, setting push notifications and controlling recording options.

- 12MP HOHE AUFLÖSUNG MIT 93° BLICKWINKEL: Diese PoE IP Kamera rühmt sich einer beispiellosen 12MP Klarheit und erfasst revolutionär schärfere Details als alle 4K-Überwachungskameras. Die schärferen Bilder und der größere Betrachtungswinkel machen die RLC-1212A zu einer bahnbrechenden Überwachungskamera für Ihr Zuhause
- PERSONEN-/FAHRZEUGERKENNUNG MIT SMARTEN ALARMEN: Diese 12MP-Überwachungskamera identifiziert Personen und Fahrzeuge mit Hilfe eines innovativen Erkennungsalgorithmus, der unnötige Alarme vermeidet. Präzise Push-Benachrichtigungen mit spezifischen Typen halten Sie jederzeit über das Wesentliche auf dem Laufenden.
- PLUG UND PLAY: Die Power over Ethernet-Technologie ermöglicht die Übertragung von Videos und die Stromversorgung der Kamera über ein einziges Netzwerkkabel, so dass sie in kürzester Zeit installiert werden kann. Die kostenlose Reolink App/Client mit einfach zu bedienender Funktion sorgt für eine unkomplizierte Einrichtung der Kamera
- ZWEI-WEGE-AUDIO & EINGEBAUTER LAUTSPRECHER: Sie können Ihre Familie oder Freunde jederzeit und überall durch einfaches Antippen hören und mit ihnen sprechen. Mit der Technik des eingebauten Lautsprechers können Sie auch den Sirenenalarm anpassen, um jegliche Bedrohungen abzuschrecken. MEHRERE AUFZEICHNUNGSOPTIONEN: Diese Überwachungskamera
- MEHRERE AUFZEICHNUNGSOPTIONEN: Diese Überwachungskamera unterstützt die Aufzeichnung 24/7 kontinuierlich oder während der geplanten Zeit. Die Videos können auf einer microSD Karte(bis zu 512GB, nicht im Lieferumfang enthalten), einem Reolink NVR, einem FTP-Server oder Reolink Could gespeichert werden. Reolink Cloud verfügbar, nachdem die Kamera auf die neueste Firmware aktualisiert wurde.
Next step: Integrate WLAN cameras into the network
Once the PoE camera has been successfully integrated, the next step is to set up a Reolink WLAN or WLAN battery camera.
In contrast to the wired version, the network connection here is exclusively wireless via WLAN.
The following section explains in detail the procedure for registering a Wi-Fi camera in the Reolink App and in the Reolink Client.
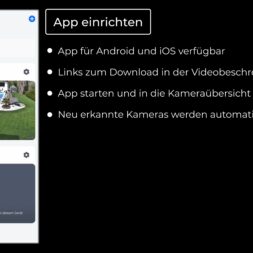
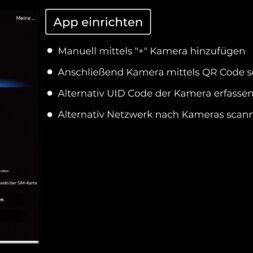
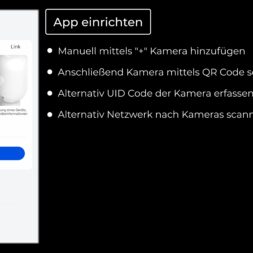
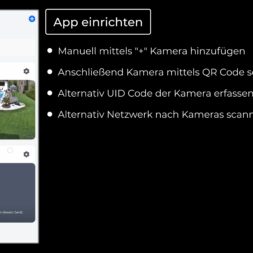
Video: Integrating Reolink cameras into the network – PoE and WLAN explained step-by-step!
I have documented the setup and integration of the Reolink Elite X Pro PoE and the Reolink Altas WLAN battery camera in a detailed video.
In the video, I show in a practical way how the cameras are integrated into the home network via the Reolink client on the PC and via the Reolink app on the smartphone. I explain the most important settings step by step and give tips on how to make the best use of functions such as motion detection and remote access.
You can find more projects relating to surveillance cameras and smart homes in my Youtube playlist Smarthome and in my blog category Smart Home.
If you want to see more of me and my projects, feel free to check out my YouTube channel.
Zuletzt aktualisiert am 21. February 2026 um 21:58 . Ich weise darauf hin, dass sich hier angezeigte Preise inzwischen geändert haben können. Alle Angaben ohne Gewähr. (*) Bei den verwendeten Produktlinks handelt es sich um Affiliate Links. Ich bin nicht der Verkäufer des Produktes. Als Amazon-Partner verdiene ich an qualifizierten Verkäufen. Dein Preis ändert sich jedoch nicht.
Register WLAN camera in the Reolink app
WLAN IP cameras from Reolink enable wireless integration into the existing home network. The setup is mainly done via the Reolink app and uses modern Wi-Fi standards for a fast and stable connection.
Preparation
The following points should be considered before starting the installation:
- The Reolink app is installed on the mobile device (Android or iOS).
- The camera is within range of the WLAN router.
- The camera is fully charged (for battery-powered cameras) or supplied with power via the mains adapter.
- The smartphone is connected to the same Wi-Fi network that will later be used for the camera.
Registration process via the Reolink app
- Start the app:
Open the Reolink app on your smartphone or tablet. - Add device:
Select the “Add device” option on the start page. - Scan QR code:
Scan the QR code on the camera or on the label with the smartphone camera. Alternatively, the UID code can be entered manually. - Select connection method:
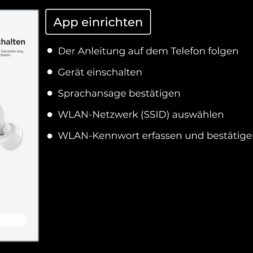
The app offers several options for adding the camera. With WLAN cameras, the connection is established by selecting the existing WLAN network. - Enter WLAN data:
Select the preferred Wi-Fi network and enter the Wi-Fi password. - Configure the camera:
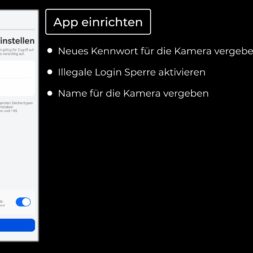
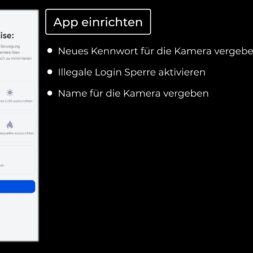
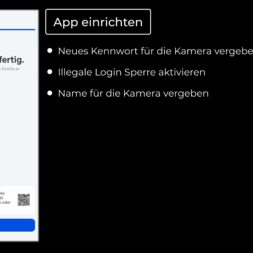
After a successful connection, an individual password for the camera is assigned and saved. - Integration completed:
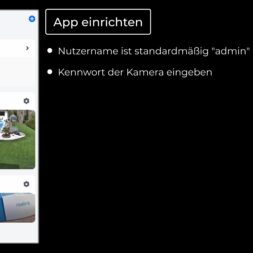
The camera now appears in the Reolink app overview and is ready for operation. The live image can be called up and the camera functions can be adjusted.
Special instructions for WLAN registration
- Ensure a stable WLAN connection:
The camera should be located in an area with sufficient WLAN coverage. If the signal is too weak, we recommend positioning the camera closer to the router. - Dual-band Wi-Fi 6 support:
Modern models such as the Reolink Duo 3 WiFi or TrackMix WiFi support dual-band Wi-Fi 6, which makes the connection more stable and faster. - Note on wireless battery-powered cameras:
With pure WLAN battery cameras, the first login is often also carried out via Bluetooth to make setup easier. After scanning the QR code, the Bluetooth interface is automatically used for pre-pairing before the WLAN connection is configured.
Advantages of logging in via the Reolink app:
- Instant access to the live image from anywhere
- Management of multiple cameras within one app
- Activate push notifications when motion is detected
- Performing firmware updates without a PC
Notes on problems with the camera’s WLAN connection
- WLAN network is not found:
Ensure that the camera is within range of the router and that the WLAN signal is sufficiently strong. For dual-band routers, you should switch to the 2.4 GHz band if the camera does not support 5 GHz.- Connection setup fails:
Check whether the WLAN password has been entered correctly.
It is also advisable to avoid special characters in the WLAN password, as these can lead to connection problems with some models.- Bluetooth setup fails (for battery-powered cameras):
Check whether Bluetooth is activated on the smartphone and the camera is in set-up mode. If necessary, restart the camera and repeat the process.- Camera constantly loses connection:
Ensure a stable WLAN environment if possible. A camera that is installed too far away from the router can cause connection interruptions. In such cases, a WLAN repeater or mesh system can improve the signal quality.- Check network compatibility:
Make sure that the router is set to a compatible WLAN mode (no pure 5 GHz networks, no deactivated DHCP servers).- Restart as the last step:
If all other measures are unsuccessful, it often helps to restart both the camera and the router and re-establish the connection.


Next step: Register WLAN camera in the Reolink client
After successfully setting up the Wi-Fi camera via the Reolink app, the camera can also be integrated into the Reolink client on the PC.
This enables centralized management of multiple cameras as well as direct access to recordings and additional setting options via the computer.
The next section describes how to register the WLAN camera in the Reolink Client step by step.
Register WLAN camera in the Reolink client
The integration of a WLAN camera into the Reolink Client enables centralized management and advanced configuration directly from the PC or Mac.
The client offers additional functions compared to the app, especially when managing multiple surveillance cameras or long-term recording.
Preparation
The following requirements should be met before starting the application:
- The Reolink Client is installed on the computer (download available for Windows and macOS).
- The camera has been successfully integrated into the WLAN network and is ready for operation.
- The PC is connected to the same network as the camera.
Login process via the Reolink client
- Start client:
Open the Reolink client on your PC or Mac. - Add device:
Select the “Add device” option or use the automatic device list. - Device search:
The client scans the local network for available devices.
If the client finds the camera automatically, it is displayed in the device list below. - Add manually (if necessary):
If the IP camera is not automatically recognized:- Select “Add manually”
- Enter the IP address of the camera or the UID (Unique ID)
- Enter password:
Enter the previously assigned password that was set in the app during the initial setup. - Establish a connection:
After successful login, the camera is displayed in the Reolink client. The live image is available immediately and the camera settings can be adjusted.
Special instructions for client login
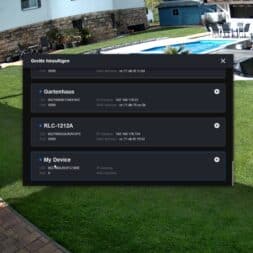
- Check camera name and IP address:
The camera may initially appear in the device list under a generic name such as “My Device”.
For a better overview, the device name can be customized after registration.- Device safety:
To increase security, individual port sharing or the use of secure password management should also be considered.- Note compatibility:
The Reolink Client supports all popular Reolink IP cameras and enables access to real-time live streams as well as the management of recordings and alarm notifications.
Advantages of using the Reolink Client:
- Management of multiple cameras on one platform
- Access to advanced camera settings
- Control of recording schedules and storage locations
- Possibility to update firmware directly on the PC

- Sehen Sie, was passiert ist, BEVOR die Bewegung beginnt: Erfassen Sie bis zu 10 Sekunden, bevor eine Bewegung ausgelöst wird – im Gegensatz zu anderem Überwachungskamera Aussen solar, die erst aufzeichnen, wenn die Bewegung beginnt, und somit wichtige Ereignisse verpassen.
- 500 Tage mit einer Akkuladung: Dank der riesigen Akkukapazität können Sie die Wlan Kamera Outdoor Solar bis zu 500 Tage lang mit einer einzigen Akkuladung nutzen, wenn Sie sich zu Hause aufhalten. Wahrer Seelenfrieden – einfach einrichten und vergessen.
- 4K Farbnachtsicht – zusätzliche Klarheit bei schwachem Licht: Die ColorX-Technologie der Überwachungskamera solar 4K bringt jedes Detail zum Vorschein. Sehen Sie auch bei schlechten Lichtverhältnissen in leuchtenden Farben. Kein blendendes Scheinwerferlicht erforderlich (damit sich die Nachbarn nicht beschweren).
- 6W Solarpanel im Lieferumfang enthalten: Mit dem mitgelieferten 6W-Solarpanel können Sie die Kamera Überwachung Aussen Solar kostenlos aufladen. Sogar an bewölkten Tagen bleibt die Stromversorgung für Bewegungsalarme erhalten, während nur 1 Stunde Sonne den vollen Funktionsumfang aktiviert.
- Verfolgt automatisch bewegliche Ziele & warnt Sie: Der 355° Schwenk- & 90° Neigungswinkel der Wlan Kamera Outdoor Kabellos deckt jeden Winkel ab. Die Smart-Erkennung erfasst Personen, Haustiere oder Autos und folgt dann automatisch der Bewegung. Sie erhalten sofortige Warnungen mit Fotovorschau – Sie wissen sofort, ob es sich um einen Hund oder einen Fremden handelt.
Successful integration of Reolink cameras into the network
The integration of Reolink IP cameras into an existing home or company network can be implemented efficiently and reliably with the right procedure.
Both the wired PoE cameras and the WLAN and WLAN battery-powered cameras offer flexible solutions for different requirements and areas of application.
Connection via the Reolink Client enables centralized management on a PC or Mac, while the Reolink App provides mobile access to live images, recordings and camera controls.
By using the latest technologies such as dual-band Wi-Fi 6, smart object detection and ColorX night vision, powerful functions are available for modern and secure surveillance.
Careful preparation is crucial for a successful installation:
- Ensuring a stable network environment
- Choosing the right camera depending on the application
- Assignment of individual access data for each camera
- Regular firmware updates to ensure maximum functionality and security
With the step-by-step instructions presented here, Reolink cameras can be efficiently set up, integrated into the network and conveniently managed.
Further information and instructions
For more tips on the optimal use and setup of Reolink cameras, I have provided additional instructions on my blog.
Recommended topics:
- Optimally configure Reolink cameras: Set resolution, motion detection and night vision
- Performing a manual firmware update on Reolink IP cameras: Step-by-step guide
- Setting up a Reolink Home Hub Pro for centralized management of surveillance cameras
These contributions provide additional information to further optimize the safety and performance of the monitoring system.

- Auto-Tracking & 6X Zoom: Diese 360 Grad schwenkbare Überwachungskamera Aussen garantiert eine Rundumsicht, vereint ein Teleobjektiv mit einem PT-Weitwinkelobjektiv für eine präzise automatische Verfolgung von Zielen mittels 6-fachem Hybrid-Zoom. In der Dual-Ansicht bieten sich simultan ein ultraweiter Überblick und superklare Nahaufnahmen.
- 4K-Vollfarbe, Tag & Nacht: Liefert rund um die Uhr scharfe 4K Ultra HD-Aufnahmen. Integrierte Scheinwerfer ermöglichen auch bei völliger Dunkelheit helle und detailreiche Farbbilder. Im Schwarzweißmodus bietet sie eine beeindruckende Nachtsichtreichweite von bis zu 30 Metern.
- Dual-Band Wi-Fi 6: Diese 4K PTZ Outdoor Kamera unterstützt Dual-Band 2,4 GHz und 5 GHz Wi-Fi 6 für eine stabilere Reichweite, höhere Flexibilität und deutlich schnellere Übertragungsgeschwindigkeiten – ideal für anspruchsvolle Videoüberwachung. Für die Ersteinrichtung und Konfiguration ist ein Ethernet-Kabel erforderlich.
- Personen-/Fahrzeug/Tiererkennung & Alarme: Diese 4K WLAN Kamera Outdoor erkennt intelligent die Personnen/Auto/Tierbewegung und sendet Ihnen in Echtzeit präzise Warnungen. Lassen Sie sich jederzeit und überall beruhigt zurücklehnen. Fehlalarme lassen sich durch Anpassung der Sensitivität und der KI-Erkennungsmodi wirksam reduzieren.
- Flexible Speicheroptionen: Diese Reolink Kamera Outdoor mit 24/7-Aufzeichnung unterstützt bis zu 512 GB microSD-Karte (nicht enthalten), FTP, Reolink Home Hub & Hub Pro, Sowie Reolink PoE & WiFi NVR für die Speicherung. Dank der hocheffizienten H.265-Videocodierung wird die Hälfte der Bandbreite und des Speicherplatzes gespart.
Summary
In this article, I use a practical example to show how I successfully integrated Reolink IP cameras into my private home network.
I explain how to set up both a wired Reolink Elite X Pro PoE camera and a wireless Reolink Altas WLAN battery camera and demonstrate how to manage both devices via the Reolink client on the PC and via the Reolink app on the smartphone.
The Reolink Elite X Pro PoE is connected to a PoE switch via Ethernet cable, which means that both data transmission and power supply are provided via a single cable. I then recognized the camera in the Reolink client, assigned an individual password and made the live monitoring and function settings.
The Reolink Altas WLAN battery camera was integrated directly into my WLAN network via the Reolink app. The connection was established by scanning the QR code, selecting the Wi-Fi network and entering the network information. After setup, I was able to manage the camera both on the mobile app and on the PC in the Reolink client.
In addition, I have also provided an overview of some camera models such as the Reolink RLC-1212A, Reolink Duo 3 PoE, Reolink TrackMix WiFi, Reolink Duo 3 WiFi, Reolink Altas PT Ultra and Reolink Argus 4 Pro in the article. These models offer advanced features such as ColorX night vision, dual-band Wi-Fi 6 support, smart detection and optimized battery life.
In addition, I have provided troubleshooting tips for connection problems, tips for optimal WLAN setup and recommendations for firmware updates.
With this step-by-step guide, I was able to securely integrate my Reolink cameras into the network, configure them reliably and ensure remote access from any location.

- 4K 8MP FARBIGE NACHTSICHT: Tauchen Sie ein in eine super klare Welt mit dieser optimierten, batteriebetriebenen Außenkamera. Sie ist mit leistungsstarken Spotlights ausgestattet und erfasst selbst nachts die kleinsten Details. Dunkle Ecken werden erleuchtet, kein Platz für Gefahr zu verstecken.
- 2,4/5GHz WLAN-KONNEKTIVITÄT: Diese Solar WLAN Kamera unterstützt sowohl 2,4GHz- als auch 5GHz-WLAN. Wählen Sie 2,4GHz für stabilere Verbindung oder 5GHz-WiFi für schnellere Geschwindigkeit. Entscheiden Sie sich je nach Installationsort der Kamera für das geeignetste WLAN-Band.
- STANDALONE & 100% KABELLOS: Die Überwachungskamera Aussen Akku wird mit einem 3W-Solarpanel geliefert, das Nonstop-Stromversorgung gewährleistet. Installieren Sie die Kamera mit der um 360° drehbaren Halterung und dem 4m langen Solarpanelkabel an Orten mit optimaler Sonneneinstrahlung. Genießen Sie die bequeme Lösung.
- 24/7-SCHUTZ: Bleibt im Standby-Modus und wacht nur beim Erkennen der Bewegung auf. Alle Bewegungsereignisse werden lokal auf der microSD-Karte (max. 512 GB) gespeichert und können später abgespielt werden, auch bei dem Stromausfall oder der abgebrochenen WLAN-Verbindung. Sicherer, sorgenfreier 24/7-Schutz.
- INTELLIGENTE ERKENNUNG: Diese 4K Solar WLAN-Kamera Outdoor kann Personen, Fahrzeuge, Tiere und Bewegung erkennen. Sie können die Erkennungsart flexibel wählen. Für Abspielen der Aufnahmen können Sie die Videoclips ganz einfach nach dem ausgewählten Modus filtern, um die gewünschten Aufnahmen schnell zu finden.
Frequently asked questions about setting up Reolink cameras – FAQ
1. how does a Reolink PoE camera differ from a WLAN camera?
PoE cameras use a single cable for power and data (via a PoE switch or PoE injector), while WLAN cameras communicate wirelessly but require a separate power supply via a power supply unit or battery.
2. what do I need to integrate a Reolink PoE camera into my network?
An Ethernet cable (Cat5e or higher), a PoE-enabled switch or injector and the Reolink Client to detect and manage the camera.
3. how do I set up a Reolink WLAN camera?
Via the Reolink app: Scan the QR code, select the Wi-Fi network, enter the password and configure the camera. For battery models, the initial connection is often also made via Bluetooth.
4. why is my Reolink camera not recognized in the client or in the app?
Possible causes are an unstable network, incorrect WLAN band (only 2.4 GHz compatible), missing IP assignment or blocked new devices in the router.
5. do I have to have WLAN throughout the garden for Reolink cameras?
Only WLAN cameras require wireless coverage. PoE cameras are wired. Battery-powered cameras with WLAN need a good connection to the nearest antenna or a repeater.
6. how do I update the firmware of my Reolink camera?
Firmware updates can be performed directly via the Reolink Client or the Reolink App. If required, the latest version can also be downloaded manually from the Reolink website.
7. can multiple Reolink cameras be managed simultaneously in the client or in the app?
Yes. Multiple cameras can be added, monitored live and managed simultaneously via the Reolink Client or the Reolink App.
8. what special features does Reolink ColorX night vision offer?
ColorX enables color night shots without additional lighting thanks to high light sensitivity, e.g. with the RLC-1212A or the Duo 3 series.
9. what to do if the WLAN connection is unstable with battery-powered cameras?
Place the camera closer to the router, switch to a 2.4 GHz band or use a WLAN repeater to amplify the signal.
10. how secure is the connection of my Reolink cameras?
Reolink relies on encrypted connections (WPA2-PSK/WPA3) and individual access data for each camera. In addition, access can be secured with your own passwords and port shares.

- 4K UHD-Ansicht und zwei Nachtsichtmodi: Tauchen Sie ein in atemberaubende 4K UHD-Ansichten. Farb- und Infrarot-Nachtsichtmodi ermöglichen Ihnen eine umfassende Nachtsicht. Tag & Nacht Ultra-Klarheit und lebendige Details einsehen für 24/7 Sicherheit.
- 16X 3D-Zoomfunktion: Verbesserte Live-View durch die optimierte 3D-Zoomfunktion. Einfach & direkt bestimmte Bereiche fokussieren, ohne dass mehrere Klicks nötig sind, und das Ziel mühelos auf dem Bildschirm zentrieren für eine nahtlose Aufnahme. .
- 360° Schwenken & 90° Neigen mit Auto-Tracking: Erleben Sie einen erweiterten Sichtbereich. RLC-823S2 lässt sich um 360° schwenken und um 90° neigen. Objekte in Bewegung werden automatisch verfolgt für umfassende Sicherheit im Überwachungsbereich.
- Smart-Erkennung & 2-Wege-Audio: Präzise Personen-/Fahrzeug-/Tiererkennung (nicht nur Katzen/Hunde, sondern auch viele andere Tiere). Fehlalarme werden reduziert. Nahtlose Gespräche mit Personen vor der Cam über Zwei-Wege-Audio, einfach & effizient.
- PoE-Technologie & mehrere Speicher- und Aufnahmeoptionen: Ein einziges Kabel sorgt für stabile 4K-Videoübertragung & Stromversorgung. Kein Kabelgewirr und ein robustes Signal. Für optimale Leistung verwenden Sie am besten den IEEE802.3at PoE-Switch. Die Kamera unterstützt Home Assistant.
Dieser Beitrag ist auch verfügbar auf:
English
Deutsch





![Integrate Reolink camera into the network - WLAN & PoE step-by-step guide 29 [2023 Update-Version] Reolink 6W Solarpanel für Akku Überwachungskamera Aussen, USB Schnittstelle, Solar WLAN IP Kamera Outdoor, 360° Einstellbare Halterung, Non-Stop-Solar(4m Kabel), Schwarz](https://m.media-amazon.com/images/I/41kbowMLOyL._SL75_.jpg)


